Migrations
Published 10 February 2016
Migration scripts are a first-class artifact of ReadyRoll database projects, and are responsible for the entire deployment of your database.
Migrations use a change-script driven approach to deployment (as opposed to the model-driven approach of SSDT projects), where you script your database changes up-front and deploy the same set of scripts in a pre-defined order through each of your application environments. This results in consistent and repeatable deployments through to Production.
The trade-off is the up-front work required to get your scripts right during the development phase. ReadyRoll provides a tool-window to assist with the authoring and re-authoring of migrations, allowing you to work online to make your database edits, and then import your changes to generate your migrations.
Adding a migration to your database project
If you’ve already got some scripts written, or if you need to deploy scripts provided by a vendor (eg. ASP.NET Membership Provider object creation scripts), simply create a new project and then right-click the project node in Solution Explorer and select Add... Script. This will add an empty migration to the project, into which you can paste your script content.
The new script will be added to the project with the following auto-generated filename:
[nextNumber]_[date]-[time]_[username].sql
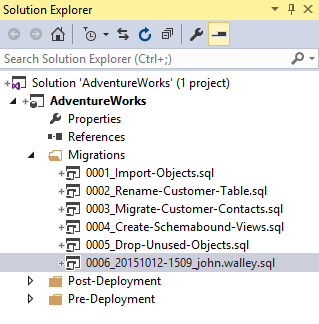
For example, 0006_20151012-1509_john.walley.sql.
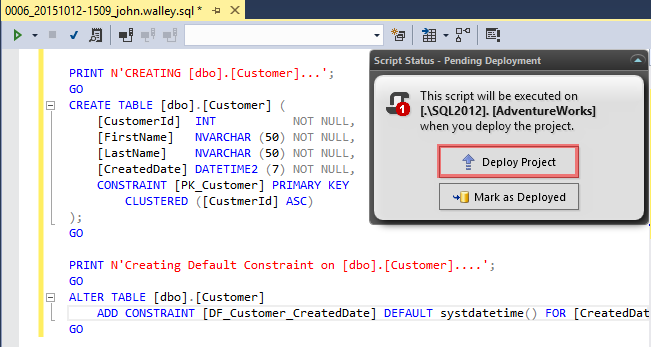
If your script contains SQL statements that have already been executed against the target database, click Mark as Deployed to prevent the script from being executed again, otherwise click Deploy Project.
Conditional script execution (Applies to package-based deployments only)
By default, all migrations within your project are executed at deployment time unconditionally. However if you would like a given migration to be executed in some circumstances and not others, then you can include an execution conditional within the header of your script to be evaluated at deployment time. This is particularly useful if you have scripts that should only be run in specific environments, such as a set of users that should only be created in the Development environment. The condition should be written in the syntax of a T-SQL "IF" statement condition, for example:
-- <Migration Id="{UniqueIdentifier}" Condition="@@SERVERNAME LIKE 'DEV%' OR '$(Environment)'='DEV' " />Only if the condition evaluates to TRUE during the first pass will the script be executed; if the condition is not met, ReadyRoll will bypass the script and mark it as deployed. Even if the condition later evaluates to TRUE, the script will not be executed during a subsequent deployment (unless the appropriate record is deliberately removed from the [__MigrationLog] table first).
Package deployment only
The condition attribute is only evaluated when deploying via SSMS, PowerShell, VSTS, Octopus Deploy (or any other method that involves deploying with the package scripts that ReadyRoll produces at build time): the Condition attribute is ignored altogether when the database is deployed within Visual Studio (or any other method that involves deploying the patch scripts produced with MSBuild). With the latter method, all migrations will be executed regardless of whether the condition is met.
Guidelines for working with migration scripts
- To ensure that your project stays in-sync with your Dev, Test and Production environments, we strongly recommend following the immutability principle with migrations: once a migration has been deployed, the script file should not be removed from the project or otherwise modified. For example, if a migration that adds a column has already been shipped to the Test environment, but you later decide the column wasn't needed, then a new migration should be added to the project to drop the column, rather than removing/modifying the original file
- An exception to the previous point is in the scenario where a migration has not yet been deployed to any environment other than your own: if the migration was generated directly from your local database, or you wrote the migration yourself and only applied it locally, it should be safe to delete the script. You then have the option to re-generate the migration (or write a new one by hand), or alternatively, use the ReadyRoll tool-window to revert the change from your local database altogether
- In the scenario where a migration containing destructive or otherwise undesired changes is accidentally deployed to one or more of your lifecycle environments, you may need to follow a recovery process to restore the environment back to its pre-deployment state, prior to removing the migration from the project. Depending on the type of change, it may be possible to use the ReadyRoll window to connect to the environment(s) directly and follow the revert process to roll-back the affected objects
- Note that the ReadyRoll tool-window is not capable of reverting/synchronizing all types of database changes. For example, if your migration dropped a column, then you decide to delete that migration and revert the changes, the revert tool will not be able to recover the data that was lost (unless the static data feature is enabled for that table). We recommend the use of backups or a tool such as SQL Clone to help with maintaining and preserving the state of your lifecycle environments
- To prevent a migration being executed more than once, the ID within your migration script must be preserved: the Xml fragment in the header of your migration scripts contain a unique identifier for the migration (i.e. <Migration Id="{UniqueIdentifier}"/>). ReadyRoll uses this UUID to ensure that the script is executed a single time against the target database. Please note that the value of the UUID does not have an effect on deployment order (more on controlling the order of deployment below)
- By default all of your project's migrations (and programmable objects, if that feature is enabled) will be deployed within a single user transaction. You can elect to disable automatic transactions at the migration level by setting the TransactionHandling attribute in the metadata to Custom (i.e. <Migration Id="{UniqueIdentifier}" TransactionHandling="Custom"/>), however there are some caveats to be aware of. See this article on transaction handling for more information
- Migration scripts can be renamed at any time, even if the script has already been deployed. This is possible because the script is always referred to via the UUID mentioned in the previous point, rather than the script's filename. Aside from the fact that the filename must start with a number, and end with .sql, the rest of the file content is up to you; ReadyRoll will auto-generate a filename when the migration is added to your database project, however you can then change it as desired (e.g. 0005_20170413-1318_john.walley.sql can be renamed to 0005_Alter-Customer-Add-PhoneNo.sql)
- The order of your database deployment is determined by the numeric prefix of the migration filename, therefore the filename must always start with a number. To adjust the order of deployment, simply change the file's numeric prefix. If two migrations have the same number, then the rest of the filename will be used as the tie-breaker. Unless the script is renamed (see below), the suffix will contain the date and time that the migration was originally added to the project, plus the username, e.g. 20170413-1318_john.walley
- To avoid causing the environment to go out-of-sync with the target environment(s), we recommend not changing the deployment order after a migration has been deployed outside of your local development environment
- As ReadyRoll sorts the prefix as a number, rather than an alpha-numeric string, we recommend using consistent padding within the numeric prefix (001, 002, etc). This also makes it easy to view the order of deployment directly in the file system (e.g. using the Solution Explorer or within your source control repository)
- To view the order of deployment for your entire database project (including migrations, programmable objects and pre/post-deployment scripts), perform a clean build of your project and view the output. When working in Visual Studio, this can be found within the Output tool-window. When building your project within your Continuous Integration server, the deployment order can be found within the build log
- If you are finding that the number of migrations in your project is starting to become unmanageable, try using semantic versioning with your database project to help organize your migrations by branch or release
Alternatives to migrations
If you would like to have your migration executed with each modification to the script file, try using Programmable Objects (useful for deploying replaceable objects such as stored procedures, functions and views).
Alternatively, if you would like to perform an action each time you deploy the database project, try using a Pre or Post-Deployment script instead. These can be used for creating the database if it doesn't exist, altering database settings, or for static data.


