Using the SQL CI TeamCity plugin in SQL Automation Pack
Published 23 April 2014
We recommend upgrading to the DLM Automation Suite so you can take advantage of the latest features and fixes. For more information, see Upgrading.
This example works with SQL Automation Pack v1.1 and later. If you're using an earlier version, see Using the SQL CI TeamCity plugin (v1.0.4.2 and earlier).
It shows how to use Red Gate's TeamCity plugin to:
- link TeamCity to SQL Source Control
- configure TeamCity to build a development database every time a change is checked in to source control
- automatically deploy the development database to a staging database, or publish a NuGet package to a NuGet feed, every time a build is triggered
NuGet is the package manager used by the Microsoft development platform. A NuGet package (.nupkg) contains every file needed to recreate the database. A NuGet feed is a repository (private or public) that packages can be published to and accessed from. For more information about NuGet, see NuGet docs.
We've tested the plugin against TeamCity v 8.1.2.
Working through this example
By the end of this example, you'll have configured TeamCity as your continuous integration server. Every time you check in code to source control, a build of the GizmoDev development database will be triggered. You'll also be able to automatically synchronize the development database with the GizmoStaging staging database, or publish a NuGet package to a release management tool ready for deployment.
The steps are:
- Install the Red Gate TeamCity plugin on the machine running the TeamCity server
- Install LocalDB, .NET 3.5 and .NET 4 on your build agents
- Create a new TeamCity project
- Link TeamCity to SQL Source Control
- Add a build step using the Red Gate SQL CI Build runner
- Either:
Add a build step using the Red Gate SQL CI Sync runner
or:
Publish the package to a NuGet feed - Add a VCS trigger
- Make a database change
1. Install the Red Gate TeamCity plugin
To install the plugin on the machine running your TeamCity server:
- On a computer with SQL Automation Pack installed, run Intro to SQL Automation Pack.
- Under the section TeamCity plugin, click Open Folder.
Move the sqlci-teamcity.zip file to the plugins folder of the TeamCity data directory.
If TeamCity was installed to its default location, the plugins folder is located at:
%ALLUSERSPROFILE%\JetBrains\TeamCity\plugins or C:\ProgramData\JetBrains\TeamCity\pluginsThe location of the plugins folder may be different if TeamCity was not installed in its default location. For more information, see: TeamCity Data Directory (TeamCity documentation).
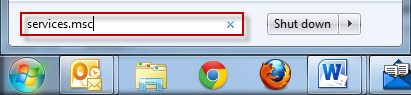
- Restart the TeamCity server. In the Windows Start menu search box, type services.msc, and then press Enter:
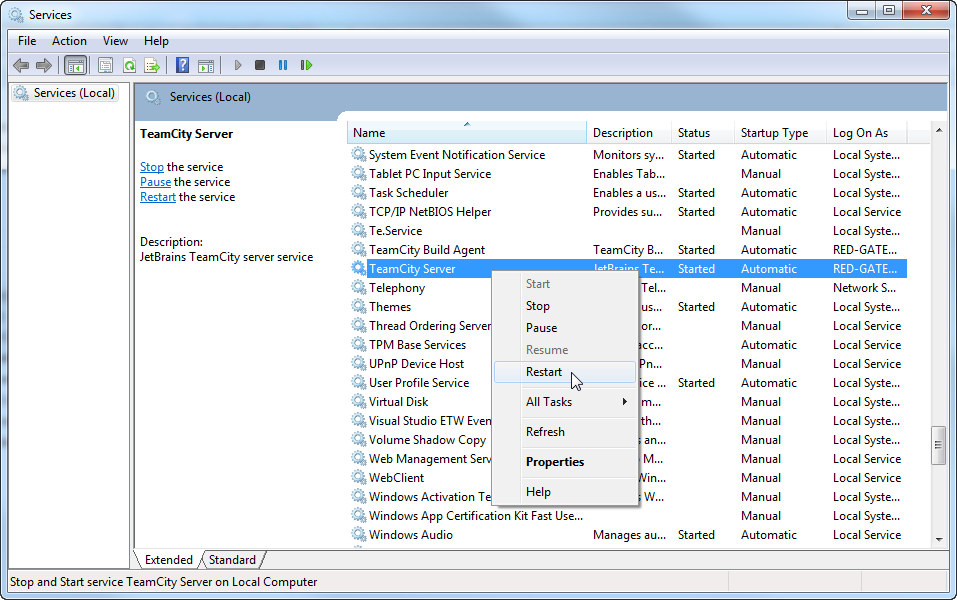
- In the list of services, right-click TeamCity Server, and select Restart:
Red Gate's TeamCity plugin is now installed.
2. Install LocalDB, .NET 3.5 and .NET 4 on your build agent
You must install .NET 3.5 and .NET 4 on the machine running your build agent. You only need LocalDB if you plan to use it to recreate and validate your database during the build step (recommended).
You have two options:
- Install the version of SQL CI included in SQL Automation Pack versions 1.1.1.1950 and later. If your machine has an internet connection, this installs the .NET versions and LocalDB automatically. See Installing SQL CI in SQL Automation Pack
- Install each tool manually:
3. Create a new TeamCity project
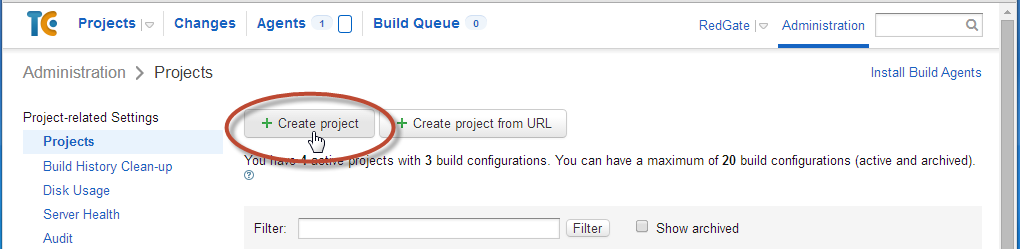
- In TeamCity Administration, under Projects, click Create project:
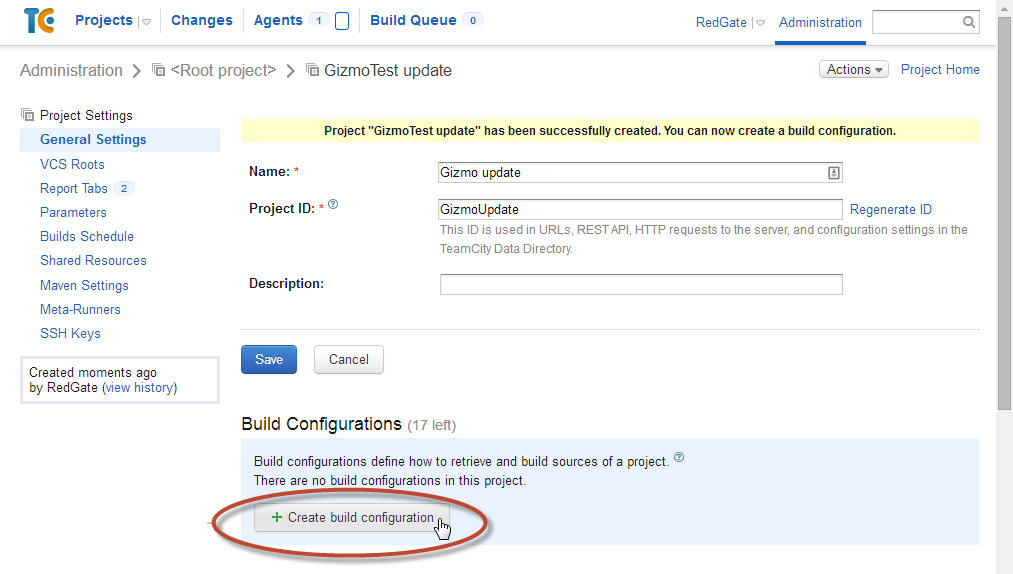
- On the Create New Project page, enter a name for the project.
In this example, we'll call the project Gizmo update. The Project ID is created automatically: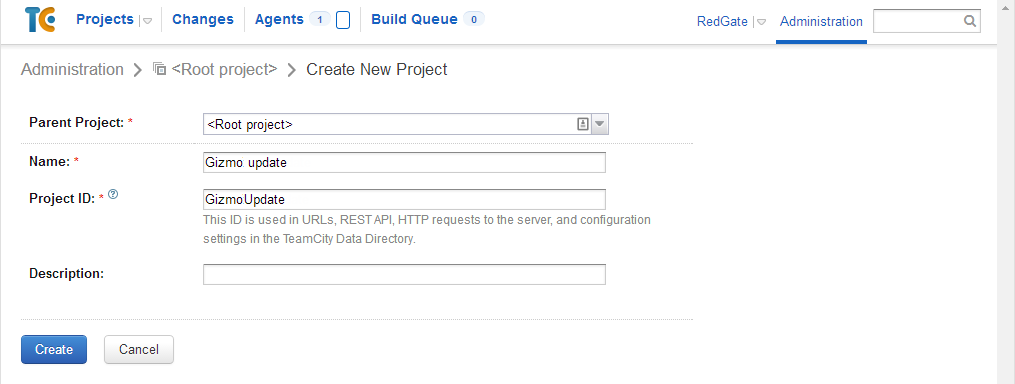
- Click Create.
- Under Build Configurations, click Create build configuration:
- On the Create Build Configuration page, enter a name for the build.
In this example, we'll call it Integration build: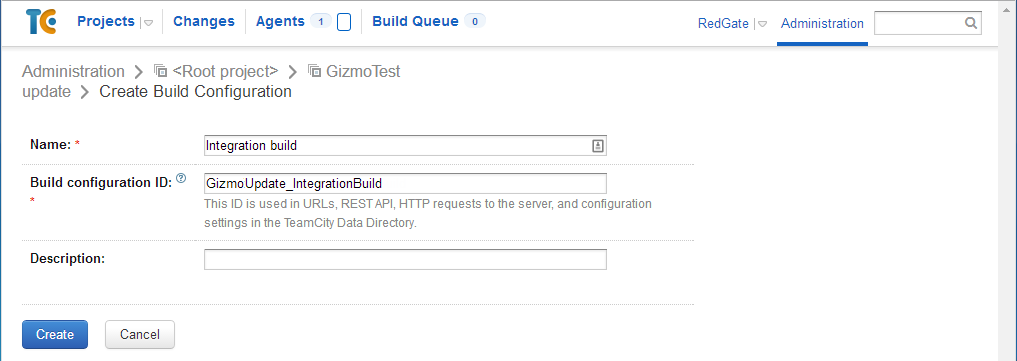
- Click Create. The New VCS Roots page is displayed.
4. Link TeamCity to SQL Source Control
Continuous integration is driven by checked in code changes, so the first stage of the database deployment pipeline gets your schema and data under source control. Once you've created a TeamCity project, you need to link your development database to the version control system you're using.
In this example, we're using SQL Source Control to link our GizmoDev development database to a Subversion (SVN) server.
To link to source control:
- In the Type of VCS box, select the source control system you are using with your development database.
In this example, we're using Subversion. - Under VCS Root, in the VCS root name box, enter a unique name for this root. For example, SVN Gizmo.
Under SVN Connection Settings, in the URL box, specify the location that TeamCity will monitor for changes.
In SQL Source Control, the location of a database in source control is displayed on the Setup tab:
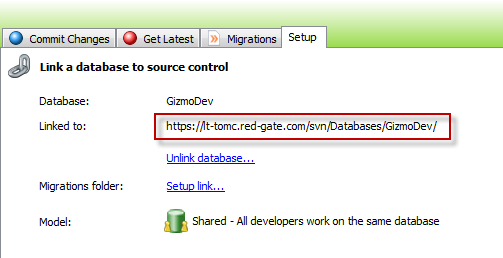
To copy the location, right-click on the path, and then click Copy: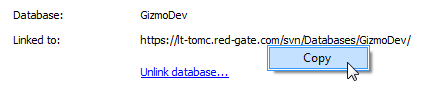
In this example, the location is https://lt-tomc.red-gate.com/svn/Databases/GizmoDev/:
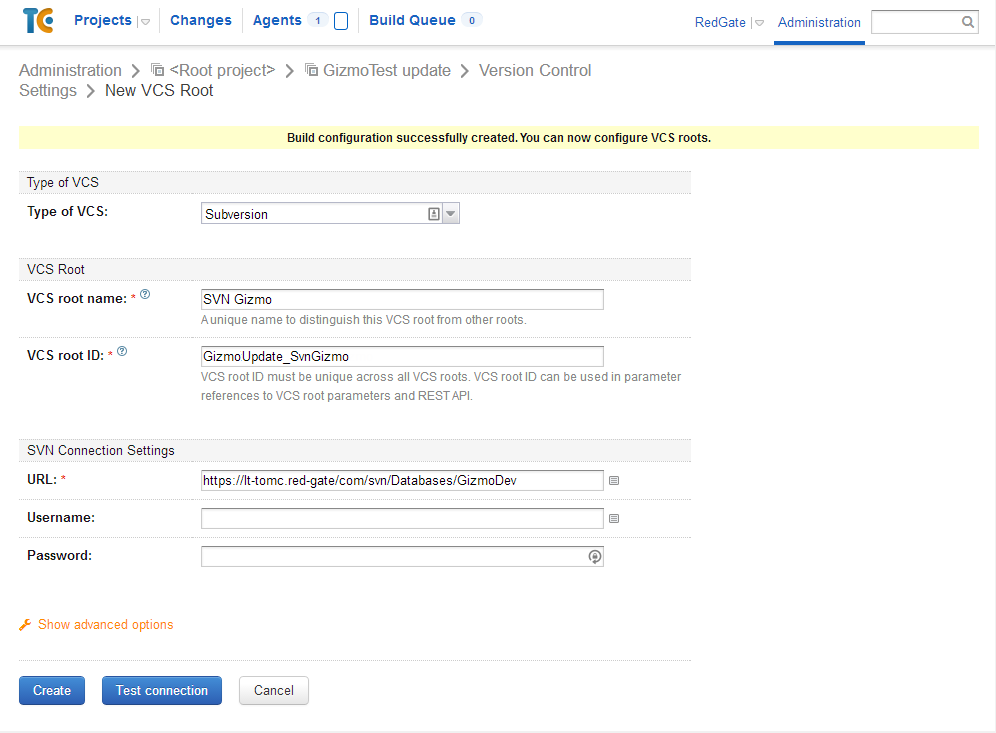
If authentication is required for your source control server, you must specify a username and password.
- Click Test connection. TeamCity checks that it can connect to the source control location.
- If the connection is successful, click Create. The VCS root is created.
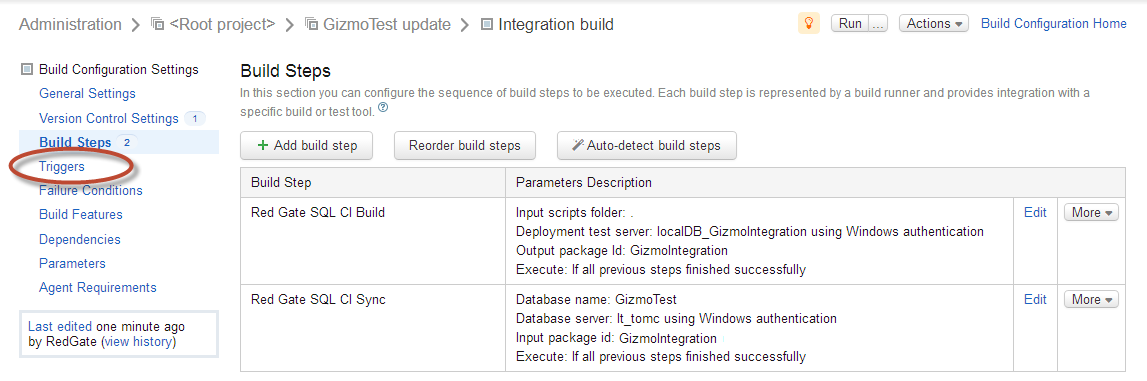
5. Add a build step using Red Gate SQL CI Build
Add a build step that will create and validate the SQL creation script used to generate the GizmoDev database package. You do this by using a build runner called Red Gate SQL CI Build.
A build runner allows a specific third party build tool, such as SQL CI, to integrate with TeamCity. In this example, a component of Red Gate's TeamCity plugin called the Red Gate SQL CI Build runner is used. It defines how to run the build and handle the output. For more information on build runners, see Configuring Build Steps (JetBrains documentation).
- Under Build Configuration Settings click Build steps, and then click Add build step.
- In the Runner type box, select Red Gate SQL CI Build:
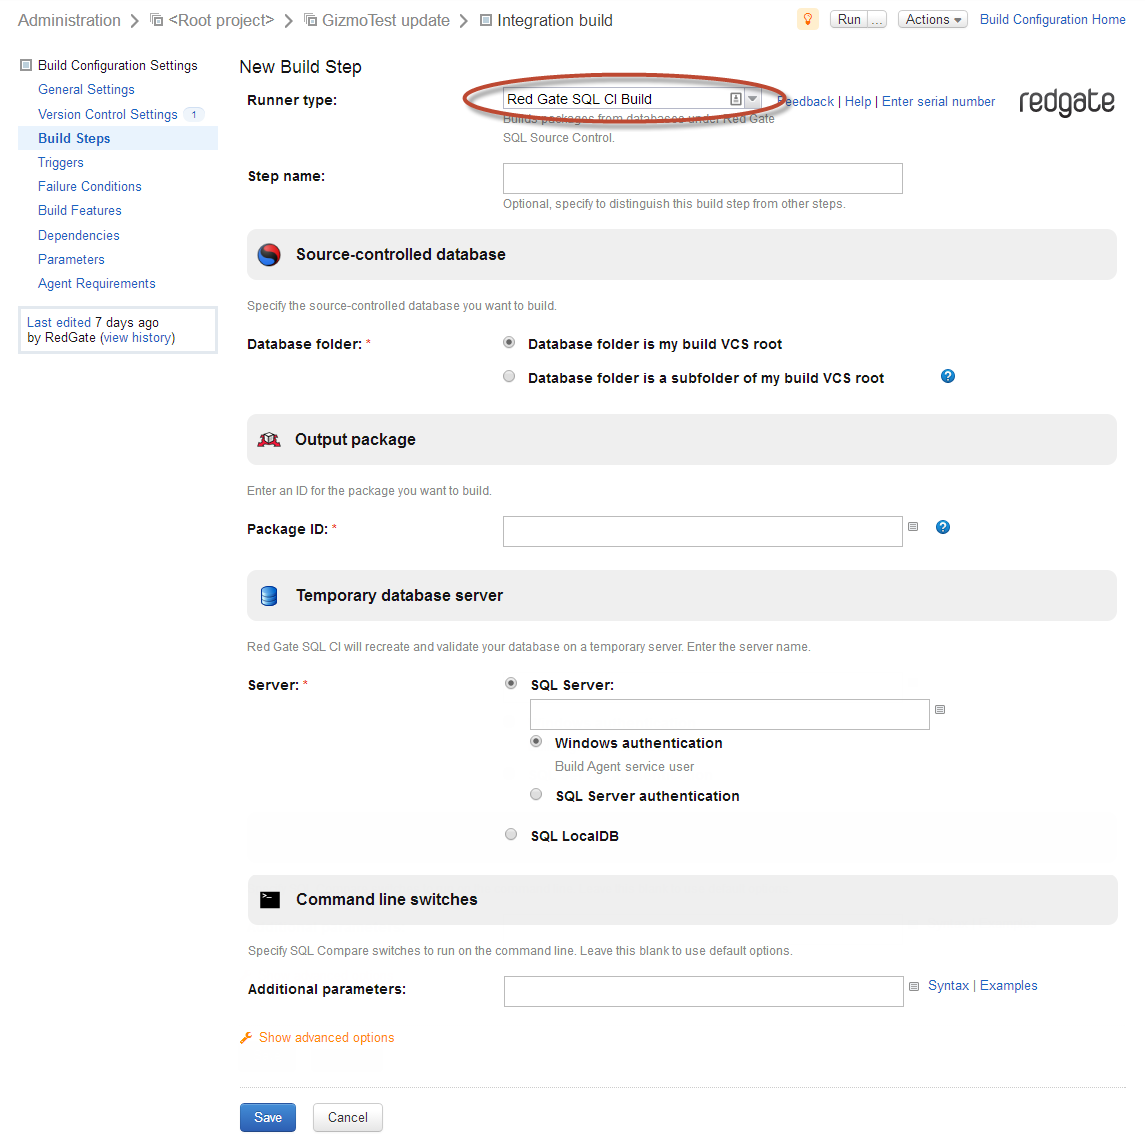
Under Source-controlled database, the Database folder is my build VCS root option is selected by default. In this example, that's the correct option because VCS root is our database location.
If it was located in a subfolder, you would need to select Database folder is a subfolder of my build VCS root and enter a path relative to your build VCS root. For example, if your VCS root is http://subversion.example.com/ and your database folder location is http://subversion.example.com/AdventureWorks, enter AdventureWorks. Under Output package, enter a unique package ID that does not contain spaces. The package ID is the name given to the NuGet package you're creating that'll be deployed to other databases, so you should use something relevant when you use it in your environment. In this example, we'll call it GizmoIntegration.
Under Temporary database server, select SQL LocalDB. SQL CI will use LocalDB to recreate and validate your database.
If you want to run full-text queries against your tables, you'll need to specify a different temporary server. LocalDB doesn't support Full-Text Search.
- Click Save.
6. Update a target database or publish the package
You have two options:
- If you want to update the GizmoStaging database with the updated GizmoDev database, see Add a build step using the Red Gate SQL CI Sync runner.
Choose this option if you're not using a release management tool such as Octopus Deploy. - If you are using a release management tool, and want to publish the package to a NuGet feed, see Publish the package to a NuGet feed.
The configuration instructions assume you're using Octopus Deploy, but the process should be similar for other release management tools.
Add a build step using Red Gate SQL CI Sync
Once this step is configured, it will automatically update the GizmoStaging database with the contents of the GizmoDev database after every build.
- Click Add build step.
- In the Runner type box, select Red Gate SQL CI Sync:
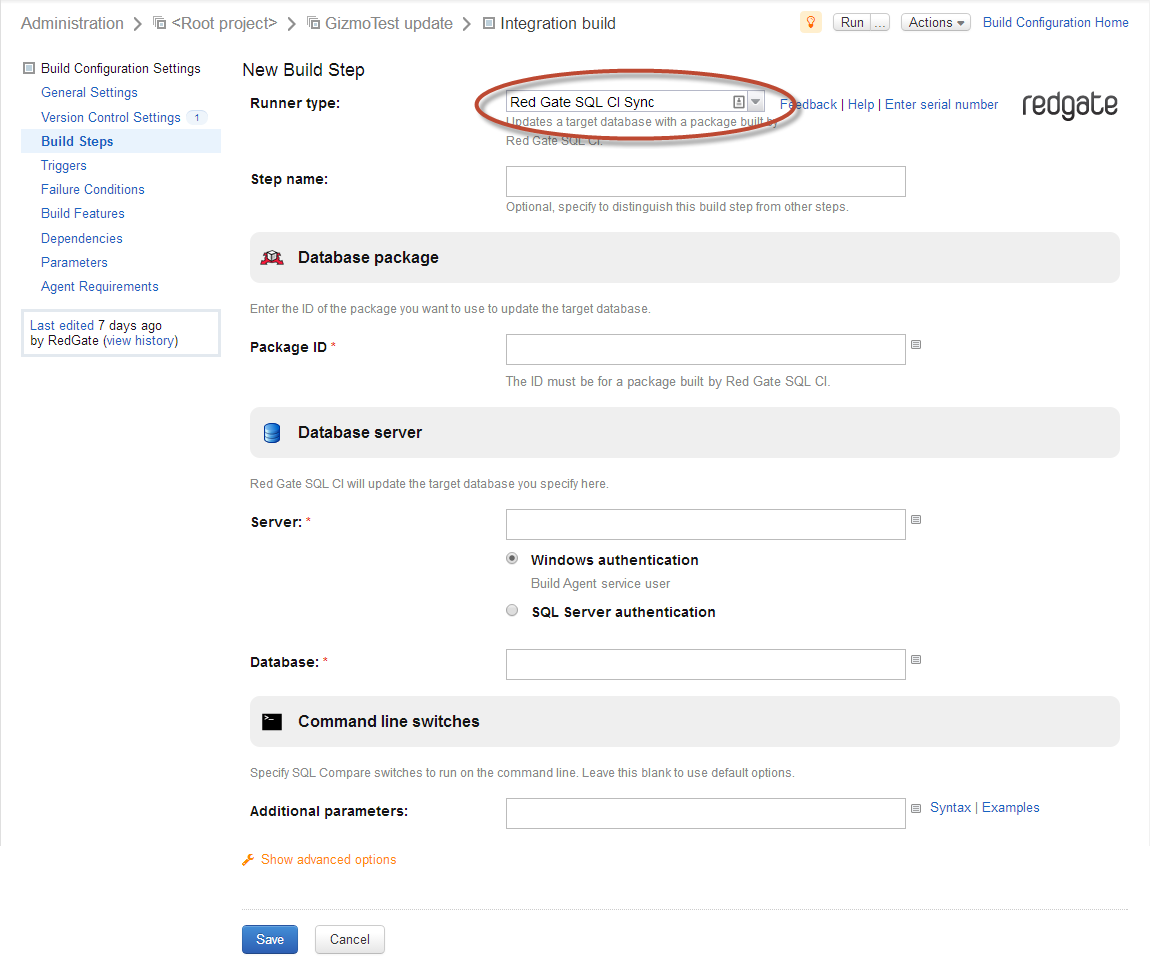
- Under Database package, enter the package ID previously defined in the build step. In this example, we called it GizmoIntegration.
- Under Database server, enter the name of the target server and database you want to update. In this example, we're updating the GizmoStaging database on the lt_tomc server using Windows authentication.
- Click Save.
You now need to add a VCS trigger.
Publish the package to a NuGet feed
There are two ways to publish a package to a NuGet feed:
- configure a build step in TeamCity to publish it to the NuGet feed in your release management tool. See Add a publish build step using the NuGet Publish runner
- configure your release management tool to pick up the package from TeamCity's feed. See Add a package to your release management tool
Add a publish build step using the NuGet Publish runner
The NuGet Publish runner build step will publish the package to the NuGet feed of a release management tool such as Octopus Deploy.
- Click Add build step.
- From the Runner type drop-down list, select NuGet Publish.
- Under NuGet settings in the Package Source text box, enter the URL for your release management tool package feed.
- Enter an API key if your release management tool requires one.
- By default, an API key isn't required when you push packages to the release management tool package feed.
- Under Packages in the Packages to upload text box, enter the name of the published package. In this example, we called it
GizmoIntegration.nupkg.
This will pick up the NuGet package output by the Red Gate SQL CI Build step. - Click Save.
For more information about the NuGet Publish runner, see NuGet Publish.
Next, you need to enable the TeamCity NuGet server.
Enable the TeamCity NuGet server
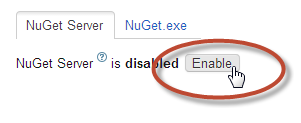
- In TeamCity Administration, under Integrations, click NuGet Settings:

- On the NuGet Server tab, click Enable:
Add a package feed to your release management tool
- Enable the TeamCity NuGet server.
The URLs for your TeamCity NuGet feed are displayed. - Copy the URL for the feed you want to use.
- Add the URL as a package feed to your release management tool.
If you're using Octopus Deploy, see Find the Octopus Deploy package feed. If you're using another release management tool, check the help documentation provided by the tool vendor.
7. Add a VCS trigger
For TeamCity to trigger a build when changes are detected in source control, we need to add a VCS trigger:
- On the Build Steps page, under Build Configuration Settings, click Triggers:
- On the Triggers page, click Add new trigger and select VCS Trigger from the drop-down box:
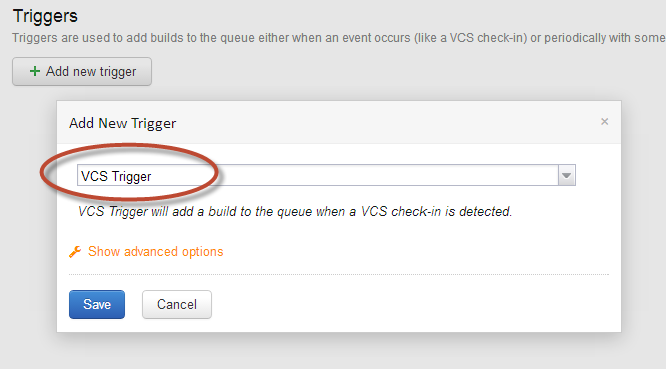
- Click Save.
- TeamCity will now run a build when a check-in to your VCS root is detected.
8. Make a database change
Now that the build is set up in TeamCity, we can make a database change to trigger a build.
In this example, we will add a new Image column to our Gizmos table:
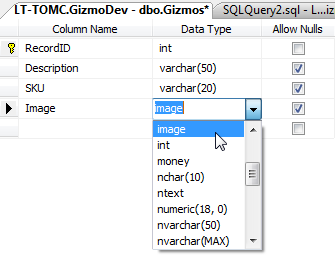
We then commit the change using SQL Source Control:

Once the change is committed to source control, TeamCity picks up the change and runs a build. You can view the status of the build by clicking Projects in TeamCity:

For a summary of the log messages printed by the build, or for troubleshooting a failing build, move your cursor over the  drop-down button and then click Change log.
To verify that continuous integration is working correctly:
- if you added a build step using the Red Gate SQL CI Sync runner, check that the target database has been updated successfully.
- if you published the package to a NuGet feed, check the NuGet feed in your release management tool.
Adding a test build step
You can also add a step using the Red Gate SQL CI Test runner to generate test data using SQL Data Generator, and run tSQLt tests against the package.


