Configuring SQL Monitor with IIS 7 and later
Published 08 July 2015
This page explains how to set up SQL Monitor with IIS 7 later. For instructions for IIS 6, see Configuring SQL Monitor with IIS 6.
SQL Monitor doesn't install IIS.
If you don't already have a IIS web server, we recommend you install the SQL Monitor web server instead of following these instructions. For more information, see Choosing the web server.
1. Before you start
- Make sure your IIS server has ASP.NET enabled. If you installed IIS using Add or Remove Programs or the Configure Your Server wizard, ASP.NET should be enabled already. For more information, see Problems with IIS and ASP.NET.
- Make sure your IIS service account has full control over the folders listed under web service account on the Permissions page.
- If you've already installed SQL Monitor, stop the SQL Monitor web service:
- From the Start menu, open services.msc.
- In the list, select the SQL Monitor web service and click the stop button in the toolbar.
2. Install SQL Monitor to work with IIS
If you've already installed SQL Monitor, skip this section.
For more information about installing SQL Monitor, see Installing.
- Run the SQL Monitor installer on your IIS server and follow the steps until you reach the Choose web server page.
- Select I'll use an IIS web server:
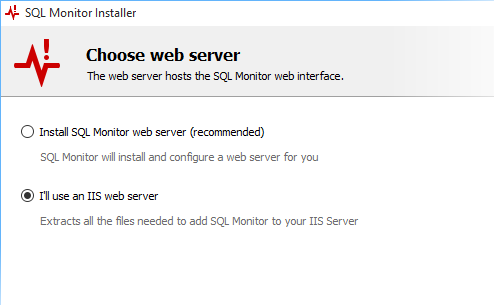
- Click Next.
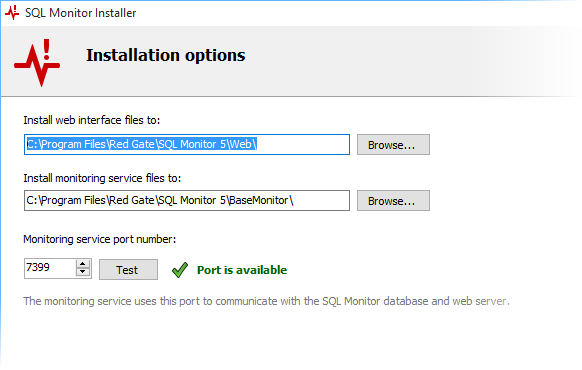
- On the Installation options page, under Install web interface files to, enter a folder to extract the website files to:
- Follow the SQL Monitor installer steps until you reach the Add the SQL Monitor website to your web server page:

Don't click Finish yet – we'll come back to the installer later.
3. Configure the application pool
The SQL Monitor website needs an application pool with these properties:
- .NET Framework version: 4.0 (for SQL Monitor 4.3 and later), or 2.0 (for older SQL Monitor versions)
- Managed pipeline mode: integrated
To make sure you have a valid application pool
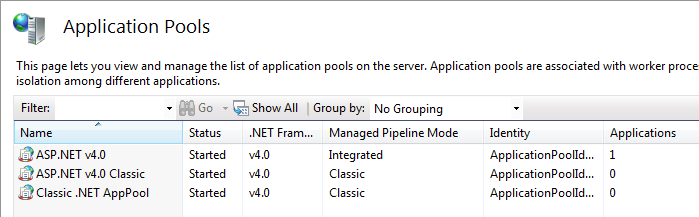
- Open IIS Manager.
- On the right, under Actions, select View Application Pools. This lists the application pools on the server with their properties. Note the .Net Framework Version and Managed Pipeline Mode columns:
If you don't have an application pool with the right properties, you can modify the properties of an existing application pool.
You might not want to do this if the application pool is used by other applications. If so, you can create a new application pool just for SQL Monitor.
To create a new application pool
- On the right, click Add Application Pool.
The Add Application Pool dialog box opens.
Enter a name for the application pool (eg .NET 4.0) - In the .NET Framework version dropdown menu:
- If you're using SQL Monitor 4.3 or later, select NET Framework v4.0.30319.
- If you're using an earlier version of SQL Monitor, select NET Framework v2.0.50727.
- In the Managed pipeline mode dropdown, make sure Integrated is selected.
- Click OK.
4. Configure the SQL Monitor website
- In IIS Manager, under Connections, right-click the IIS server and select Add Web Site:
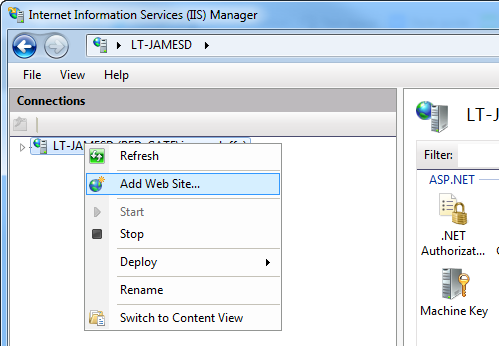
The Add Web Site dialog opens: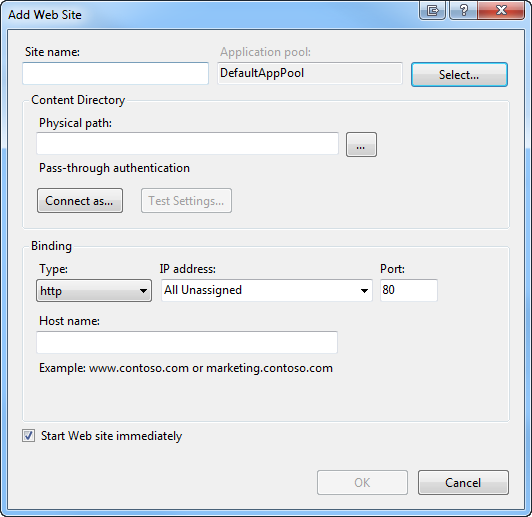
- Under Site name, enter a name for the website (eg SQL Monitor).
- Click Select.
In the Application pool dropdown menu, select the application pool you want to use.
Under Properties, make sure you've selected an application pool with the properties:
.NET Framework version: 4.0 (if you're using SQL Monitor 4.3 or later) or 2.0 (if you're using an older version)
Pipeline mode: integrated- Click OK.
- Under Physical path, enter the path to the location of the SQL Monitor website files. By default, this is C:\Program Files\Red Gate\SQL Monitor\Web\Website
If you're installing SQL Monitor, you can copy the path from the SQL Monitor installer: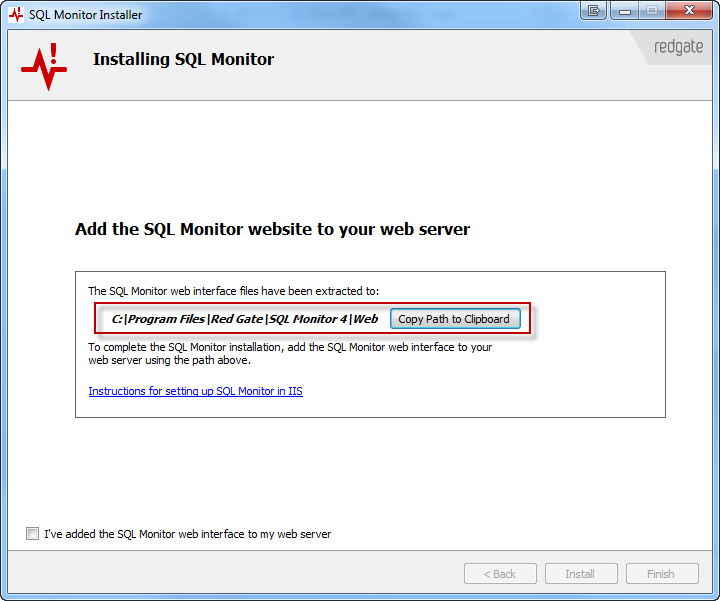
- Under Port, specify an available port number.
- Specify any other options you need (eg binding or certification).
- Click OK.
5. Finish
- Test the configuration:
- In IIS Manager, under Connections, make sure the SQL Monitor website is selected.
- On the right, under Actions, click Browse. The SQL Monitor website opens in your default browser.
- If you're installing SQL Monitor, in the installer, select the I've added the SQL Monitor web interface to my web server checkbox and click Finish.
SQL Monitor is now set up with IIS.


