Example: renaming a table without data loss
Published 18 March 2014
We're going to remove the migrations V2 beta from SQL Source Control in version 5. We're replacing it with an improved version of the original migrations feature that supports more things (including Git, branching, and merging).
We'll be publishing more information about this soon.
This page refers to the Migrations V2 beta. For information about how to use V1 migration scripts, see Working with migration scripts.
This page walks through an example case of writing and using a migration script.
When you rename a table in Management Studio, SQL Source Control interprets this as dropping and recreating the table. Any data in the table is lost. (For more information about why this happens, see What migration scripts do.) You can avoid this by creating a migration script to rename the table with the sp_rename stored procedure.
In this example, we'll rename a table in the development database (Dev) and create a migration script to avoid data loss. Then we'll commit the change to source control and finally apply it to the production database (Prod) using SQL Compare.
1: Set up the databases for this example
This script creates two databases, Dev and Prod. Both databases contain a table named Person with some data.
SQL creation script
IF db_id('Dev') IS NULL
     CREATE DATABASE Dev
GO

IF db_id('Prod') IS NULL
     CREATE DATABASE Prod
GO
IF OBJECT_ID('Dev.[Person]', 'U') IS NULL
     BEGIN
          CREATE TABLE Dev.[dbo].[Person] (Name NCHAR(50))
          INSERT INTO Dev.[dbo].[Person] VALUES ('James')
          INSERT INTO Dev.[dbo].[Person] VALUES ('John')
          INSERT INTO Dev.[dbo].[Person] VALUES ('David')
     END
IF OBJECT_ID('Prod.[Person]', 'U') IS NULL
     BEGIN
          CREATE TABLE Prod.[dbo].[Person] (Name NCHAR(50))
          INSERT INTO Prod.[dbo].[Person] VALUES ('Mary')
          INSERT INTO Prod.[dbo].[Person] VALUES ('Margaret')
          INSERT INTO Prod.[dbo].[Person] VALUES ('Madeline')
END- Run the script on your server and refresh the Object Explorer.
The Dev and Prod databases are created. Link Dev and Prod to the same evaluation repository in source control.
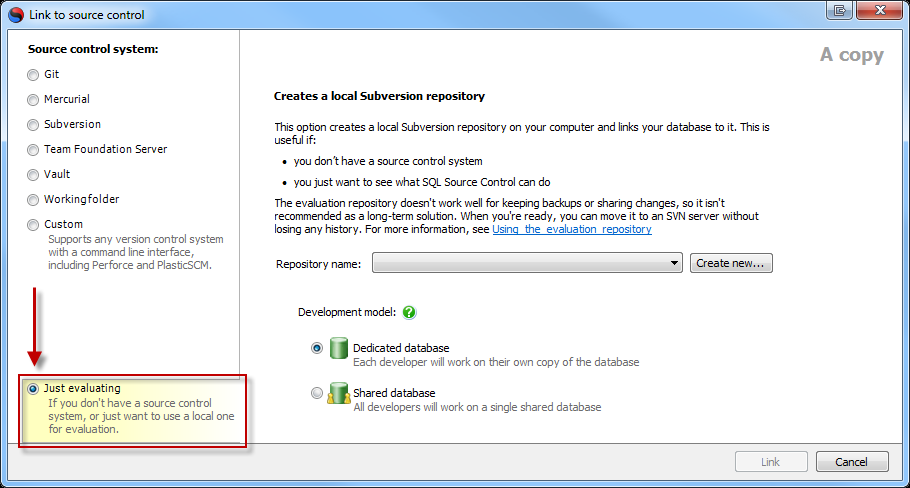 Make sure Dedicated database is selected as the development model.
Now we need to do an initial commit of all the objects in the Dev database.
With Dev selected, go to the Commit changes tab.
The Person table is listed as a new change to commit: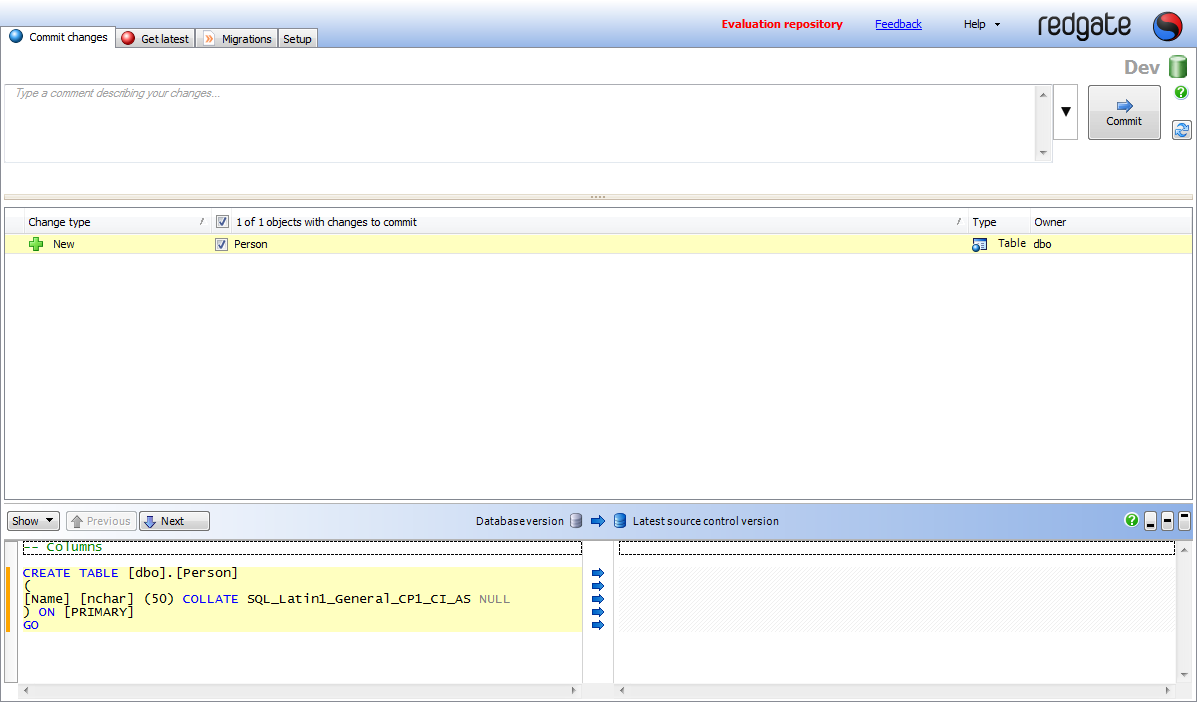
- Click Commit.
The Person table is committed to source control.
2: Create, test, and commit the migration script
We want to rename the table in Dev and apply the change to Prod.
If we wanted to do this conventionally, we might rename the table, write a migration script to prevent data loss, and commit the change and the migration script to source control.
However, in this example, we'll write a migration script first, use the script to make the change, and then commit both the change and the script to source control. By using the migration script to make the change in the first place, we can test the script works.
- Select Dev in the Object Explorer. In SQL Source Control, go to the Migrations tab and click Add migration script.
The New migration script tab opens:

Paste this SQL into the main box in the migration script dialog:
IF OBJECT_ID('[dbo].[Person]', 'U') IS NOT NULL
BEGIN
EXEC sp_rename '[dbo].[Person]', 'Customer'
END
This SQL is our migration script. It uses a guard clause to check for a table named Person. If the table exists, the script renames it Customer. If it doesn't exist, no changes are made.
For more information about guard clauses, and examples of other migration scripts, see Example V2 migration scripts.
Run the script.
The server displays a caution:
This is normal, and you can ignore it.
Refresh the Object Explorer.
In Dev, the Person table has been renamed to Customer:
This means the script worked correctly.- In the Migrations tab, in the Name field, type a name for the migration script and click Save and close.
Go to the Commit changes tab.
New changes are listed:
Although we've renamed the Person table to Customer, the change is listed incorrectly as a drop and create. This will be fixed in future versions.
The RedGate schema contains the table-valued function MigrationHistory. This contains the new migration script so it can be used again in future deployments.
- Click Commit.
The changes are committed to source control.
3: Deploy the changes to Prod
Now we've committed the changes, we need to apply them to Prod using SQL Compare.
We could do this using the Get latest tab, but we don't recommend using SQL Source Control on production databases.
In SQL Compare, make sure Migrations V2 is enabled in the project options.
Create a new project. In the New Project dialog box, select Dev as the source database and Prod as the target:
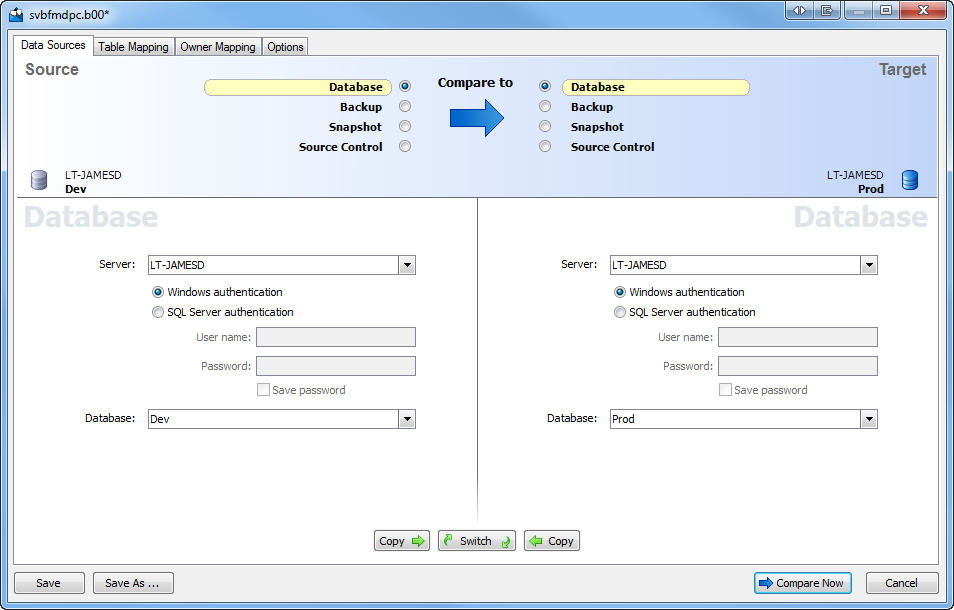
For more information about setting source and target databases in SQL Compare, see Setting data sources in the SQL Compare documentation.
Click Compare Now.
SQL Compare displays the differences between Dev and Prod: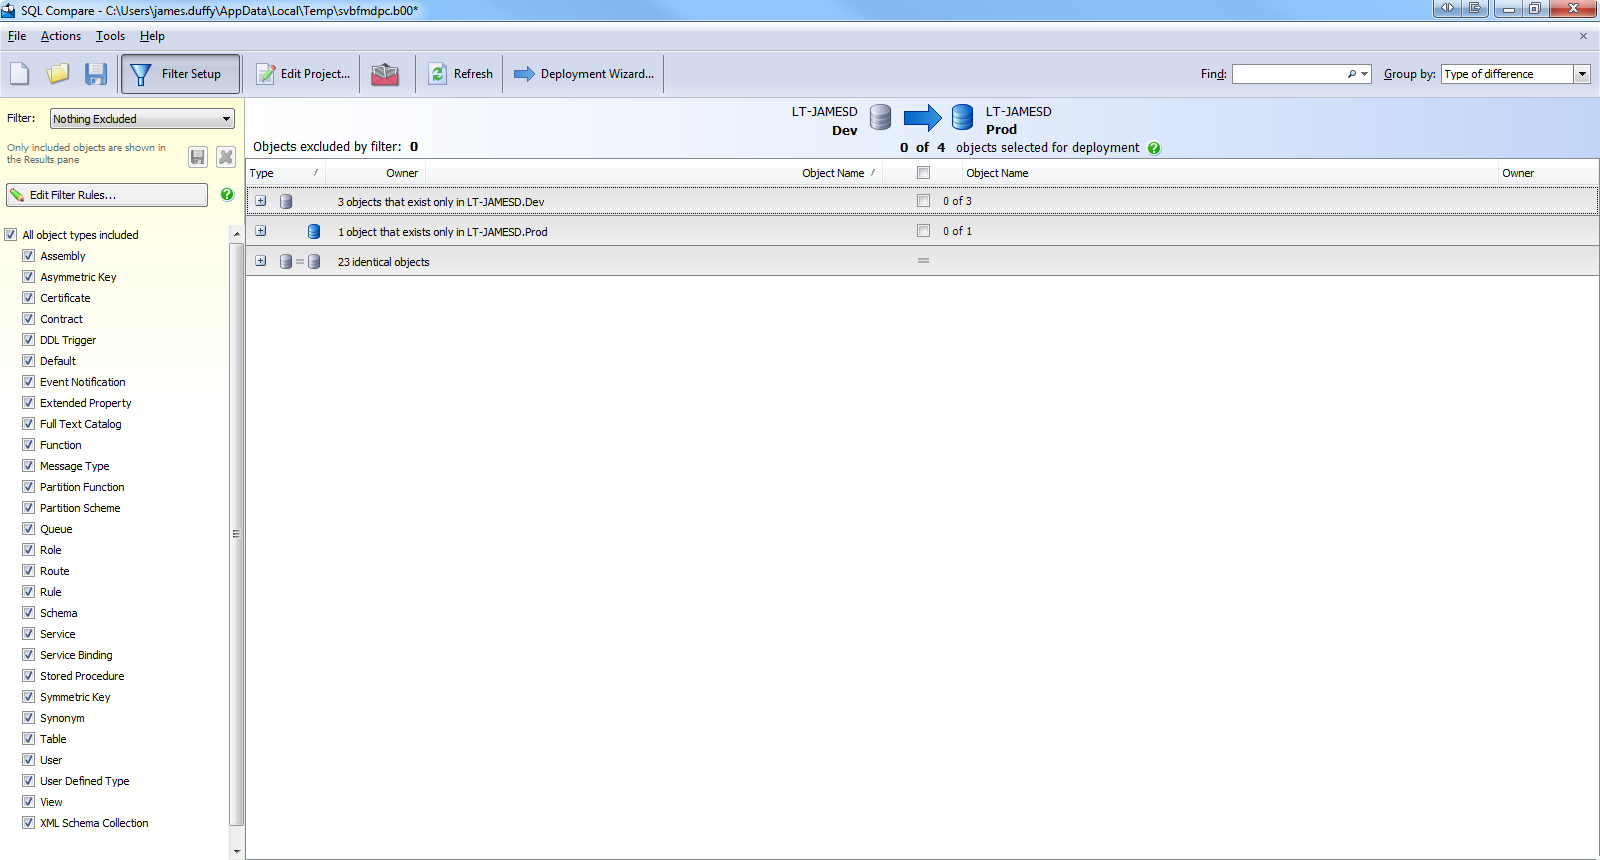
- Select all the objects and click Deployment Wizard.
The Deployment Wizard opens: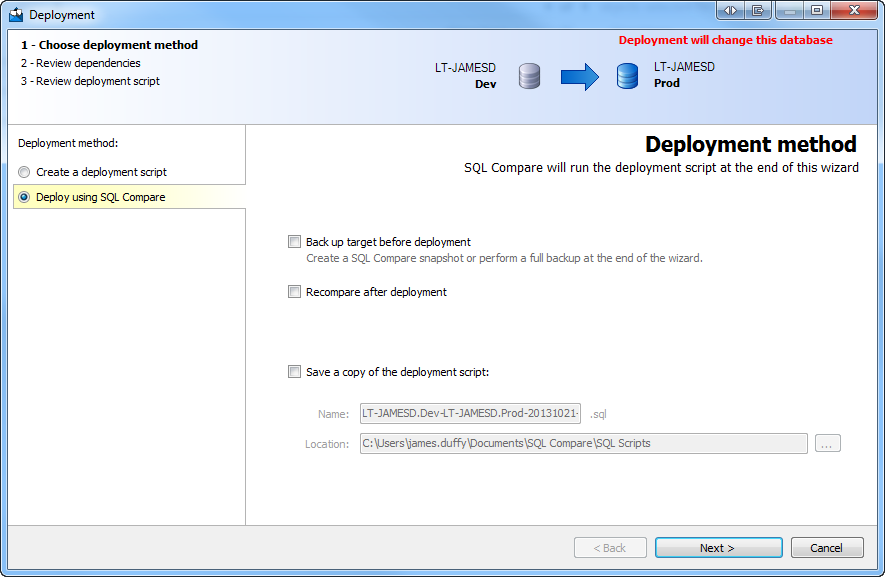
Make sure Deploy using SQL Compare is selected in the left, and click Next.
SQL Compare displays the deployment script to deploy the changes from Dev to Prod: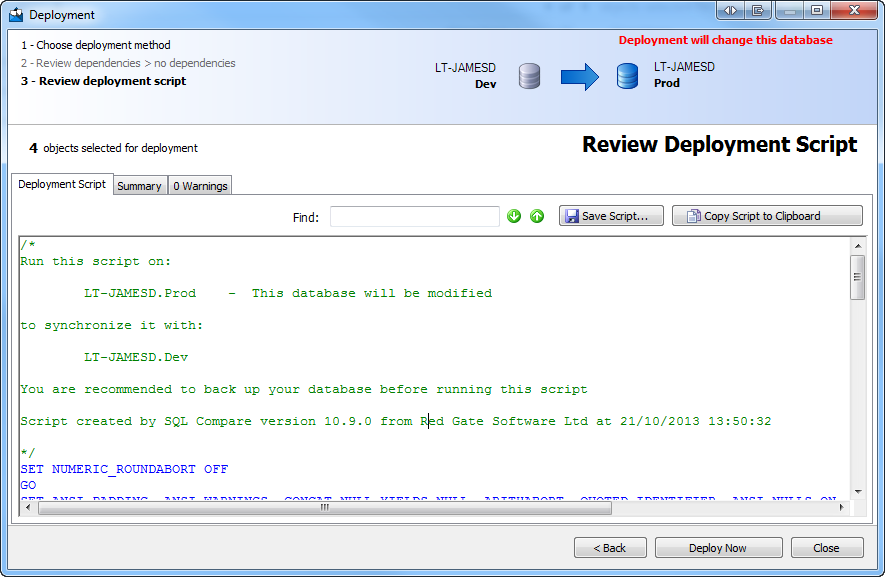
The deployment script includes the migration script we added to rename the table:-- Apply upwards migration script: Rename Person table to Customer -- IF OBJECT_ID('[dbo].[Person]', 'U') IS NOT NULL BEGIN EXEC sp_rename '[dbo].[Person]', 'Customer' END- Click Deploy Now.
SQL Compare warns you that you're about to make changes to the database: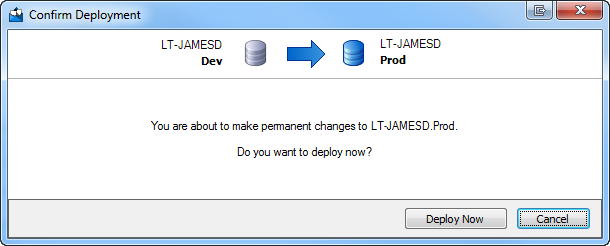
- Click Deploy Now.
The script is run on the Prod database.
- Make sure Migrations V2 is enabled in the SQL Compare project options.
- In the SQL Compare command line, enter:
sqlcompare /Database1:Dev /Database2:Prod /Synchronize
Prod is updated with the changes from Dev:

For more information about the SQL Compare command line, see Using the command line in the SQL Compare documentation.
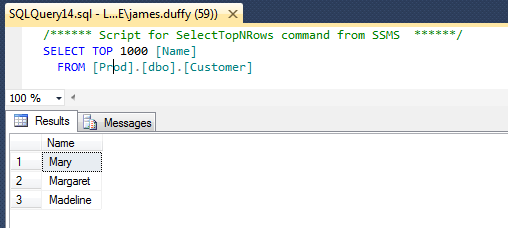
4: Verify the data is preserved
Now we've deployed the changes, we can verify that the data is preserved.
In Management Studio, refresh the Object Explorer and view the tables in Prod:
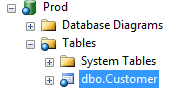
The Person table has been renamed to Customer.
If we select the top 1000 rows, we can see the data is preserved: