Use the VSTS Build extension
Published 20 July 2016
This tutorial takes you through each stage of setting up a database-build pipeline using Visual Studio Team Services (formerly known as Visual Studio Online) and the VSTS DLM Automation Build extension. You'll use the extension to build, test and sync a SQL Server database.
1. Prerequisites
Make sure you have the following:
- Access to Visual Studio Team Services (VSTS) or TFS 2015 Update 2 or later.
- SQL Server Management Studio (SSMS).
- Redgate SQL Source Control installed into SSMS.
- DLM Automation 2: Build VSTS plugin installed:
See Set up the VSTS Build extension. - The WidgetShop demo files:
Download the WidgetDevelopmentDatabaseCIDemo.zip file, and extract the contents.
Build agent location
The VSTS DLM Automation Build extension will work with a hosted build agent or a build agent running on your own environment. There are different issues to consider depending on which you choose:
- The sync step of this build task synchronizes a SQL Server database to the contents of a package. This SQL Server must be accessible from the build agent. For a hosted build agent, this will typically be an Azure database. For a build agent running on your own environment, you can use a SQL Server instance visible from the build agent. This will typically be your local SQL Server.
- The hosted build-extension cannot generate SQL Data Generator data for use by the test step. To overcome this, use a build agent running on your own environment and install DLM Automation on that machine.
2. Create a project in Visual Studio
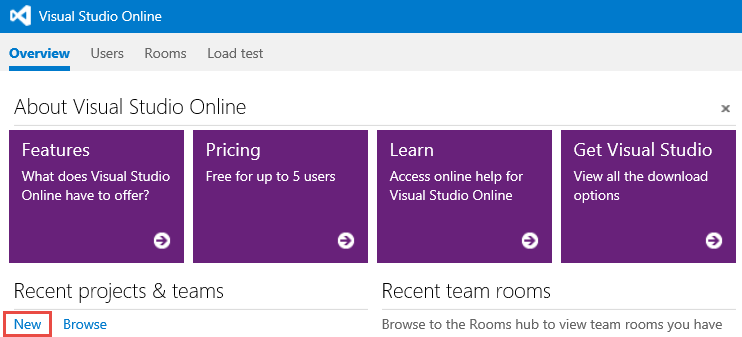
- In VSTS, go to your Default Collection.
- Under Recent projects & teams, click New.
- Name the new project WidgetShop. Use any Process template, such as Agile. For Version Control, use Team Foundation Version Control. (Git can also be used but this is not covered in this tutorial.)
- Click Create project, then Navigate to project when it has finished.
3. Create example databases
For this tutorial, you'll create two databases:
- WidgetDevelopment: you'll use this for development
- WidgetCI: this is a blank database that, once you've configured the sync step, will be automatically updated every time a change is made to WidgetDevelopment
To create WidgetDevelopment:
- Open SQL Server Management Studio (SSMS).
- From the File menu, select Open > File.
Browse to the WidgetDevelopment.sql file (extracted from the WidgetDevelopmentDatabaseCIDemo folder in the zip file) and click Open.
Using Azure SQL Databases
If you want to put your WidgetDevelopment and WidgetCI databases in Azure, you'll need to make a few edits to the WidgetDevelopment creation script:
- Delete all content before the first CREATE TABLE statement.
- Find the CREATE ASSEMBLY [tSQLtCLR] statement, and change WITH PERMISSION_SET = EXTERNAL_ACCESS to WITH PERMISSION _SET = SAFE.
You'll also have to create the WidgetDevelopment and WidgetCI databases yourself in the portal. Basic-tier databases should be fine.
- Click Execute to create the database.
To create WidgetCI:
- In SSMS, click New Query.
Execute the following SQL query:
CREATE DATABASE WidgetCI
GO
USE WidgetCI
GO
ALTER DATABASE WidgetCI SET TRUSTWORTHY ON
4. Link the development database to version control
Use SQL Source Control to link the WidgetDevelopment database to TFS version control. For this tutorial, you'll use the dedicated development model, which assumes each developer has their own copy of the database.
- In SSMS Object Explorer, right-click the WidgetDevelopment database and select Link database to source control.
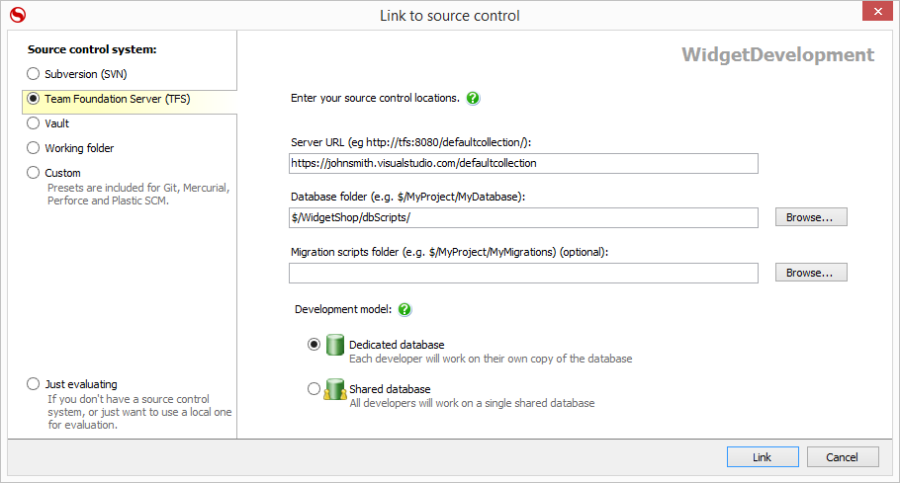
- On the Link to source control page under Source control system, select Team Foundation Server (TFS).
- In Server URL, enter the server URL of your VSTS's collection, for example: https://johnsmith.visualstudio.com/defaultcollection.
- To the right of Database folder, click Browse and select the WidgetShop database. Click Create Folder… and create a folder called dbScripts.
- Under Development model, select Dedicated database.
- Click Link.
- When the link to source control has been confirmed, click OK.
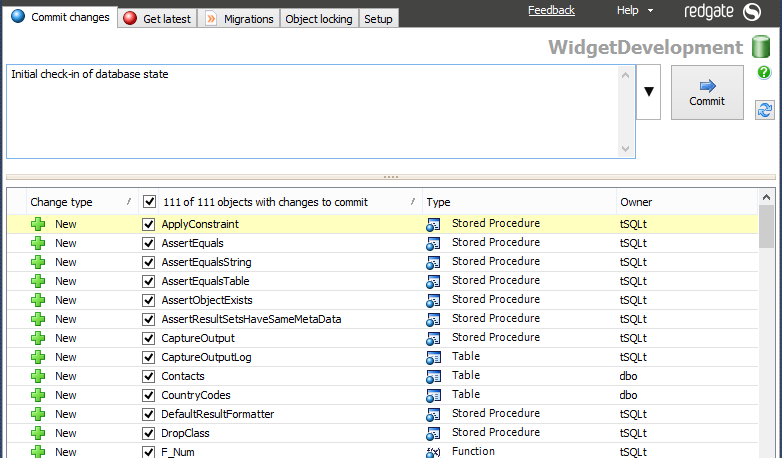
- Click the Commit changes tab.
- Make sure the check box at the top of the list is selected so that every object in the list will be checked in.
- Enter a comment to describe the changes; for example, Initial check-in of database state.
- Click the Commit button. After a few seconds, a message confirms the changes are committed.
- Set up the VSTS Build extension
5. Create a build definition
You can now create a VSTS build definition for our database build.
- Go to the Widgetshop project in VSTS.
- In the top menu, click BUILD.
- Click the green plus icon to create a new definition. Don't try to create a XAML definition.
- Select an Empty build definition and click Next.
- In Repository type, select Team Foundation Version Control.
- In default agent queue, select either hosted or local build-agents.
- Click Create.
6. Build a database package
You can now build a database package from the schema in Team Foundation Source Control.
- Click Add build step…
- Go to the Redgate DLM Automation Build task and click Add.
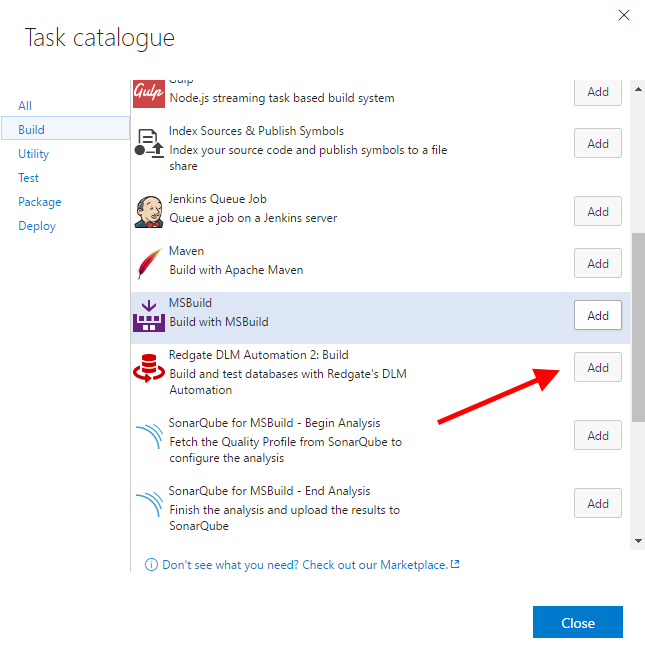
- Click Close.
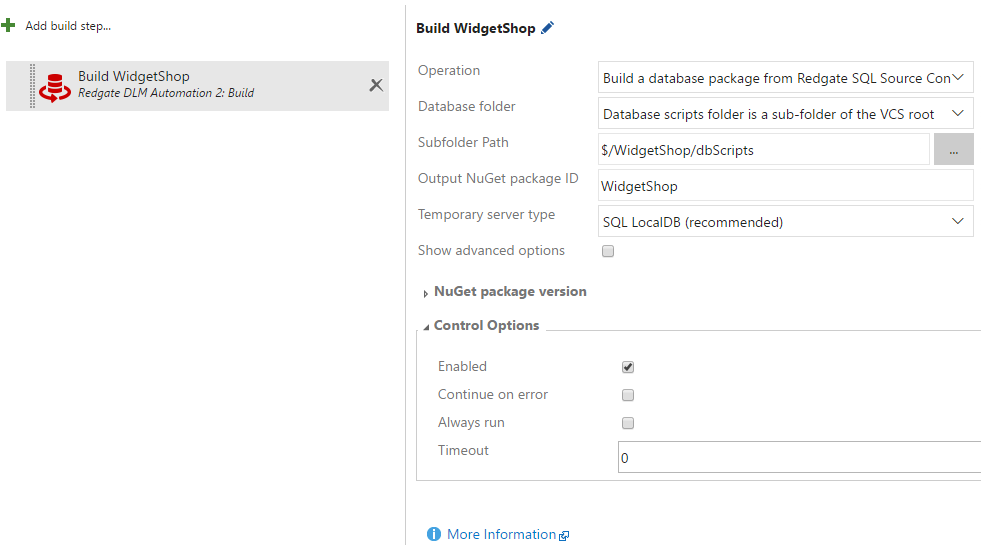
- In Operation, select Build a database package.
- In Database Folder, select Database scripts folder is a sub-folder of the VCS root.
- In Subfolder Path, click the ellipsis (…). Select the $/WidgetShop/dbScripts directory, which is where you committed the database schema.
- In Output Package Name, enter WidgetShop.
We're now ready to save and run our build.
- Click Save. Enter WidgetShop as the name of the build definition. Click OK.
- Click Queue build…
- Select the Queue you want to use.
- Click OK.
Typically, the build will take a few minutes on a hosted agent, or about 20 seconds on a local agent. The first time it runs on your local agent, it will need to download the DLM Automation build task. This is about 10MB, so may take a few minutes on a slow connection.
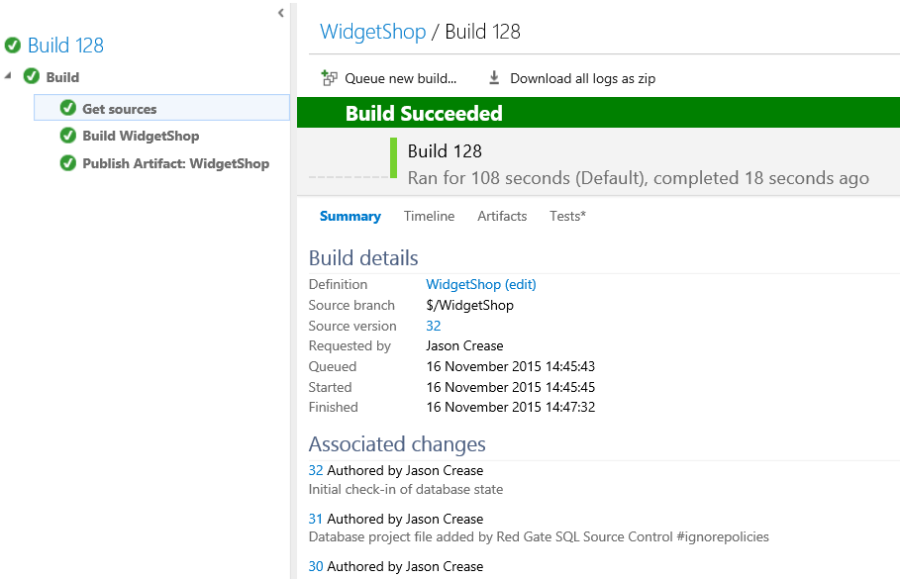
Once it's complete, you can investigate the build output.
- Click on Build <number> to see a summary of the build.
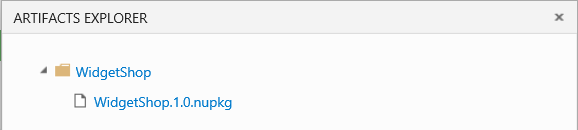
- Click Artifacts to see the outputted artifacts.
- Click Explore. There is one artifact – the NuGet package built from the database scripts.
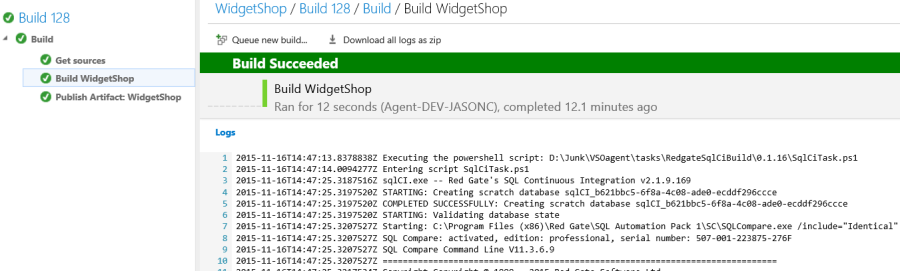
- Click Build WidgetShop to see the log output of the DLM Automation Build step. If there's a build error, this is a good place to start investigating.
7. Add a test step
You can now add a DLM Automation test step. On every build of the WidgetDevelopment database, DLM Automation will create a temporary version of the database using LocalDB and run tSQLt tests (such as static analysis, unit or integration tests) against it.
Redgate SQL Data Generator can be used to add test data to the temporary database. This is covered in step 9: Add Data Generator to the test step.
The database schema for WidgetDevelopment already includes four basic SQL Cop tests that will run against the temporary database and check for:
- procedures named SP
- procedures using dynamic SQL without sp_executesql
- procedures with @@Identity
- procedures with SET ROWCOUNT
There's also a unit test in the schema that checks for email addresses in the Contacts column. Once the tests are complete, DLM Automation generates test reports for review and the temporary database is dropped.
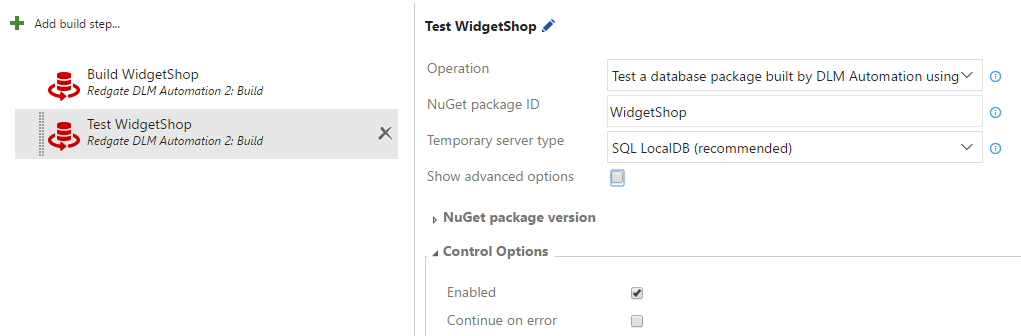
To add the test step:
- Go to the WidgetShop build definition.
- Click a Redgate DLM Automation Build step.
- In Operation, select Test a database package.
- In Package ID, enter WidgetShop.
- Leave the remaining fields as default.
You're now ready to save and run the build:
- Click Save, and save the build.
- Click Queue Build, queue a build, and wait for it to complete.
- Go to the build summary. On the right, you'll see the test results. Click on the link to see a breakdown of the tests.
8. Add a sync step
You can now add a sync step that will update an existing database with the contents of WidgetDevelopment after the build and test steps have completed successfully.
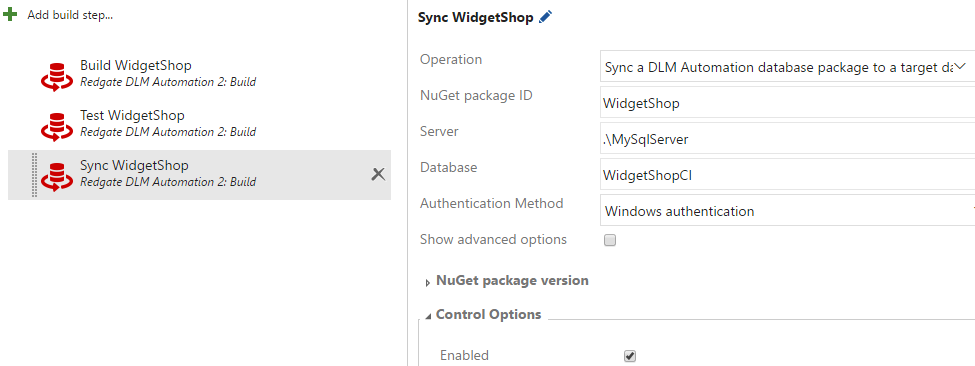
- Go to the WidgetShop build definition.
- Click a Redgate DLM Automation Build step.
- In Operation, select Sync a DLM Automation package.
- In Package ID, enter WidgetShop.
- Enter the details of your server:
- In Server, enter the name of your server. This can be an Azure SQL Database server, or a SQL Server.
- In Database, enter WidgetCI.
- Select either Windows Authentication or SQL Server Authentication. If you select Windows Authentication, it will connect as the account that is running the build agent.
- Leave the remaining fields as default.
You also need to make sure the steps are in the right order. - Drag the Sync WidgetShop step to the end.
You're now ready to save and run the build.
- Save the build definition.
- Queue a build, and wait for it to complete.
- In SSMS, open the WidgetCI database. Notice that the schema has been synchronized to the checked-in schema.
9. Add Data Generator to the test step
DLM Automation uses Redgate SQL Data Generator technology to generate test data for the test step. Due to space limitations, this feature is not available for hosted agents. To use it with an on-premises agent, you must install DLM Automation on the agent.
SQL Data Generator can operate according to two modes:
- Automatically generate data based on the schema. It will make educated guesses based on the name and the datatype of the column, and generate 1000 rows per table.
- Use a sqlgen file. In SQL Data Generator, create a project for the WidgetShop database. Set it up as you see fit, then save as a sqlgen file.
- We've created an example WidgetTestData.sqlgen file for you. Find it in the zip file, under WidgetShop\Database directory.
You can then commit this file to Team Foundation Source Control. In this tutorial, you'll do this in VSTS, but you can also use Visual Studio. - Go to the WidgetShop project.
- Click CODE in the top menu.
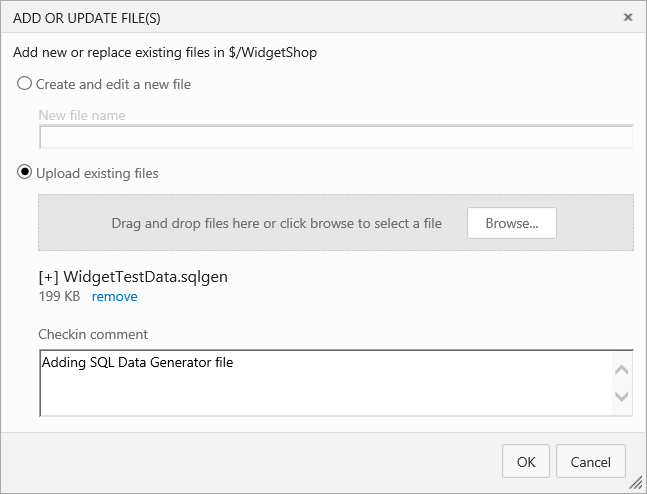
- Right-click the $/WidgetShop node, and select Add file(s).

- Click Upload existing files.
- Click Browse.
- Navigate to where you unzipped theWidgetDevelopmentDatabaseCIDemo.zip. Go to the \WidgetShop\Database subdirectory, and select WidgetTestData.sqlgen.
- Enter a suitable check-in comment and click OK.
You can now edit the DLM Automation Test step to use this file.
- Open the WidgetShop build definition.
- Go to the Test WidgetShop step.
- Check Show advanced options.
- Check Use Redgate SQL Data Generator.
- From the Generate data dropdown select Generate data using an existing SQL Data Generator project file
- Click the ellipsis next to SQL Data Generator file. This open a file-selection box.
- Select WidgetTestData.sqlgen and click OK.
- Save and Queue a build.
A build, using the SQL Data Generator file, will now run. - Once the build is complete, look at the build log of the Test WidgetShop step. Notice that rows have been generated and inserted into the test tables.
This documentation contains proprietary information and is protected by copyright law.
Copyright © 2026 Red Gate Software Limited. All rights reserved


