Azure DevOps - Classic Editor - Pipeline Setup Guide (Deprecated)
Published 24 March 2022
This guideline is deprecated. The latest Classic Pipeline Setup guide can be found here - https://documentation.red-gate.com/flyway/deploying-database-changes-via-a-pipeline/example-ci-cd-pipelines/azure-devops/azure-devops-classic-editor-simple-build-and-release-pipeline-setup-guide
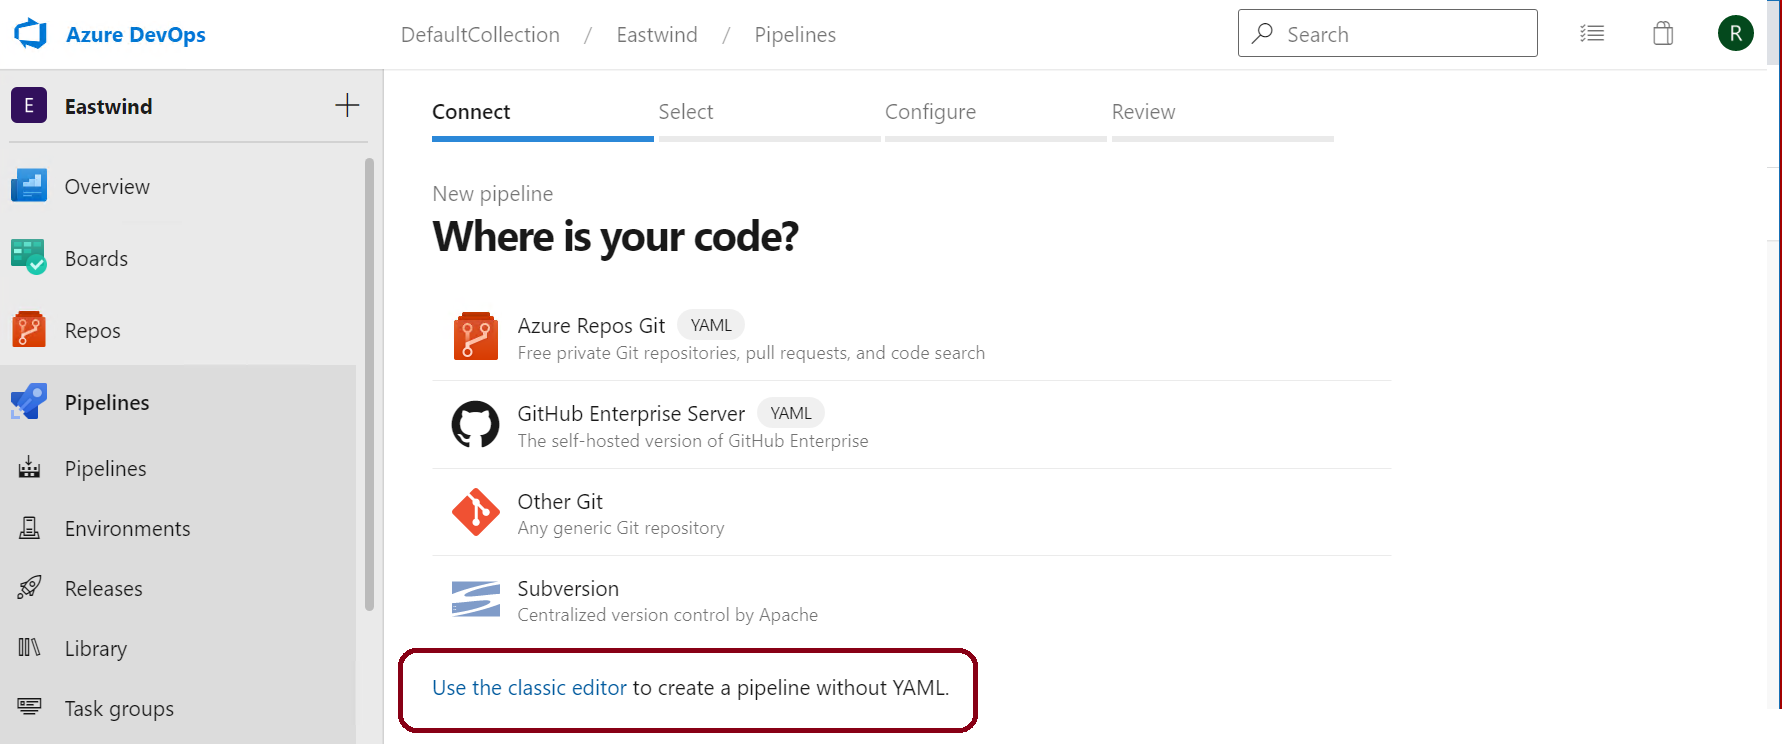
- In your Azure DevOps Organization, click Pipelines > New pipeline.

- Click Use the classic editor to create a pipeline without YAML.
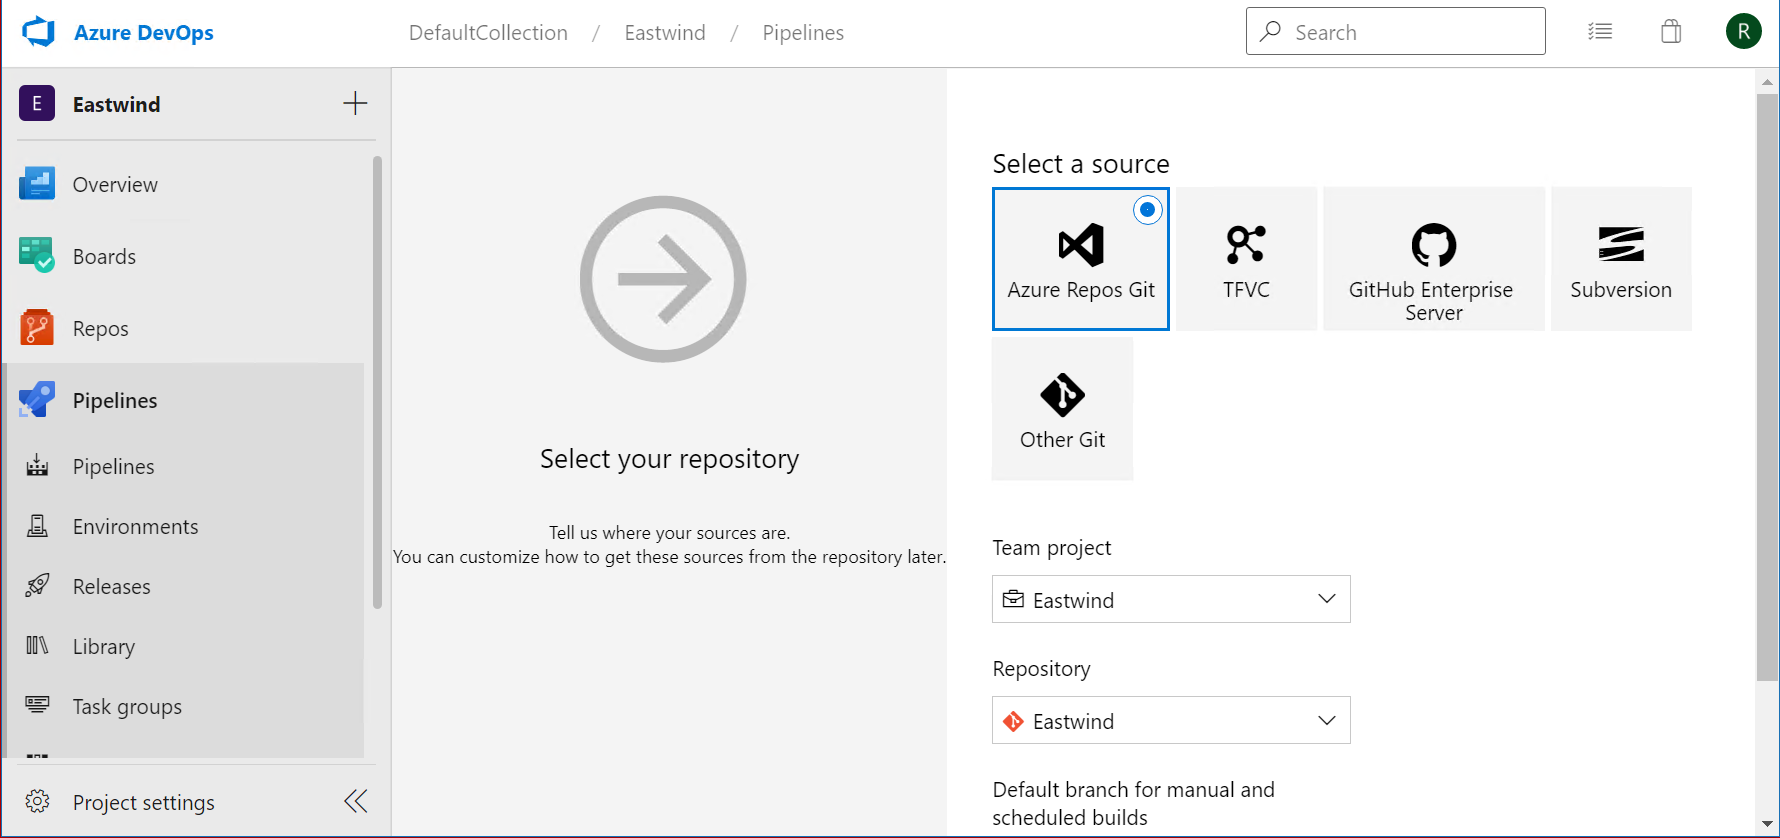
- Select your repository and configure your settings.
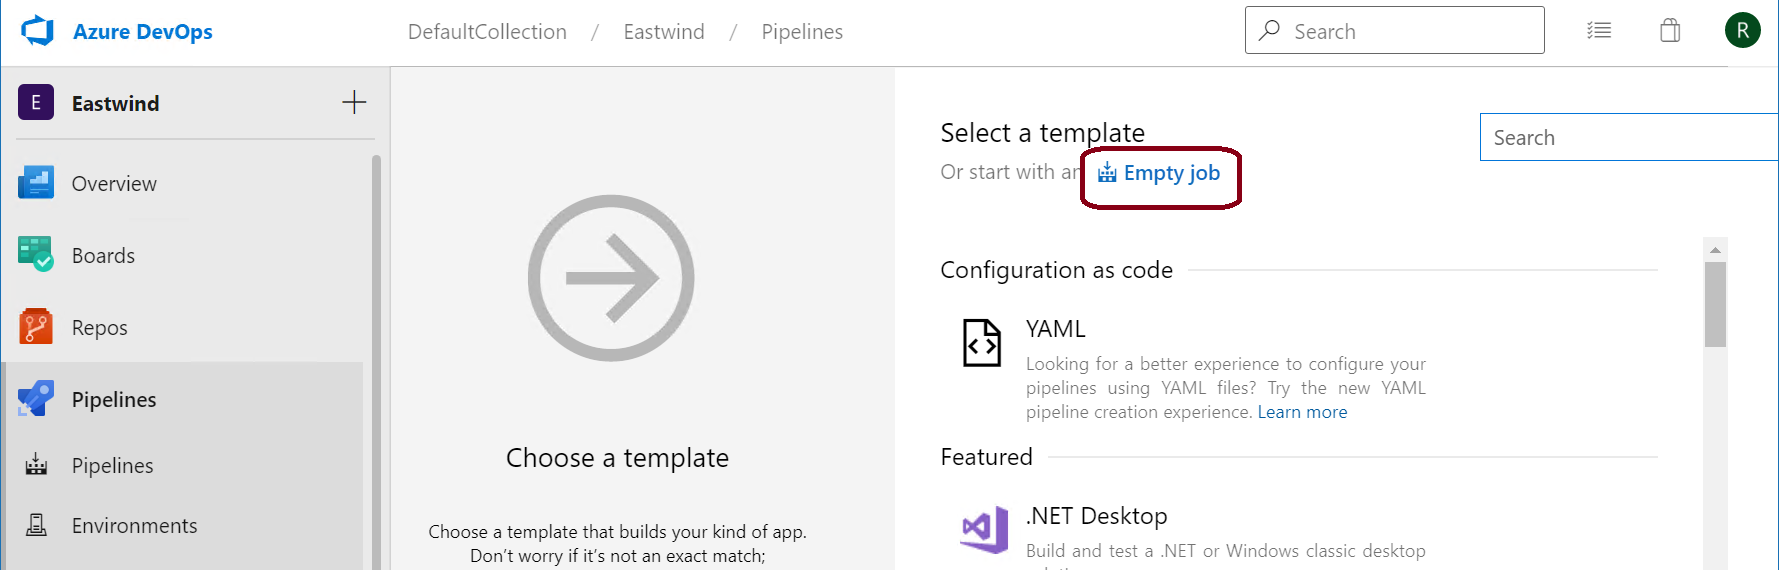
- Click Empty job.
- Give your pipeline a name and make sure you're in the correct Agent pool.

- Use the plus (+) for the Agent job to add 3 Command line tasks and 2 Publish build artifacts tasks and reorder them as shown under the agent (cmd, cmd, pub, cmd, pub).

- For the first cmdline task, set the following properities:
Name: Validate Migration Scripts
Script: flyway clean migrate info -url=<jdbc_connection>
- ToDo - Usernames and passwords need to be set as variables or using integrated security of a service account.
Release process (example)
Pre Release Schema Snapshot
sco /forceservicename /source HR/Redgate1@localhost/Acceptance{HR} /snapshot C:\Reports\prereleasesnapshot.onpDrift Detection
sco /forceservicename /source C:\Reports\prereleasesnapshot.onp{HR} /target C:\Reports\postreleasesnapshot.onp{HR} /Report:C:\Reports\DriftDetection /ReportType:interactiveDeploy To Acceptance
flyway migrate -url=jdbc:oracle:thin:@//localhost:1521/AcceptancePost Release Schema Snapshot
sco /forceservicename /source HR/Redgate1@localhost/Acceptance{HR} /snapshot C:\Reports\postreleasesnapshot.onpCompile Change Report
sco /forceservicename /source C:\Reports\prereleasesnapshot.onp{HR} /target C:\Reports\postreleasesnapshot.onp{HR} /Report:C:\Reports\ChangesReport /ReportType:interactive
This documentation contains proprietary information and is protected by copyright law.
Copyright © 2026 Red Gate Software Limited. All rights reserved


