Provisioning Your Databases
Published 14 April 2025
In this step, you’ll create a metadata-only Oracle Data Pump export and use it to provision the required environments for your Flyway Autopilot project. Unlike SQL Server, where backups and restores are handled via .bak files, Oracle environments are best provisioned from Data Pump exports (.dmp files).
Flyway Autopilot is built to support this workflow both in Flyway Desktop and in CI/CD pipelines—allowing you to use your backup as the baseline for provisioning Shadow, Check, and Build databases, or even to recreate Dev/Test/Prod if needed.
⚠️ This process is central to the Oracle Autopilot flow. Whether you’re testing Flyway or implementing it for real, this step ensures your environments are in sync and compatible with migration-based development.
Step 1: Create a Schema-Only Data Pump Export
You’ll use Oracle’s expdp (Export Data Pump) tool to generate a metadata-only export file of your schema. This file will serve as the reusable baseline for any environment.
🎯 Goal: Export a clean, up-to-date copy of your schema—ideally from production or a production-like source.
Export Data Pump
expdp your_user/your_password@your_service_name ^
FULL=Y ^ DIRECTORY=DATA_PUMP_DIR ^
DUMPFILE=baseline_export.dmp ^
LOGFILE=baseline_export.log ^
CONTENT=METADATA_ONLY
✅ Tip: Run this on a server where DATA_PUMP_DIR is already defined. You can confirm this using:
Export Data Pump
SELECT directory_name, directory_path FROM dba_directories;
💡 Creating the export is a common task for Oracle DBAs. If you don’t have access to expdp or the proper permissions, just share the script above with your DBA team and ask for:
A
METADATA_ONLYData Pump export of your schemaThe path and Oracle directory name where it’s stored (e.g.,
DATA_PUMP_DIR)
Once you have the .dmp file and directory details, you’re good to go.
Step 3: Import the Data Pump to Provision any needed Environments
Whether you're setting up a Proof of Concept or rolling out a real-world implementation, it's important to plan and provision all the environments Flyway will interact with. This includes:
Your development and operational environments:
AutoPilotDev,AutoPilotTest,AutoPilotProdInternal environments used by Flyway for automated operations:
AutoPilotShadow,AutoPilotCheck,AutoPilotBuild
These additional environments are critical for tasks like validating migrations (Check), generating scripts (Build), or safely previewing changes (Shadow).
You have two options:
✅ Ask your DBA team to create these environments for you
✅ Use your Data Pump export with
impdpto create them yourself using schema remapping
Either way, ensure that each schema is in place and accessible before continuing—this will unlock the full power of Flyway Autopilot.
If provisioning the environments yourself, check out the collapsible guide below:
Step 4: Confirm Database Creation and Set Up Connections
This step is crucial, as it helps to validate that the databases created can be accessed by Flyway, with the best location for doing this inside Flyway Desktop.
Therefore, head back into the Flyway Desktop application so that the connection string of each environment can be validated.
1. Open up Flyway Desktop, and click on the settings icon in the top right! 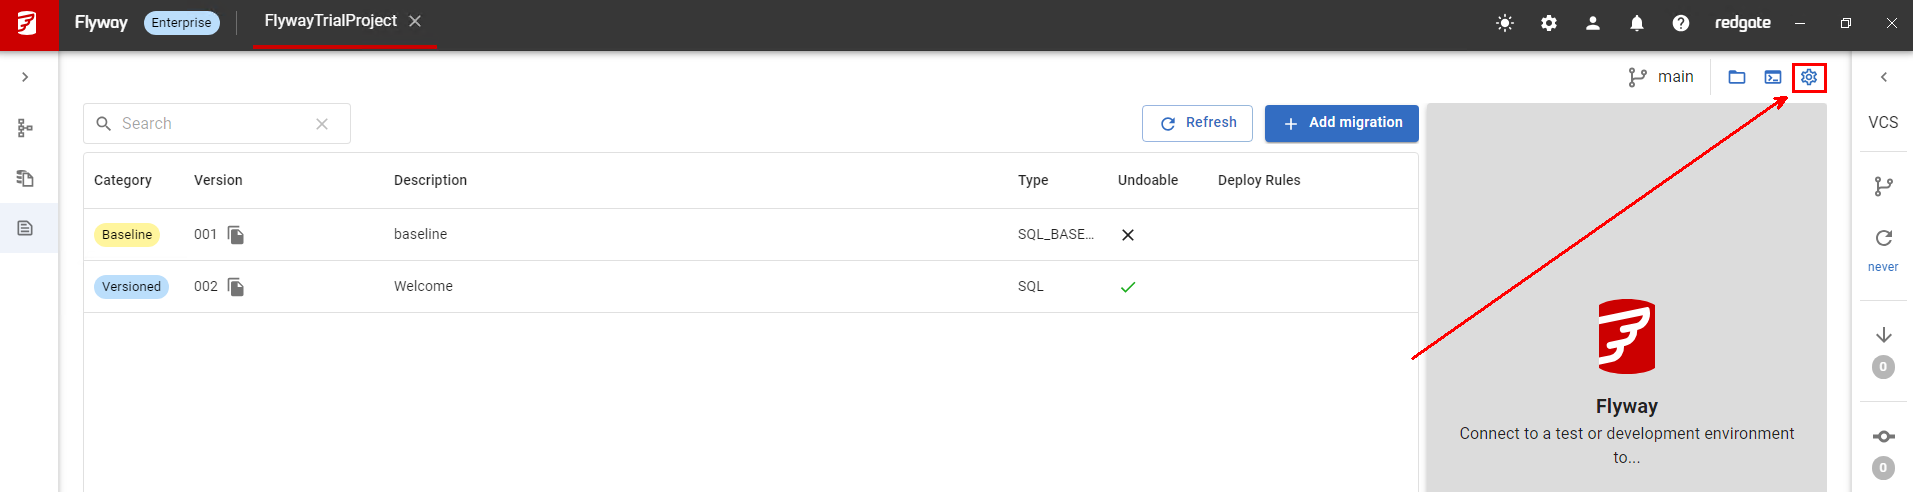
2. First edit the Development Database configuration details, followed by the Shadow Database (See next step for details). 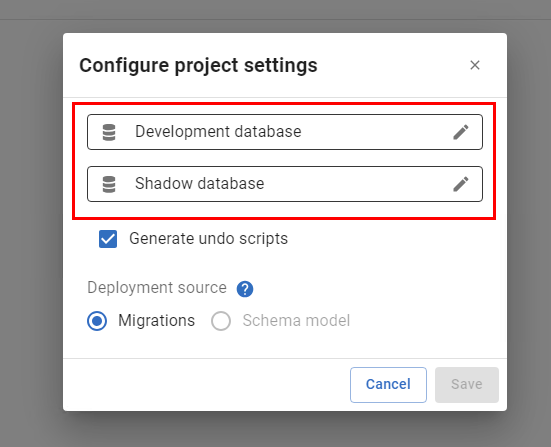
3. It is important that the connection details are updated to match the environment the earlier created databases now reside. As mentioned, the default server location of Localhost is used. However, if the databases were created on an instance other than one locally, ensure the connection details are updated to point at the relevant server and then test the connection.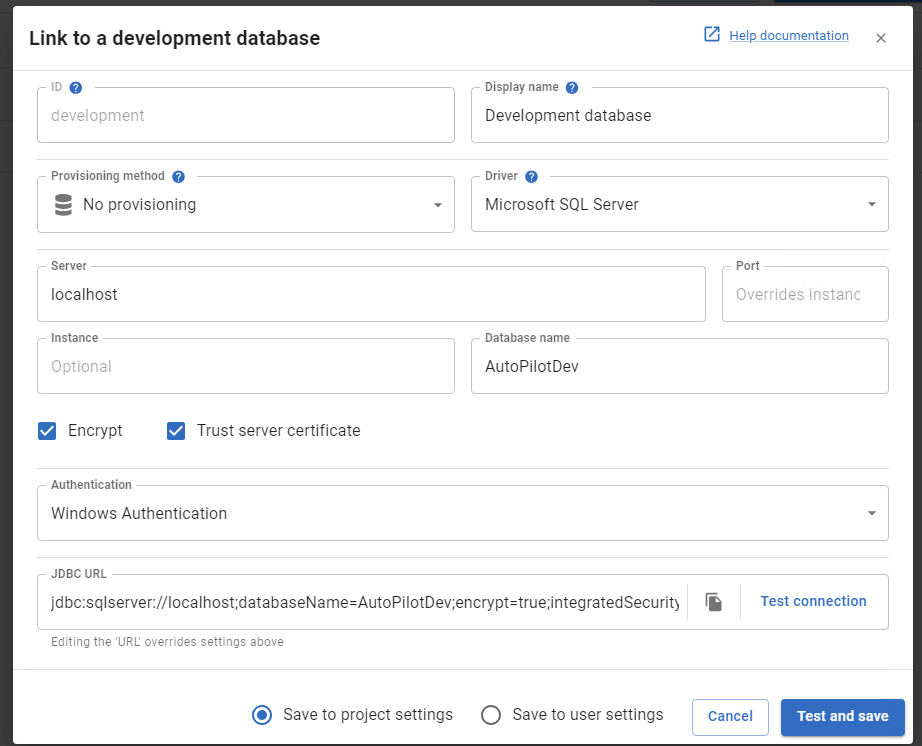
4. Once the connection details for the Development and Shadow databases are successful, you will now want to head to the migrations tab, and make sure all of the 'Target Databases' are also correct (These are important as they will be referenced by our pipeline in a later setup stage)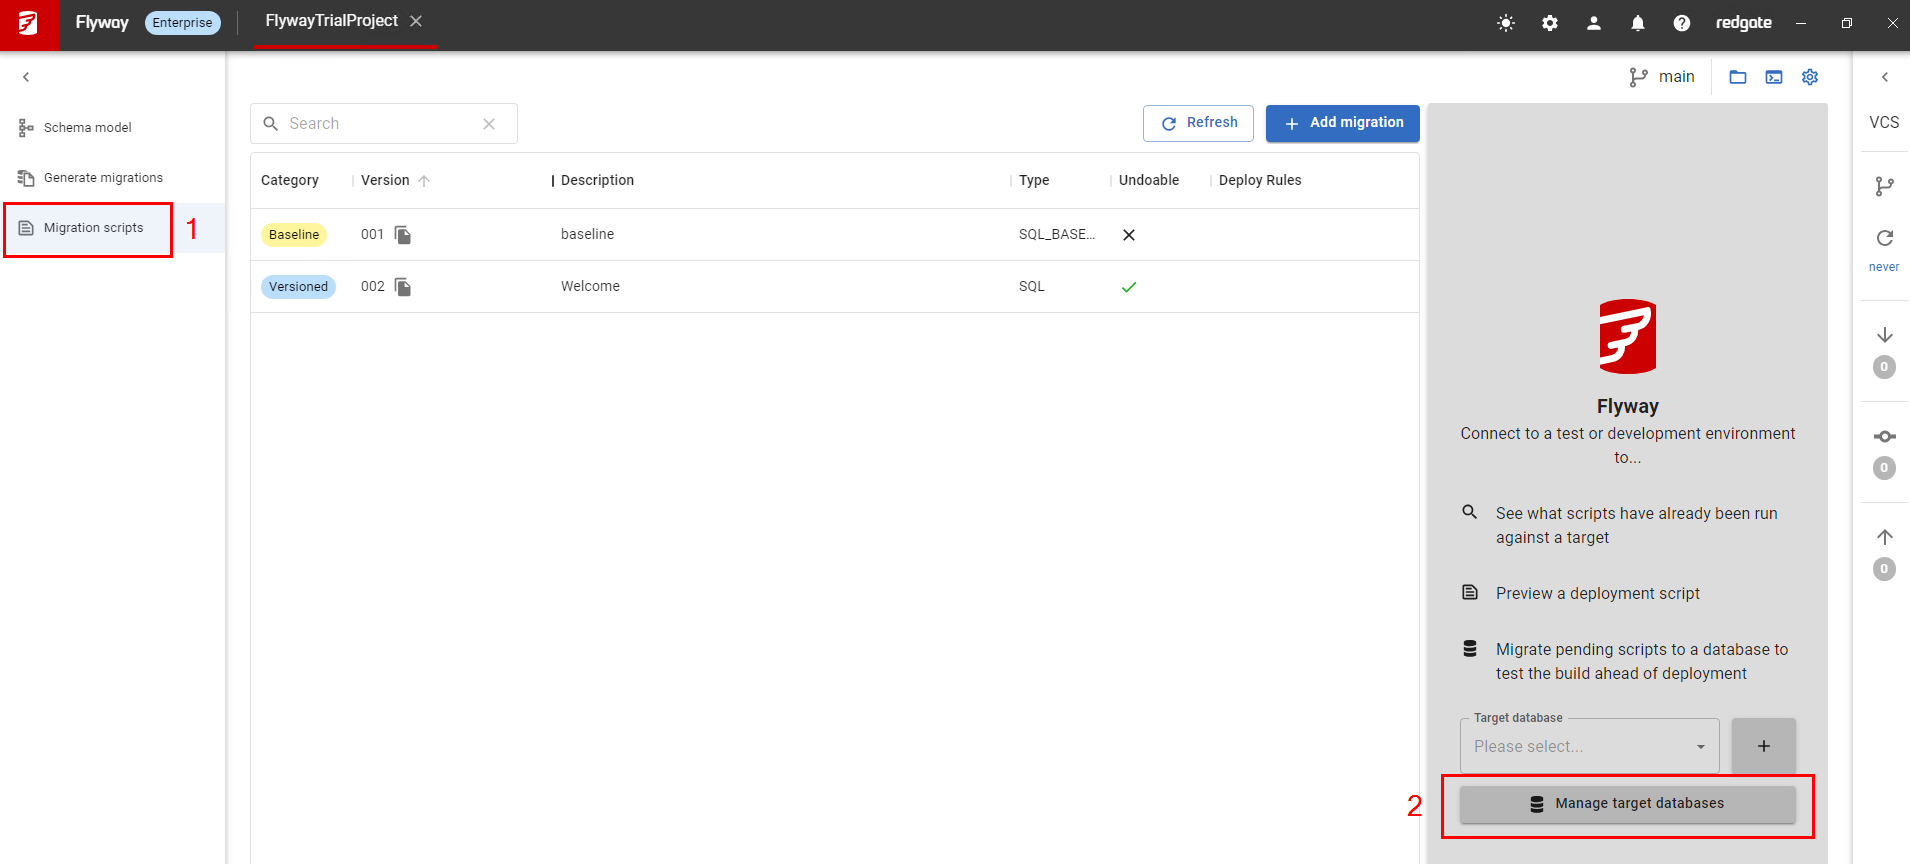
5. As we did before, edit each of these connection strings and test that a connection is possible. Once this has been done, You will now be ready to use the project in its full capabilities!

Final Outcome
After this step, you should have:
✅ A baseline_export.dmp file that Flyway will use when provisioning from backup
✅ All environments (Dev, Test, Prod, Shadow, Check, Build) created and connected
✅ Flyway Desktop configured and ready for schema capture and migration generation
Next Step → Capturing Schema & Generating Migration Scripts
Let me know if you want the Data Pump commands pre-templated for environments like AutoPilotDev or AutoPilotShadow—and I can create those too!
This documentation contains proprietary information and is protected by copyright law.
Copyright © 2026 Red Gate Software Limited. All rights reserved


