Tutorial - Initialize a repository
Published 17 January 2025
If you are working with an existing repository, clone the repository to your local desktop first using your version control systems tools. Then, create a new project in your local repository folder and Flyway Desktop's Git integration will already be initialized and these steps can be skipped. This is sometimes simpler and ensures you are working against the latest version and avoid merge conflicts on initialization.
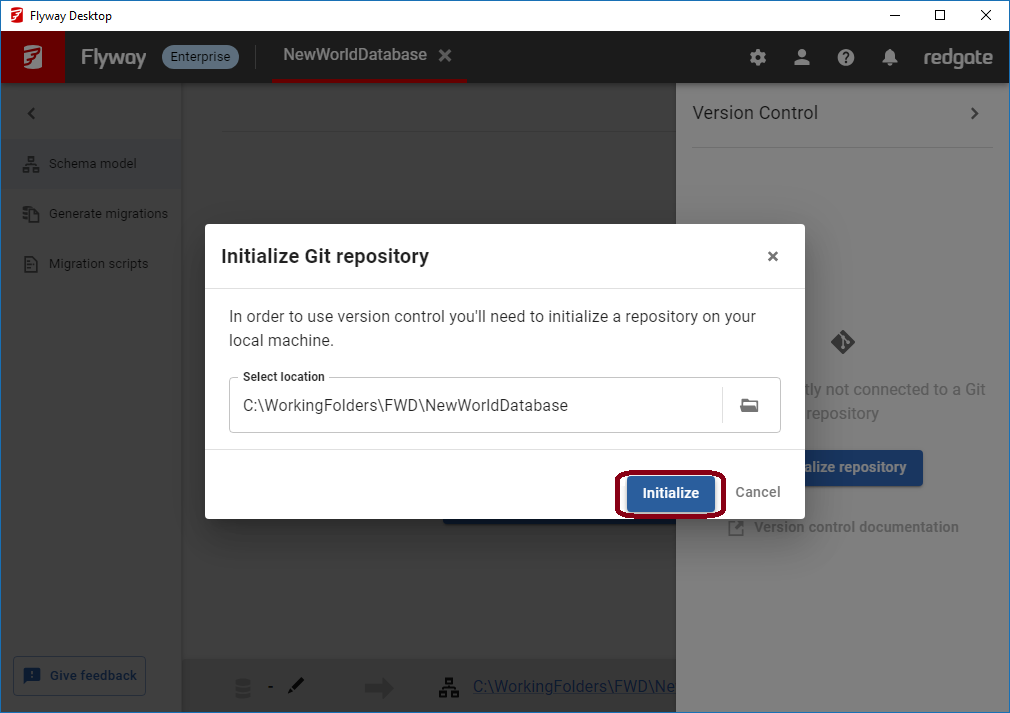
If your Flyway project was created outside an existing local Git repository, then you'll have the option to initialize a repository through Flyway Desktop. In the Version Control side panel, click Initialize repository. This defaults to the current project folder and you can browse to a higher level folder, if needed (e.g., you have a "Database" folder within a folder that will contain other files that should all be version controlled.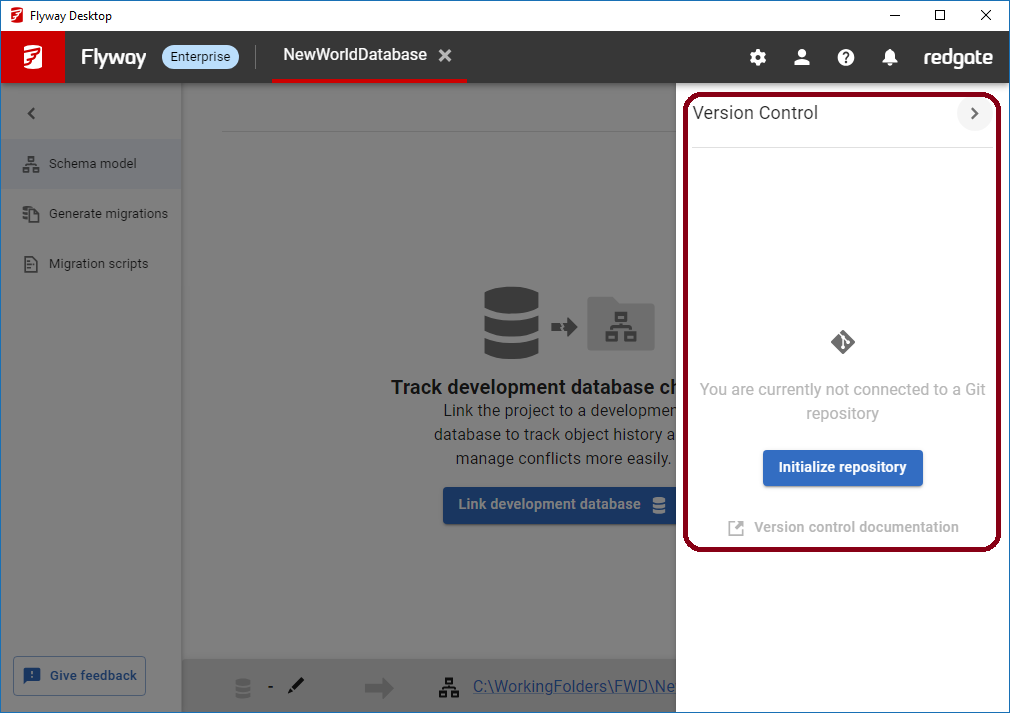 →
→ 
After initializing your local repository, you'll be able to commit changes locally. You'll have to add a remote repository in order to push/pull changes to/from a remote repository and share changes with other team members.
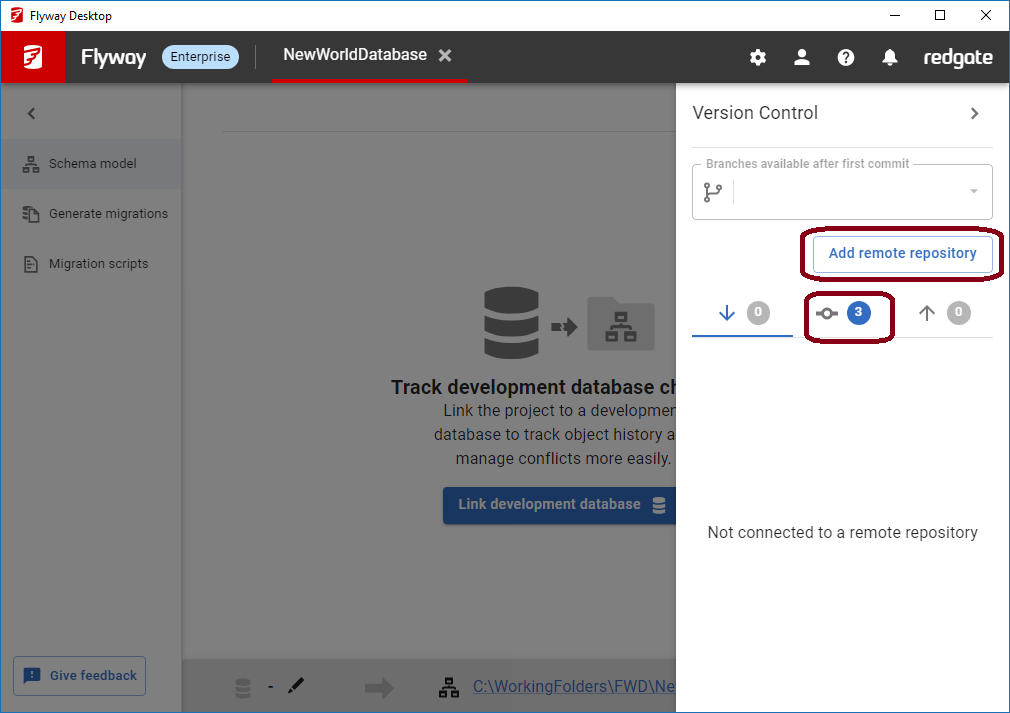
After clicking Add remote repository, enter the URL for the remote repository. By default, we name the remote repository origin, which aligns with Git's defaults. Read more about how to find your remote repository URL.

Your Flyway project is now ready to use all the Git integrations.
Next steps
This documentation contains proprietary information and is protected by copyright law.
Copyright © 2026 Red Gate Software Limited. All rights reserved


