Agents
Published 13 February 2026
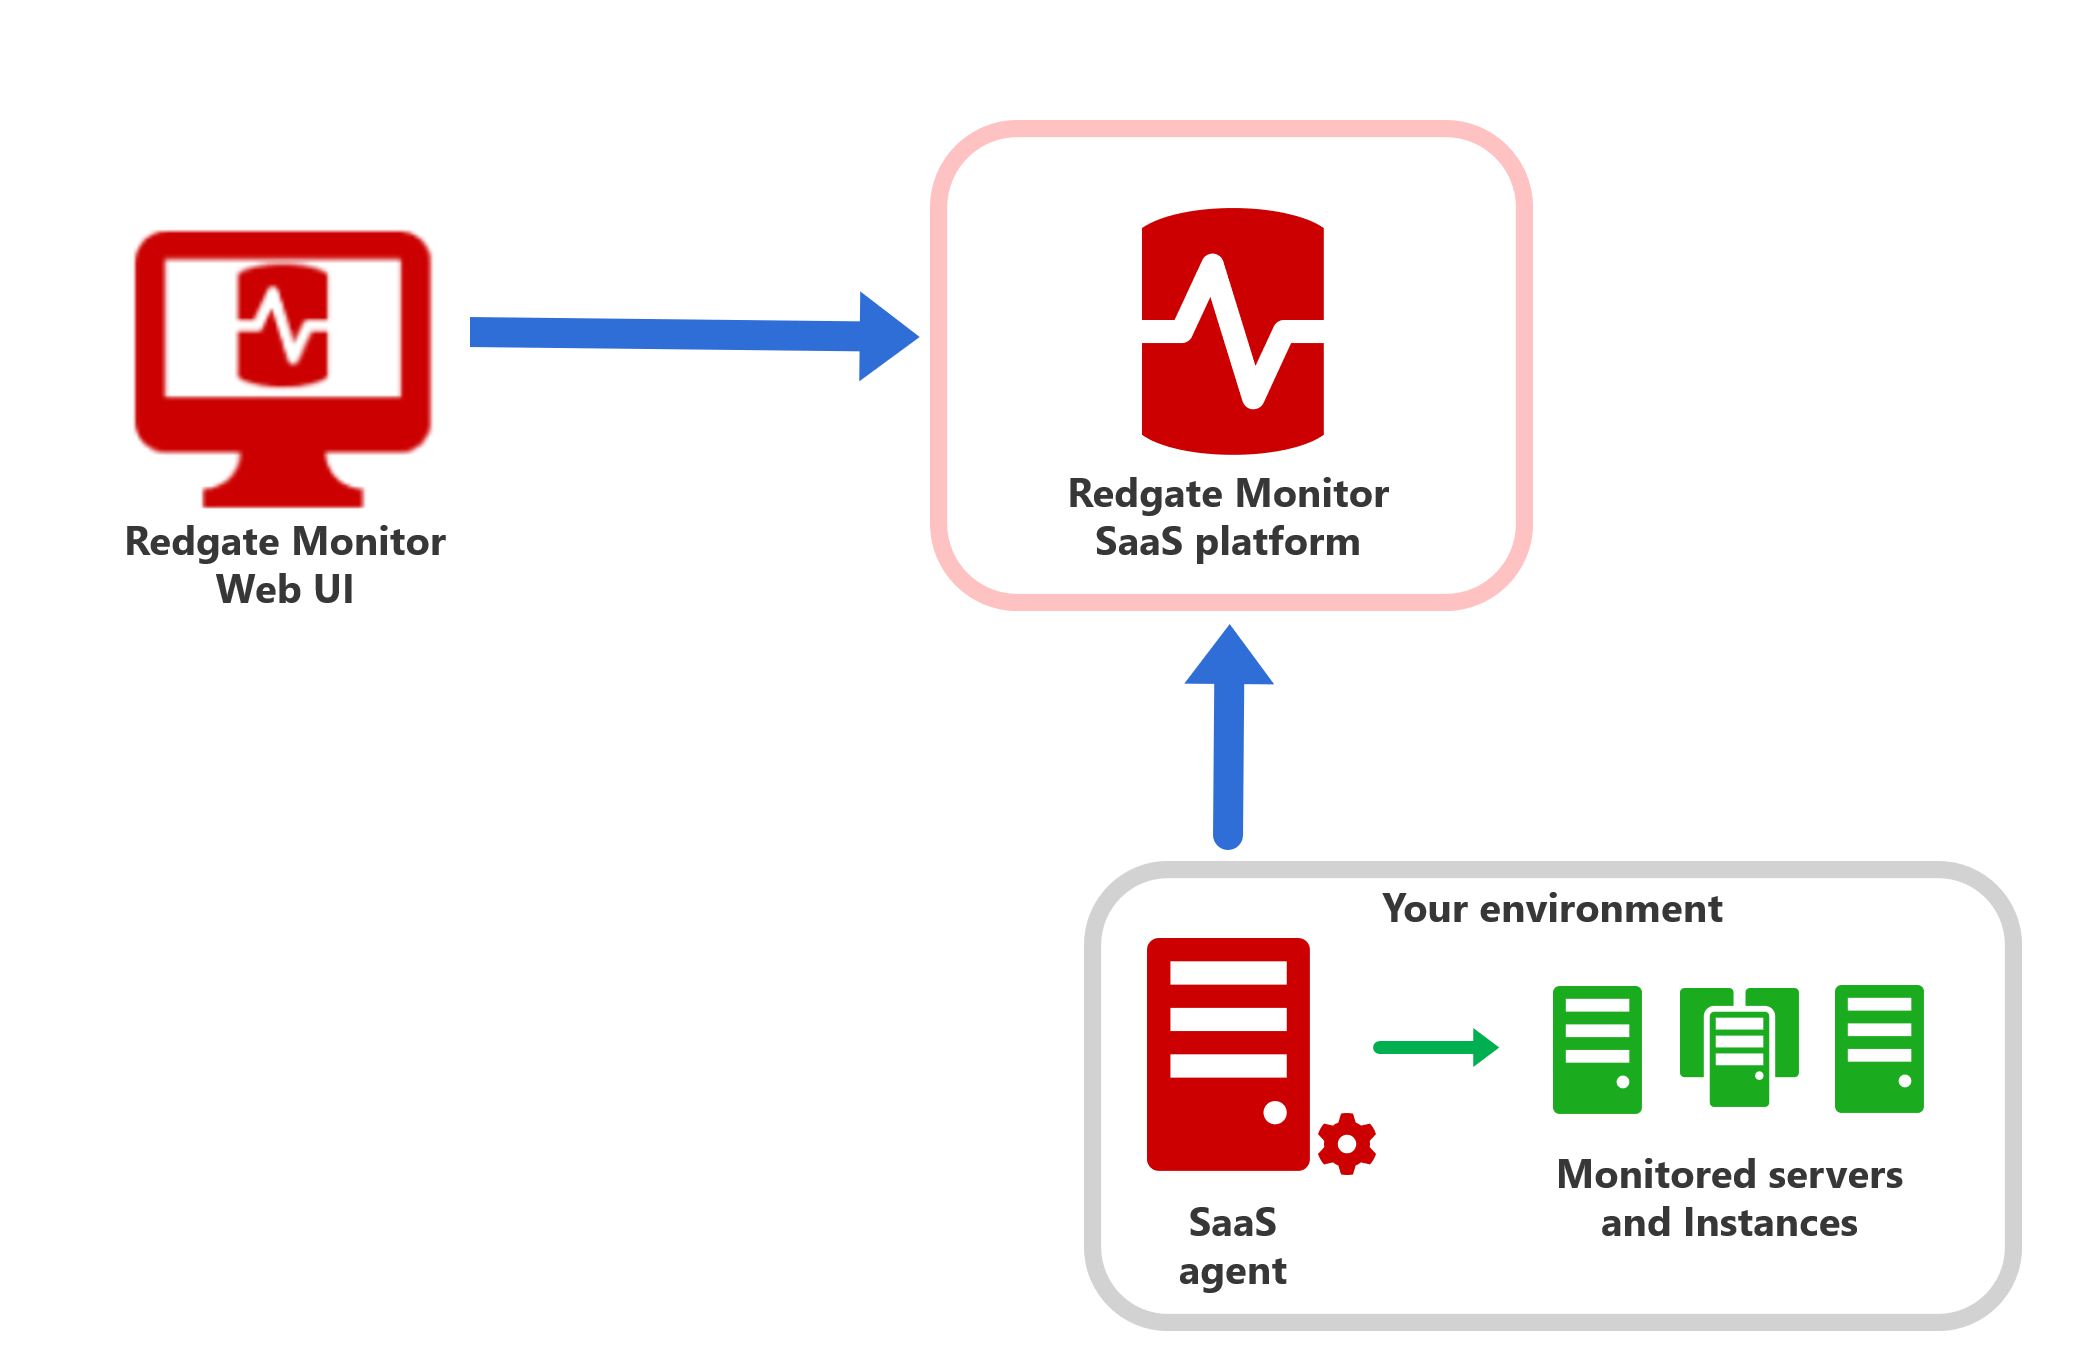
To start monitoring your databases with Redgate Monitor in its SaaS format, you’ll need to install a lightweight data collector or Agent on a Windows machine within your environment. You can have one or more agents and they can each monitor multiple servers.
What the Agent does
- The Agent connects to your database instances and servers in the same manner as the Base Monitor for self-hosted Redgate Monitor and collects performance data.
- It sends this data securely to the Redgate Monitor cloud service for analysis and visualization.
System Requirements
- The Agent runs as a Windows service.
- You’ll need a Windows machine—we recommend Windows Server 2022 or Windows 11.
- A known good configuration is 4 CPU cores and 8GB RAM, but the agent management page will give you upto date information about your agent's performance so that you can adjust this based on your workload.
Security & Connectivity
- The Agent is stateless, except for:
- A certificate stored in the user certificate store (used for mutual TLS with our SaaS endpoint).
- Local log files written to the file system for diagnostics.
- Before installation, please ensure the following:
- The machine can reach our SaaS endpoint. You can find a way to test this below.
- Your firewall or proxy is configured to permit outbound HTTP (port 80) connections from your agent(s) to the following domain and all its subdomains: *.monitor.redgate-platform.com
Testing your machine can reach the platform
From a PowerShell command prompt, validate that outbound traffic on ports 8444 and 8443 is permitted so that the host machine for your Agent can send monitoring data to your Monitor instance. If a 'Connection failed' error message is displayed for either command, then check your firewall configuration.
if (Test-NetConnection <your-unique-hostname>.monitor.redgate-platform.com -Port 8444 -InformationLevel Quiet) {'OK'} else {'Connection failed'}
if (Test-NetConnection <your-unique-hostname>.monitor.redgate-platform.com -Port 8443 -InformationLevel Quiet) {'OK'} else {'Connection failed'}
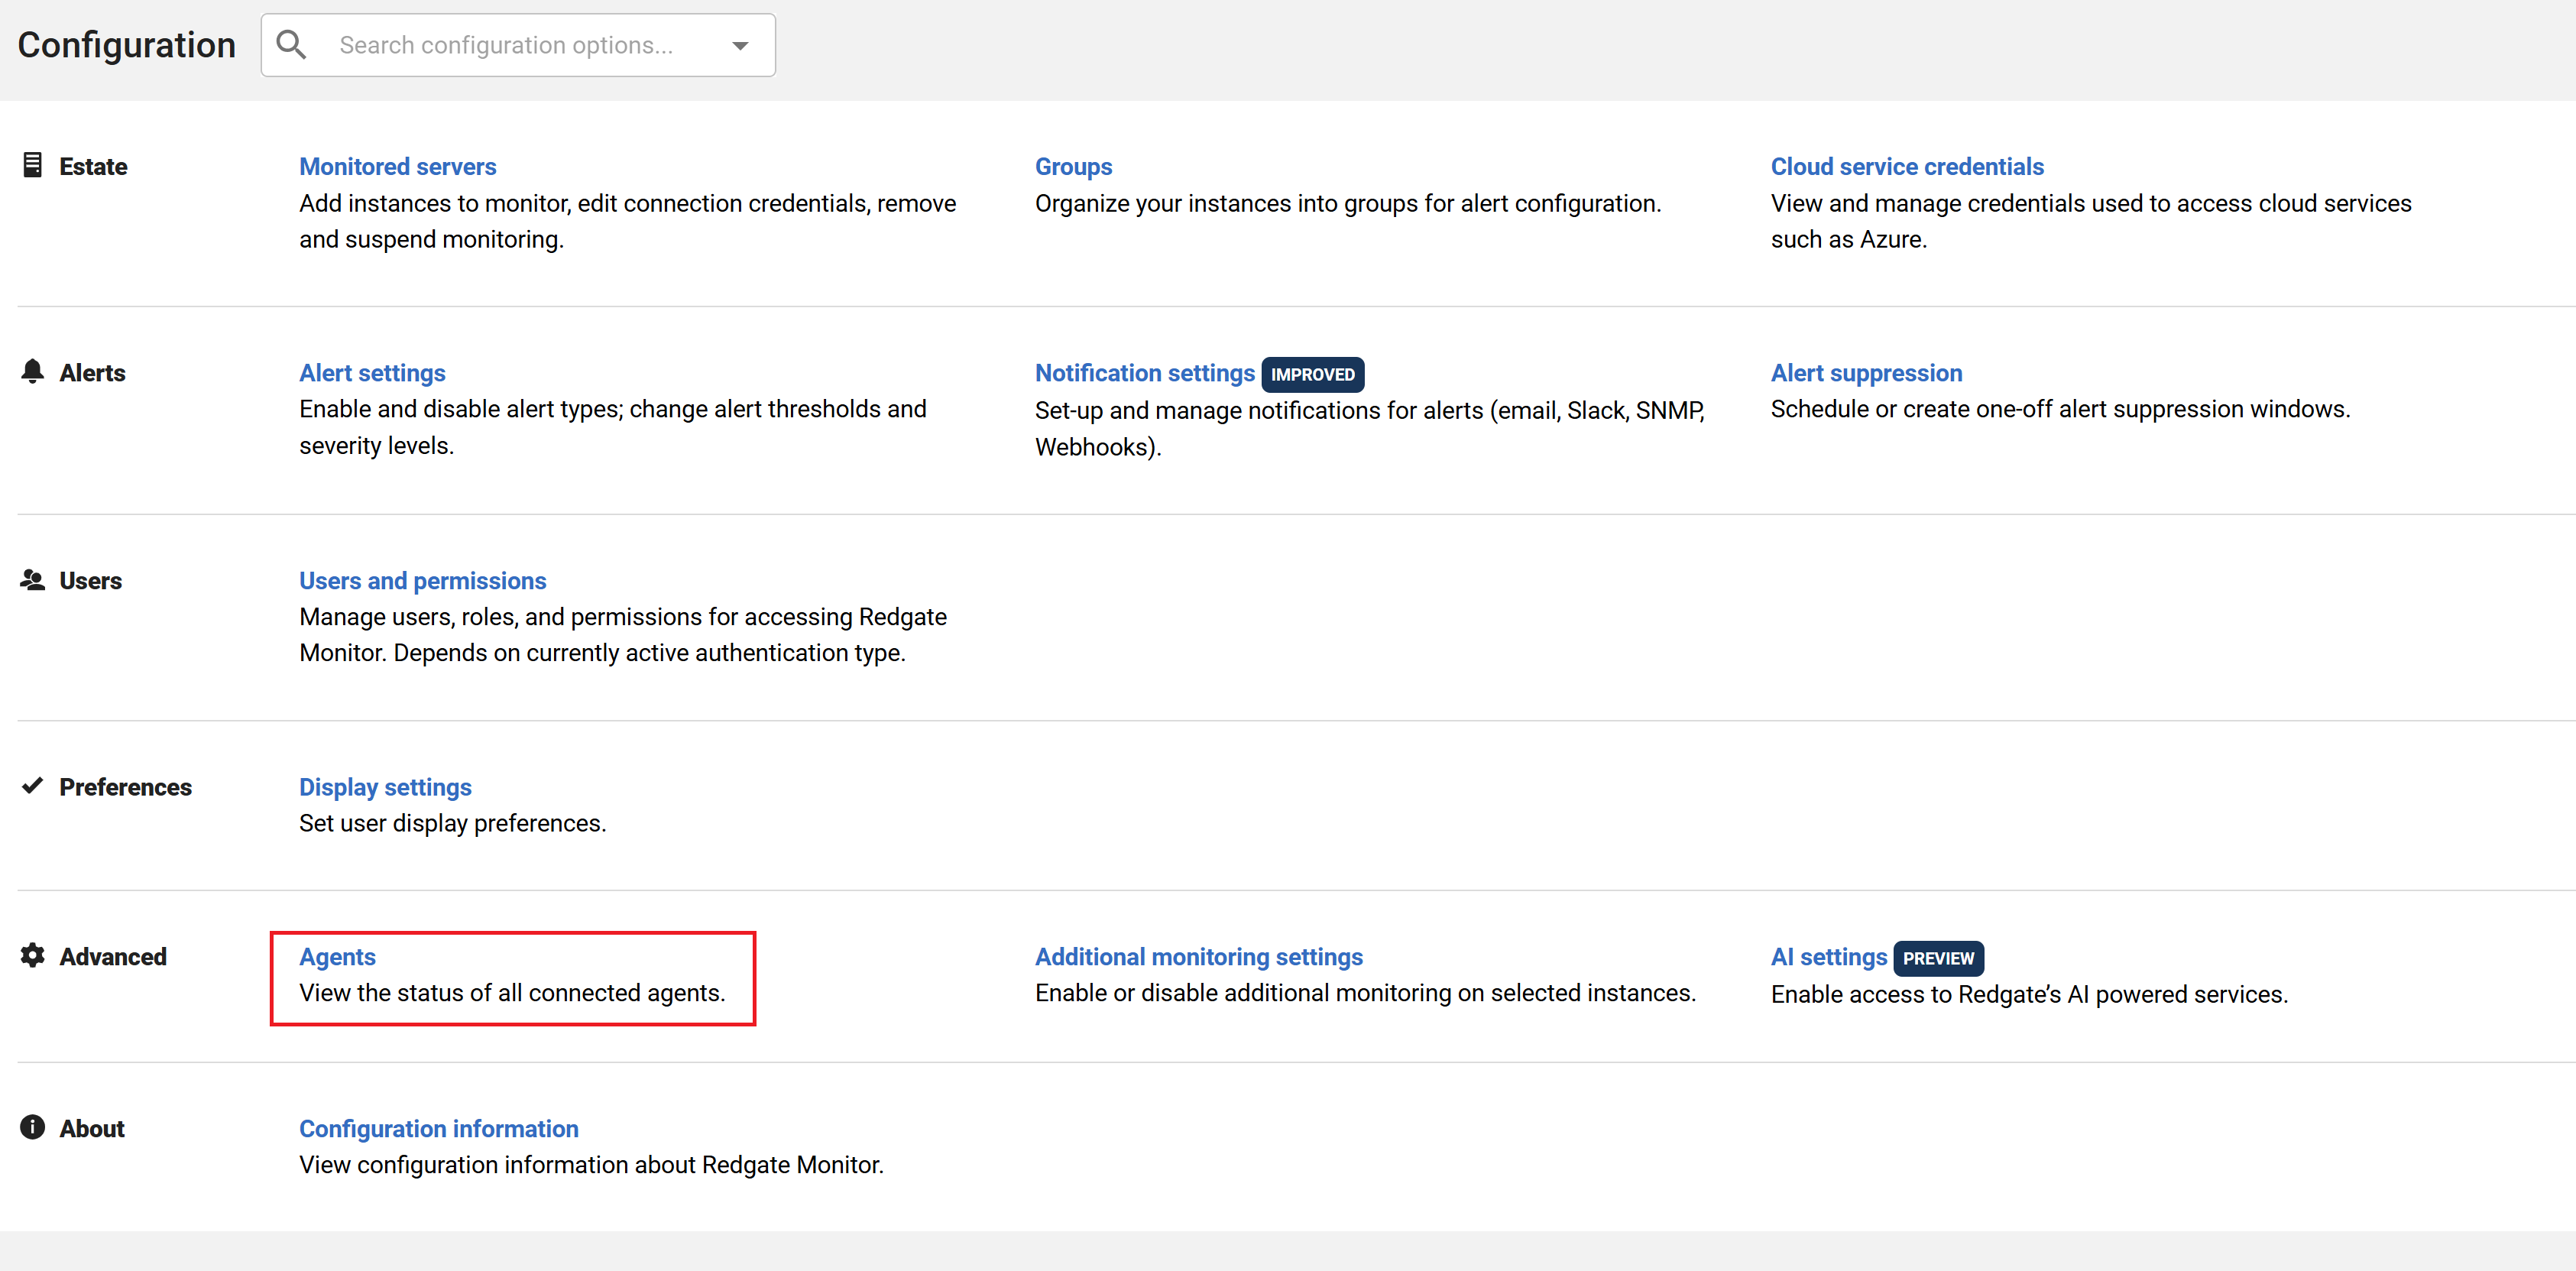
Managing your agents
You can access the Agents section in the Configuration section of Redgate Monitor, as shown below:
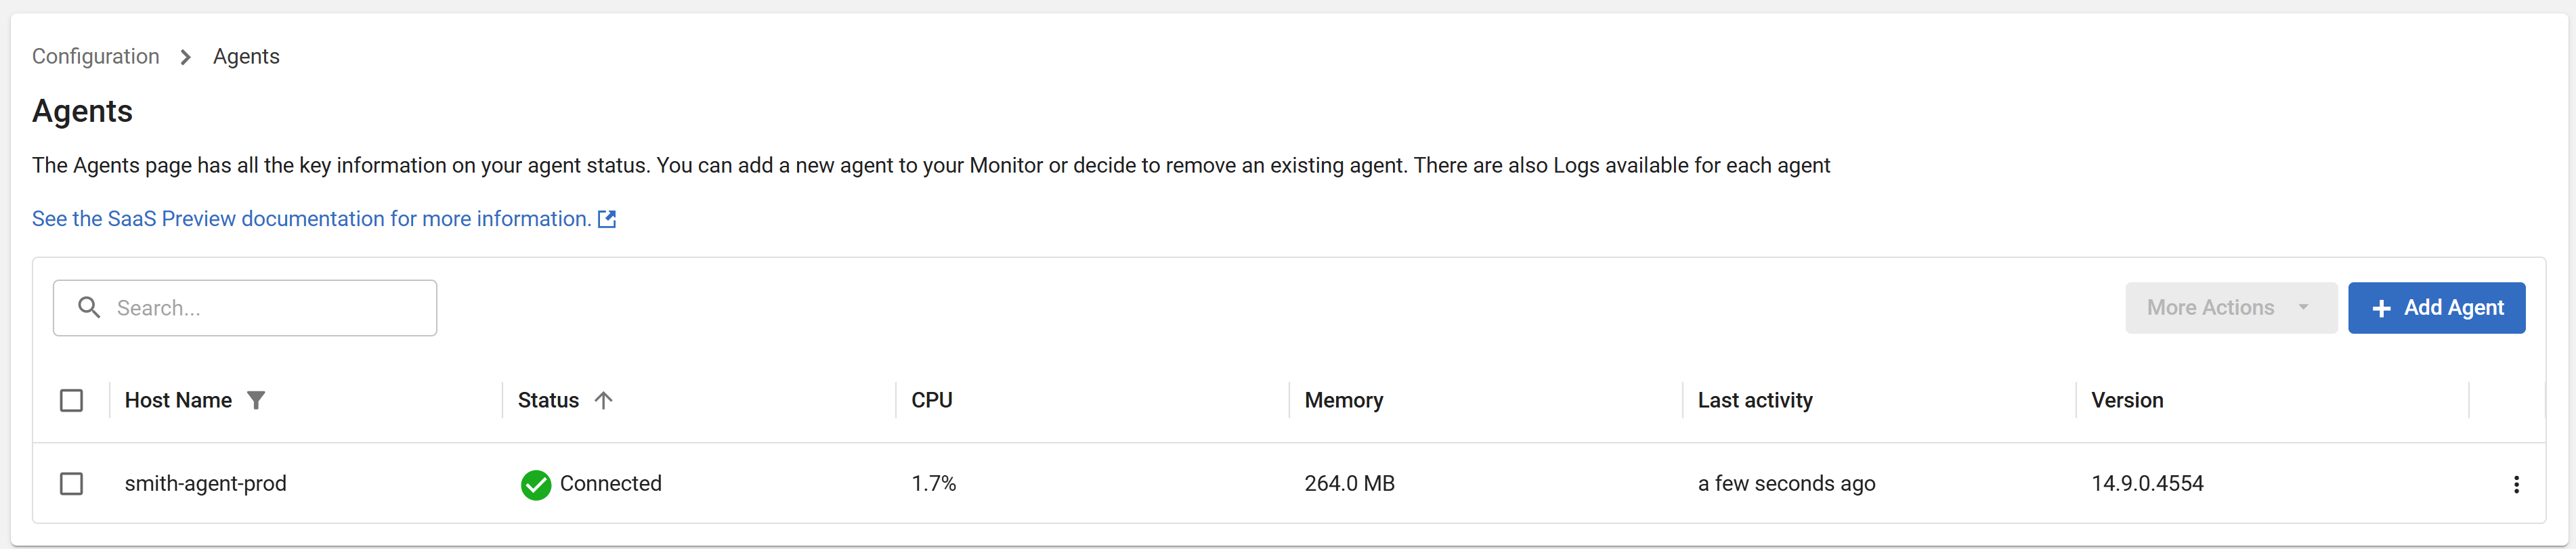
From this page you can see your agents, whether or not they are connected, some basic machine metrics, when they were last active and their version. You can also use the Add Agent modal to download an agent installer and get a command line including a one-time token to install an agent and establish a secure connection to the platform.
Installing an Agent
If you don’t need to connect to your databases using the privileges of the user the agent is installed with, run the copied command in the same directory as the downloaded installer to install the agent as a service with the permissions of NT Authority\LocalService (a low-privilege service user suitable for most Monitor Agent installations).
Upon a successful install the installation window will disappear. You can check the ‘Add/Remove Programs’ screen in Windows to check it has installed successfully and visit the Monitor agents web site to check the agent has connected successfully.
On a failed install the installation window will remain open until you press a key. It will direct you to where you can retrieve detailed logs to determine the cause of the error.
Running the Agent under a different account
If you'd like to have the service running as another account (because you don't want to enter credentials for your machines and databases in Monitor, for example) the installer accepts additional command line arguments to support this. The terminal must be run as administrator.
NOTE: If you are running these through an automated script you should also use the –headless argument to ensure a key press is never required.
NOTE: For all of the below examples, you must also include the arguments from the command that you copied from the Add Agent dialog. The examples show only the additional arguments required to install the agent to run as a different user, with the "..." on the end of the command indicating that the remaining arguments must follow.
Install as an interactive user (not a service user) in Command Prompt
C:\Users\<username>\Downloads>Agent_Installer_<VERSION>.exe --install –u ".\username" -p %MYPASSWORD% --grant-service-right ...
Install as a service user in Command Prompt
C:\Users\<username>\Downloads>Agent_Installer_<VERSION>.exe --install –u "NT Authority\LocalService" ...
Install as an interactive user (not a service user) in PowerShell
PS C:\Users\<username>\Downloads> Start-Process -FilePath "Agent_Installer_<VERSION>.exe" -ArgumentList '--install', '-u', '.\username', '-p', $env:MYPASSWORD, '--grant-service-right' ... -NoNewWindow -Wait
Install as a service user in PowerShell
PS C:\Users\<username>\Downloads> Start-Process -FilePath "Agent_Installer_<VERSION>.exe" -ArgumentList '--install', '-u', 'NT Authority\LocalService' ... -NoNewWindow -Wait
Troubleshooting the Agent installation
On a failed install the installation window will remain open until you press a key. It will direct you to where you can retrieve detailed logs to determine the cause of the error. These should be found under %TEMP%\redgateinstaller\.
You can check which version of the Agent is installed from the Windows ‘Add or Remove Programs’ screen. This may differ from what is reported in the Agent Management page; in this case the version in the Windows ‘Add or Remove Programs’ screen is authoritative.
Run services.msc (Services control panel) to ensure that the ‘Redgate Monitor Agent’ service started successfully. If the service shows as stopped then check the Event Viewer and look under ‘Windows logs -> Application‘ for entries with ‘Redgate Monitor Agent’ and ‘'Redgate.Monitor.Agent.ServiceV1’ source fields.
If there is no service under services.msc this means the installation failed.
Out of date Agents
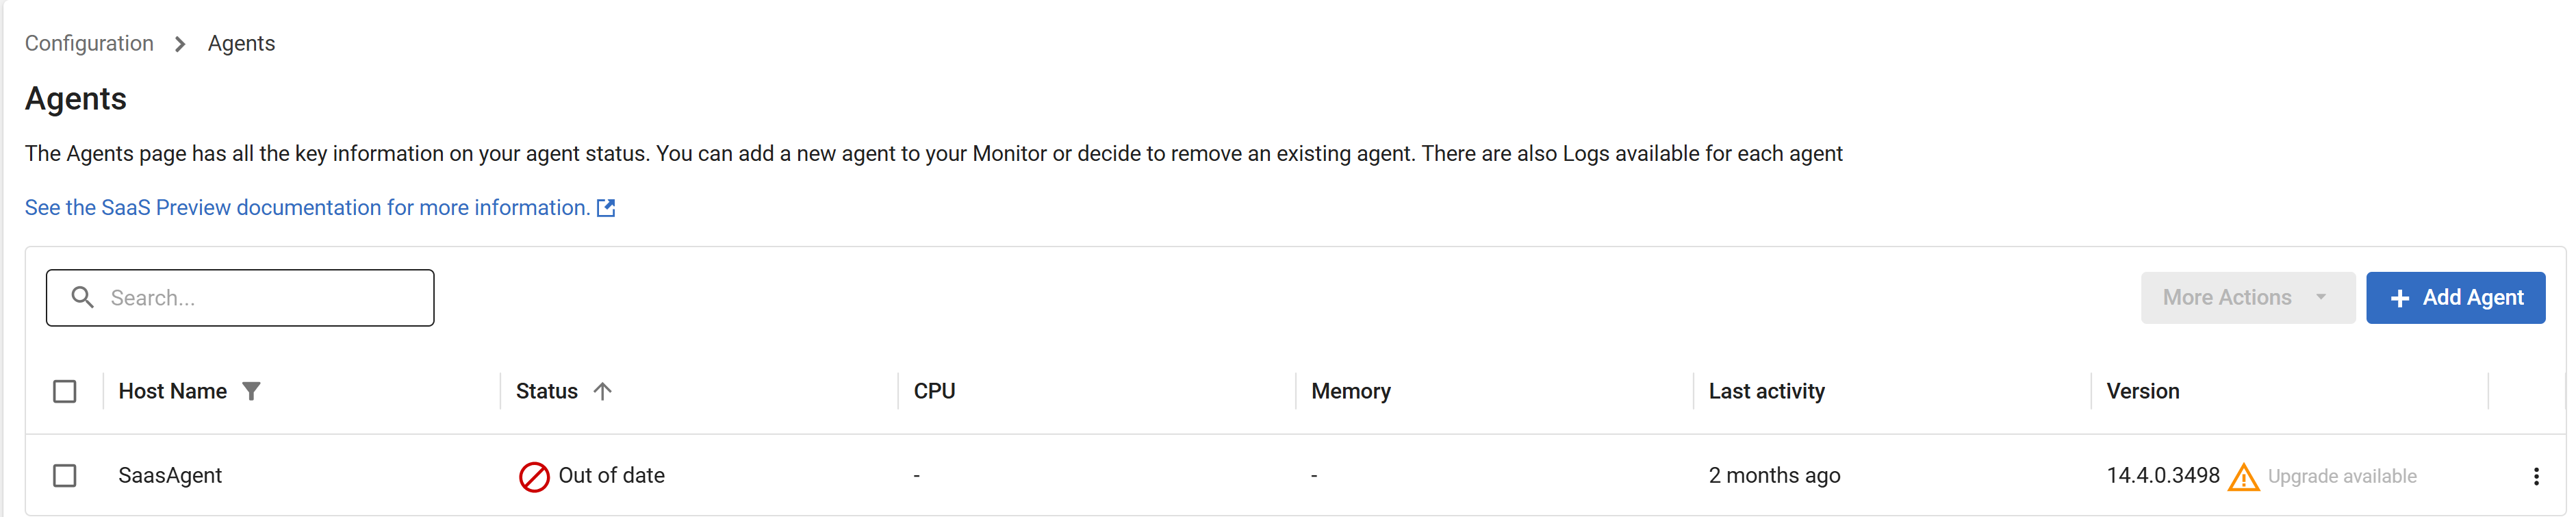
The platform will also tell you if your agent is out of date or if an update is available.
Updating an Agent
Select Update Agent under More Actions, or under the context menu in the column at the right of your Agent's entry on the Agents page. This will allow you to download the latest version of the Agent installer.

To update the Agent, copy the new installer onto the host on which the agent is running, and run the installer. Unlike for the initial installation, the installer requires no arguments to perform an update, so you can either run it from the terminal or simply double click the executable. The same installer executable can be used to update each of your Agents; it is not necessary to download it again for each Agent.
We recommend updating your Agents regularly as new versions become available to take advantage of the latest features and fixes.
This documentation contains proprietary information and is protected by copyright law.
Copyright © 2026 Red Gate Software Limited. All rights reserved


