Editing PostgreSQL configuration settings
Published 26 September 2024
This page describes the steps to edit PostgreSQL configuration settings in each hosting environment. After making changes, they must be applied in order to take effect - see Step 3 of Preparing PostgreSQL for monitoring for details.
Regardless of your environment, if you are using a configuration management tool like Terraform to provision and configure PostgreSQL infrastructure, refer to that documentation for how to make changes instead.
Self-managed Linux environments
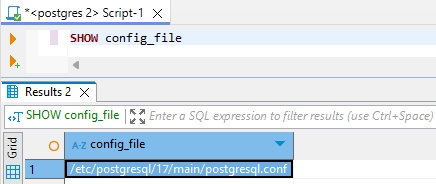
PostgreSQL's configuration is stored in the postgresql.conf file on the database server's host machine - configuration changes are made by editing that file. First, find the location of this file by connecting to the PostgreSQL instance with a Database IDE of your choice, and running SHOW config_file. Record this file path, which is likely to be similar to /etc/postgresql/17/main/postgresql.conf as shown below.
Next, connect via SSH to the host running PostgreSQL. From Windows, a popular tool for this is PuTTY. From this terminal window, open the postgresql.conf file using a text editor. A good option is "nano", launched with:
sudo nano /etc/postgresql/17/main/postgresql.conf
Navigate to the setting you wish to edit. In nano, ctrl+w is a helpful shortcut to search for the text of a setting name, rather than scrolling through the file. Where a setting already exists in the file, edit its value, or add a new line where a setting doesn't yet exist.
Additionally, lines can be commented out with a # symbol - for example you may find a line as follows:
#track_io_timing = on
That line is having no effect - after changing it to the following, io timing information will be recorded.
track_io_timing = on
Save the file by writing it out (ctrl+o in nano), before exiting the tool (ctrl+x).
Amazon RDS and Aurora environments
Instance configuration changes for PostgreSQL on Amazon RDS or Aurora are applied through a Custom Parameter Group, which is a container for configuration values to be applied to one or more database instances. Every database instance uses settings from a single Parameter Group.
When monitoring multiple RDS or Aurora instances, we recommend applying a single Custom Parameter Group to many instances, rather than a separate one for each instance.
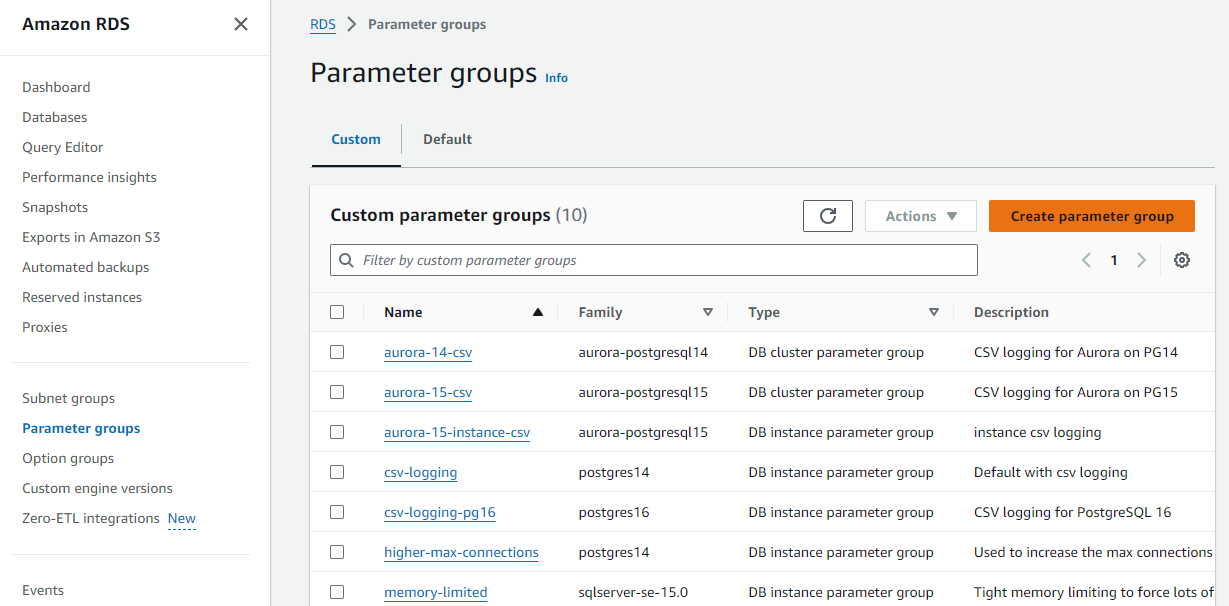
First, find which Parameter Group a PostgreSQL instance is using in the AWS console by opening the RDS service, navigating to Databases in the left-hand side bar, selecting the relevant instance, opening the Configuration tab, and searching for "DB instance parameter group". Note this is different to the similarly named "Option groups". In this example the instance is already using a Custom Parameter Group called csv-logging .
If the instance is using the Default Parameter Group, first create and apply a Custom Parameter Group
Default Parameter Groups may be named something like default.postgre16. You can skip this step if a Custom Parameter Group is already in use.
Default Parameter Groups aren't editable, so you must create a new Custom Parameter Group to apply to your instance. First navigate to Parameter Groups in the left-hand side bar to view current Custom Parameter Groups.
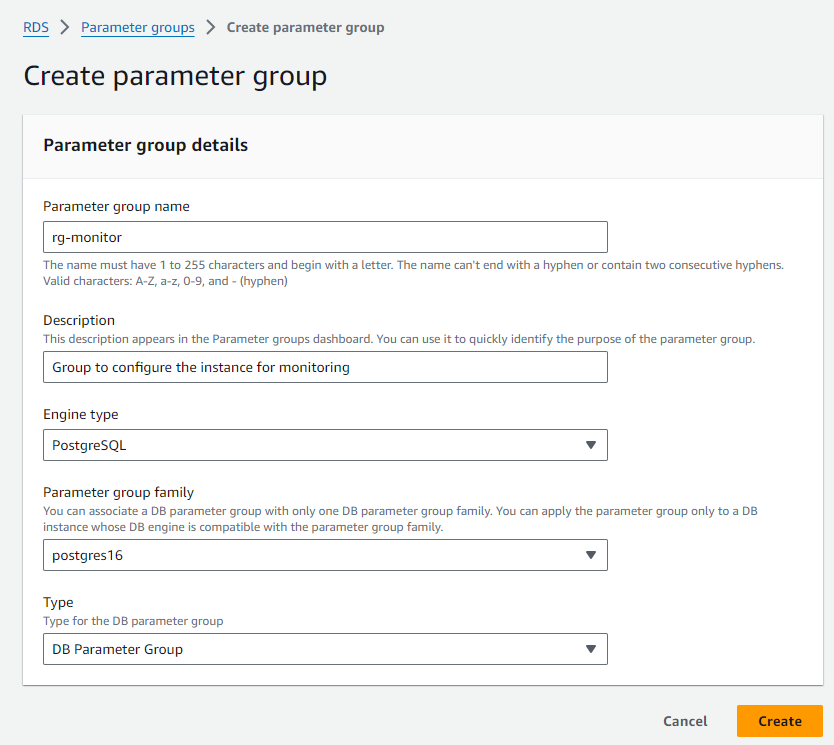
Select Create Parameter Group. After choosing an Engine Type ("PostgreSQL" for RDS, or "Aurora PostgreSQL" for Aurora), choose a Parameter Group Family appropriate for your version of PostgreSQL, for example "postgres16". In the case of both RDS or Aurora, the Type should be set to "DB Parameter Group", not "DB Cluster Parameter Group".
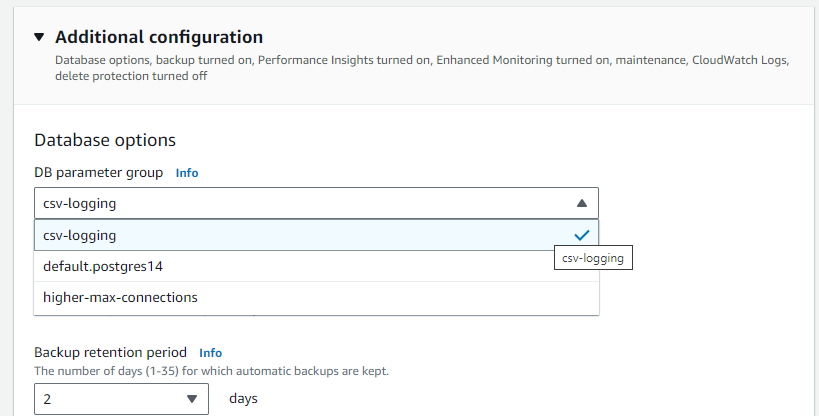
Having created the parameter group, navigate back to the Databases side bar tab, and select your database instance (in the case of Aurora, select specifically a node, not the cluster as a whole). Click Modify, then under Additional Configuration, change the DB Parameter Group from its default to your new Custom Parameter Group. Note that if applying these changes immediately a restart is necessary, so it may be preferable to wait for a maintenance period.
Editing a Custom Parameter Group
Once the instance is using a Custom Parameter Group, click that group to open its details. Select Edit in the top right of this page to change its settings. You can use the search bar to find the names of values you want to alter, for example searching for "auto_explain". After making necessary changes, click Save Changes in the top right of the page.
More information about Parameter Groups is available in the AWS documentation.
Azure Flexible Server environments
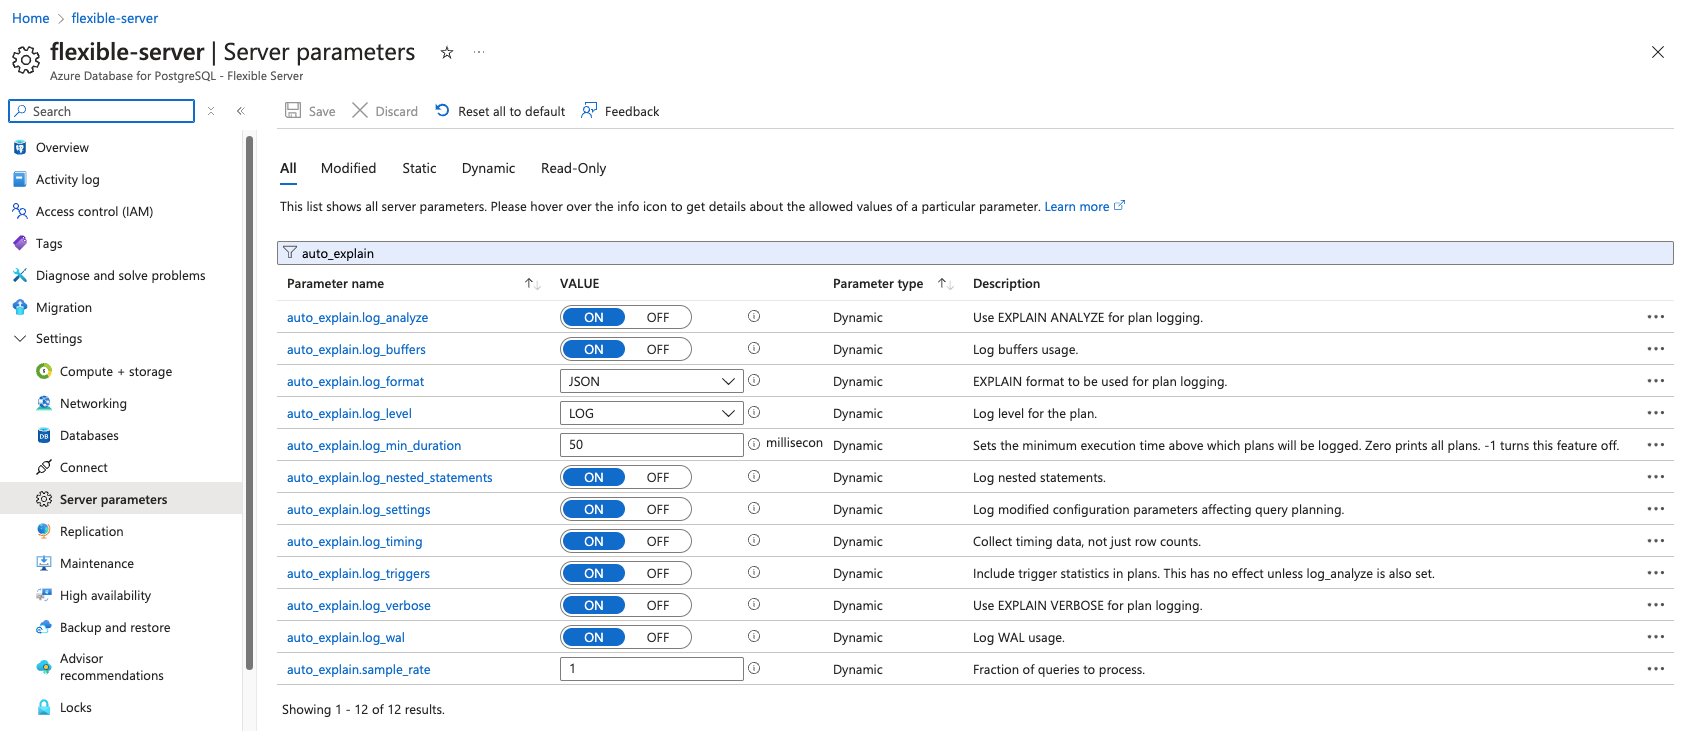
Instance configuration changes for PostgreSQL on Azure Flexible Server are made through the Server parameters sub-section of Settings section within the overview page for the Flexible Server resource in the Azure Portal.
Within this page, you can simply search for the parameter you wish to change and update the value.
Be aware that pressing the "Save" button will automatically perform any server restarts, if necessary.
Changing settings via SQL queries
As well as being configurable by editing the configuration file through the operating system or cloud portal, configuration settings can alternatively be set by running queries against the database instance as a superuser.
Running this query, for example:
ALTER SYSTEM SET auto_explain.log_min_duration TO '2000'
is equivalent to the following config file line:
auto_explain.log_min_duration = 2000
After editing settings through ALTER SYSTEM SET... queries, you must still run pg_reload_conf() for changes to take effect (or restart the service if a non-dynamic setting has been changed), just like if you had edited the configuration file directly.
For ease of management, it is generally preferred to directly edit the settings in the postgresql.conf file or in the cloud portal for Platform as a Service offerings.
