Enabling Microsoft Entra ID PostgreSQL authentication
Published 08 January 2025
If you are monitoring PostgreSQL instances on Azure Flexible Server, then you can set up Redgate Monitor to authenticate via Microsoft Entra ID.
This can provide enhanced security when using managed identities, as there is no need to store long-lived credentials such a password or secret key to connect to an instance.
This page will provide a guide on how to set up your service principal or managed identity in Azure, and enable it as a method of authenticating with your Azure Flexible PostgreSQL instance.
Authentication options
There are two authentication options available, depending on where the Base Monitor is hosted.
- Option 1.
- If your Base Monitor is hosted on an Azure virtual machine, and you do not need to assign additional user-assigned managed identities to it,
then we recommend system-assigned Managed Identity credentials.
- If your Base Monitor is hosted on an Azure virtual machine, and you do not need to assign additional user-assigned managed identities to it,
- Option 2.
- Otherwise, use Service Principal credentials.
Creating Managed Identity credentials
In order to use managed identity credentials, you will need to enable the system assigned managed identity on your Azure VM if you have not already,
The following instructions show how to do that, via both the Azure CLI or the Azure Portal depending on your preference.
Redgate Monitor currently only supports system-assigned managed identity for Azure Flexible Servers. We recommend using service principal credentials instead if your virtual machine is using user-assigned managed identities.
Steps
Assign a system identity for the Base Monitor host
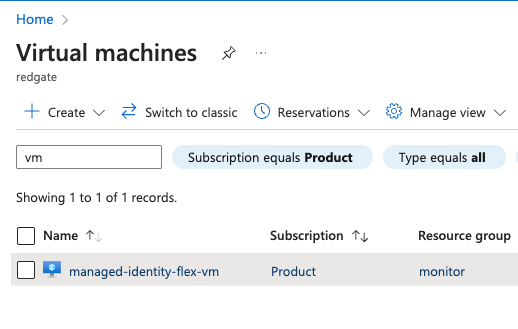
- In the list of virtual machines, find the machine you intend to use as the Base Monitor for your Azure Flexible Server.
- Under the "Identity" sub-section of the "Security" section of your virtual machine, set "Status" to "On" for the system assigned managed identity as below, and click Save:
- In the list of virtual machines, find the machine you intend to use as the Base Monitor for your Azure Flexible Server.
Steps:
- In a terminal such as bash or PowerShell, login to Azure with the
az logincommand and choose the appropriate subscription that contains the Azure Flexible Server as a resource.Login to the Azure CLI
az login
- It's assumed that you already have a virtual machine running Redgate Monitor that will be used as the Base Monitor for your Flexible Server instance. If you already have a system-assigned managed identity enabled for the virtual machine you can use the following command to retrieve its object ID, which will be used later:
Retrieve VM object ID
az vm list --query "[?identity.principalId != null].{name:name, vmObjectId:identity.principalId}"

# Example command output:
[
  {
    "name": "redgate-monitor-vm",
    "vmObjectId": "12b356de-1728-498c-9488-58902e913d48"
  }
]
If you have not already added a system-assigned managed identity to the virtual machine running Redgate Monitor, you can do so using the following commands:- First, retrieve the resource ID
Retrieve the VM resource ID
az vm list --query "[].{name:name, resourceId:id}" # Example command output [ { "resourceId": "/subscriptions/e11e87fh-ga1f-005a-bb79-d7b375fcff35/resourceGroups/redgate/providers/Microsoft.Compute/virtualMachines/Monitor", "name": "Monitor" } ] - Then use the resource ID from the previous command to assign the system managed identity:
Assign the managed identity
# Change the "resourceId" below to the one retrieved from the previous command

az vm identity assign --ids "resourceId"

# Example command output

{
  "systemAssignedIdentity": "12a536dc-1a38-b98c-9488-58902e913d48",
  "userAssignedIdentities": {}
}
- First, retrieve the resource ID
Creating Service Principal credentials
In order to use service principal credentials, you will need to create an app registration in Azure if you do not already have one, and then give the app registration the "Monitoring Reader" role on your Azure Flexible Server instance.
Redgate Monitor needs three values to connect with the Service Principal
- Client ID
- Tenant ID
- Client Secret
The following instructions show how to retrieve these values, via both the Azure CLI or the Azure Portal depending on your preference.
Steps
Find Client ID and Tenant ID for the app registration
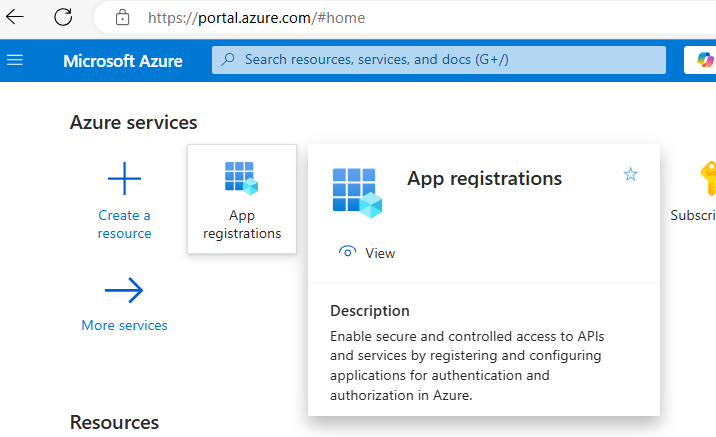
- First, go to the "App registrations" section under "Azure Services".
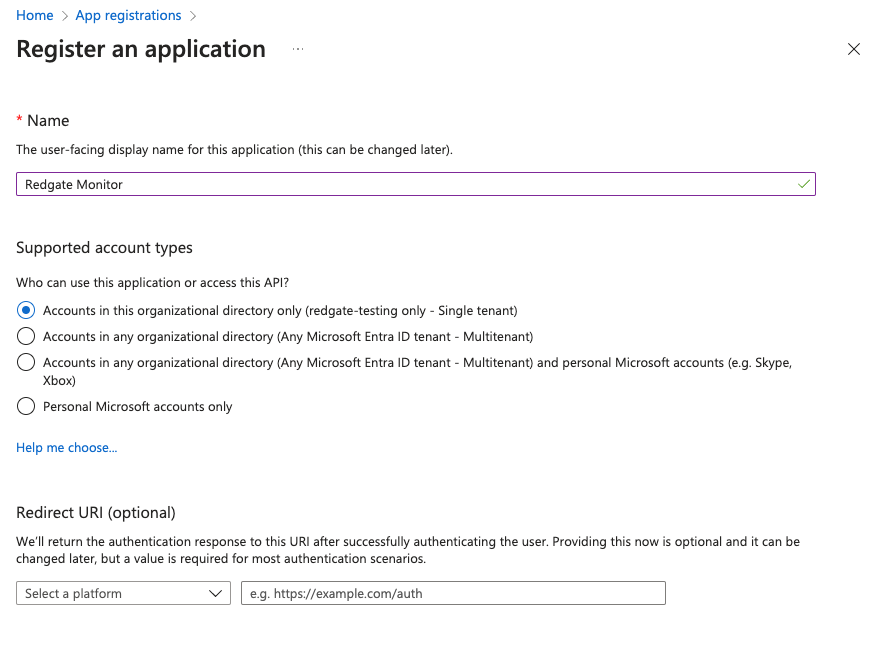
- If you do not already have an app registration that you wish to use, create a new one. For this guide, we will create one named "Redgate Monitor":
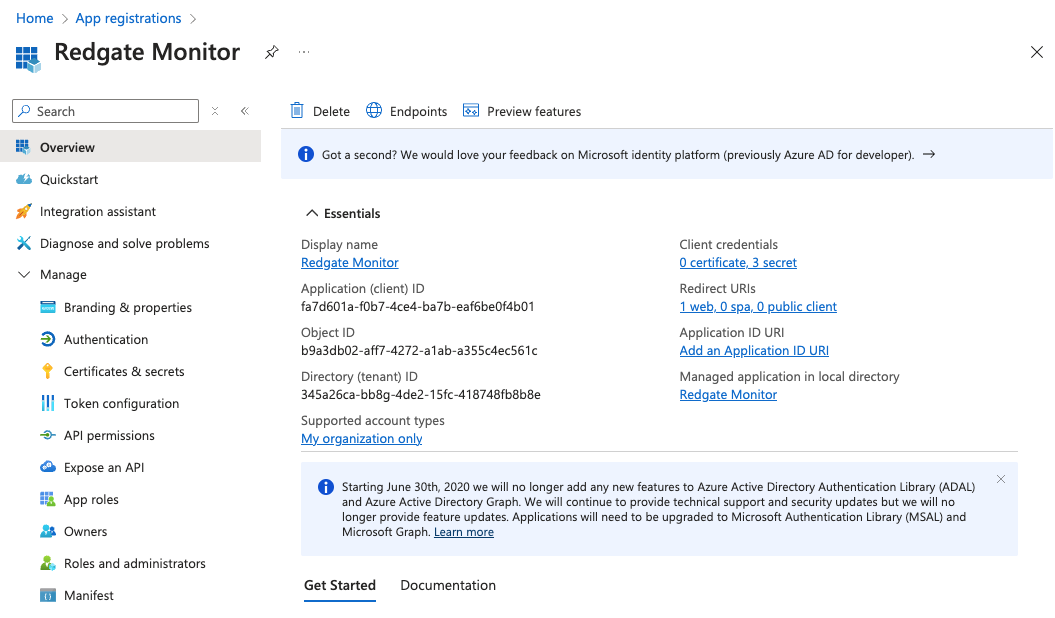
- Note the Application ID and Directory ID of the App registration
After creation, you should take note of the "Application (client) ID" as well as the "Directory (tenant) ID" as shown in the "Overview" page under "Essentials", as these will be needed in Monitor:
- First, go to the "App registrations" section under "Azure Services".
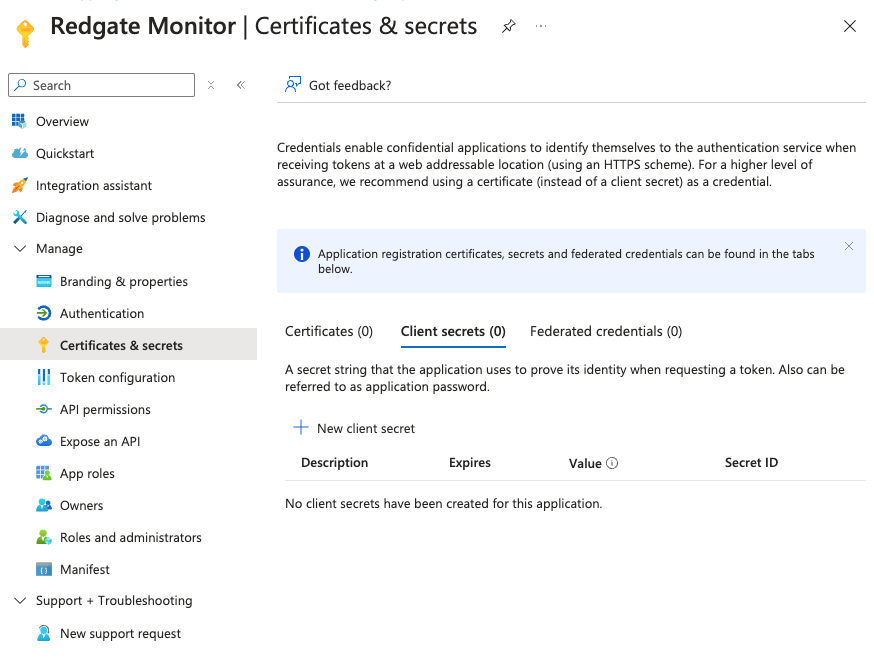
Create a new Client Secret and note its value
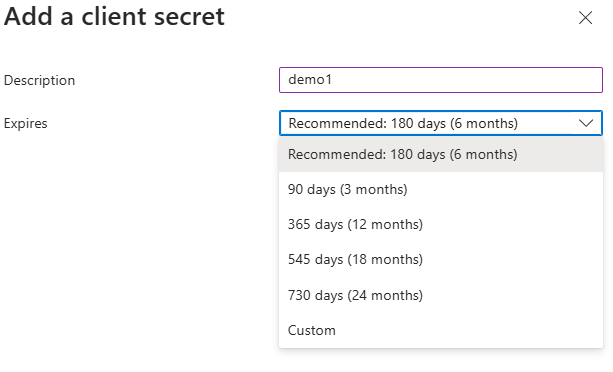
Under "Certificates & secrets" click "New client secret" to generate a secret:Click on "New client secret" Choose expiry time
Copy the Value for the newly created secret.
After the client secret has been created, the UI will show a new entry in the table. You should copy theValuefrom here. This secret value is shown only once on creation, so do not forget to copy it before leaving the screen.- You should then use the noted values (client secret, client ID, and tenant ID) to create a cloud service configuration in your Monitor installation by following this guide.
Steps:
- In a terminal such as bash or PowerShell, login to Azure with the
az logincommand and choose the appropriate subscription that contains the Azure Flexible Server as a resource.Login to the Azure CLI
az login
- If you already have an app registration that you wish to use with Redgate Monitor, you can search for it by its display name to retrieve its application ID, which will be used later:
Retrieve app registration ID
# Change 'Redgate Monitor' in the command below to your own app registration name

az ad app list --filter "startswith(displayName, 'Redgate Monitor')" --query "[].{displayName:displayName, appId:appId}"

# Example command output:
[
  {
    "appId": "446gf34d-3da8-5a57-9gfc-6962f16ed896",
    "displayName": "Redgate Monitor"
  }
]
If you do not have an existing registration, you can create one first using the following command:Create app registration
az ad app create --display-name "Redgate Monitor"
- With the application ID retrieved from above, use the following command to create a new client secret (called
passwordin the output) within that application. You should save the output for creating cloud service credentials in Monitor.Create Secret App Registration
# Change 'appId' below to your own application ID as retrieved from step 1. az ad app credential reset --append --id "<appId>" --display-name "flex-monitor" # Example command output: { "appId": "446gf34d-3da8-5a57-9gfc-6962f16ed896", "password": "*****", "tenant": "124b26cd-db3f-4dc2-85ec-408758fb8b8e" } - You should then use the noted values (client secret, client ID, and tenant ID) to create a cloud service configuration in your Monitor installation by following this guide.
Enabling Entra ID authentication on your Azure Flexible Server
After creating a service principal or managed identity that can be used as your PostgreSQL user, as described in the steps above, you will now need set it up to authenticate with your Flexible Server.
The following steps will show how to do that via the Azure Portal UI.
- From the list of instances, select the Flexible Server that you want to use with Microsoft Entra ID authentication.
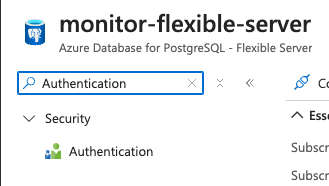
- Under the Security section, select Authentication.
- Then under Assign access to select either PostgreSQL and Microsoft Entra authentication or Microsoft Entra authentication only, depending on whether you wish to preserve existing the default authentication method.
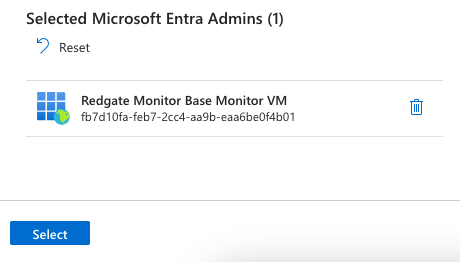
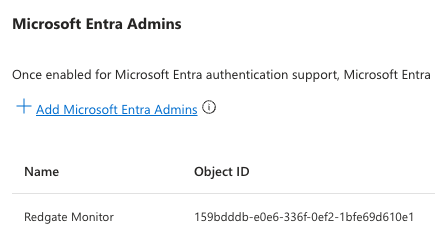
- Click Add Microsoft Entra Admins. Then select the Microsoft Entra service principal or managed identity that you created in the previous steps above in the pop-up window.
- Make sure to click Save at the top of the authentication pane, as this will trigger the deployment of the new role to the PostgreSQL instance.
- (Optional) If you wish to create a user that does not have Entra admin privileges, you should use the admin you have created and follow Microsoft's documentation to create a non-admin user for your service principal or managed identity.
- Follow the access and permissions set up steps in our Preparing PostgreSQL for monitoring documentation for the new Entra PostgreSQL user.
Using your Entra ID credentials in Redgate Monitor
After following the steps above to enable Entra ID authentication for your chosen Azure Flexible Server, you can configure it as the monitoring user in Redgate Monitor by doing the following:
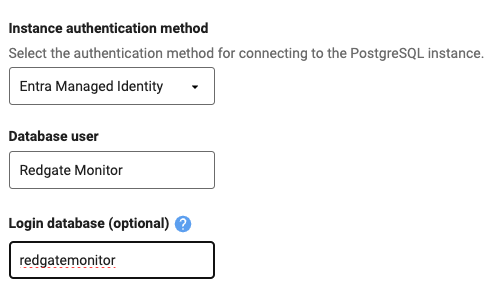
- In the add server page, or edit credential page for an existing Azure Flexible Server, you should be able to choose Entra service principal or managed identity as the Instance authentication mode:
- Select your desired option, and in the case of Entra Service Principal, select your cloud service client that you should have configured as the last step of the Creating Service Principal credentials guide.
- For Database user, you should use the name of your service principal or managed identity. You can find this by visiting the Authentication page of your Azure Flexible Server:
If you have created your own Entra user following Microsoft's documentation, you should use the same text as you used for the
roleNameargument.
4. Login database should be set to the database you created when preparing PostgreSQL for monitoring, if it is not the same as the Database user.
