Setting up ServiceNow notifications
Published 27 August 2025
Available from version 14.0.80
About Service Now notifications
You can set up Redgate Monitor to create or update a ServiceNow incident when:
- alerts are raised.
- an alert level increases (e.g. from Medium to High).
- an alert ends.
Configuring Service Now notifications
Go to the Configuration page. Under Alerts and Metrics, select Notification settings:

Configuring Redgate Monitor to create ServiceNow incidents
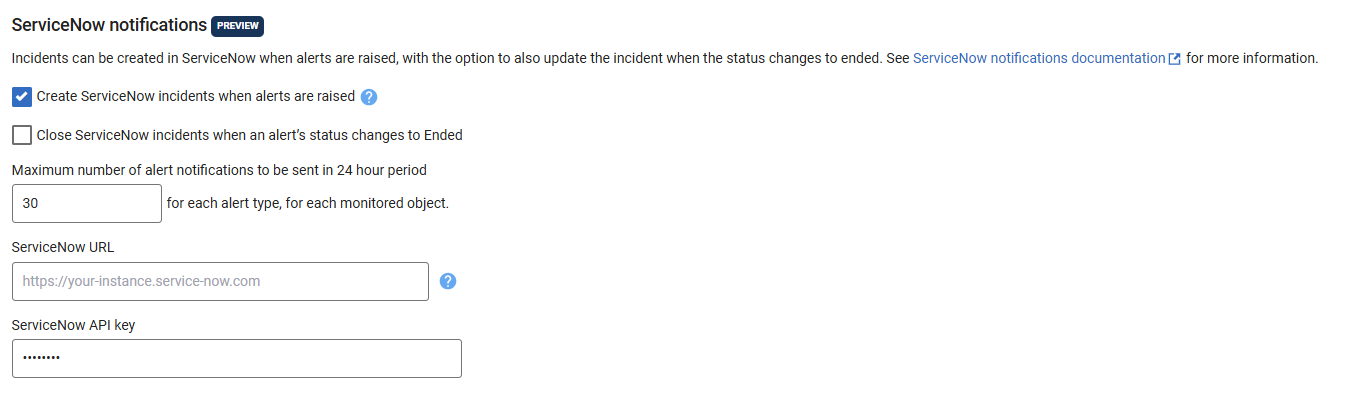
- Choose when Redgate Monitor should create ServiceNow incidents.
- Enter the ServiceNow URL that will be used to create ServiceNow incidents.
- Enter a ServiceNow API key.
- You can choose how many notifications each alert type can send for each monitored object in a 24-hour period. The default limit is 30 notifications, and it can’t be set lower than 1.
How to create ServiceNow REST API key?
You need to follow the steps below to ensure the API key has the right access policies for Redgate Monitor to be able to create, update and close incidents.
- Create an Inbound API Key Authentication profile
- Create REST API Key
- Create API Access policy
- Create an ACL to ensure that the API key can update the description field
- Create an ACL to ensure that the API key can update the state field
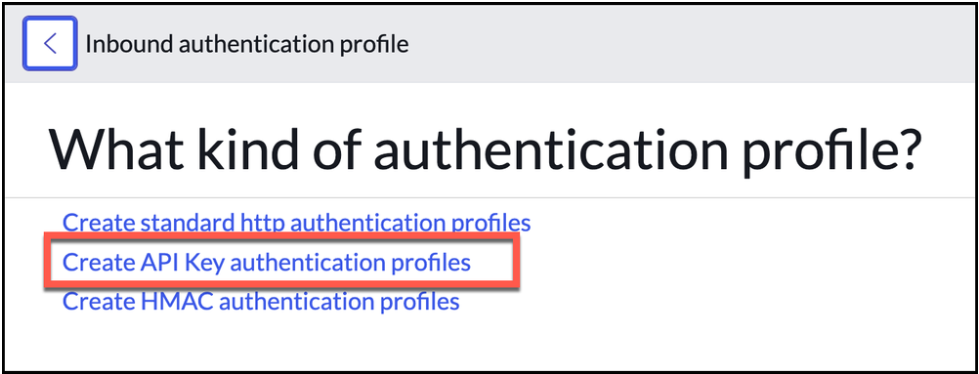
1. Create an Inbound API Key Authentication profile
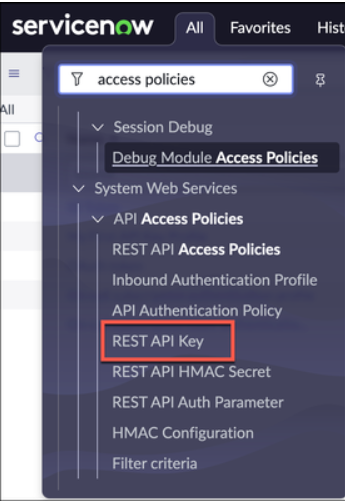
Navigate to All > System Web Services > API Access Policies > Inbound Authentication Profile.
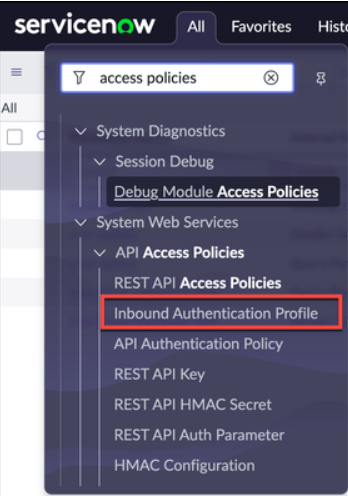
Click New.
Click Create API Key authentication profiles.
Provide a descriptive name in the Name field.
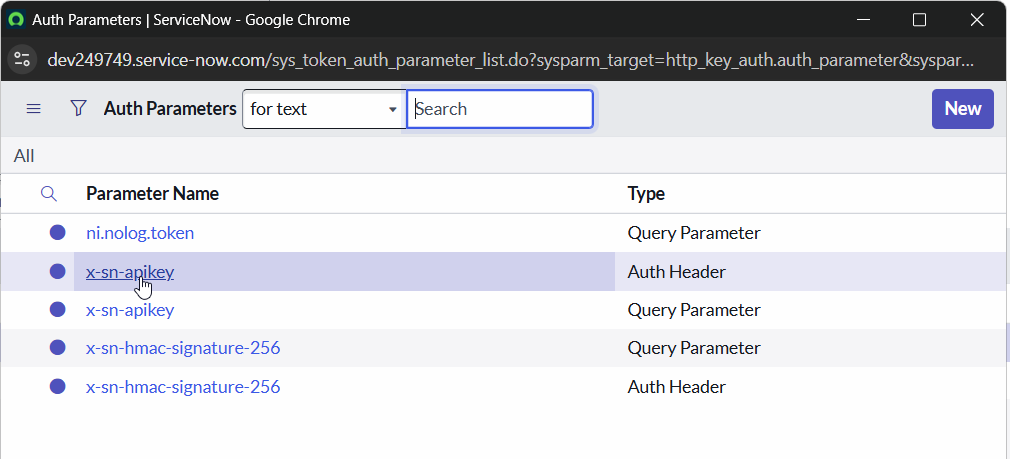
In the Auth Parameter field, add the Auth Header record for x-sn-apikey.
The Auth Parameter is used to determine how incoming requests are to send the API key (either as a query parameter or header. Redgate Monitor uses the header parameter)

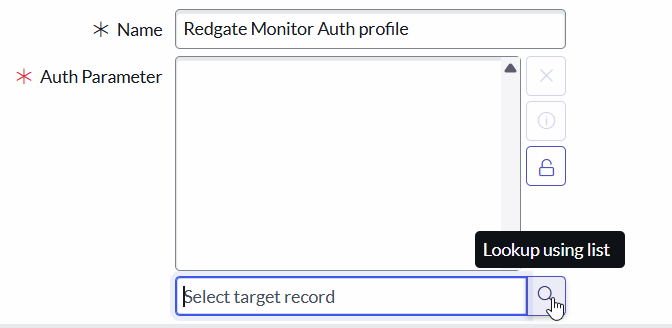
- Click Submit.
2. Create REST API Key
Navigate to All > System Web Services > API Access Policies > REST API Key.
Click New.
Provide a descriptive name and select a user.
The user is used to determine what data can be accessed to the API. This is similar to using Basic Auth.
Tip: Consider using a non-user (e.g. service) account for your APIs rather than an actual employee. If the employee leaves and their account is deactivated, your API could stop working.
Use the form menu and choose Save.
The system generates a token and saves it in the Token field. To see the token, use the lock icon and copy the contents display below the field. This is your header (or query paramter) value when your other system sends a REST API request to ServiceNow.
Tip: Copy the token

3. Create API Access policy
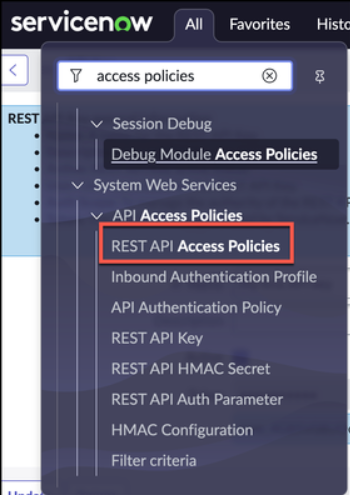
- Navigate to All > System Web Services > API Access Policies > REST API Access Policies
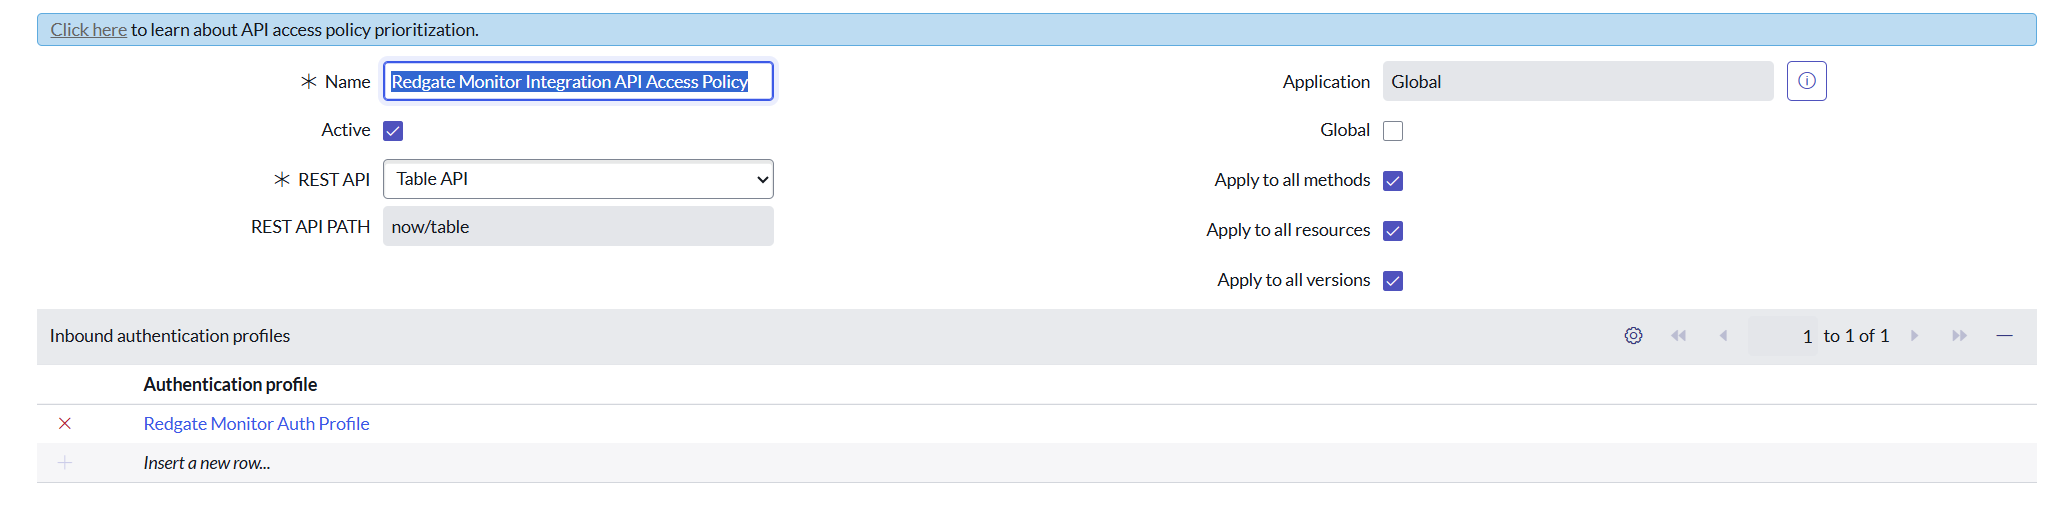
Click New. For this example, we'll create a new one, although you can use the same policy with multiple API keys if you chose.
Provide a descriptive name, and select the REST API you want to use.
On the right side of the form are a series of checkboxes. As you uncheck them, fields on the left appear. Use these to limit this policy to a specific method (e.g. GET, POST), or resources in that API, or even a version of the API. The flexibility is really powerful.
Add your new API Authentication Profile(created in section Create an Inbound API Key Authentication profile) to the embedded list on the form.
Make sure apply to all methods, resources and versions are selected. Click Submit.
4. Create an ACL to ensure that the API key can update the description field
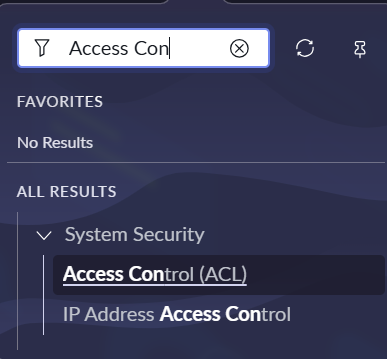
- Navigate to System Security → Access Control
- Click New and create an ACL with the following details
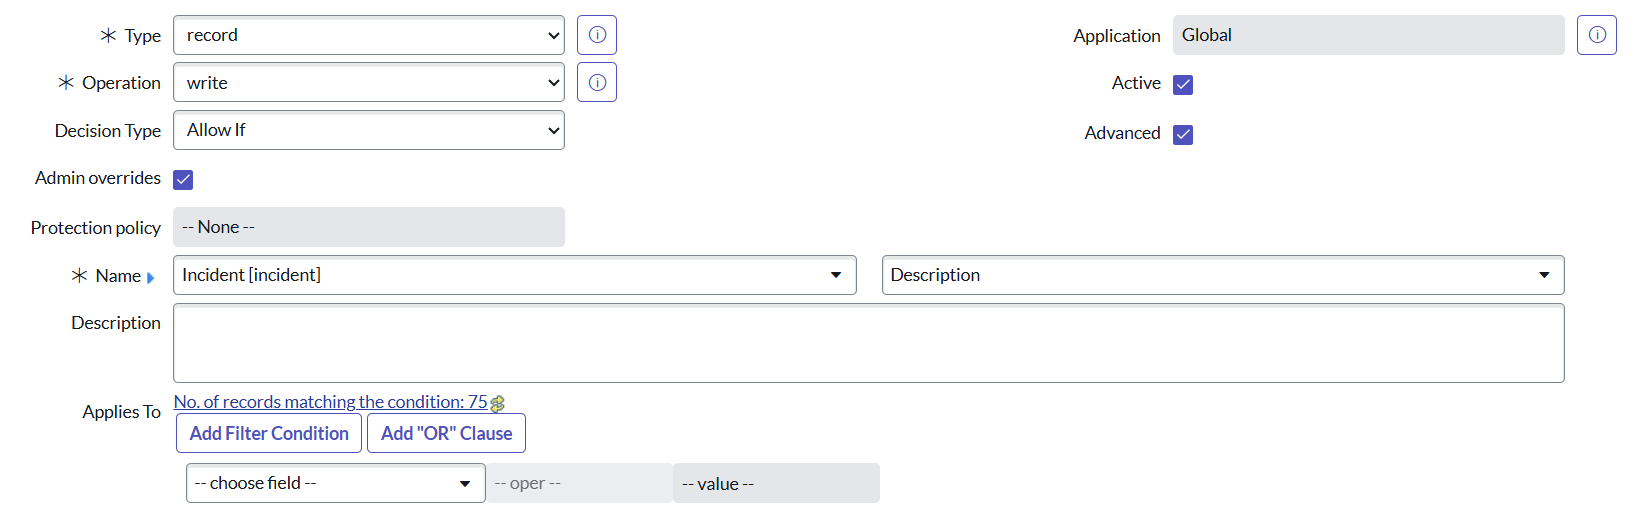
- Under the Data Condition add the following javascript:gs.getUserID()

- Click Submit.
5. Create an ACL to ensure that the API key can update the state field
- Navigate to System Security → Access Control
- Click New and create an ACL with the following details
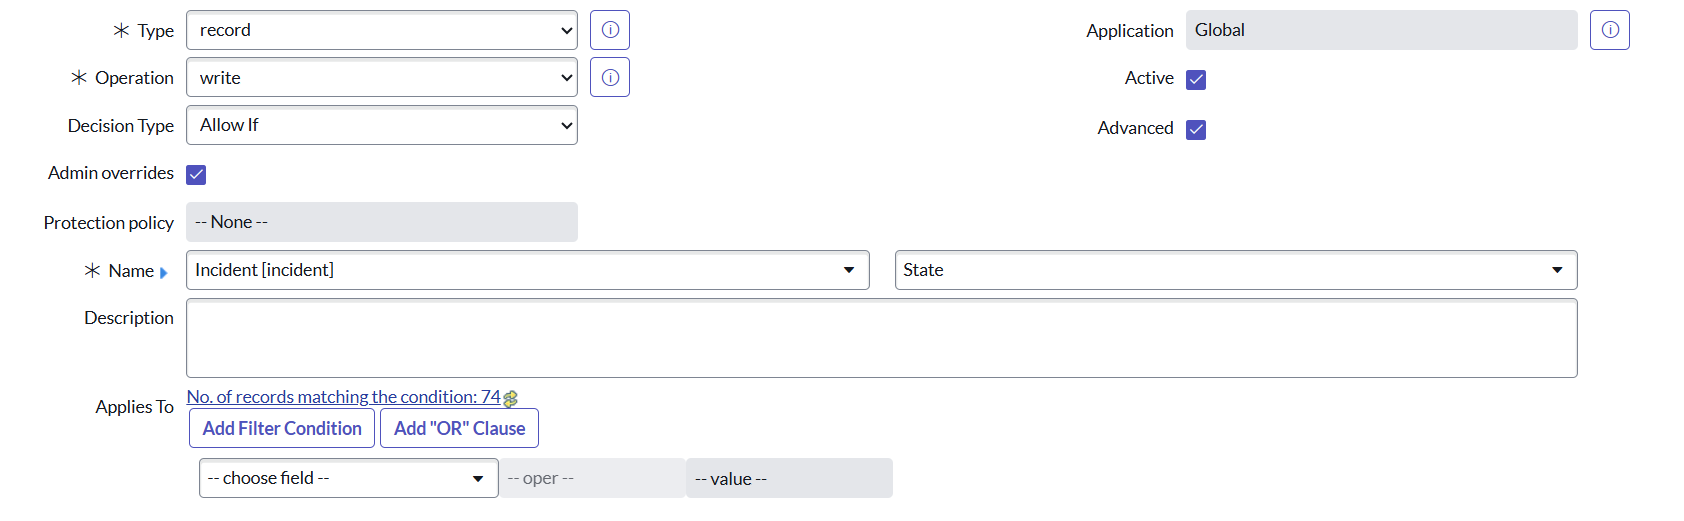
- Under the Data Condition add the following javascript:gs.getUserID()
- Click Submit.
This documentation contains proprietary information and is protected by copyright law.
Copyright © 2026 Red Gate Software Limited. All rights reserved


