Configuring .NET Demon
Published 09 December 2013
You can configure .NET Demon from the .NET Demon menu in Visual Studio:

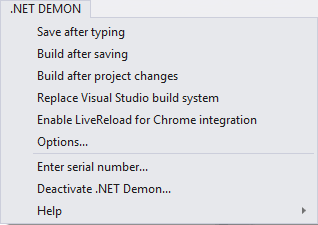
Advanced options are available in .NET Demon > Options.
Save after typing
This option saves your code after you stop typing. To change how long .NET Demon waits before saving, select .NET Demon > Options and change the Save after typing time period.
To build as you type, you must select this option and Build after saving.
Build after saving
This option builds the project when you save a file in Visual Studio.
To build as you type, you must select this option and Save after typing.
Build after project changes
This option builds the project every time a file is modified outside Visual Studio (for example, when you pull changes from source control) and when you change the project configuration.
Replace Visual Studio build system
Manual builds will use the .NET Demon build system, instead of the default Visual Studio build system. You might want to use this option because .NET Demon build system makes builds faster: it only compiles code that's changed since the last build.
Enable LiveReload for Chrome integration
With this option enabled, the LiveReload Chrome extension reloads your browser tab every time .NET Demon builds your web application. Only LiveReload for Chrome is supported.
There are several steps to set up LiveReload integration: see Setting up LiveReload integration.
Allow code formatting before saving
If you have Save after typing enabled, this option lets third-party tools, such as Resharper, format your code before .NET Demon saves it.
To find this option, go to .NET Demon -> Options.
Always build a project
To get .NET Demon to always build a project, in the project's csproj file, add the following code before the closing </Project> :
<ProjectExtensions>
<VisualStudio>
<UserProperties Neptune_AlwaysBuild="true" />
</VisualStudio>
</ProjectExtensions>


