This page helps you get started with developing and deploying databases with ReadyRoll. It takes you through different methods of working with migrations in ReadyRoll database projects.
- Method 1: create new objects by using the Visual Studio designers to generate migration scripts in the project.
This is a useful method when you're refactoring objects, because changes are captured in the generated script. The trade-off is that you may end up with many scripts in your project, increasing your team's maintenance and code-review overheads. - Method 2: make online changes to your database, and import the new/modified object(s) into the project when ready.
This is a useful method if you want to make multiple changes to your database without scripting a migration for each change. The trade-off is that, given the process used to generate scripts is limited to comparing the before-and-after state of the schema, some fidelity in the changes may be lost. For example, if you add a nullable column to a table, update it with data and then make the column NOT NULL, the generated script will fail to execute as it will lack the intermediate step of adding the nullable column (in such cases, an import should be performed after performing the first step).
In this tutorial we'll:
Create a ReadyRoll database project
- In Visual Studio, from the File menu, select New > Project.
The New Project page is displayed:
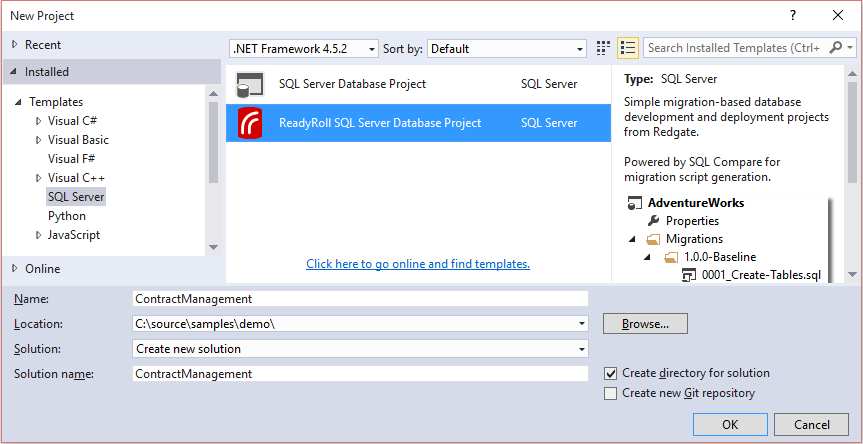
- From the Installed > Templates > SQL Server menu, select ReadyRoll SQL Server Database Project.
- Enter the project name ContractManagement.
This will also be the default name of your database.
You will be presented with a setup wizard. Follow the instructions to set your development database.
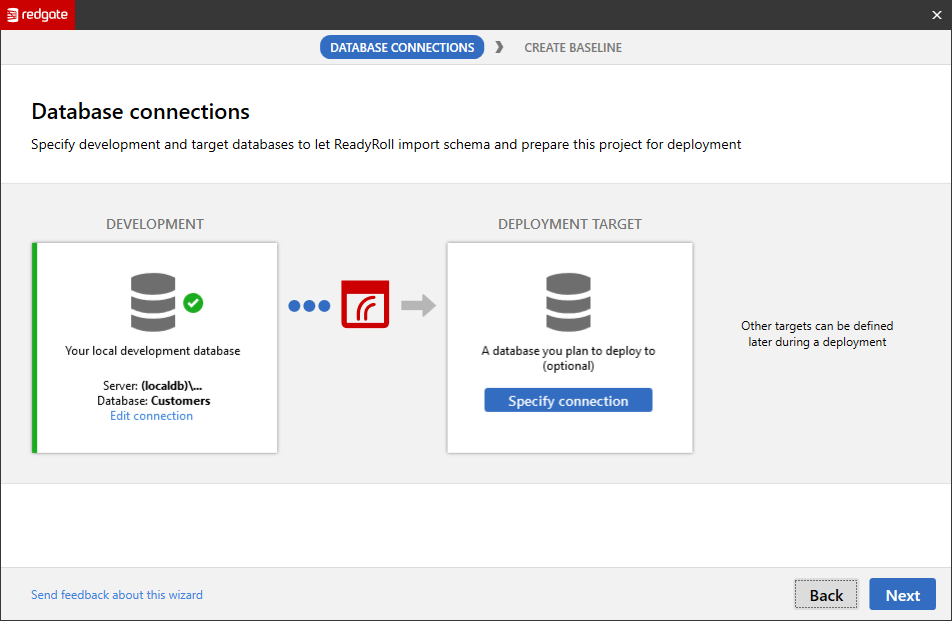
You only need to specify a database in the area marked Development. Do not specify anything under the area marked as Deployment Target. This is used for specifying an existing database you would like to create a baseline schema from. For more information see Deploying to an existing database. |
- Click OK.
- Once the new project is initialized, from the View menu, select SQL Server Object Explorer.
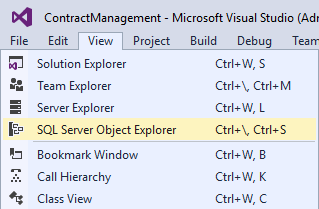
This will allow you to view objects in the development database you specified in the wizard.
Design a table and generate your first migration
In this step, we'll use Visual Studio designers to deploy a table in the newly-created schema.
Within the SQL Server Object Explorer window, expand the SQL Server node and expand the appropriate SqlLocalDb instance for your version of Visual Studio.
An instance of SqlLocalDb is created automatically when you install Visual Studio. The name of the instance varies depending on which version of Visual Studio you have installed: Visual Studio 2010: (localdb)\Projects
Visual Studio 2012. (localdb)\Projects or (localdb)\ProjectsV11
Visual Studio 2013: (localdb)\Projects or (localdb)\ProjectsV12
Visual Studio 2015 prior to Update 5: (localdb)\ProjectsV12
Visual Studio 2015 Update 5 onwards: (localdb)\ProjectsV13 |
- Expand the Databases node and then expand the ContractManagement database.
- Right-click on Tables and select Add New Table.
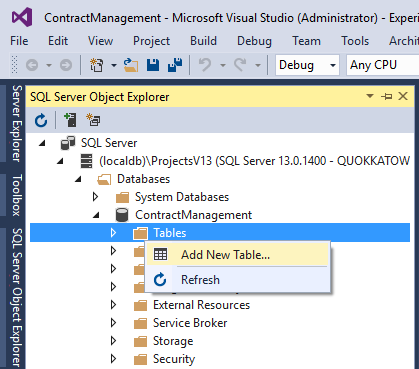
The table designer is displayed. It contains two panes:
- an upper pane that you can use to add new columns, specify data types, default values, constraints, etc
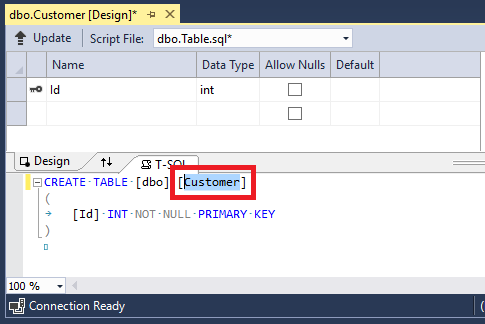
- a lower pane that displays the object's declarative T-SQL, and lets you set the name of the table In the lower pane, set the name of the table to Customer by editing the CREATE TABLE statement:
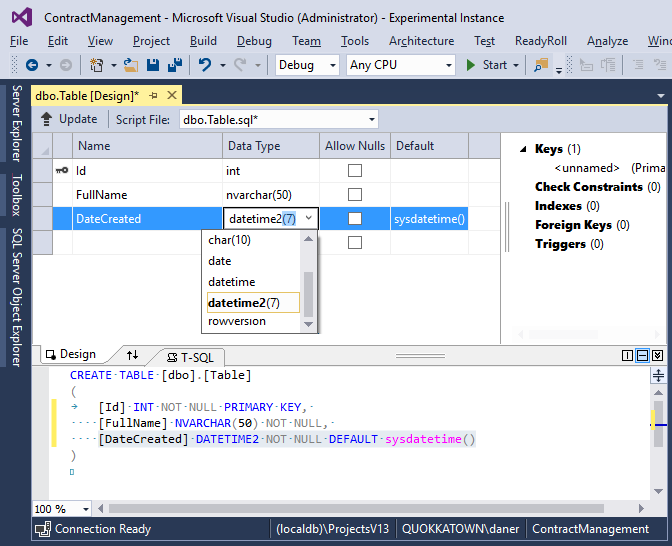
In the upper pane, add columns to the table and set a primary key, as follows:
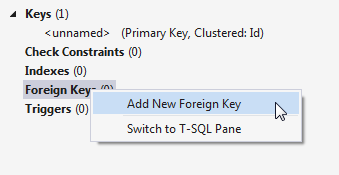
You can also right-click on properties to set table metadata, such as foreign keys, constraints and indexes:
Even though this contains the DDL to deploy the object, the T-SQL will always display a CREATE statement, even if you modify the object after deployment. We'll cover how SSDT generates an ALTER statement to sync table modifications later in the tutorial. |
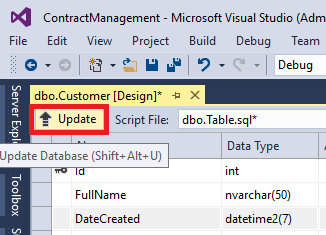
To deploy the table, on the designer's toolbar, click Update.
The Preview Database Updates dialog displays the changes that'll be made to the database:
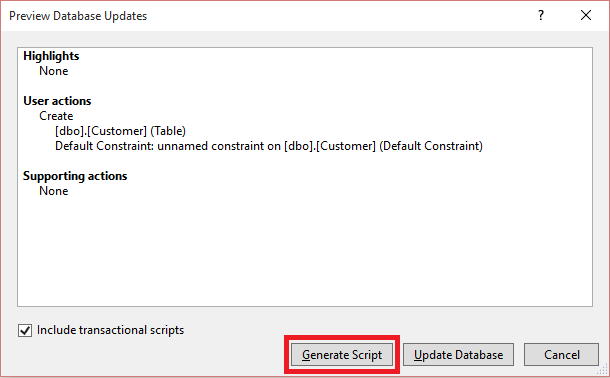
Click Generate Script.
The new script is displayed so you can preview it prior to deployment:
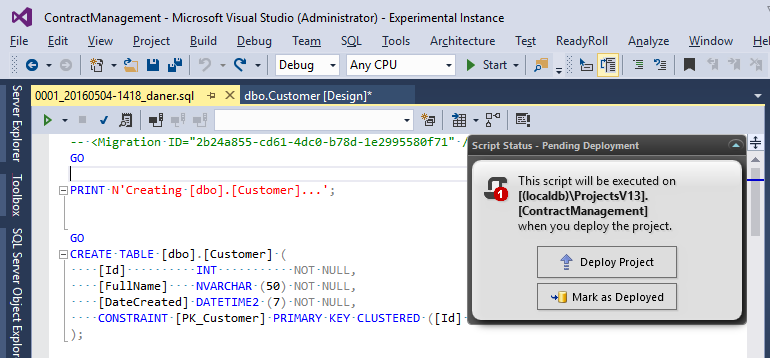
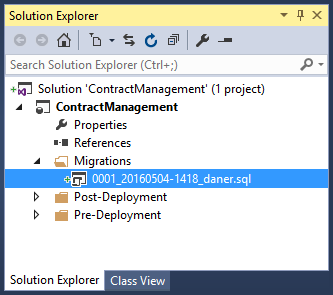
The script is also added to your project:
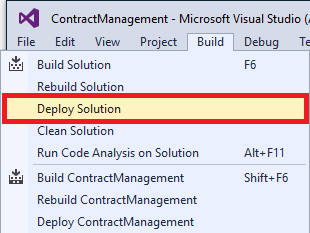
Once you're ready to apply the changes to your database, from the Build menu, select Deploy Solution:
View the deployment results in the Output window:
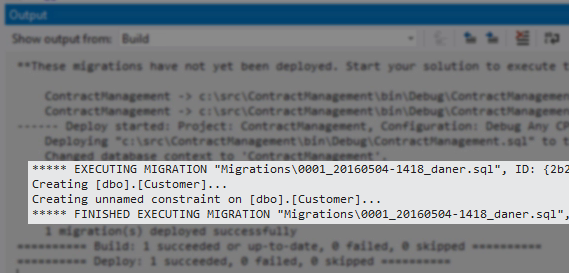
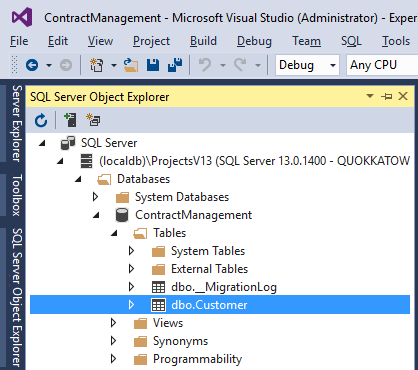
Once deployed, the SQL Server Object Explorer window displays the new table in the database schema:
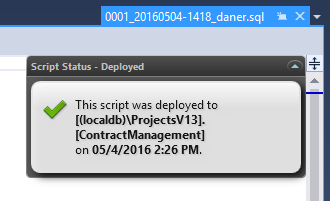
The Migration Status widget in the T-SQL script editor confirms the deployment:
You can also deploy by starting the solution [F5]. However, if you happen to have a different project set as the Start-up Project in your solution, you'll need to add a reference from that project to the database project to make sure that the database is also built and deployed. |
Once your object has been successfully deployed, close any open designers.The designers in SQL Server Data Tools keep an in-memory copy of your schema, so closing them refreshes the cached copy of your database.
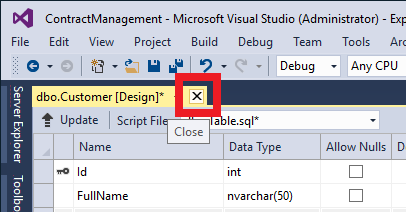
If you're prompted to save changes, click No. Changes have been applied already.
You've now created new objects by deploying changes via the project as migration scripts. If you want to modify existing objects, the process is the same.
Create a view using the online-editing method
Instead of scripting a database object before deployment, we're now going to save changes directly in the database, and then create a migration script by importing the changes into the project at the end.
To add a view to the database:
Within the SQL Server Object Explorer window, expand the SQL Server node and expand the appropriate SqlLocalDb instance for your version of Visual Studio (see the list above).
Expand the Databases node and then expand the ContractManagement database node.
- Right-click on Views and select Add New View.
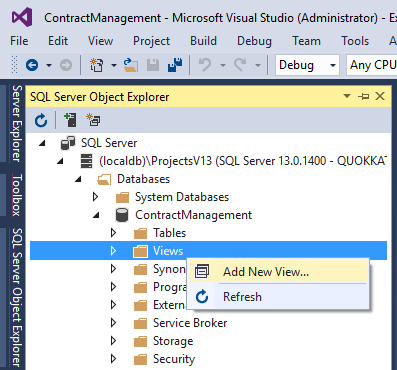
- Enter a query to create the view. The code editor provides IntelliSense to help you pick column names.
- When you're ready to deploy your view to the schema, click Update.
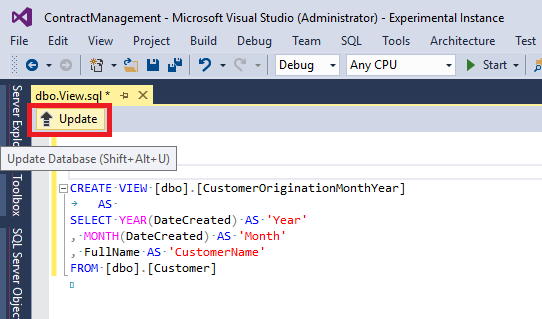
Click Update Database to deploy your object to the schema:
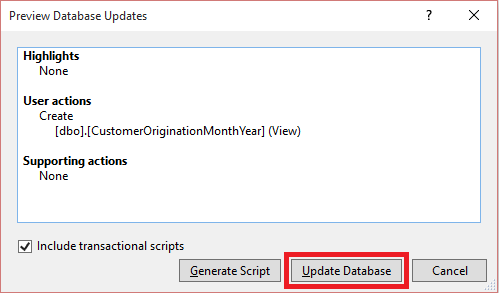
Changes are applied directly to the target database, skipping the 'generate script' step. You can make additional edits if necessary, before you generate a delta script of pending changes.
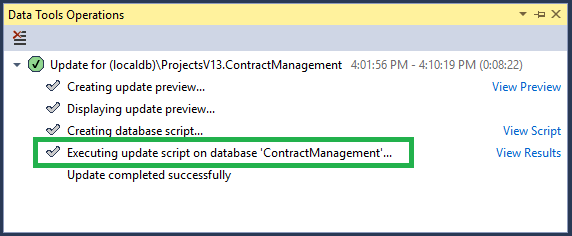
If you prefer, you can use SQL Management Studio (instead of Visual Studio) to make online changes to your database. Once you've made changes in SSMS, switch back to Visual Studio and use the ReadyRoll tool-window to import them. |
To script your changes, from the View menu, select ReadyRoll:
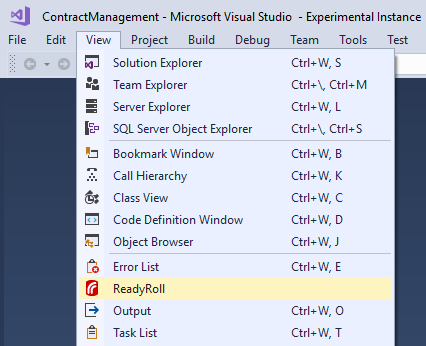
The ReadyRoll tool-window is displayed. You can use it to import schema objects from your sandbox (i.e. target) database, and revert changes to a previous known "good" state.
In the ReadyRoll tool-window, click Refresh:

ReadyRoll starts to compare the sandbox database to your project. The list of pending objects is displayed.
To display the object's contents in the Object Diff window, double-click on the view:
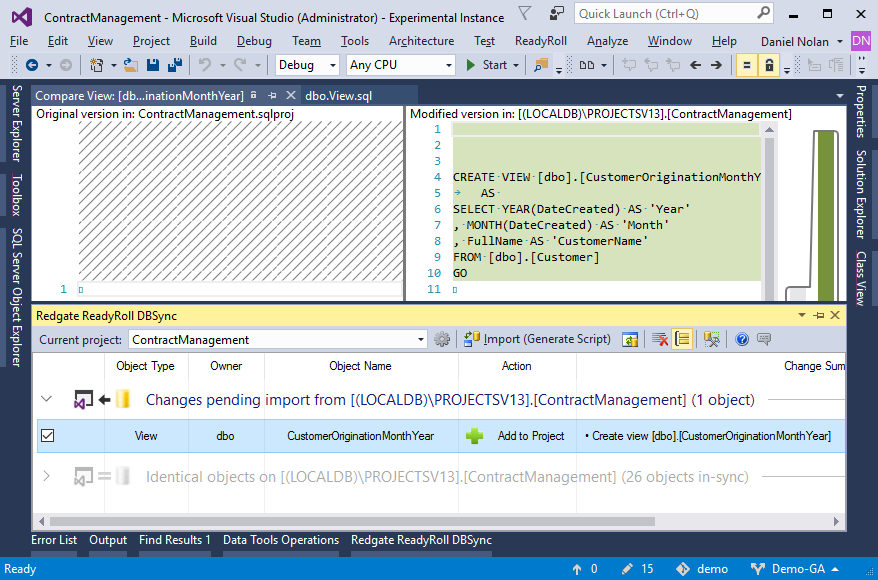
To import the changes into the project, click Import (Generate Script).
The generated migration script is added to your project.
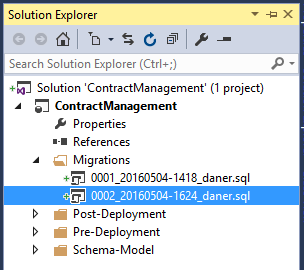
And also opened within Visual Studio in 'preview' mode:
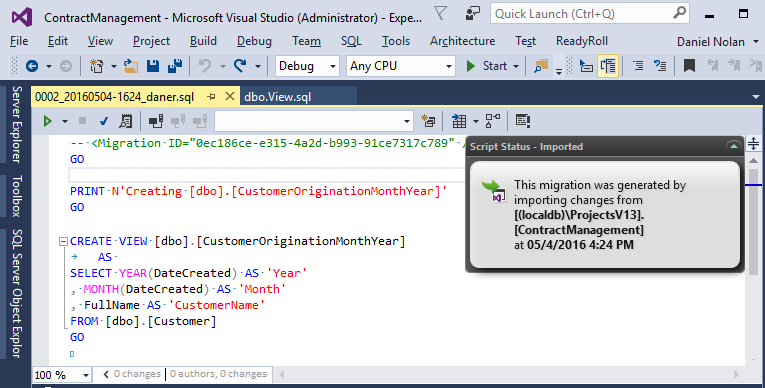
The script isn't executed against the sandbox database: its purpose is to allow your changes to be deployed to another server. I.e., it would only be executed on your sandbox if you were to drop and redeploy your sandbox database. For more information about the target database, see Target and shadow databases.
Although any edits to the script will not be applied to your Sandbox database, you can make changes to the T-SQL if the generated script doesn't do what you expected. For example, if you rename a Table, ReadyRoll will actually script a DROP/CREATE instead of an EXEC sp_rename. |
To test the script, click Refresh (Verify Script) within the tool-window.
The script is executed against the Shadow database in order to test the integrity of the migration. If the verification of your script is successful, the tool-window will update, indicating that all objects have now been imported.
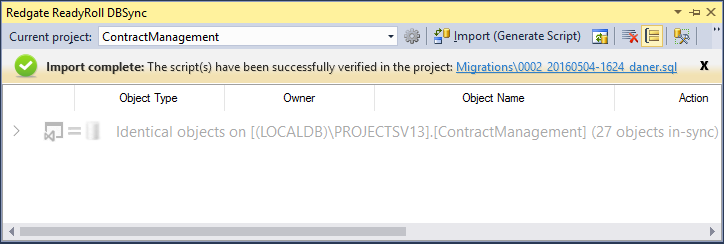
You've now made online changes to your database, and imported the new/modified object(s) into the project.
Summary
You've now tried two different ways of making database changes and creating migration scripts in your ReadyRoll database projects.
Depending on how you like to work, you may choose one approach over the other. You may even combine the two methods: edit online when you want to create new tables or modify programmable objects, and generate migrations directly when you want to refactor table objects.


