This page describes how to back up to and restore from a network share using SQL Backup Pro. You may want to to store backups on a network share, for example, because you do not have enough disk space to store the backups on a local server. You may want to restore a database from a backup stored on another server, for example, in order to verify the backup on a non-production server.
You can use SQL Backup Pro to:
SQL Backup Pro's network resilience settings can reduce the impact of network outages when backing up or restoring. If the connection is interrupted during a backup or restore, SQL Backup Pro will attempt the operation again after 30 seconds up to 10 times by default. You can adjust these settings on step 4 of the Back Up wizard or step 5 of the Schedule Backup Jobs wizard or with by using the DISKRETRYCOUNT and DISKRETRYINTERVAL keywords in a BACKUP script run from the command line or extended stored procedure. The network resilience settings used to create the backup are applied when restoring from the backup.
Nevertheless, backing up directly to a network location can be slower than copying the backup after creation and occasionally problematic:
It is best practice to back up locally and copy the backup to a network share. To do this, the appropriate permissions must be set up for the network share.
When you have set up the permissions appropriately, use the Back Up wizard or Schedule Backup Jobs wizard to create a backup. On step 3 of the Back Up wizard or step 4 of the Schedule Backup Jobs wizard:
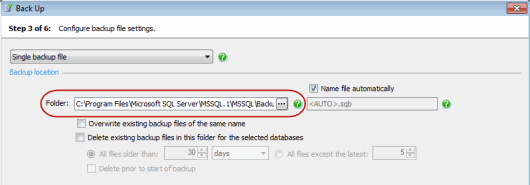
Specify a local folder for the backup location.
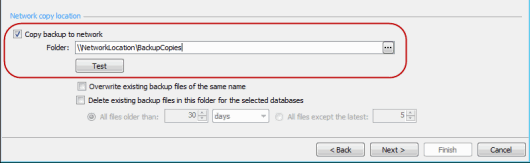
Select the Copy backup to network check box and specify a location on the network share. Type the full path, including the server name, for example: \\ServerName\MyFolder\<DATABASE>. Note that the file path is relative to the selected SQL Server. For example, if you have chosen to back up a database on a remote SQL Server instance called ServerA and you specify a local path such as C:\Backups, the backup files will be created on the C: drive on ServerA, not on the local server.
Alternatively, click  to open the Folder Browser. From the Server drop-down list, select the network share. If it is not displayed, click Add Server and specify the server name or IP address. Other servers will only be visible to the local server if it has the appropriate permissions to write to or read from them. The name of the local server you are connected to and your user name are displayed above the Server list. This information may explain why some servers cannot be browsed.
Proceed through the rest of the wizard as normal.
When the job is run, SQL Backup Pro will create the backup file or files with compression and encryption as specified, run any backup checks as specified, and then copy the files to the network share.
To back up directly to a network share, the account used to start up the SQL Backup Agent service application must have full permissions on the network share address (in addition to the other permissions specified in Permissions).
The following procedure describes how to grant the permissions using Microsoft Windows 7; refer to your Microsoft Windows documentation for full details for your operating system.
When you have set up the permissions appropriately, use the Back Up wizard or Schedule Backup Jobs wizard to create a backup. On step 3 of the Back Up wizard or step 4 of the Schedule Backup Jobs wizard:
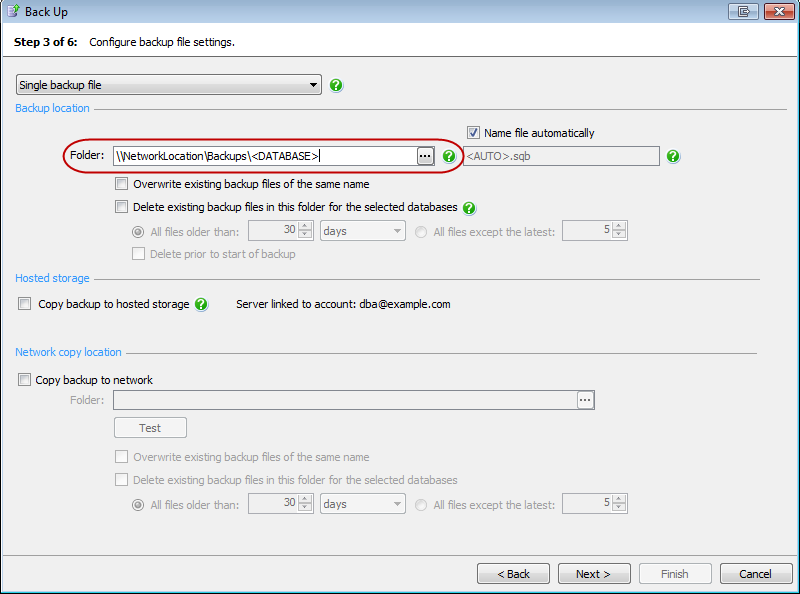
Specify a location on the network share as the backup location folder. Type the full path, including the server name, for example: \\ServerName\MyFolder\MyFile. Note that the file path is relative to the selected SQL Server. For example, if you have chosen to back up a database on a remote SQL Server instance called ServerA and you specify a local path such as C:\Backups, the backup files will be created on the C: drive on ServerA, not on the local server.
Alternatively, click to open the Folder Browser. From the Server drop-down list, select the network share. If it is not displayed, click Add Server and specify the server name or IP address. Other servers will only be visible to the local server if it has the appropriate permissions to write to or read from them. The name of the local server you are connected to and your user name are displayed above the Server list. This information may explain why some servers cannot be browsed.
You can use SQL Backup Pro to restore a database from a backup file (or set of files) on a different server by either copying the files to a local folder before the restore, or restoring directly from the network location. Note that to restore by creating a new database, the user must have CREATE DATABASE permissions.
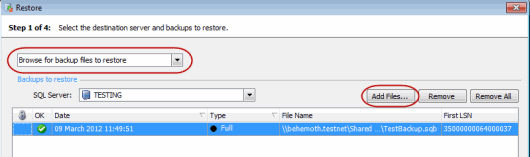
Click Add Files and browse for the backup files. From the Server drop-down list, select the network share. If the network share is not displayed, click Add Server and specify the server name or IP address. Other servers will only be visible to the local server if it has the appropriate permissions to write to or read from them. The name of the local server you are connected to and your user name are displayed above the Server list. This information may explain why some servers cannot be browsed.
| If the backup file you want to restore is incorrectly labelled "Missing", this is because the startup account for the SQL Backup Agent service does not have the correct permissions for the folder or network location it is stored in. To resolve this, grant the SQL Backup Agent service startup account read/write access to the folder or network location. |
Continue through the Restore wizard as normal.
Select Specific backup files from the drop-down list if you are creating a scheduled restore job for a file of a specific name. Click Add Files to open the File Browser.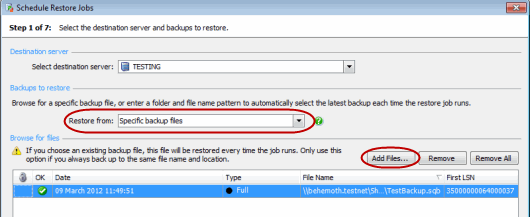
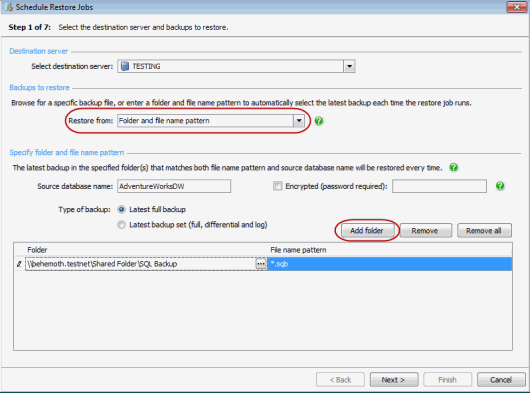
Select Folder and file name pattern from the drop-down list if you are creating a scheduled restore job for the most recent backup of the database available each time the job runs. Enter the name of the source database and click Add folder to add a folder and file name pattern. Click to open the Folder Browser.