Specifying file paths
Published 22 November 2018
SQL Backup often requires you to specify a file path or name, as, for example, in the Back Up wizard:
You can type the file path and name in the boxes. To specify a network path, type the full path, including the server name, for example \\ServerName\MyFolder\MyFile
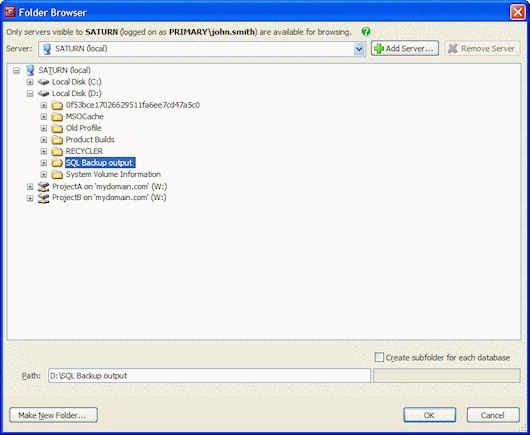
Alternatively, you can click to browse to the folder or file you require. For example:
SQL Backup displays the local file system for the selected SQL Server. By default this is the local server, which you have chosen to back up to or restore from.
You can also browse for resources on other servers, provided they are visible to the local server. Other servers will only be visible to the local server if it has the appropriate permissions to write to or read from them. The name of the local server you are connected to and your user name are displayed above the Server list. This information may explain why some servers cannot be browsed.
To see the file system on other servers:
- Click the Server list to see if the server you want to access is listed (the local server is always available).
- Select the server from the list. If the server you require is not displayed in the list, click Add Server and type the name or IP address of the server to add.
To remove a server from the list, select it and and click Remove Server.
Browsing SQL Servers with SQL Server authentication
If you are using SQL Server authentication on a SQL Server, for security reasons browsing to folders or files on the SQL Server is disabled by default. This is to prevent information about the file system structure being revealed to SQL Authenticated users who do not have permissions to browse the file system on the SQL Server.
You can override this restriction. However, you should do this only after careful consideration.
To enable file browsing by SQL Authenticated users, you must edit the registry of the SQL Server whose file system you want to browse. In the registry folder HKEY_LOCAL_MACHINE\SOFTWARE\Red Gate\SQL Backup\BackupSettingsGlobal\<instance name> create the registry key AllowSQLBrowsing as type DWORD, and set the value to 1. You must have administrator privileges to do this. This setting will not take effect until you refresh the connection to the instance.
For information about switching from from SQL Server authentication to Windows authentication see Editing a SQL Server instance registration.


