Restoring backups - select backups
Published 23 March 2017
Restoring backups > Select backups > Destination database > Restore options > Review summary
On step 1 of the wizard, select the SQL Server you want to restore to and the backup files to use.
Choose:
- Select from backup history to select from a list of backups that were created on the destination SQL Server (the SQL Server to which you want to restore the backup).
- Browse for backup files to restore to select individual backup files using the file browser. This is useful if the destination SQL Server is different from the SQL Server on which you created the backup, or if you are restoring from a copy of the backup files.
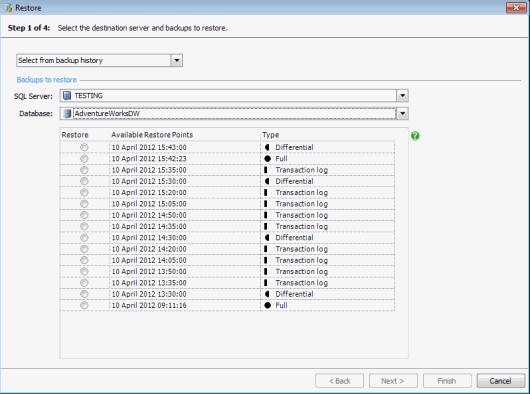
Select from backup history
Select the SQL Server and Database that was backed up.
The backups for the selected database are listed. Select the backup you want to restore.
Backups that were created using SQL Backup version 4 are not listed; you can use Browse for backup files to restore to select these files.
If you select a files or filegroups backup, you can select individual files or filegroups to restore at a later stage in the wizard.
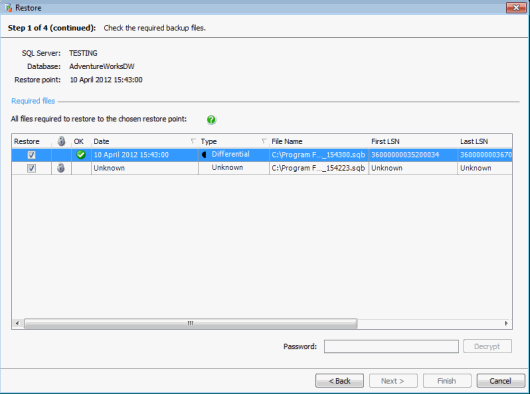
When you click Next, SQL Backup Pro retrieves the files for the selected backup. If you selected a transaction log backup or a differential backup from a backup set, SQL Backup Pro automatically retrieves files for all backups in the set. For example, if you selected a transaction log backup, SQL Backup Pro retrieves all transaction log backups since the corresponding full backup, and the full backup itself. You may see displayed while SQL Backup Pro searches for the appropriate files.
The files are listed with the most recent first. You can re-order the list by clicking the column headers as required; this will not affect the order in which they will be restored.
is displayed next to any encrypted files. Type the password in Password, and click Decrypt. For all files that use the password you entered, is displayed. You must enter the passwords for all selected files before you click Next.
If there are any problems with a file, is displayed next to the file. For example, SQL Backup Pro checks that all the files exist and are not corrupted. To see details of the error, move your mouse pointer over the icon.
By default, all the files that SQL Backup Pro has identified as part of the backup set are selected to be restored. If required, you can clear the Restore check box for a file. For example, you may want to do this if you know that the full backup has already been restored to a database. However, note that the restore process may fail if you do not restore all required files.
Browse for backup files to restore
You may want to back up a database on one SQL Server, but restore the backup to a different SQL Server. Similarly, you may want to restore a backup from a copy of the backup files. (If the backup files are on a network share, you are recommended to copy the files to a local folder before restoring; for more information, see Backing up and restoring on a network share.)
In these circumstances, you must choose Browse for backup files to restore. (If you choose Select from backup history, when you select the SQL Server to which you want to restore the backup, you will not see the backup you require in the Available Restore Points list because it is not associated with the destination SQL Server.)
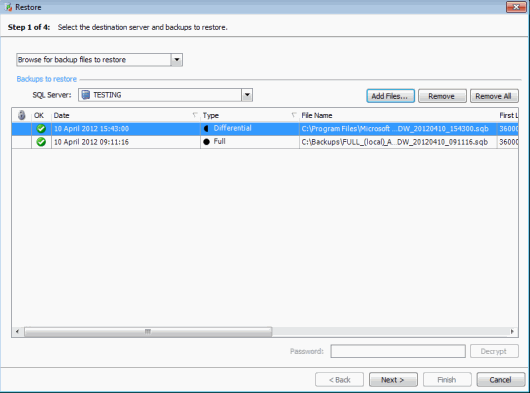
Select the SQL Server to which you want to restore the backups, and then click Add Files. The File Browser is displayed for you to select the backup files. From the Server drop-down list, select the server on which the backups are stored. If the server is not on the list, click Add Server and specify the name or IP address of the (physical) server. You can then select the files from the tree view.
When you click OK on the File Browser, the files you have selected are listed in the Restore wizard.
is displayed next to any encrypted files. Type the password in Password, and click Decrypt. For all files that use the password you entered, is displayed. You must enter the passwords for all selected files before you click Next.
If there are any problems with a file, for example a file is missing, is displayed. To see details of the error, move your mouse pointer over the icon.
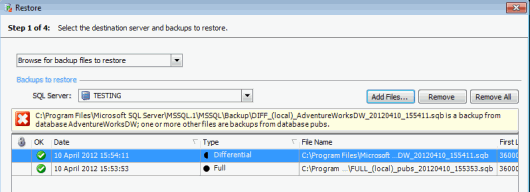
If there are any problems with your selection, for example if you have selected backup files from different backup sets or databases, a message is displayed above the list of files.
SQL Backup Pro displays only one message at a time, therefore when you have fixed the displayed problem, you may see a second message.
To remove a file from the list, select the file and click Remove; to clear the list, click Remove All.
Files or filegroup backups
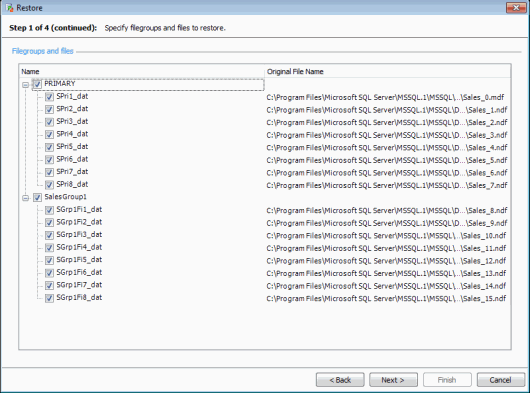
If you have selected a files/filegroups backup, when you click Next a tree of the available files is displayed.
Select the check boxes for any files or filegroups that you want to restore and click Next.
