Use the TeamCity plugin with a SQL Source Control Project
Published 21 May 2018
This tutorial takes you through each stage of setting up a database pipeline using TeamCity and the SQL Change Automation TeamCity plugin. You'll use the plugin to build, test and sync a SQL Source Control project.
1. Prerequisites
Make sure you have the following:
- An existing TeamCity server (version 7 or later).
- An existing TeamCity Build agent.
- An existing database source controller using SQL Source Control.
- An existing TeamCity project. See Creating and Editing Projects.
2. Install the SQL Change Automation plugin
- Download the SQL Change Automation TeamCity plugin
- Copy the zip file to the TeamCity data directory plugin folder.
For more information, see Installing additional TeamCity plugins.
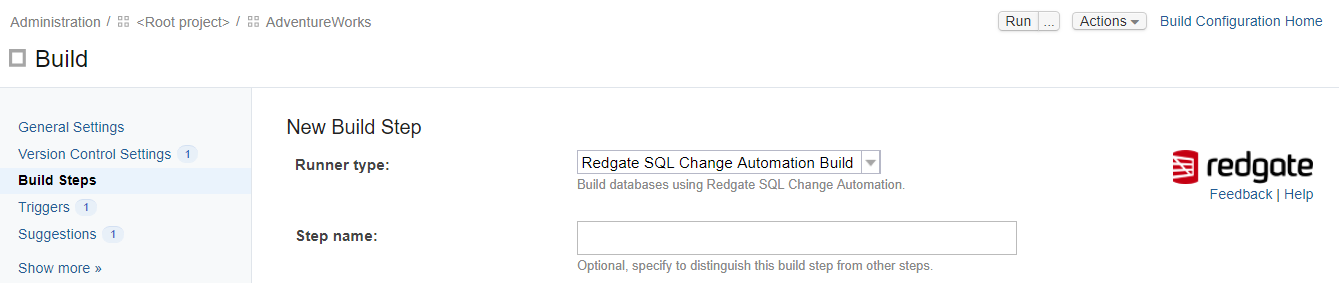
3. Add a build step
You'll add the build step using one of Redgate's build runners for TeamCity. For more information on build runners, see Configuring Build Steps.
- From the Build Configuration Settings menu, select Build Steps.
- Click the Add build step button.
- From the Runner type drop-down, select Redgate SQL Change Automation Build.
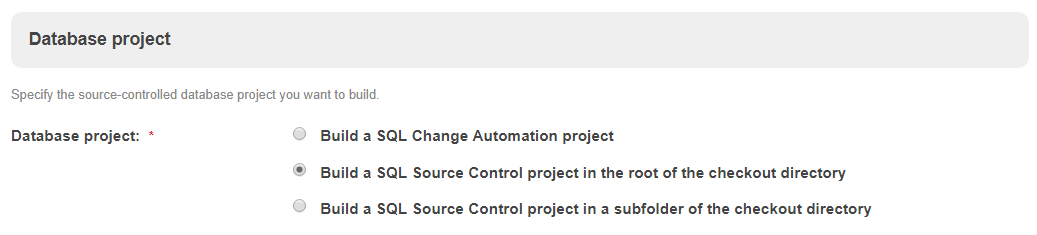
- Under Database project, select one of the following options:
- Build a SQL Source Control project in the root of the checkout directory
- Build SQL Source Control project in a subfolder of the checkout directory.
Then provides the path to your SQL Source Control folder relative to your checkout directory
Under Build artifact, enter a name for the NuGet Package ID. This is the name of the NuGet package you'll create. The name must be unique and can't contain spaces.

(Optional) Under Temporary database server, select SQL Server if you have features in your database that are not supported by LocalDB.
By default SQL Change Automation uses LocalDB to recreate and validate a temporary version of your database. The temporary database is dropped once the build is complete.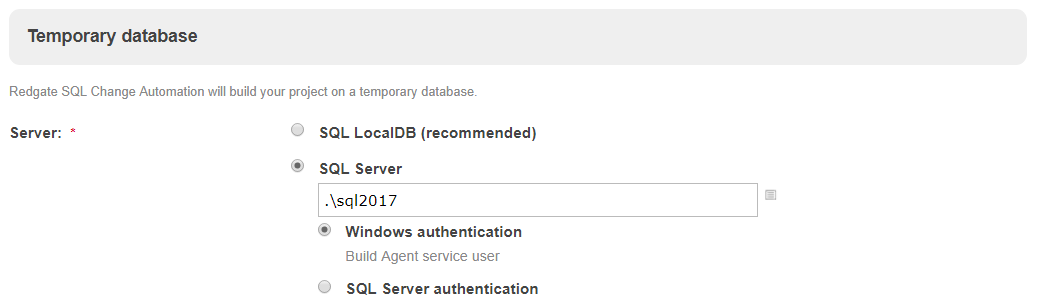
(Optional) SQL Change Automation can include SQL Doc database documentation in the NuGet package that it builds. To select this option, under Database Documentation, click Include database documentation.

Including database documentation will increase the size of the NuGet package and the time it takes to build, particularly for large databases.
The documentation is stored in db > docs > main.html in the NuGet package. If you're using DLM Dashboard version 1.6.3 or later and have set up DLM Dashboard integration, you can also view the documentation directly from DLM Dashboard. See SQL Change Automation integration (DLM Dashboard documentation) for more details. For help understanding SQL Doc documentation, see What's in the documentation?
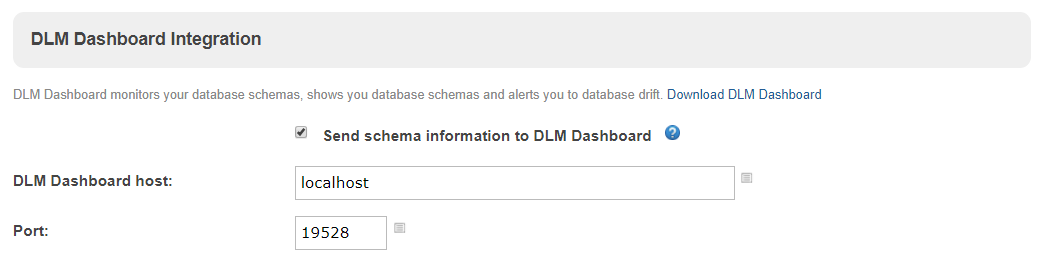
(Optional) If you're using Redgate's DLM Dashboard (version 1.4.4.313 or later) , SQL Change Automation can send schema information to it every time the build step runs.
Under DLM Dashboard Integration:- Enable the Send schema information to DLM Dashboard check box.
- Enter the name or IP address of the machine hosting the DLM Dashboard.
- Enter the DLM Dashboard port number. The default port is 19528.
For more information about how SQL Change Automation works with DLM Dashboard, see SQL Change Automation integration.
- Click Save.
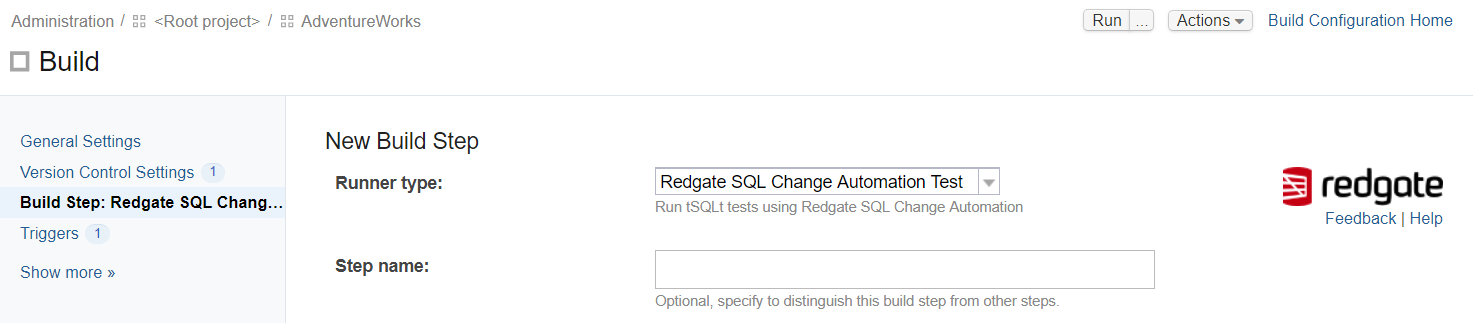
4. Add a Test step
The test step allows TeamCity to run tSQLt tests included in your database. For more info read tSQL and SQL Test.
- From the Build Configuration Settings menu, select Build Steps.
- Click the Add build step button.
- From the Runner type drop-down, select Redgate SQL Change Automation Test.
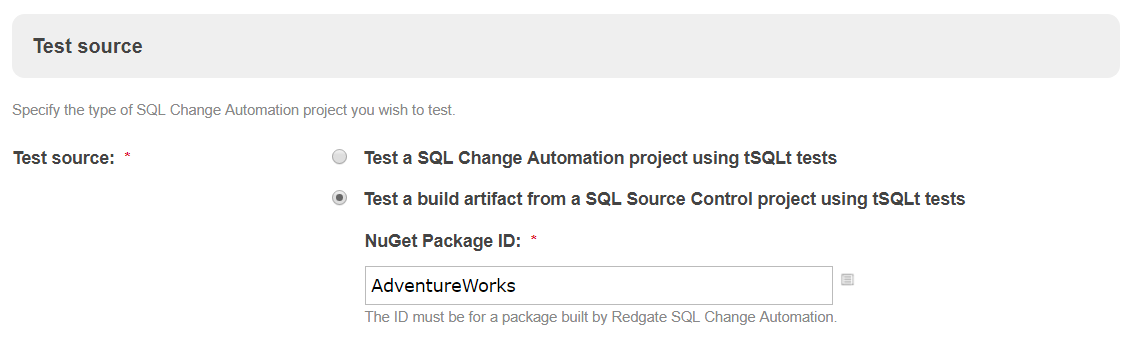
- Under Test source, select Test a build artifact from a SQL Source Control project using tSQLt tests.
- Insert the NuGet Package ID. This must be the same ID used to configure the Build step.
- Under Temporary database, select SQL LocalDB. If you need a custom SQL Server, select SQL Server and provide additional connection details.
- For the Run tests option, select Run every test.
- Select the checkbox Populate the database with data before testing if you intend to automatically populate the database with test data.
You can optionally provide a SQL Data Generator project (.sqlgen) file. - Click Save
5. Run a build
- Open your TeamCIty project and click the Run button.
See Configuring VCS Triggers to learn how to automatically start a new build each time TeamCity detects new changes in the configured VCS roots. - To display the build status, click Projects.
- To show a summary of the log messages printed by the build, move your cursor over the Success drop-down button, and then click Build log.
To view the NuGet package, click Artifacts.
The build artifact is the name TeamCity gives to the output of a build step. In this example, the NuGet package is the artifact, and it's stored on TeamCity's server until we're ready to deploy it.
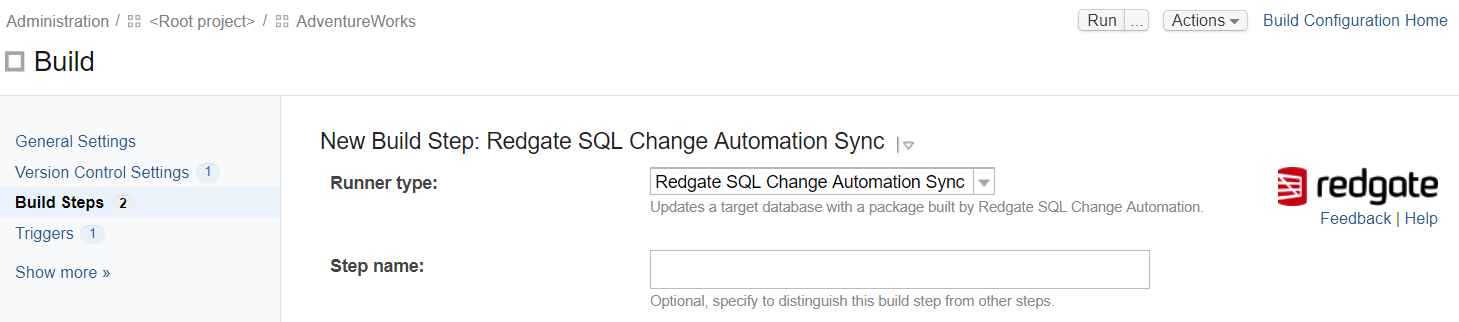
6. Add a Sync step
- From the Build Configuration Settings menu, select Build Steps.
- Click the Add build step button.
- From the Runner type drop-down, select Redgate SQL Change Automation Sync.
- Under Build Artifact, inser the NuGet Package ID. This must be the same ID used to configure the Build step.

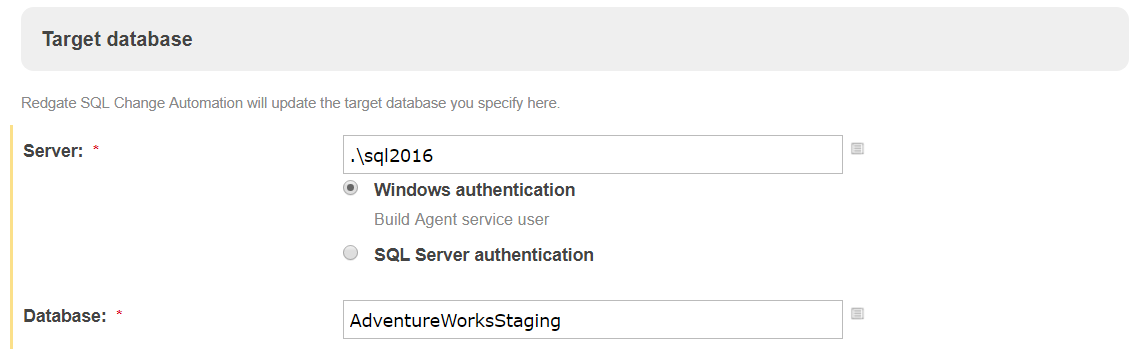
- Under Target database, enter the name of the target server and database you want to update and the SQL Server credentials if needed.
- Click Save.
7. Publish the package to a NuGet feed
Now that you've finished testing, you can publish the package to a NuGet feed. You can then use Octopus Deploy with SQL Change Automation to manage deployments.
You can use TeamCity as a NuGet server to save you having to set up your own repository. For more details, see Using TeamCity as a NuGet Server.
Once you enabled TeamCity triggering a build will publish the package to the NuGet feed automatically.
If you're using a different release management tool, check the help documentation provided by that tool vendor.
This documentation contains proprietary information and is protected by copyright law.
Copyright © 2026 Red Gate Software Limited. All rights reserved


