Worked example - a simple analysis
Published 18 January 2013
This worked example demonstrates a simple change impact analysis using SQL Dependency Tracker.
In this example, the Magic Widget Company runs a SQL Server instance to support their Web site and company activities. This instance contains two databases: the first contains the company's product, customer, and account information. It is primarily accessed by the company's intranet. The second contains customers' credit card information, and access to this database is controlled.
The Magic Widget Company's development team are performing a minor upgrade to their Web site. To increase security, they will require customers to supply the three-digit verification code found on the back of a credit card in addition to the credit card number and expiry date. Marketing also want to be able to determine which customers have verified a transaction in this way, and which have not.
The upgrade has two parts:
- adding an extra column, VerificationCode int, to the CustomerCards table in the NorthCards database
- adding an extra column, Verified int, to the Customers table in the Northwind database.
You can follow the example on your own system. You will need access to a SQL Server on which the Northwind example database has been installed.
This example uses SQL Server 2008; if you are using SQL Server 2000, or SQL Server 2005 you can follow the example, but you will see slightly different results.
Setting up the databases
The worked example uses the following databases:
- NorthCards
- Northwind, the example database provided by Microsoft
To create the NorthCards database on your SQL Server:
- If it already exists, delete the NorthCards database from your SQL Server.
- Click here to open the SQL creation file for the database. Run the file in your SQL application.
The database and its schema are created.
Setting up the project
- If you have not yet started SQL Dependency Tracker, select it from your Start menu; if you have a project already open, on the File menu, click New to create a new project.
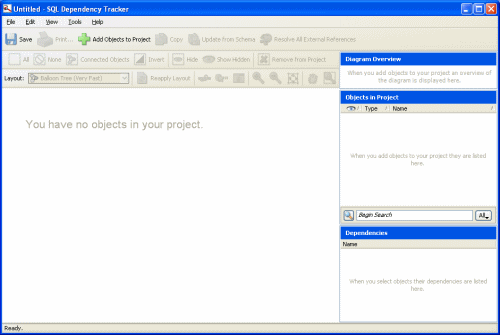
We need to add some objects to the project so that they can be displayed in the dependency diagram. On the toolbar, click Add Objects to Project.
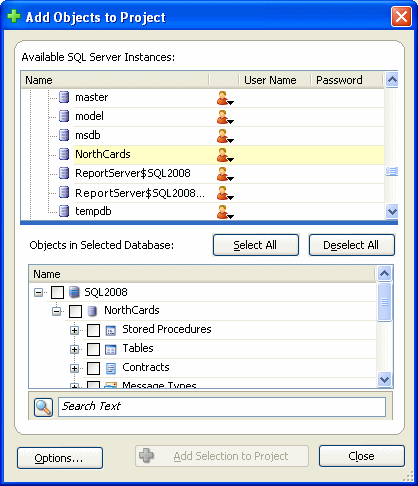
The Add Objects to Project dialog box is displayed, with a list of the SQL Server instances that SQL Dependency Tracker can find on your network.- Click next to your SQL Server instance to display the databases, and double-click the NorthCards database.
If your SQL Server instance requires SQL Server authentication, you are prompted to enter the User Name and Password.
SQL Dependency Tracker displays the objects in the NorthCards database:
We will now specify the objects that we want to track.
Usually, when you analyze the impact of a change, you select only the objects that you want to change. SQL Dependency Tracker then finds their dependencies for you. You can explore the dependent objects by following their connections from the objects you originally selected. This is the "bottom up" approach, and we will use this approach for this worked example.
Sometimes, you may want to see the relationships between all objects in the database; in this case, you could select all of the objects in the database or databases of interest. This "top down" approach can give you a good overview of your databases, but the volume of data can be overwhelming. We therefore recommend the "bottom up" approach for tracking dependencies.
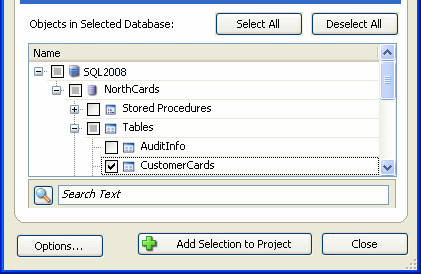
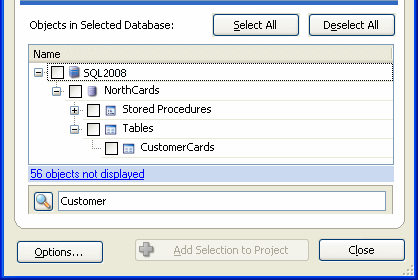
On the Add Objects to Project dialog box, select the CustomerCards table. - You can select the object by expanding the objects tree and selecting the check box, as shown below:
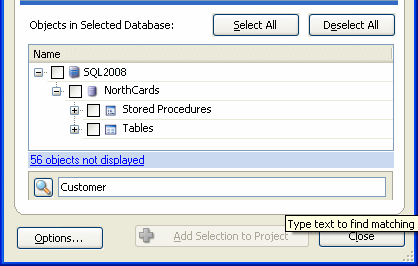
You can filter the objects tree to make your search easier, for example by typing Customer in the Search Text box.
To see the tables that match your search, click next to Tables (you could also do the same for Stored Procedures).
To see the full list of objects again, click 56 objects not displayed (if you are using SQL Server 2000, click 16 objects not displayed).
Click Add Selection to Project. - The objects are added to the project and the diagram is created.
- On the Add Objects to Project dialog box, click Close.
Analyzing the impact of the change to the CustomerCards table
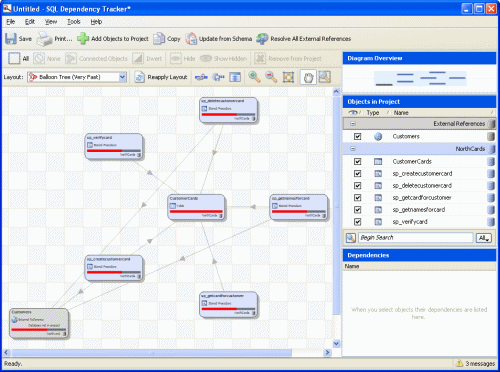
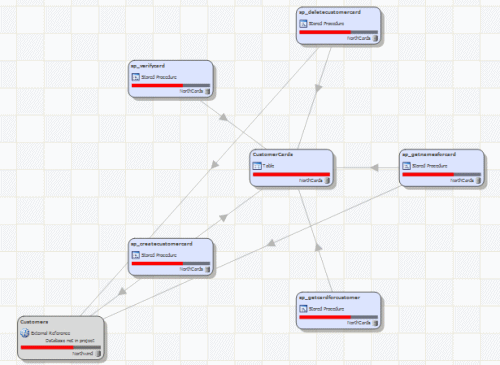
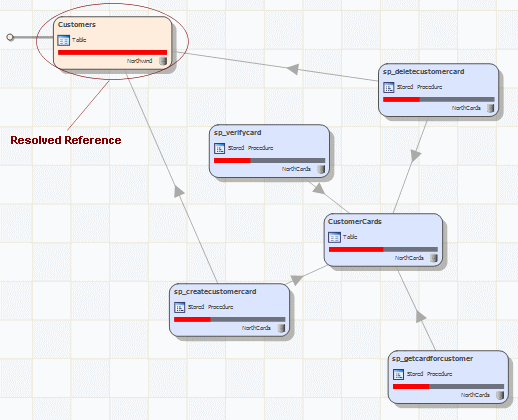
The CustomerCards table that we selected is shown in the diagram with some additional objects.
By default, when you add an object to the project, SQL Dependency Tracker automatically follows the used by dependencies; in the diagram, the object you chose to add is used by the additional objects that are shown.
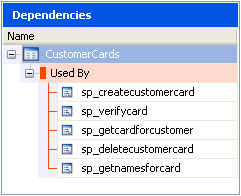
In this example, the stored procedures sp_createcustomercard, sp_deletecustomercard, sp_getnamesforcard, sp_getcardforcustomer and sp_verifycard have been added. The CustomerCards table is used by all of these stored procedures. Therefore, if we change the CustomerCards table, these stored procedures may also need to be changed. You can click the CustomerCards object to see the dependencies listed in the Dependencies pane.
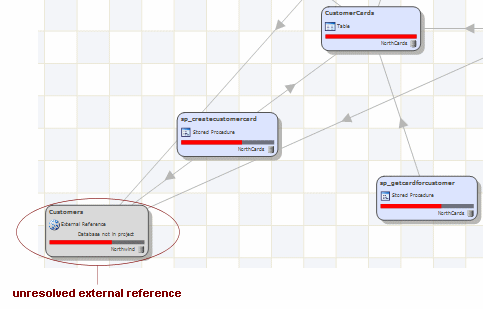
There is also an unresolved external reference in the diagram, indicated by a gray box.
This is the Customers object from the Northwind database. SQL Dependency Tracker has detected that the CustomerCards table references this object, but very little is known about the object because the Northwind database is not part of our project.
We have created the dependency diagram to find out which objects will be affected by the addition of a new column to the CustomerCards table. SQL Dependency Tracker is showing us all the possible candidates. To see whether any of these objects really would be affected by the change, we need to look at them more closely.
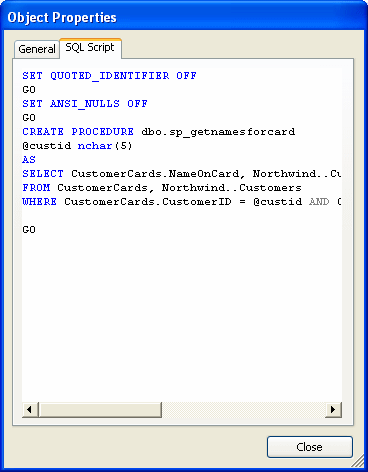
- In the diagram, right-click sp_getnamesforcard, and click Show SQL Script.
The creation SQL script for the object is displayed. You can look at the script to see whether the changes to the CustomerCards table will affect the stored procedure.
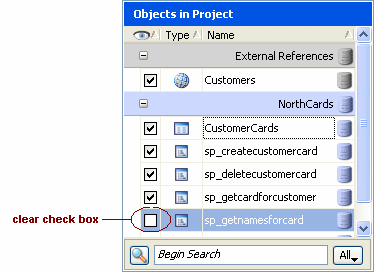
We can see that the purpose of this stored procedure is to return the customer contact name, and the name on their credit card (perhaps for comparison purposes). This should not be affected by the proposed additional column, therefore we can exclude it from the diagram. - Click Close, and in the Objects in Project pane, clear the check box in the visibility column for sp_getnamesforcard.
The Objects in Project pane lists all of the objects in the project. By clearing the visibility check box, we hide the object so that it is no longer visible in the diagram (but it is still included in the project). If we know that we will not need to refer to this object again, we can remove it from the project using the Remove from Project option. However, for now, we will just hide it.
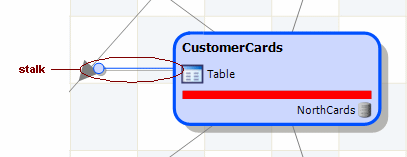
Notice that the CustomerCards object is now displayed with a stalk:
The stalk indicates that there are dependencies for this object that are not shown on the diagram (in this case, the sp_getnamesforcard stored procedure).
We will assume, for now, that we want to keep the other objects visible in the diagram. - To save the project, on the toolbar click Save, in the Save As dialog box enter a name for the project, and then click Save.
When you have saved the project, it becomes independent of the databases from which you created it. You can copy the project file, even from one computer to another, and it can be opened in SQL Dependency Tracker without reference to the original databases or SQL Server instances. You will need to connect to the original SQL Server only if you want to add further objects to the diagram or update the diagram from the databases.
If you wish to document the dependencies that SQL Dependency Tracker has found, you can export the diagram to an image file, XML format, or PDF, or you can copy the diagram to your clipboard so that you can paste it into another application, such as Microsoft® Excel® or PowerPoint®. Alternatively, you can print the diagram.
Analyzing the impact of the change to the Customers table
Now we want to look at the objects that would be affected by the addition of a new column to the Customers table in the Northwind database.
We could add the Customers table to the project using Add Objects to Project. However, the object is already represented on the diagram as an unresolved external reference, so it will be simpler to resolve the reference.
- In the diagram, right-click the Customers object, click Add to Project, then click Resolve External References.
A progress dialog box is displayed. If necessary, click OK to close the dialog box.
The reference to the Customers object has been resolved, and SQL Dependency Tracker has identified that it is a table. - Click None to deselect the Customers object.
Notice that the Customers object is displayed in a different color, because it is from a different database. It has a stalk to indicate that it has dependencies that are not shown on the diagram. These dependencies may be included in the project but hidden, or they may not be in the project. - Move your mouse pointer over the Customers object.
A tooltip lists the dependent objects that are not shown. The Customers table may be used by these objects, or it may use these objects.
These objects look interesting; we need to check whether any of them would be affected by the proposed change to the Customers table, so we will add them to the diagram. - In the diagram, right-click the Customers table, click Add to Project, and then click Objects the Selection is Used By.
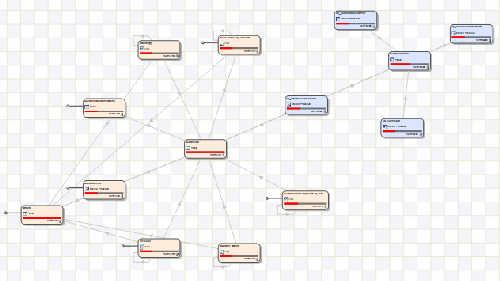
SQL Dependency Tracker adds the objects to the project, but the diagram needs to be tidied up. On the toolbar, click Reapply Layout.
The diagram is laid out again using the same layout as before. We could change the layout type if required by selecting a different layout from the list on the toolbar.For more information about layouts, see Laying out the diagram.
- On the toolbar, click Save, to save your changes to the project.
Now that we have added all of the direct dependencies for the Customers table, we can investigate those objects by looking at their SQL creation scripts. We can see from the diagram that some of these objects have further dependencies; we could analyze each of these objects in turn by adding their dependencies, until we are satisfied that we know the impact of our changes.
Creating a report
For now, we will assume that we are only interested in the objects currently shown in the diagram. We now want to include the diagram in a report.
- On the File menu, click Export, and then click Image.
- In the Export dialog box, type a name for the image file, choose the Save as type (PNG or EMF), and click Save.
You can view the image file in your usual image editor.
You have now completed the worked example. This has provided a basic overview of how you might like to use SQL Dependency Tracker, but there are many features that we have not been able to cover. For example, when you have created a dependency diagram there are many different ways in which you can customize it to suit your needs. You could discover these features by experimenting further with the NorthCards and Northwind databases, and by reading this online help.
