Creating classification rules
Published 15 June 2020
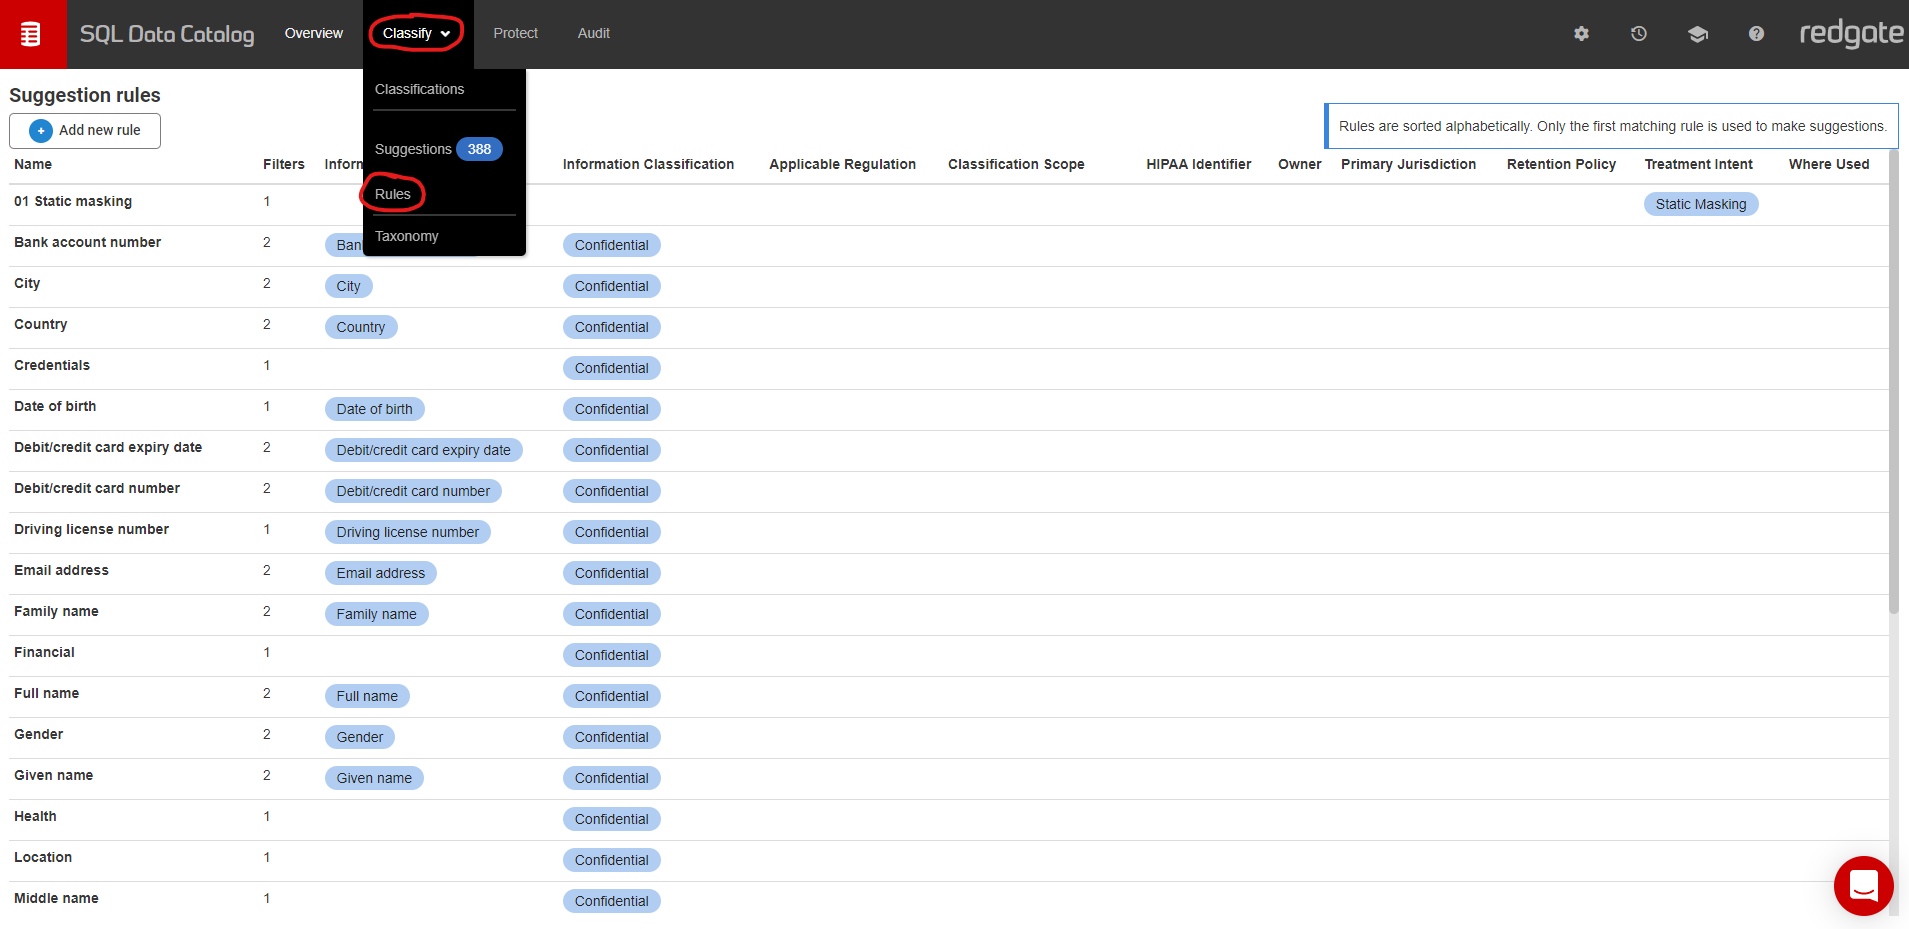
The Rules page can be accessed from the Classify drop down menu from the navigation bar.
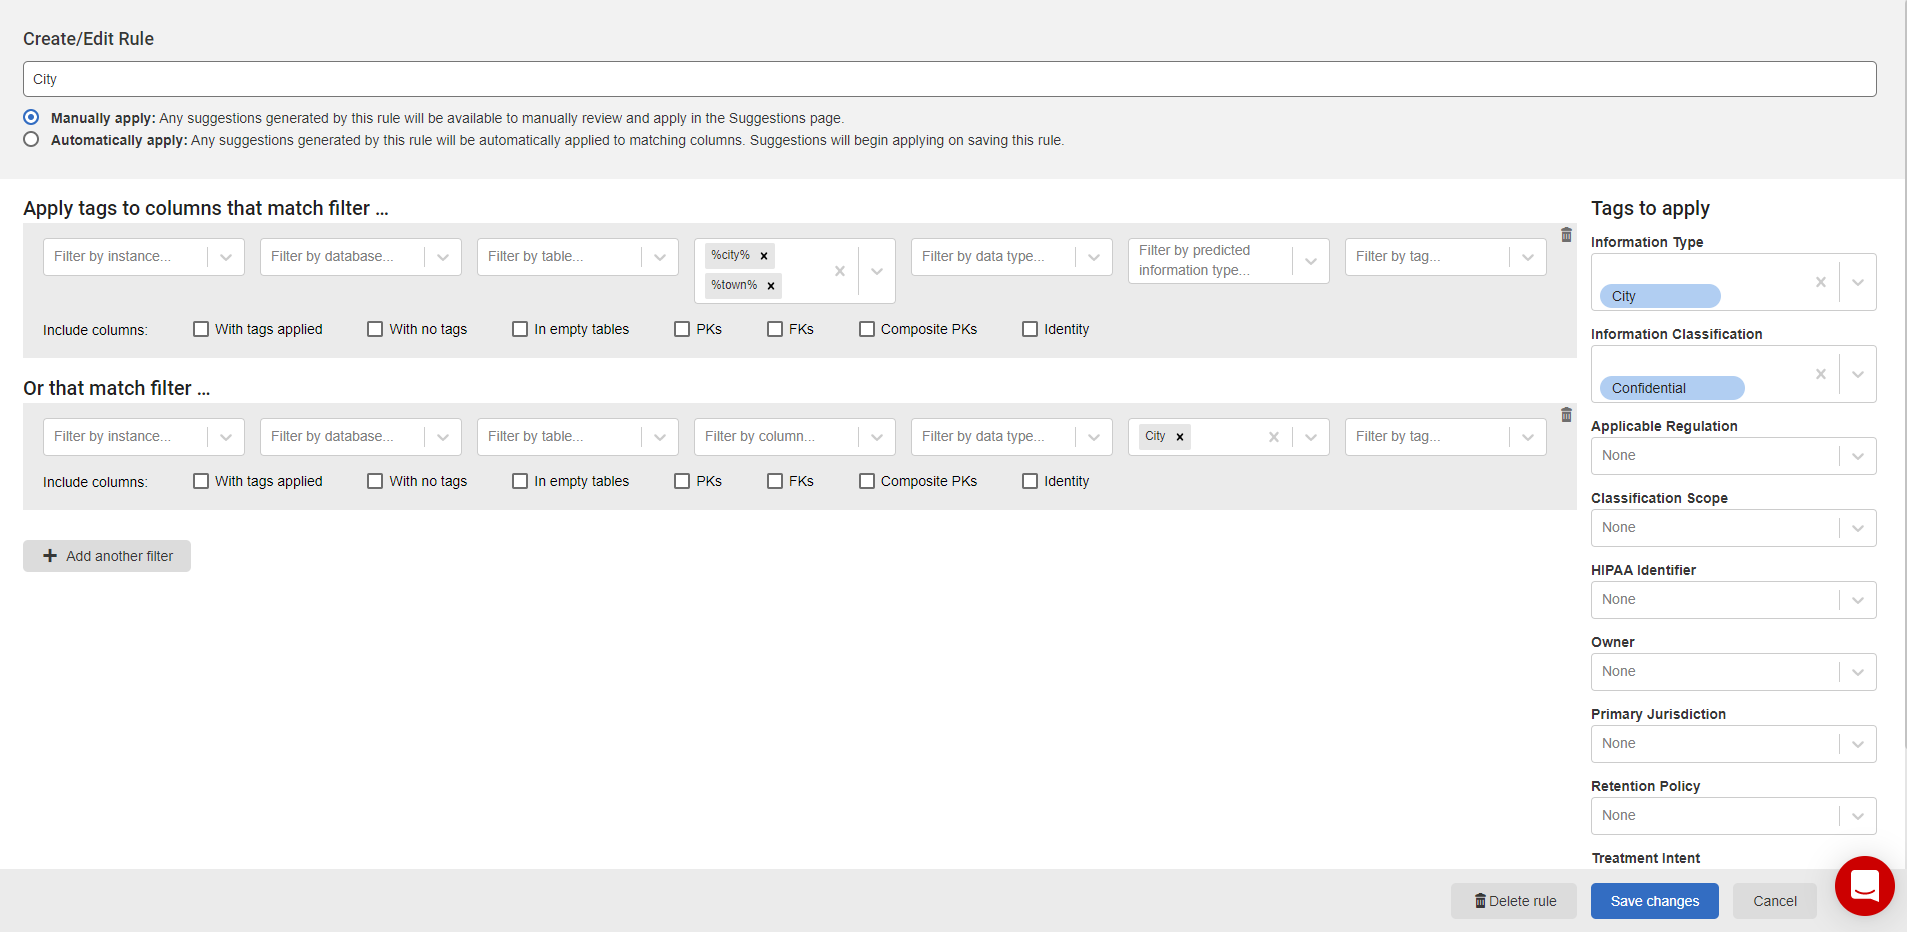
To create a new rule, click on the button at the top-left of the screen. Alternatively, to edit an existing rule, simply click on it:
From this screen, you can set the following:
- The name of the rule
- How suggestions generated by the rule are applied
- Manually (default) - the rule will generate suggestions that you can manually review and apply to the columns
- Automatically - the rule will generate suggestions that will then be immediately applied
- The filters used to match columns in your estate
- You can have multiple filters in a rule, and SQL Data Catalog applies OR logic between them.
- The classification tags you want to be applied to any matching columns
Once you're happy with your rule configuration, click 'Save changes' . If the rule has been marked as 'Automatically apply', the suggestions from this rule will be applied immediately to the columns.
Suggestions are regenerated:
- after adding, editing, or deleting a rule,
- as a result of a change being detected in the database.
Creating a rule direct from a filter
You can also create a rule directly from the Classification page. Either load up a saved filter, or create a new one using the filter bar, then click 'Create rule'. This will take you to the 'create/edit rule' page, with the filter already pre-populated.


