Packaging an upgrade as a C# project
Published 06 February 2013
This worked example demonstrates how to package an upgrade to a database as a C# project, and run the package.
In the example, the sales department of the Magic Widget Company has a SQL Server database of their products. The development department have made a number of changes to the structure and content of the product database, which now need to be packaged for deployment to the sales department as an upgrade.
You will see how to:
- Set up the databases if you want to follow the example on your own system.
You will need access to a SQL Server to do this. - Specify the contents of the package.
- Preview the SQL scripts.
- Generate the package as a C# project.
- Run the package to upgrade the existing database.
You will need Microsoft® Visual Studio® .NET 2005 or later to compile the project.
Setting up the databases
The worked example upgrades the product database, WidgetSales, with a later version of the database called WidgetDeploy. To create these databases on your SQL Server:
- If they already exist, delete the databases WidgetSales and WidgetDeploy from your SQL Server.
- Click here to view the SQL creation script for the databases.
- Copy the script, paste it in your SQL application, and then run it.
The databases are created and populated with data.
Specifying the package contents
- If you have not yet started SQL Packager, select it from your Start menu; if SQL Packager is already running, click New Project.
- On the Choose a project type page of the Packager Wizard, select Package an upgrade to a database, and click Next.
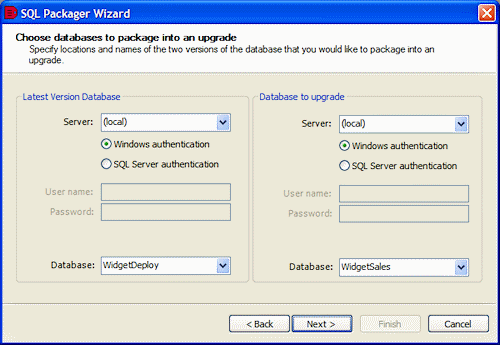
The Choose databases to package into an upgrade page of the Packager Wizard is displayed. - In the Server box, under Latest Version Database, type or select the name of the SQL Server on which you created the databases.
- Select the authentication method, and for SQL Server authentication enter the User name and Password.
- In the Database box, type or select WidgetDeploy.
If WidgetDeploy is not displayed in the Database list, right-click in the Database box and click Refresh or scroll to the top of the list and click Refresh. - Under Database to upgrade, in the Server box, type or select the name of the SQL Server.
- Select the authentication method, and for SQL Server authentication enter the User name and Password.
- In the Database box, type or select WidgetSales.
If WidgetSales is not displayed in the Database list, right-click in the Database box and click Refresh or scroll to the top of the list and click Refresh. - Click Next.
SQL Packager displays a message dialog box while it analyzes the database structure.
If you select the Close message box on completion check box, SQL Packager closes this message dialog box automatically the next time that you choose the databases. For this example, leave the setting as it is. Click OK to close the message box.
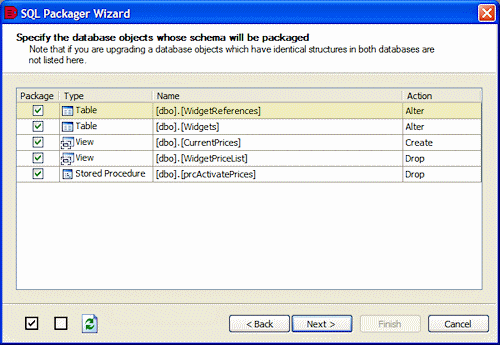
SQL Packager displays a list of objects whose structure differs in the databases.
You can choose which objects to package. For more information, see Specifying the package contents.
For this example, leave all the check boxes selected so that all of the objects are updated when the package is run.
The Action column indicates the action that will be taken on WidgetSales to make it identical to WidgetDeploy.The upgrade not only creates new objects in WidgetSales; it also alters and drops objects from WidgetSales to make it identical to WidgetDeploy. For example, the WidgetPriceList view will be dropped from WidgetSales.
- Click Next.
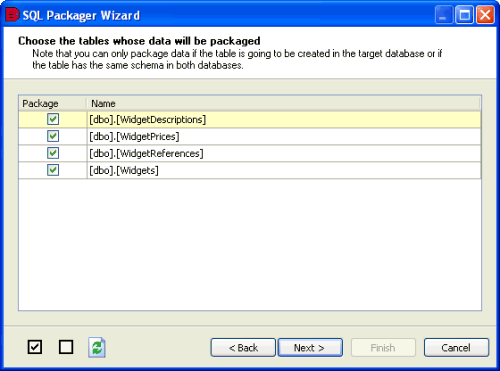
SQL Packager displays a list of the tables that contain data that can be packaged.
You can choose the tables for which you want to package data. For more information, see Specifying the package contents.
For this example, leave all the check boxes selected so that all the data in the tables will be updated when the package is run. - Click Next.
SQL Packager displays a message dialog box while it generates the SQL script.
If you select the Close message box on completion check box, SQL Packager closes this message dialog box automatically the next time that it generates the SQL script. For this example, leave the setting as it is. - Click OK to close the message box.
Previewing the SQL Scripts
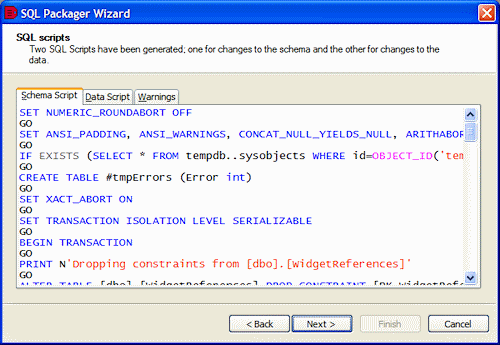
The SQL scripts page is displayed.
The SQL scripts page displays the following tabs:
- Schema Script displays the SQL code to update the structure in WidgetSales so that it is identical to WidgetDeploy
- Data Script displays the SQL code to update the data in WidgetSales so that it is identical to WidgetDeploy
- Warnings provides details about unexpected behavior that may occur when you run the package
In this example, SQL Packager displays a warning to inform you that it cannot use the ALTER TABLE command to change the IDENTITY column, so the package will rebuild the WidgetReferences table. Warnings are displayed whenever tables require rebuilding as these may be slow operations.
If required, you can save the scripts from the next page of the Packager Wizard.
When you have finished reviewing the scripts, click Next.
Generating the package
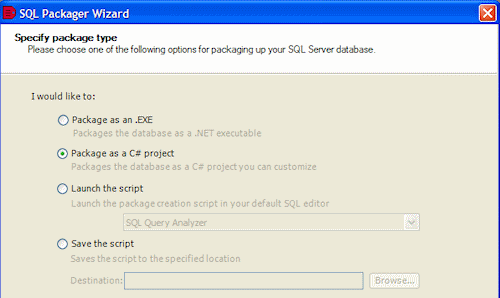
The Specify package type page is displayed.
In this example, we will create a C# project. For an example of how to generate a .NET executable, see Packaging a database as an .EXE
- Ensure that Package as a C# project is selected, and click Next.
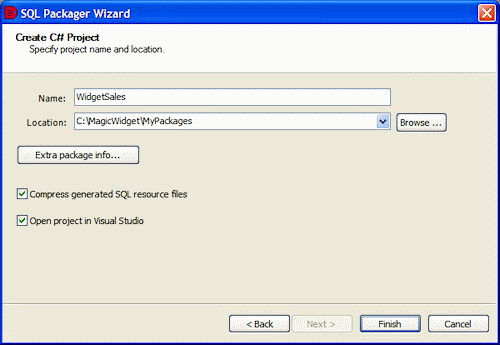
The Create C# Project page is displayed. - Enter a name and location for your package.
Leave the Compress generated SQL resource files check box selected so that your package will be compressed.
The generated files will be compressed to approximately 75% of their original size.Compressing the resource files means that you cannot edit the resource files or add resource files to the C# project.
- Ensure the Open project in Visual Studio check box is selected, and click Finish.
A message dialog box informs you that the project is created in the location you specified. Click OK to close it. Visual Studio .NET is launched with the project.
Running the package
To compile and run the project, in Visual Studio .NET 2005 or later:
- Press F5, or on the Debug menu, click Start.
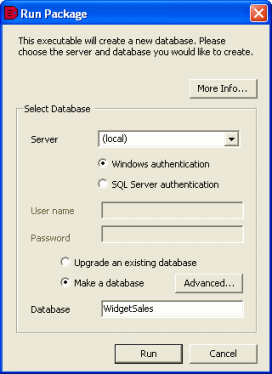
The Run Package dialog box is displayed.
You use this dialog box to specify details of the database that will be upgraded when the package is run. - Select the Server for WidgetSales, and if required, enter the authentication details.
- Click Run.
A message dialog box is displayed for you to confirm that you want to continue. Click Yes. - When WidgetSales is upgraded, a message dialog box confirms that the package has run successfully. Click OK to close it.
You can use your SQL application to check that the database has been changed as you expect. If you have purchased Red Gate SQL Compare you can compare the databases' structure to confirm that they are identical; if you have purchased SQL Data Compare, you can compare the data to confirm it is identical.

