Setting up authentication
Published 10 February 2025
The Test Data Manager (TDM) Hub employs OpenID Connect (OIDC) as its primary and recommended authentication method, ensuring robust security and modern identity management.
Basic Authentication is also available as an alternative, typically suited for environments where OIDC implementation faces initial challenges or for specific, controlled non-production scenarios where its inherent security trade-offs are understood.
Please be aware that activating Basic Authentication for use with Test Data Manager requires the Test Data Manager Standard license.
This guide details the setup for Basic Authentication alongside the full configuration process for OIDC authentication, enabling you to choose and implement the method that best fits your current requirements while being mindful of security best practices.
If your App Registration is already set up on your Auth Provider of choice and you're just interested in the parameters to put in your config.yml, skip to the TDM config.yml values section.
Basic Auth
To simplify Proof of Concept configuration in cases an OIDC setup or its parameters aren't available right away, Basic Auth can serve as a simplified alternative method of authentication for Test Data Manager Standard.
Authentication in TDM using Basic Auth requires the specific setup:
- The Test Data Manager Standard license is set up for use in TDM.
- The following 4 OIDC auth parameters in TDM config.yml need to keep their default placeholder values (<ParamName>) or be left empty:
- AuthAuthority
- AuthAudience
- AuthClientId
- AuthScope
- The password to be used for authentication through Basic Auth can be set in one of three ways:
- Set as the value of the UnsafeDemoPassword param in the TDM config.yml.
- Set as the value of the REDGATE_TDM_PASSWORD environment variable.
- Set in the "Set up access" step of the Test Data Manager setup page, which appears when starting up the application for the first time:
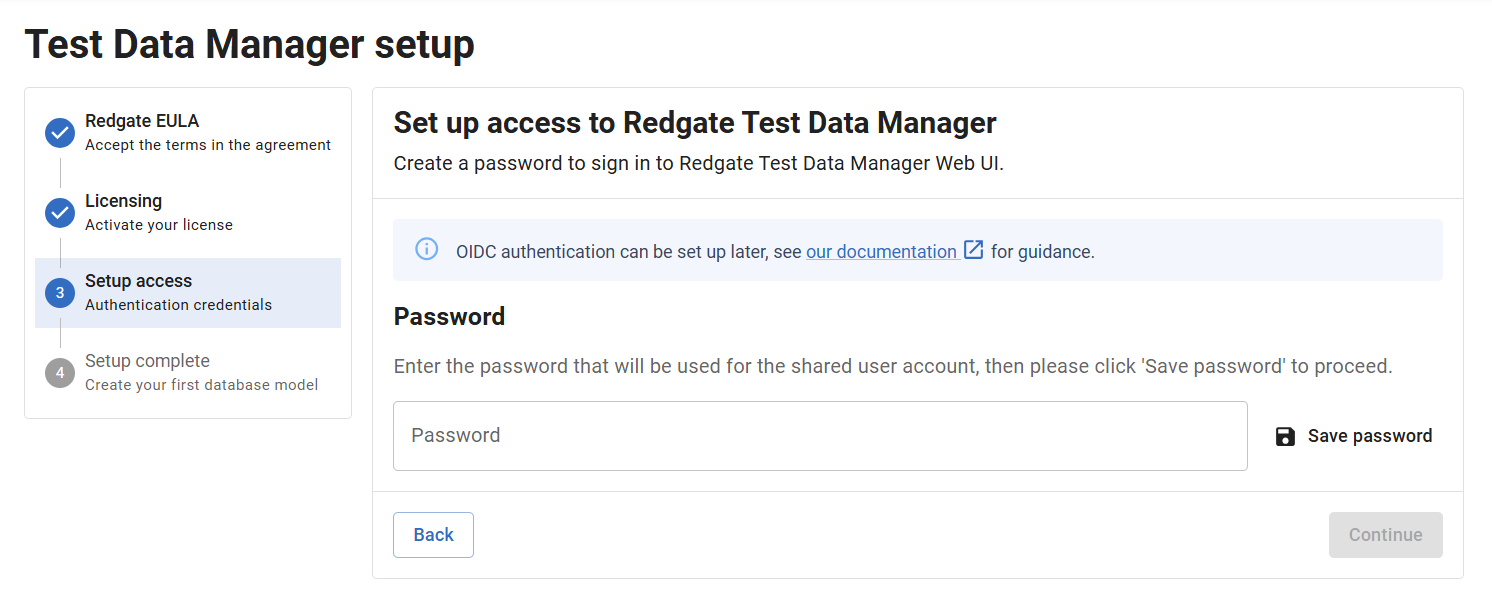
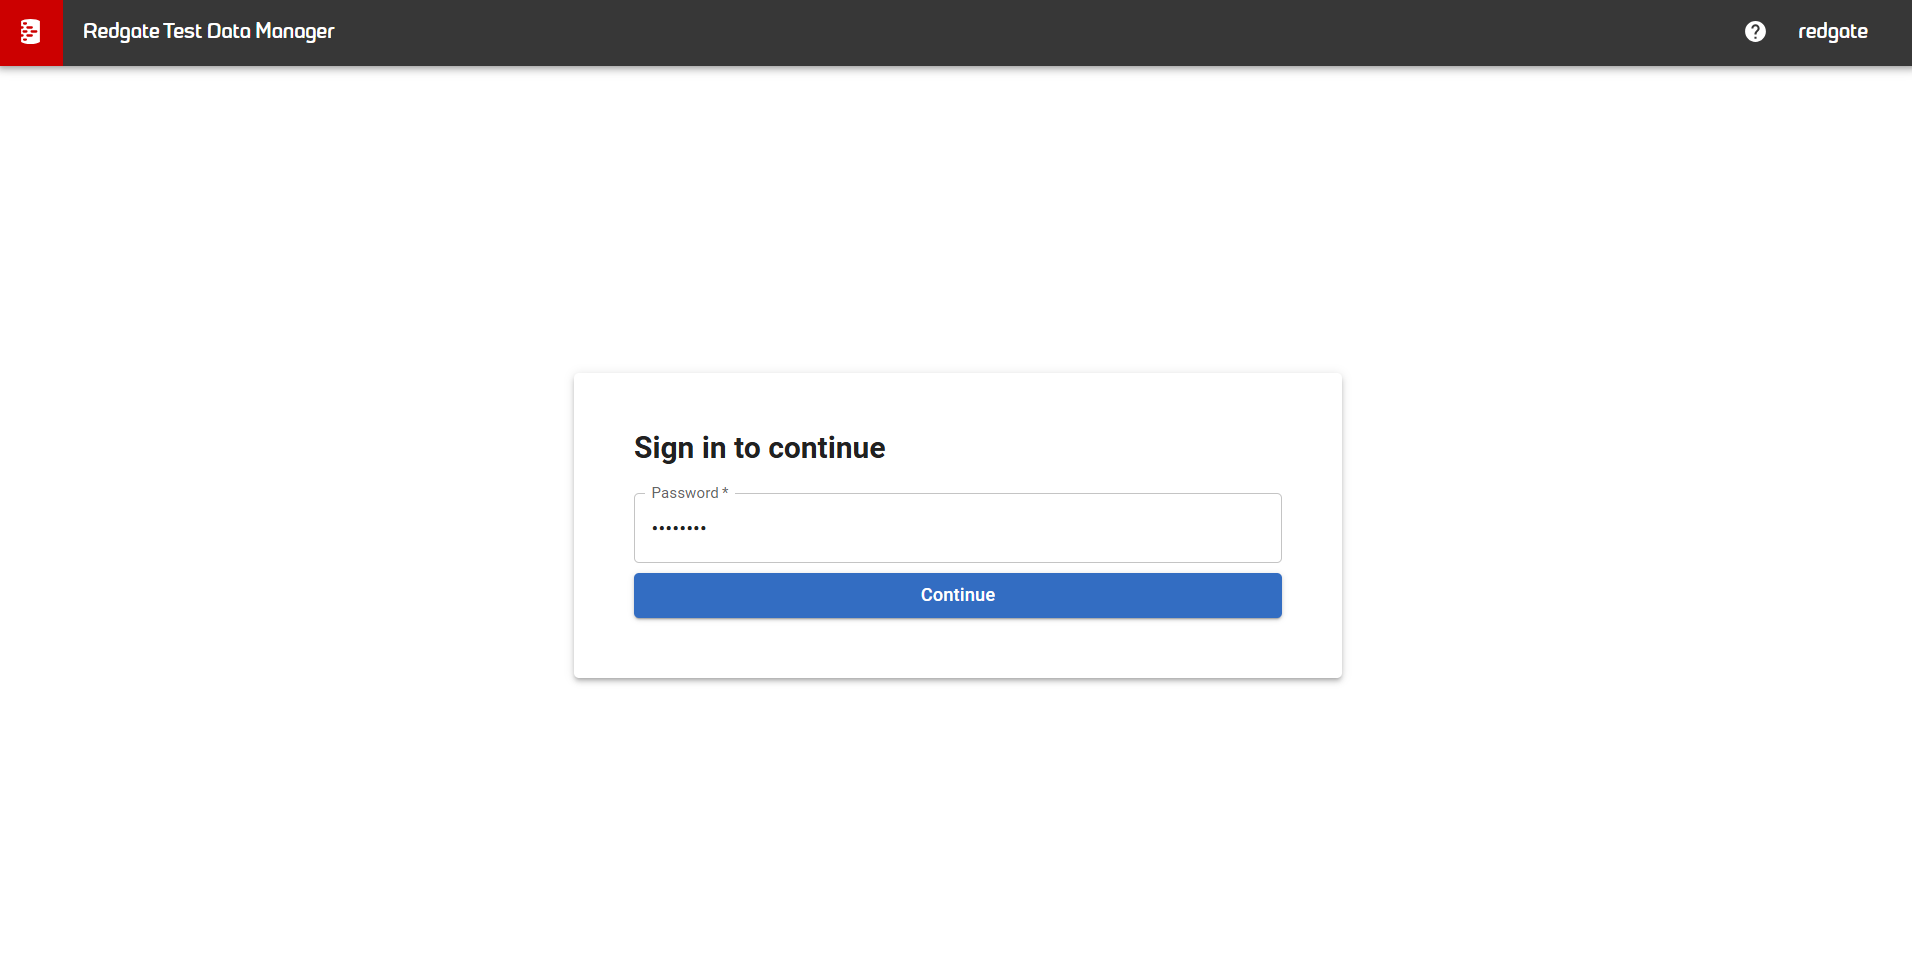
When Basic Auth is correctly set up as described, TDM Hub should open with the login page and allow you to authenticate using the password that was set.
OIDC
Authentication with OIDC is strongly recommended to be set up right after the Proof of Concept phase to guarantee maximum security when using TDM for your actual use cases. Microsoft Azure is the OIDC auth provider of choice in this example, but similar approaches will apply for other auth providers as well.
Creating a new App registration
You'll need to set up a new scope in your auth provider for your TDM Application. In Azure, this is known as an App Registration.
You can reach your App Registrations here on Azure, and a new one can be created by clicking on New Registration.
From there, you should give access to the account types you'd like, most likely only in your current organizational directory.
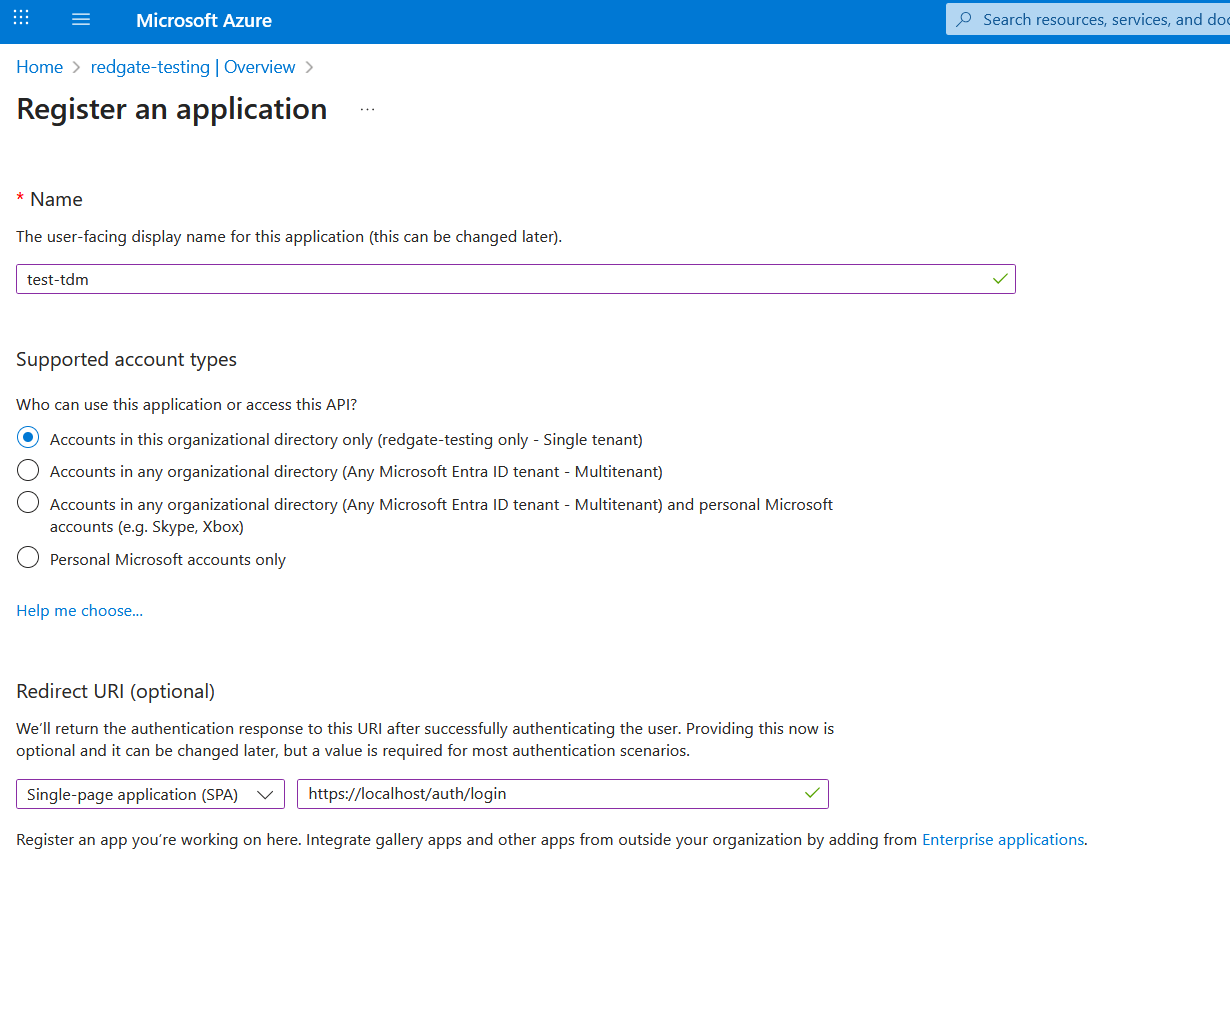
You'll need to whitelist Redirect URIs to your hosted instance. For now, you can set this to https://localhost/auth/login. This will allow you to log into the app from the local machine you're running it on. Make sure the type is set to Single-page application (SPA), not Web.
Press Register to create your app!
Adding more redirects
As mentioned earlier, you need to whitelist Redirect URIs to your hosted instance. If you don't, you'll get an error at login time.
The redirects will be wherever you're hosting the application plus "/auth/login".
These can modified in the Manage => Authentication tab of your registration.
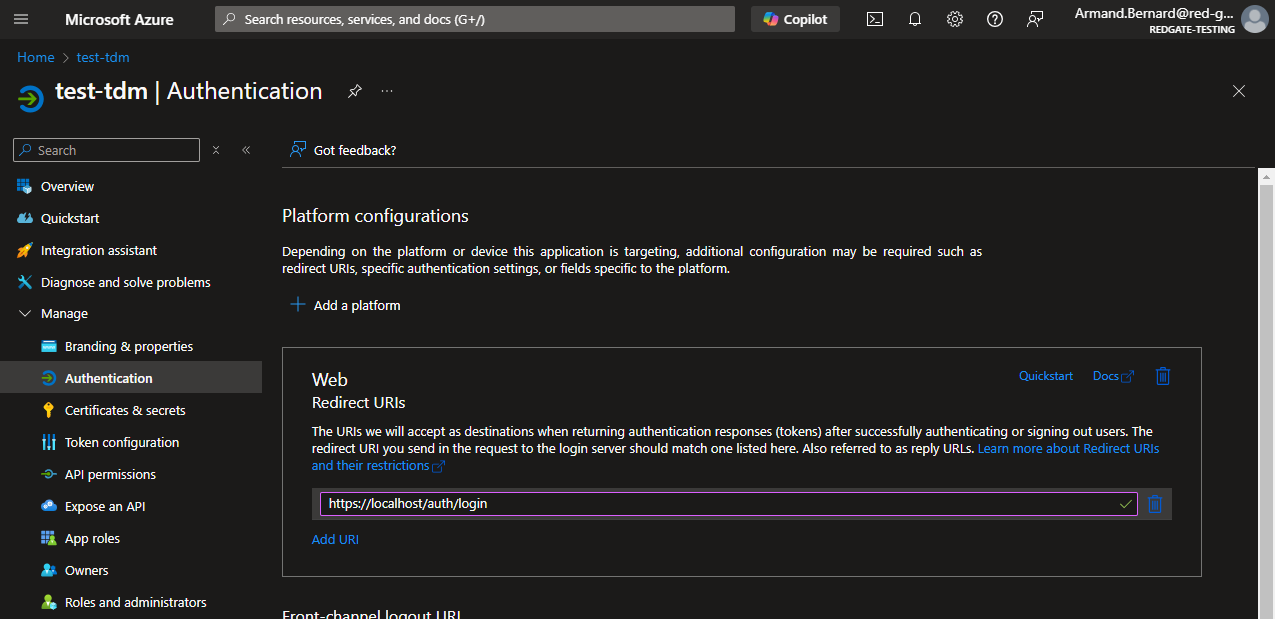
You can have several redirect URIs, for both local and remote / hosted use.
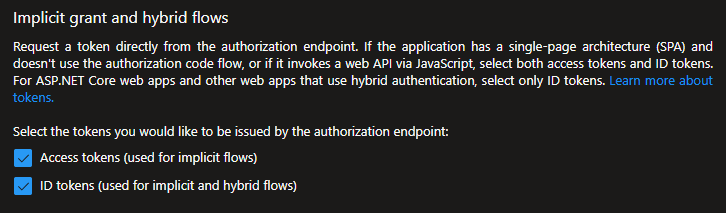
Enabling tokens
Access tokens and ID tokens need to be enabled. You can do so here in the Manage => Authentication tab:
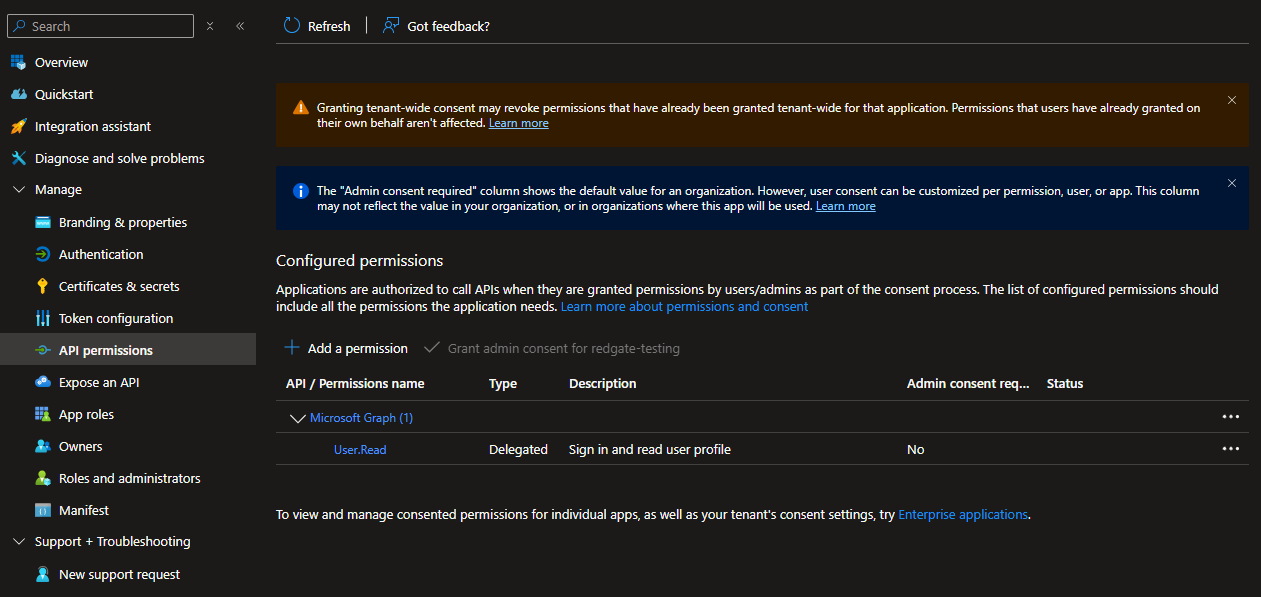
API Permissions
The authentication API needs certain granted permissions for the Hub to function correctly.
In Azure, this can be managed from the Manage => API permissions tab.
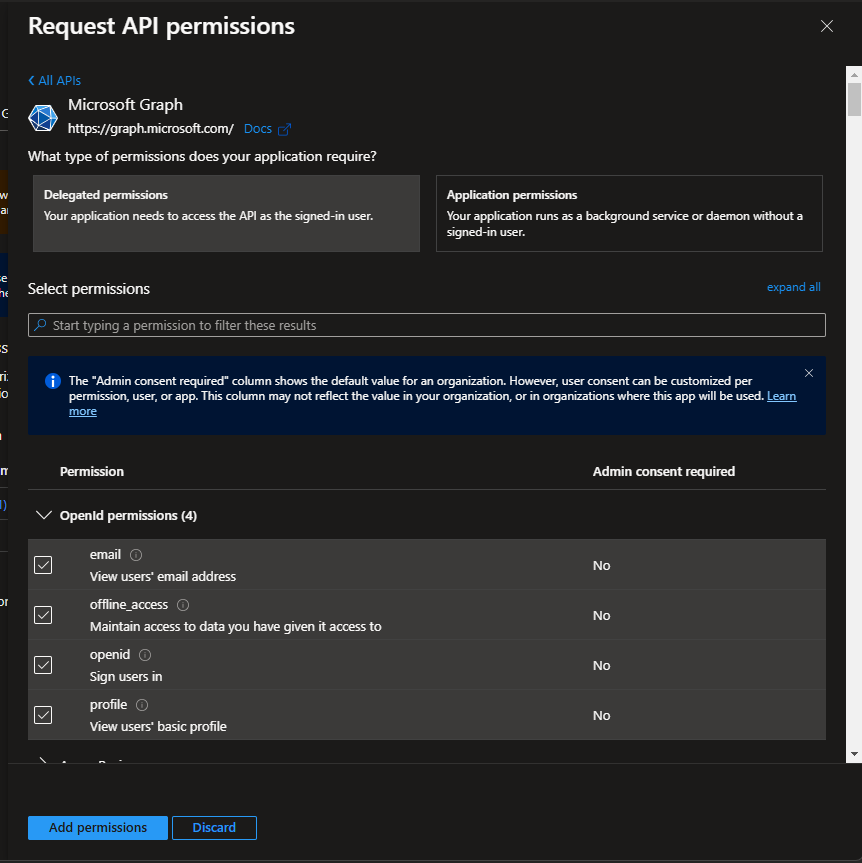
You'll need to grant the following permissions: email, offline_access, openid, profile .
On Azure, this is done by:
- Clicking the Add a permission button
- Click Microsoft Graph
- Click Delegated permissions
- Clicking the checkboxes for each permission you need
- Confirming with Add permissions at the bottom of the form.
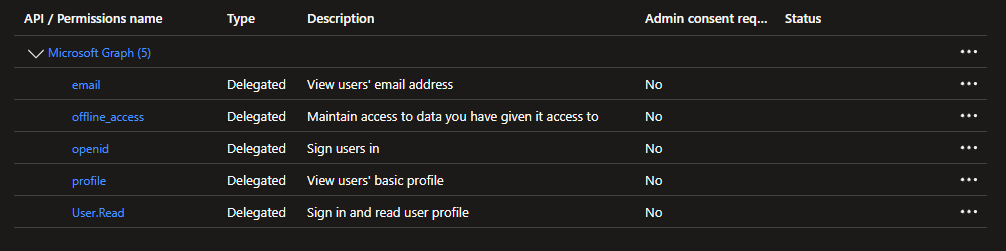
At the end, your permissions should look something like this:
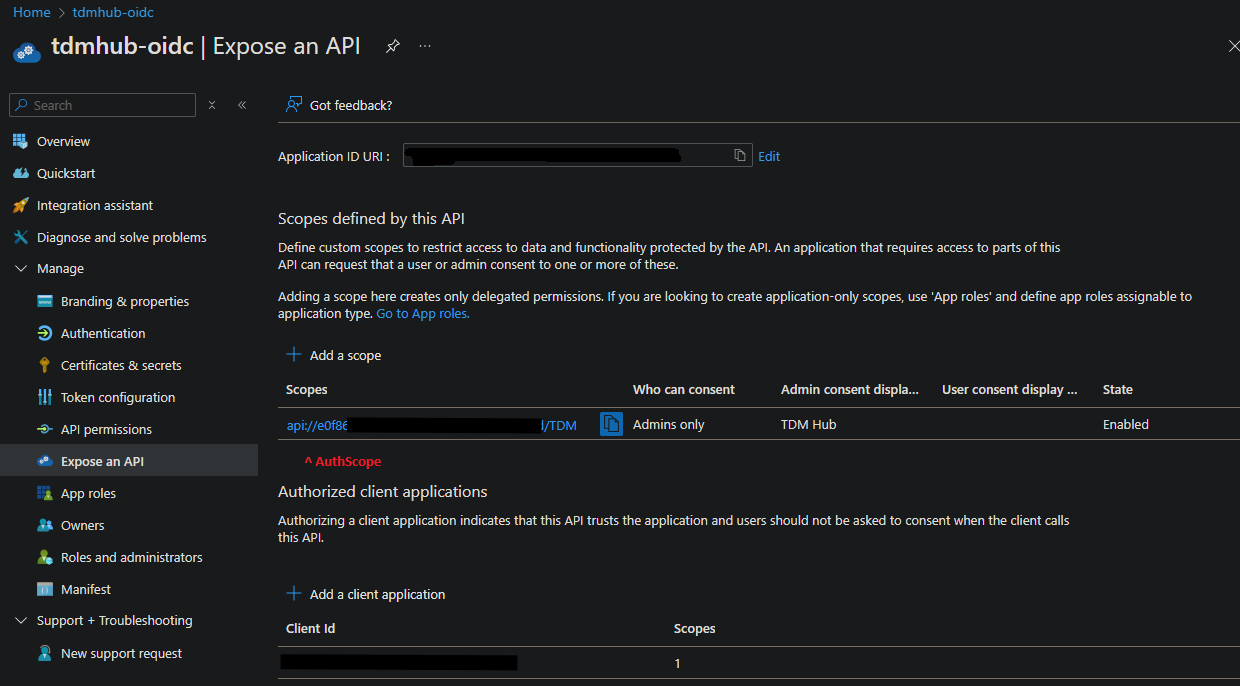
Exposing the API
You'll need to expose the API for your TDM Hub instance.
This can be done in Manage => Expose an API
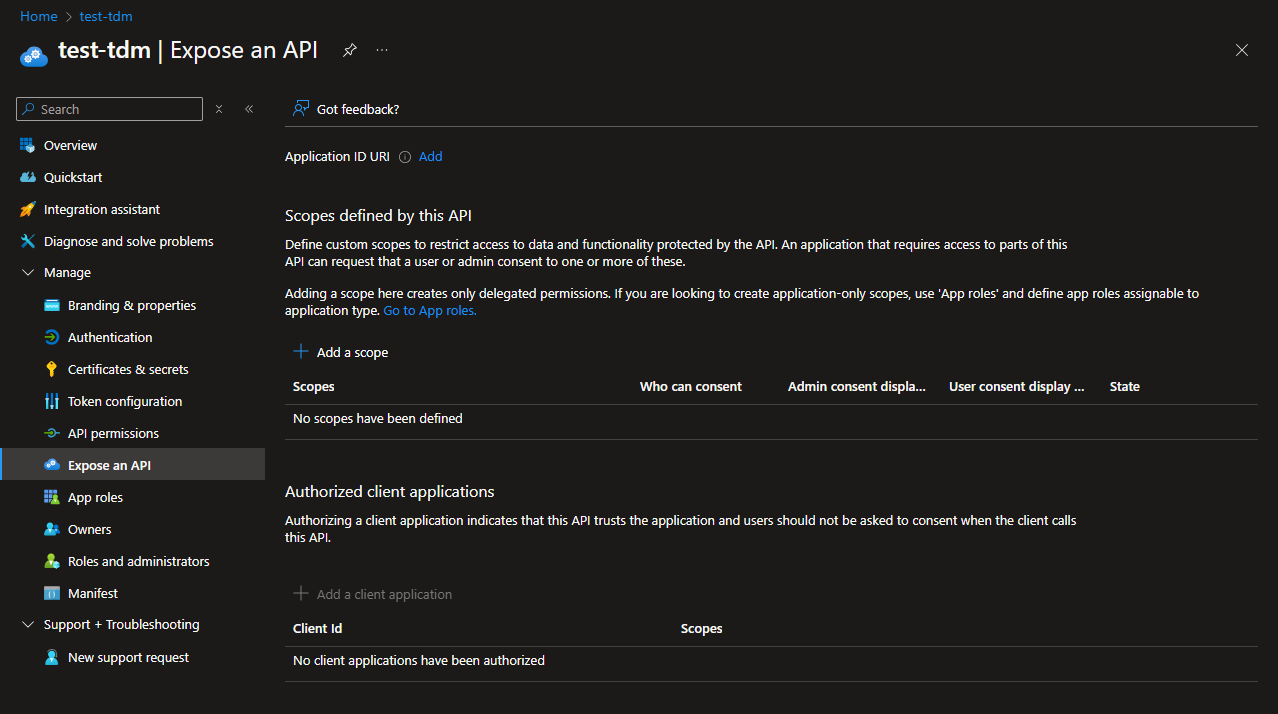
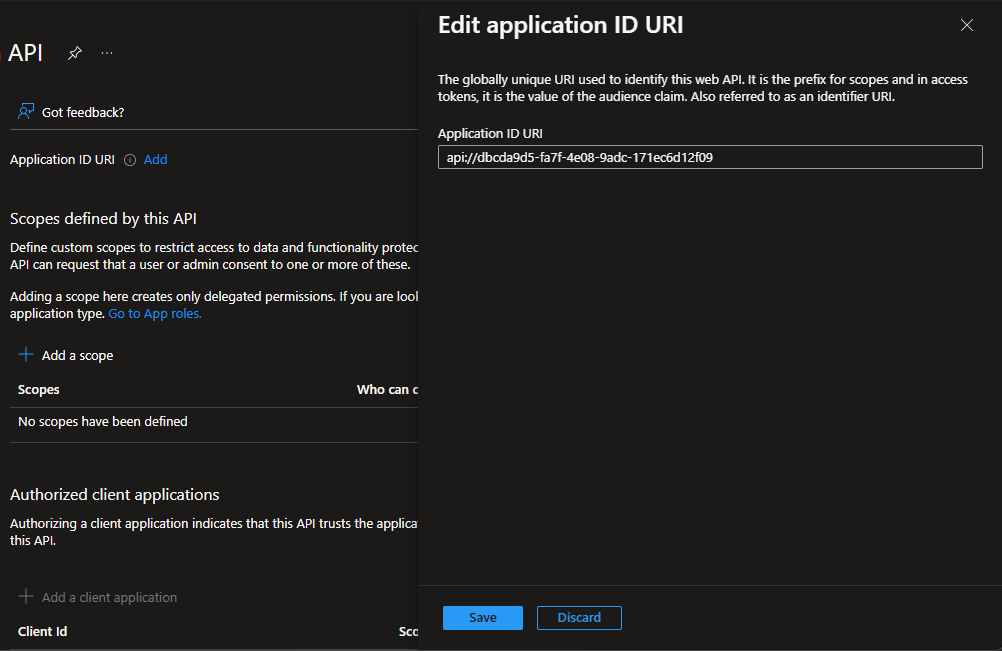
Application ID URI
First, click Add next to Application ID URI.
The defaults should be fine in this form. Click Save.
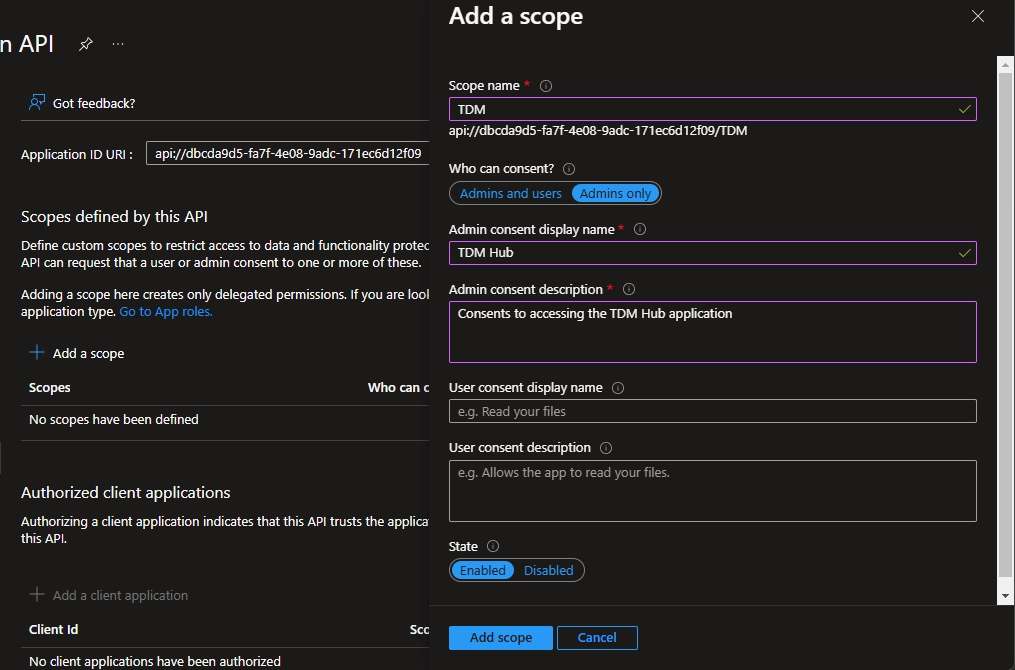
Scope
Then, add a Scope, for example "TDM".
This is the scope you'll set in the AuthScope parameter in your config.yml. e.g. api://dbcda9d5-fa7f-4e08-9adc-171ec6d12f09/TDM
You can set a few of the descriptive fields in case admins need to grant access later.
Client Id
Finally, you'll need to set up a Client Id.
Click the Add a client application button. A form will open.
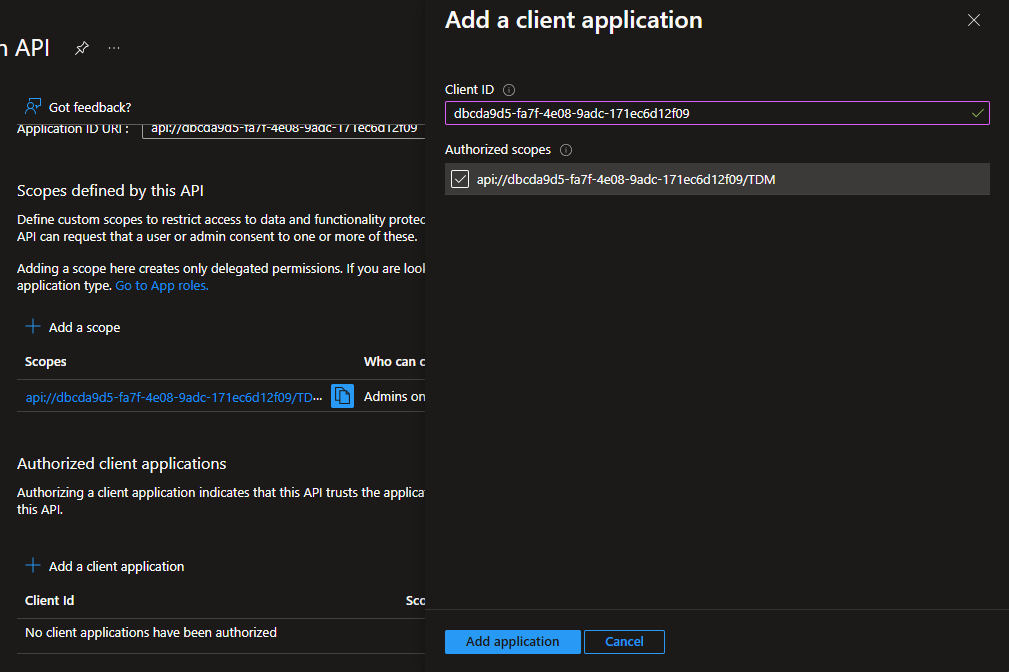
The Client ID will need to match your application's GUID, as seen in the Overview tab:
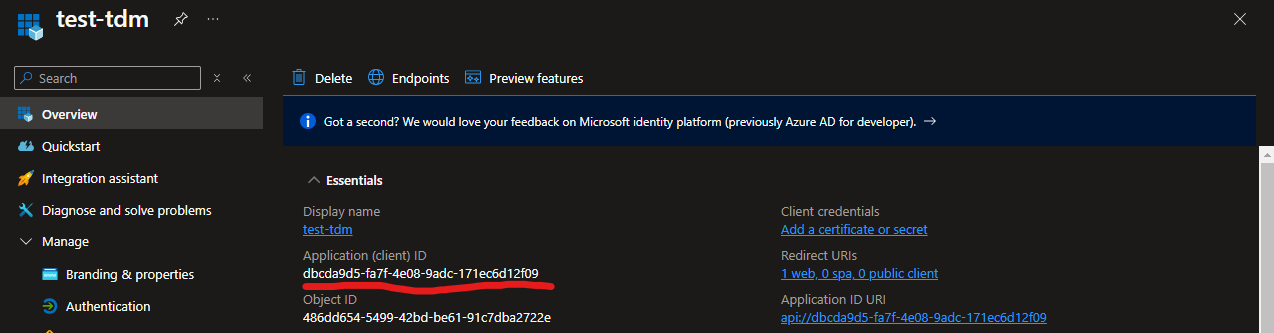
This is the value you'll use in the config.yml under AuthClientId.
You'll need to give the client application access to the scope you just created via the checkbox too.
With all this done, press Save.
Configuring tokens
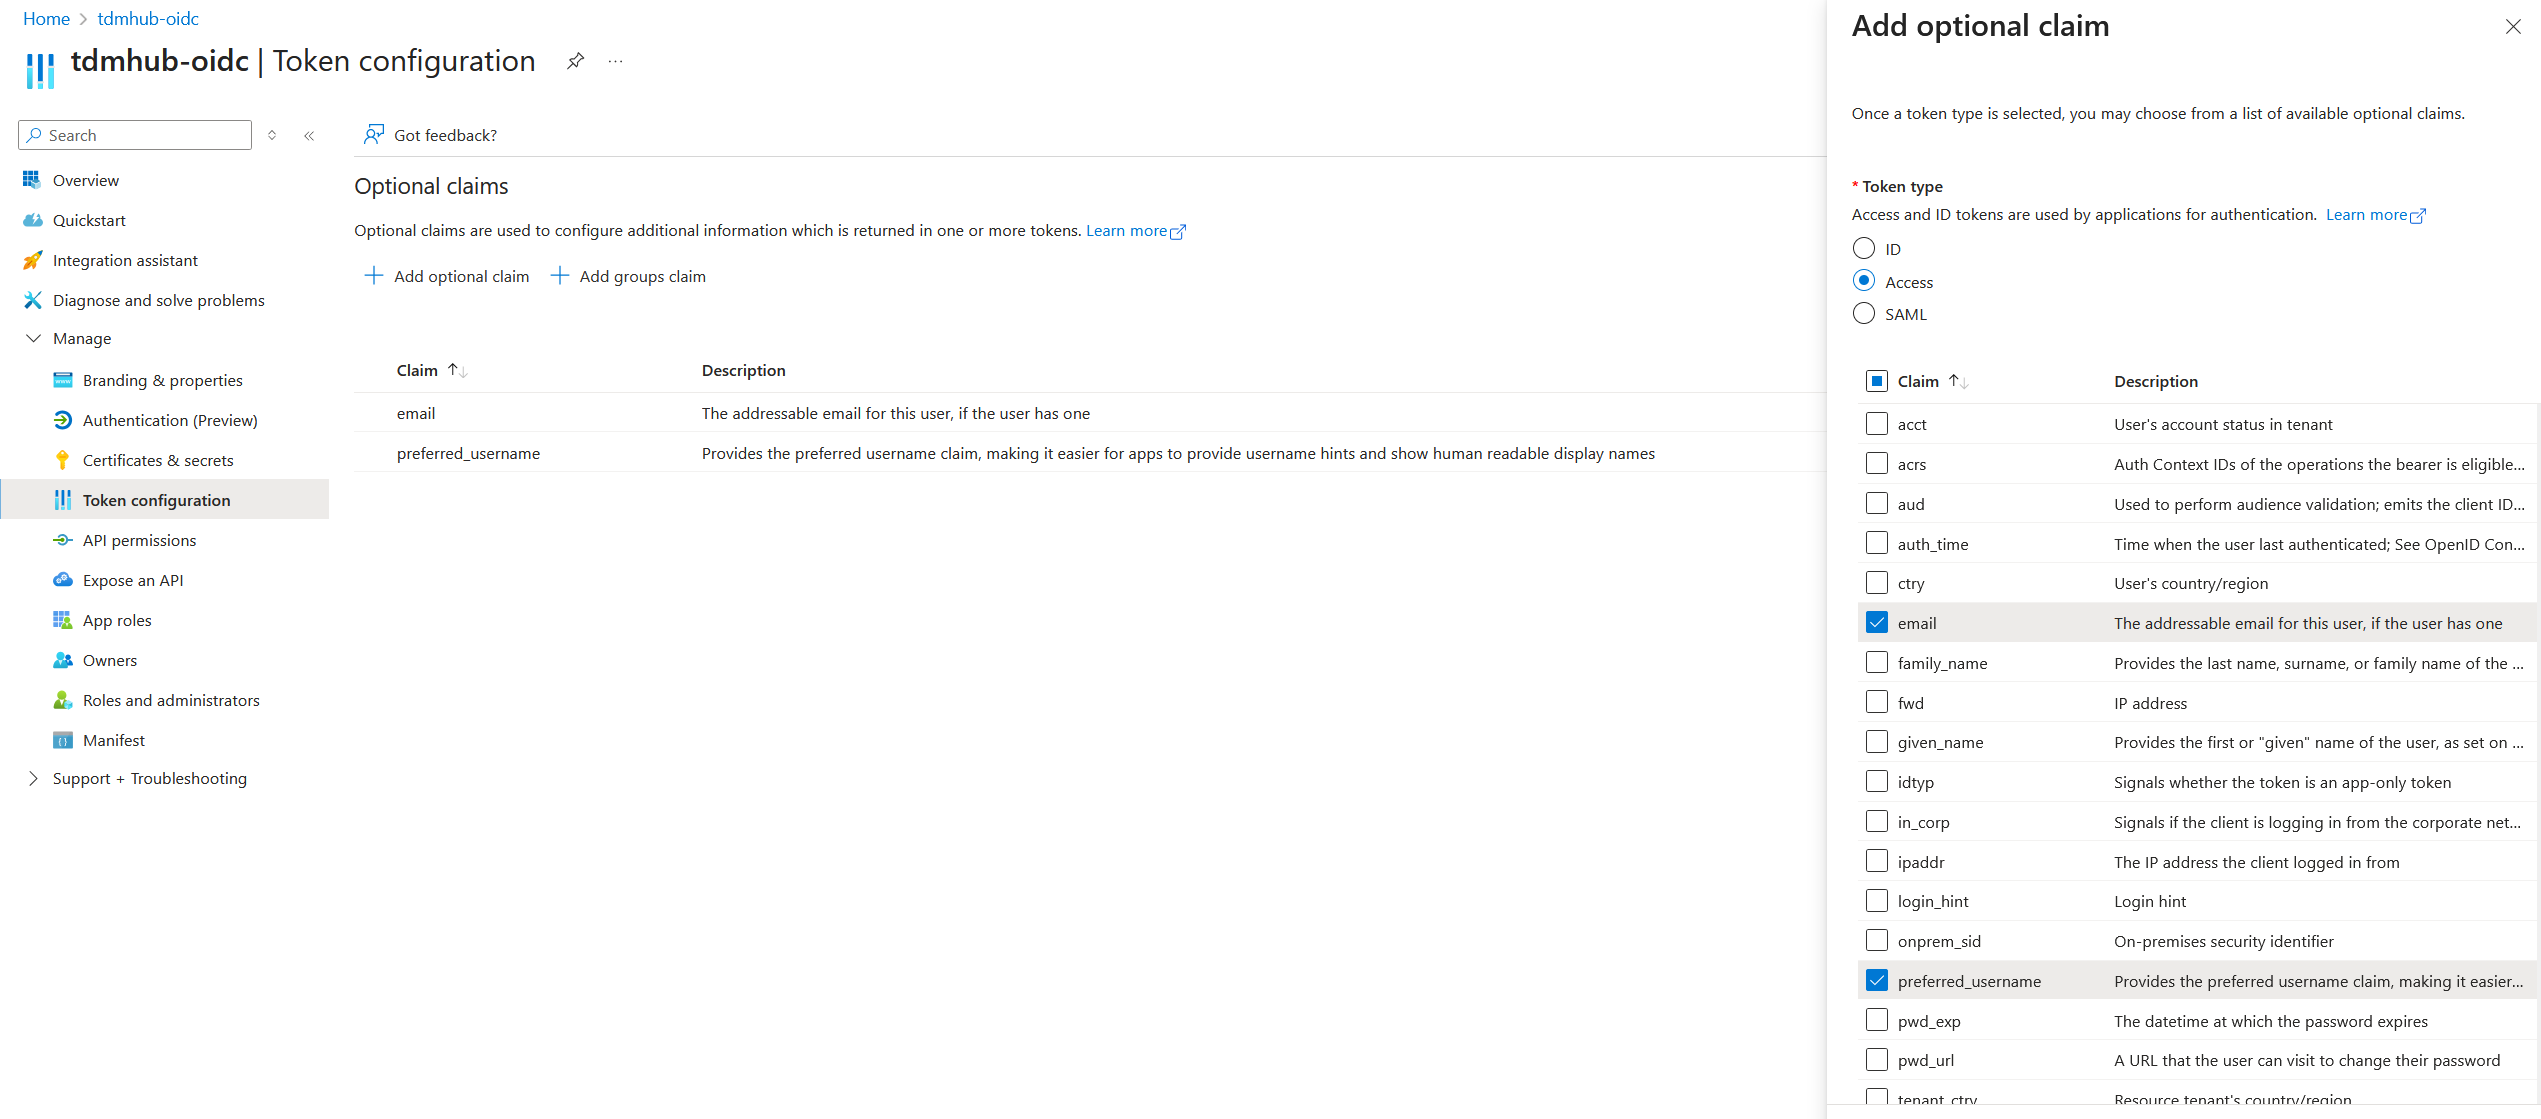
You need to configure Azure to include email in the access token.
This can be done in Manage => Token configuration
- Click Add optional claim
- In the sidebar that appears, click Access
- Check email and preferred_username in the checkboxes that appear and click Add.
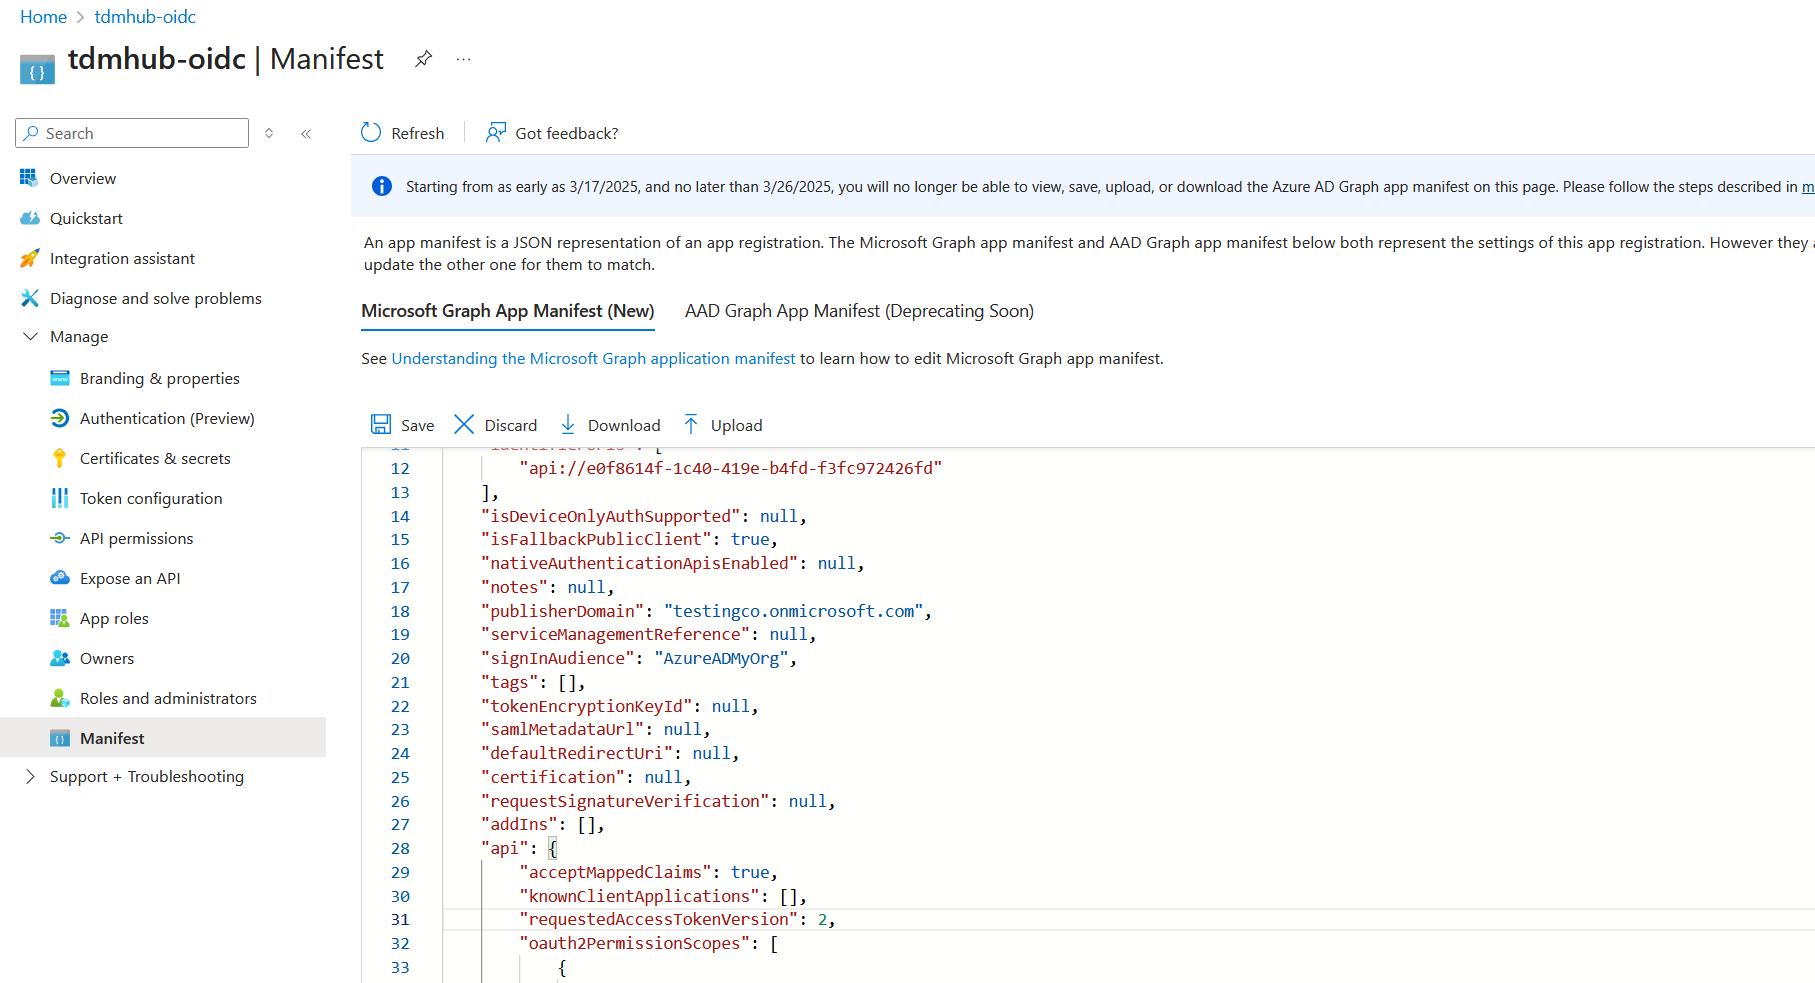
Then you need to configure Azure to use version 2 of its token format.
You can do this in Manage => Manifest.
Find the line in the textbox that comes up that says:
"requestedAccessTokenVersion": 1
and replace the 1 with a 2. Then click Save.
TDM config.yml values
This section gives you pointers to where all the values you'll need for your TDM Hub's config.yml are in your App Registration.
TDM Hub has 4 parameters you'll need to get from your Auth Provider, including:
AuthAuthorityAuthAudienceAuthClientIdAuthScope
The first three can be found on the Overview tab:
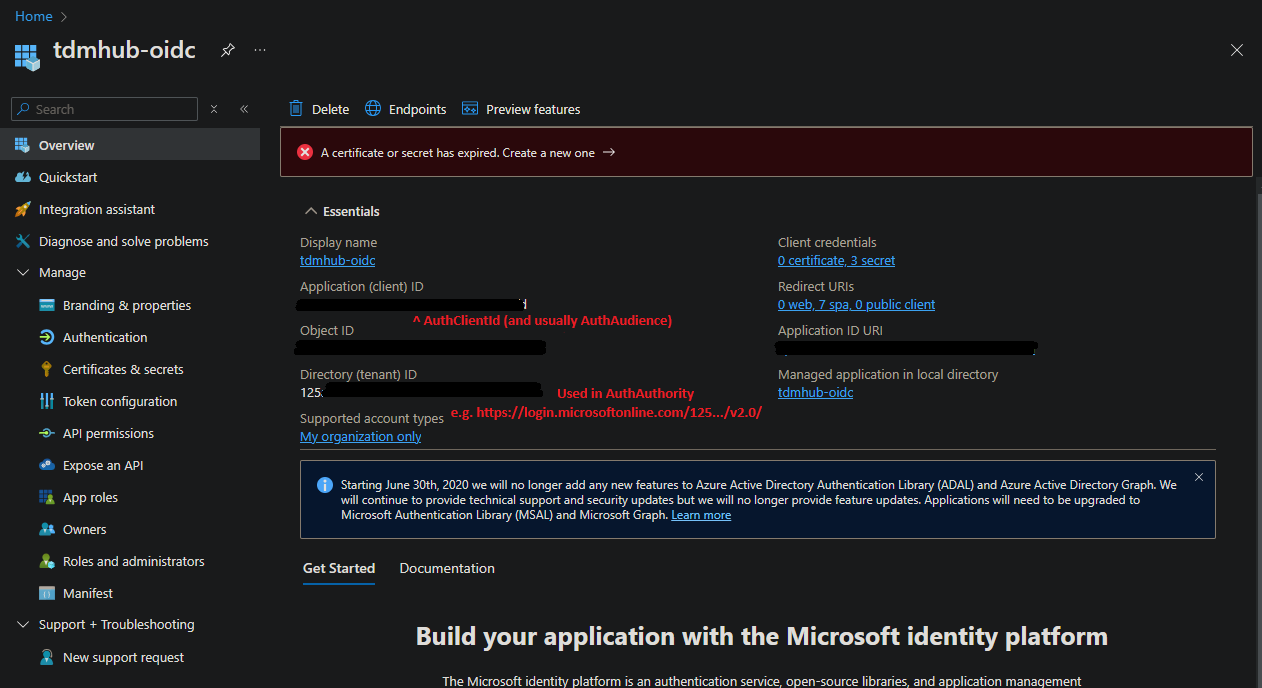
Whilst the AuthScope can be found on the Manage => Expose an API tab.
Other Auth Setup tasks
While you're here, you'll likely also want to:
- Set up some administrators for the TDM Hub
- Set up a client secret (see the "Creating a Client Secret" section) (only applies if using Clone).
This documentation contains proprietary information and is protected by copyright law.
Copyright © 2026 Red Gate Software Limited. All rights reserved


