Set up continuous integration with TeamCity
Published 10 March 2016
This example shows you how use the DLM Automation cmdlets and TeamCity's web interface to validate, test and sync your development schema.
The cmdlets that we'll use will perform the following tasks:
- Validate: Validate the schema in the source control scripts folder by checking the database can be built from scratch successfully.
- Test: Run tSQLt tests on the database schema.
- Sync: Update a test database to match the database schema.
- Package and publish: Add the development schema to a database package and publish this for later use in your deployment process.
Before you start
- Install DLM Automation on your TeamCity agent. For more information, see Installing.
- Get a copy of your database scripts folder, you can either:
- checkout a copy from your database source controlled using SQL Source Control
- generate a folder from an existing database using SQL Compare
- download and unzip WidgetShop.zip
- Place that folder into source control.
- Create a blank database that we can update.
- Create a TeamCity configuration to perform your database continous integration.
Performing Continuous Integration tasks
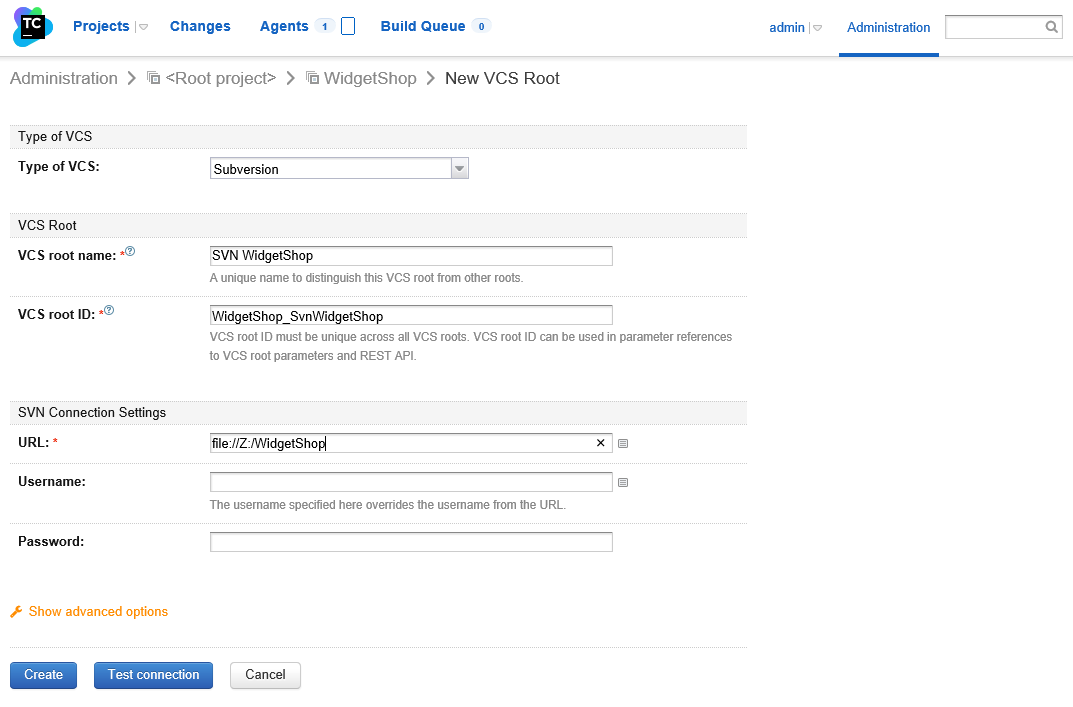
Link your TeamCity configuration to your source control from earlier. Configuring Version Control System (TeamCity Documentation).
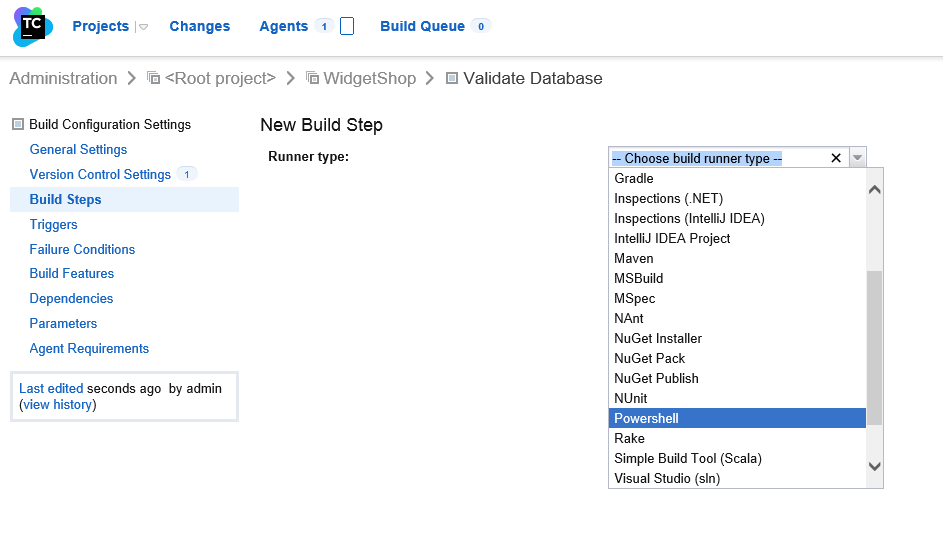
- Add a PowerShell Build Step.
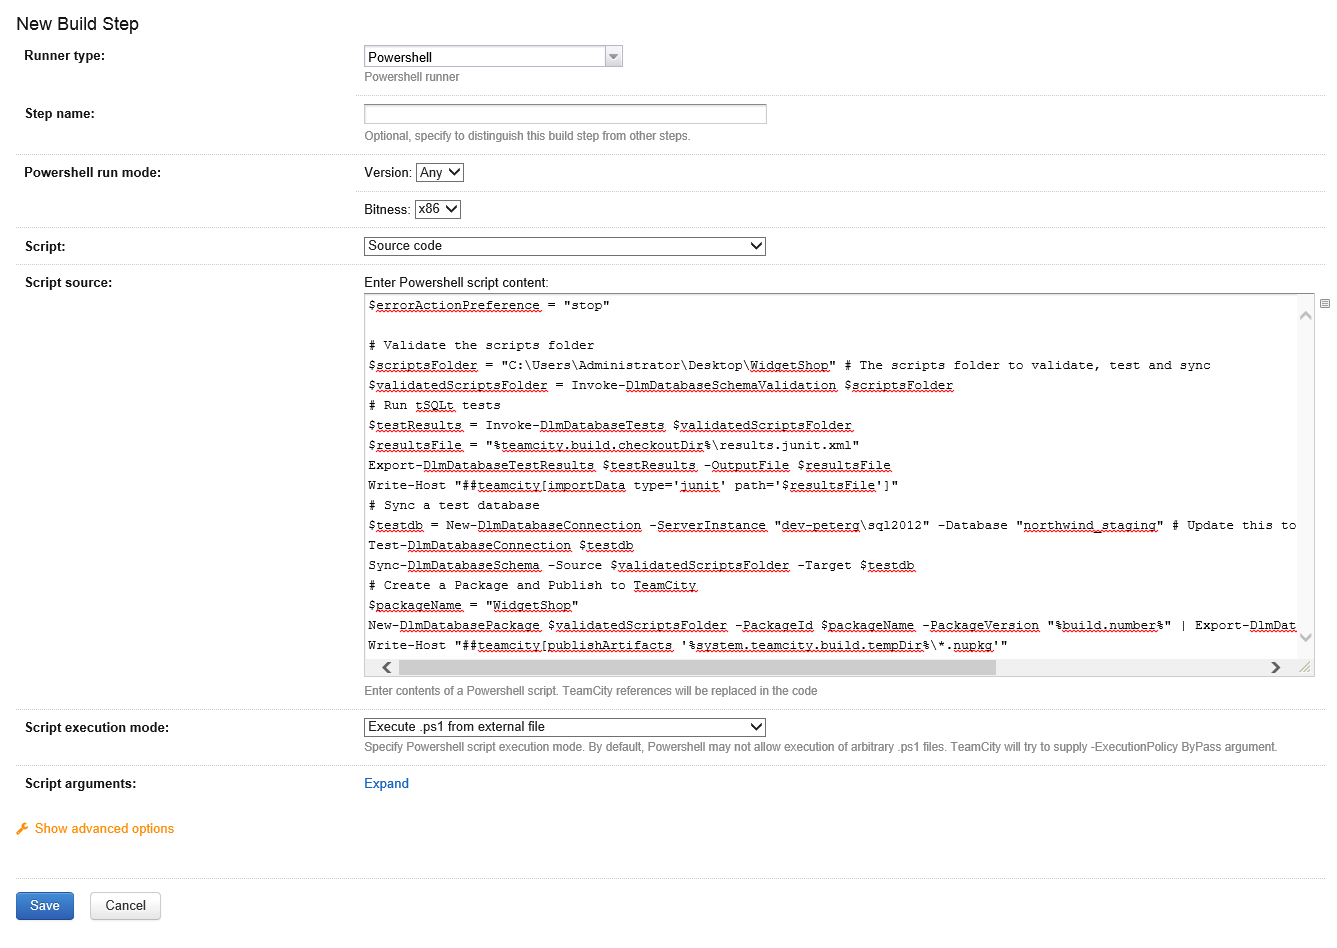
- Change Script to Source Code.
In the Script Source enter:
Validating the scripts folder
$errorActionPreference = "stop"

# Validate the scripts folder
$scriptsFolder = "%teamcity.build.checkoutDir%" # The scripts folder to validate, test and sync
$validatedScriptsFolder = Invoke-DlmDatabaseSchemaValidation $scriptsFolder
- This will check that your scripts folder is valid and can be used to produce a database.
Add the following to the end of the script:
Test the scripts folder
# Run tSQLt tests
$testResults = Invoke-DlmDatabaseTests $validatedScriptsFolder
$resultsFile = "%teamcity.build.checkoutDir%\results.junit.xml"
Export-DlmDatabaseTestResults $testResults -OutputFile $resultsFile
Write-Host "##teamcity[importData type='junit' path='$resultsFile']"
- This will run any tests in your database and publish the results to TeamCity.
Add these line to the end of your script:
Syncing to a test database
# Sync a test database
$testdb = New-DlmDatabaseConnection -ServerInstance ".\sql2012" -Database "TestDatabase" # Update this to use the blank database you created earlier
Test-DlmDatabaseConnection $testdb
Sync-DlmDatabaseSchema -Source $validatedScriptsFolder -Target $testdb
Update the connection details to the blank database you created earlier. If using SQL Server Authentication, add the desired credentials using the -Username and -Password parameters.
- This will update the test database to match your scripts folder.
Finally add this to the end of the script:
Creating a package
# Create a Package and Publish to TeamCity
$packageName = "WidgetShop"
New-DlmDatabasePackage $validatedScriptsFolder -PackageId $packageName -PackageVersion "%build.number%" | Export-DlmDatabasePackage -Path "%system.teamcity.build.tempDir%"
Write-Host "##teamcity[publishArtifacts '%system.teamcity.build.tempDir%\*.nupkg'"
- This will publish a package containing your database schema to TeamCity. If you have enabled TeamCity's NuGet server it will appear there, otherwise you can use a NuGet Publish step to upload to an external feed.
- The full script will look like:
- Click Save. You can now trigger a build and review your results.
This documentation contains proprietary information and is protected by copyright law.
Copyright © 2026 Red Gate Software Limited. All rights reserved


