How do I synchronize changes to an item with no logical join?
Published 06 January 2020
How do I synchronize changes to an item which is in more than one table when there’s no logical join condition between them? What if the same content is in multiple databases?
Setting the stage
Sometimes we face the challenge where data content is, effectively, denormalized across tables in one or more databases in a server. If we’re “lucky” there’s a logical join condition (e.g. a customer_id or person_id) that lets us use Data Masker’s Table-to-Table synchronization technique to ripple the changes across tables in the database(s). Other times, we’re not quite so lucky and we’re left with no other option but to use the item itself as the join operator. We’ll be updating the column with new values, replacing any row which contains a specific value with a specific replacement using the “old value” as the join operator. In pseudo-code “Update customer_table set customer_lastname to “new” customer_lastname where existing customer_lastname is equal to the “old” customer_lastname”.
Whilst this might seem a straight-forward approach there are several steps to be taken to achieve this objective:
- Create what’s effectively a staging table where we will store the current (original) value and its planned replacement
- Insert into that table the distinct current values from the source (or driver) table
- Select from other tables those column values which do not already exist in the staging table as derived from the driver table. Let’s call them “orphans” for now. Insert these into the staging table
- Provide the replacement (new) values on a one-for-one basis
- Update the table(s) with the new values based upon the old (current) values
- Drop the staging table once the process has completed. After all, it contains live data!
Fortunately, if we are using Data Masker we don’t have to create SQL scripts to achieve these objectives since there’s an inbuilt technique to do it for us called the “Synchronization Manager (Sync Manager)”. This facility is easy to set up and comprehensive in its functionality.
For the purposes of this Tech Tip we’ll be using the core Data Masker demo database structures, implemented in two databases, so that we can show how to span the Sync Manager across them.
The starting masking set looks like:

…and if we use the Column Finder to identify where our item of interest (which, in this case, is a last name) is in the databases we’ll see:
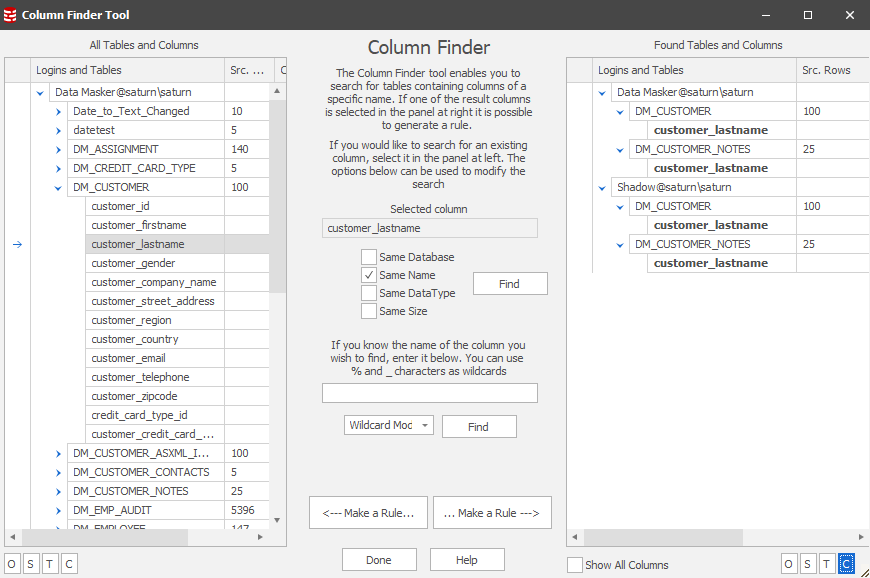
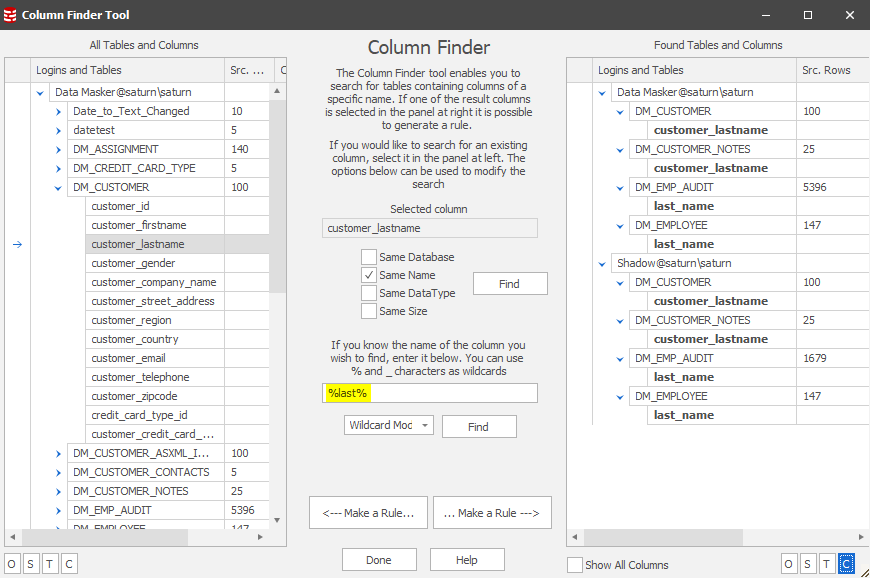
In this case we’re searching based upon a “Same Name” scenario and we find the four common items across the two databases. In practice, column naming conventions are not always consistent, so it pays to use broader (wildcard) searches as part of the discovery process. Using the lower middle section of the Column Finder we can expand our search and, in this case, will find more synchronization candidates:
Our masking plan states that each of these items must be masked in a consistent manner. Wherever there is a “Smith” we want it to be replaced throughout the databases with a random value, let’s say “Jones”. In this Tech Tip we’ll focus on displaying the data content of the last names in the DM_CUSTOMER and DM_CUSTOMER_NOTES tables in both databases and we’ll assume a consistency with the other two tables in each database. Our starting data points are therefore:
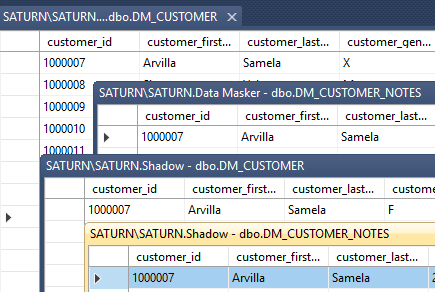
…and we’ll focus our specific attention upon “Avilla Samela”. Remember also that for the sake of this Tech Tip we’ll disregard the customer_id as a join condition.
Building the Rule
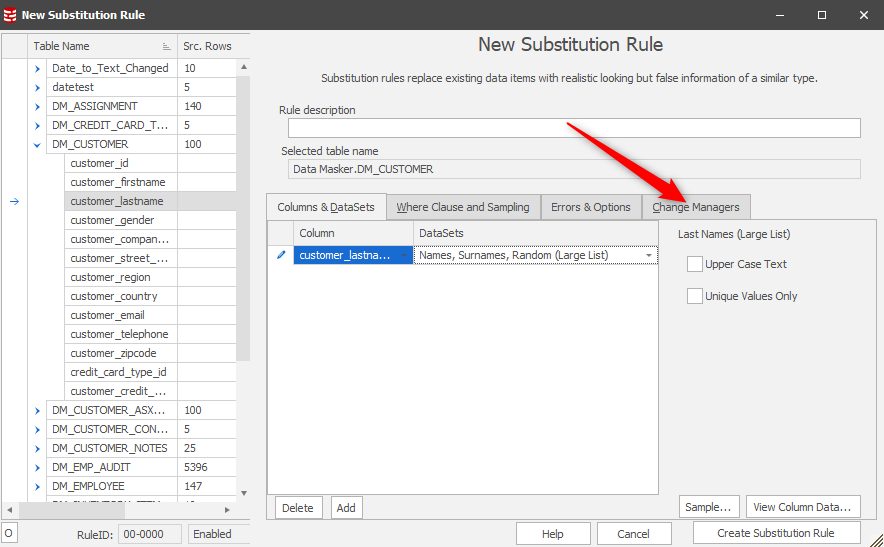
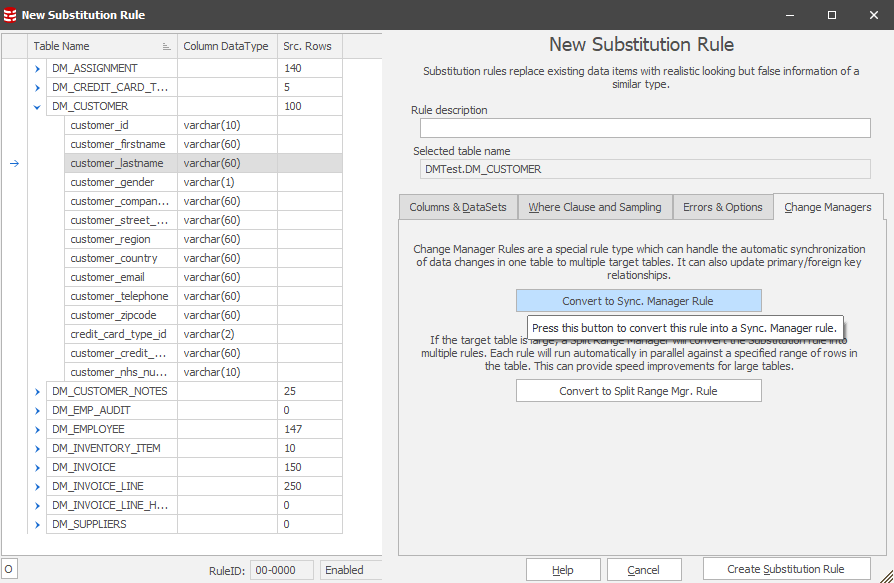
Our first step is to decide upon our starting table. Usually it’s the one with the most rows, typically what would be classed as a “Master” table. The advantage to us in choosing this as the first (driver) table is the chance that it will have the most distinct values as the source for the Sync Manager staging table. In this case we’ll choose the Data Masker database and the DM_CUSTOMER/CUSTOMER_LASTNAME COLUMN. It’s a simple substitution, replace the family name with a new one. All straight forward, we’ve done it, probably many times, before!
This time, however, we want to invoke a Change Manager to start the Sync process:
Once in this context, you’ll see:
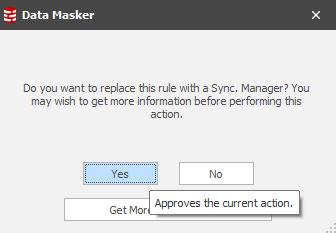
Choose this option and you’ll have the confirmation:
This simple sequence commands Data Masker to generate all the rules which are required to support the processes flow described earlier. After this one step, the Rules in Set tab will now display:
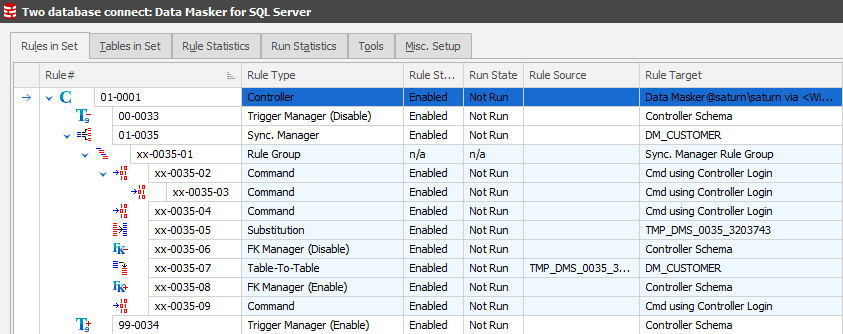
As with any other rule in Data Masker, these rules can be edited so that you can see exactly what they are doing. Only certain rules can be changed at this point, specifically the Table-to-Table rule(s).
This process achieves the consistent replacement of each distinct value in the table. But what about the other tables?
Bringing the other tables into the Sync process
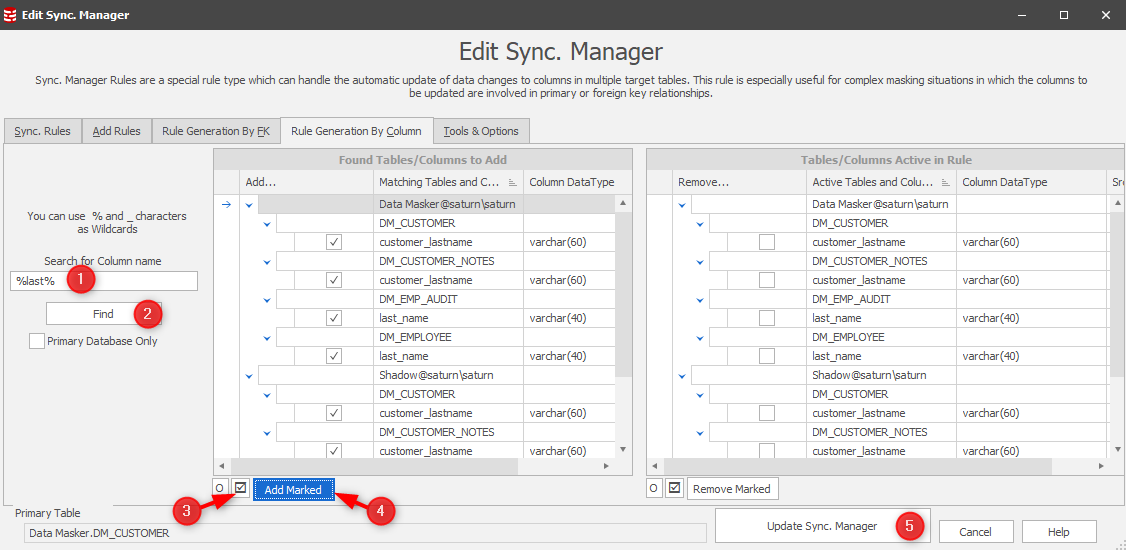
Earlier in this tip we used the Column Finder to find our columns to mask. Now that we have our core Sync Manager rule in place we can now edit it and extend its scope to these columns:
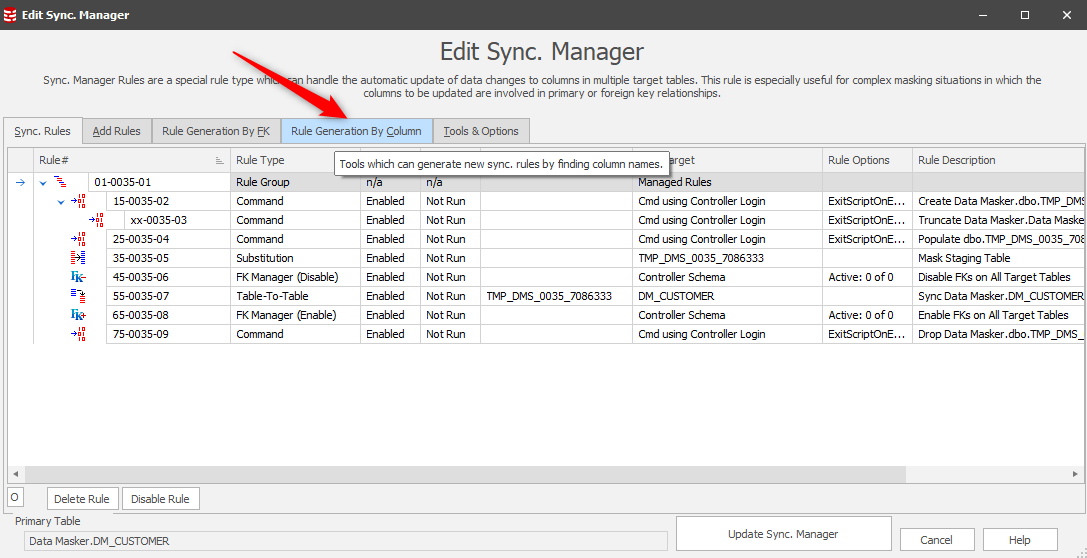
This leads us to a panel where our workflow is to:
- Specify the same wildcard search
- Find them
- Choose them all for inclusion (note: you can selectively include if non-qualifying items are discovered)
- Add them into the process after which we’ll see them in the inclusion list on the right
- Update the Sync Manager rule
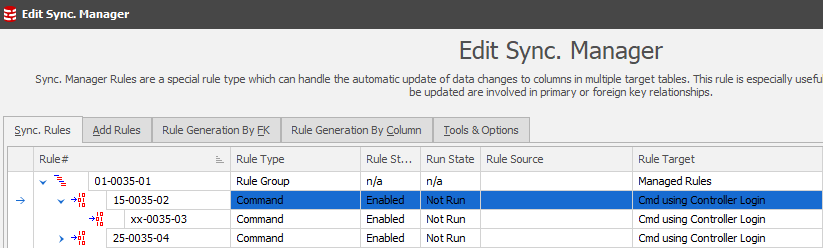
The Sync Manager rule will now display all the rules required to discover the orphan column content in the additional tables as well as those required to sync the new values back into these tables:
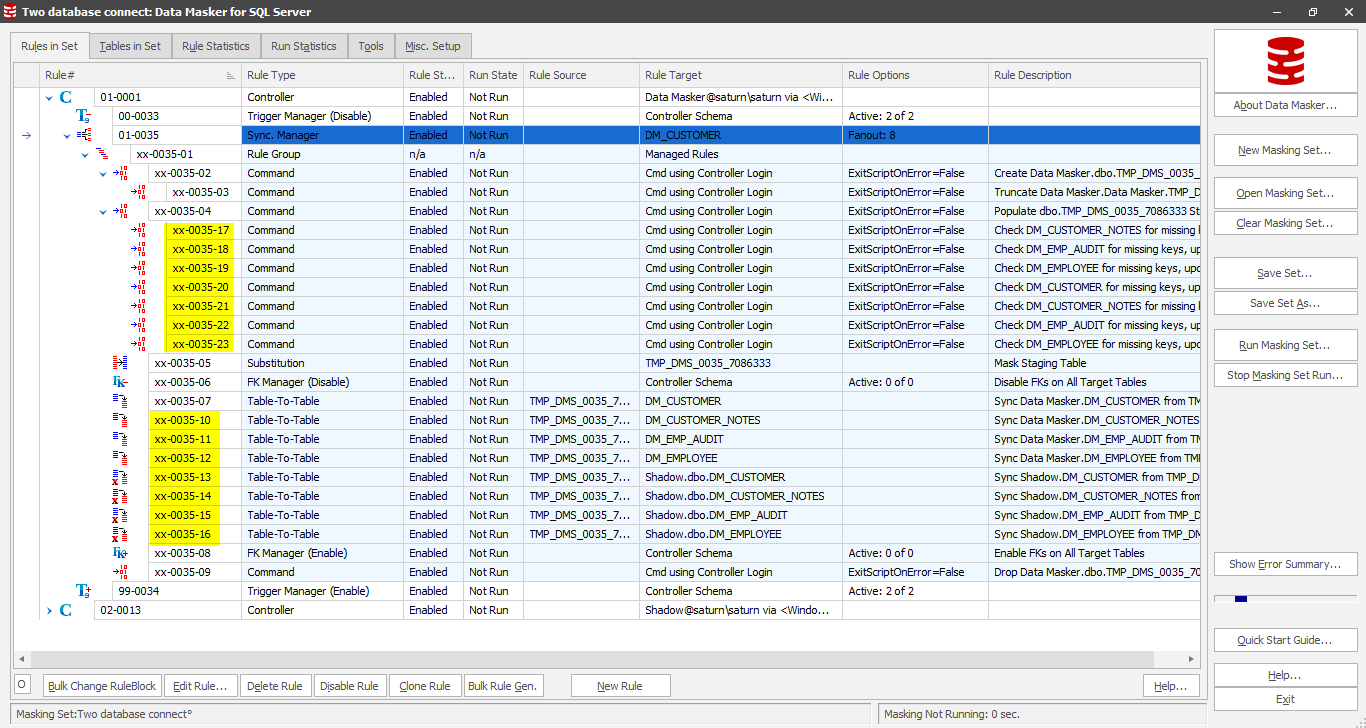
This implements the work flow described on the first page of this tip. It all looks good so far but if we run this rule there may be performance/runtime implications!!!
As with all applications and utilities there are factors which affect the performance of a set of procedures. A number of Tech Tips exist to help you use Data Masker, and are available here, one of which focuses upon Table-to-Table rules.
In this case we’re updating column content in a table where there is no other join condition other than the item itself. It follows, therefore, that we need to consider how the optimizer will approach this challenge and so we focus upon the availability of indexes to help us achieve our objectives.
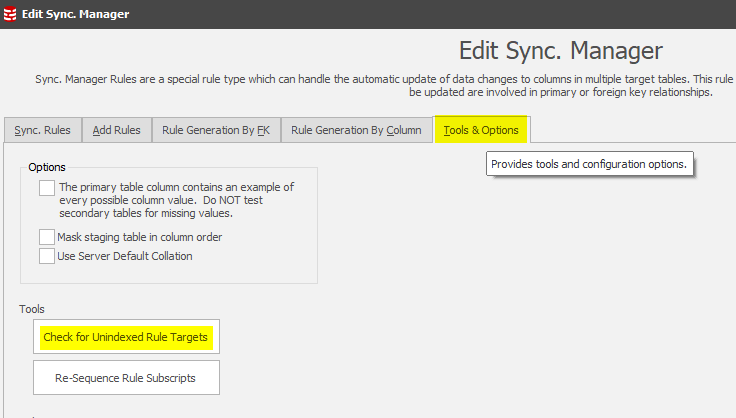
The Sync Manager provides the answers to this question by using a tool which will check all of the rules to determine whether the target table is being updated without the benefit of an index:
In this case, none of the target columns are indexed:
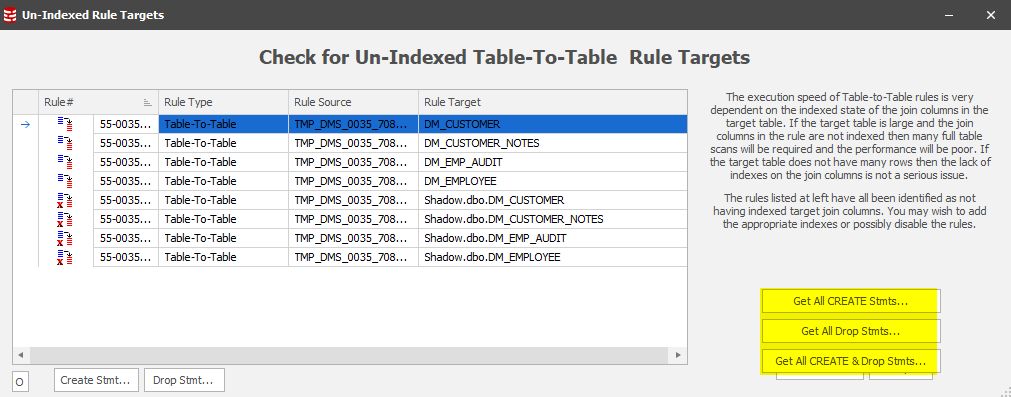
Common sense says that the first thing we should consider is the row-counts. If they’re low, a full scan / serial or sequential read on the target table won’t take too long so we can test-run the rule and confirm its success. Tables of any significant row-count, however, may need an index to help optimize performance.
In the screen-shot above, you’ll see the highlighted options to generate the create and drop statements for indexes which will support the sync operation. With these statements in hand we can quickly build rules which will pre- and post- process the Sync Manager. Choose the “Get all CREATE & Drop Stmts…” option:

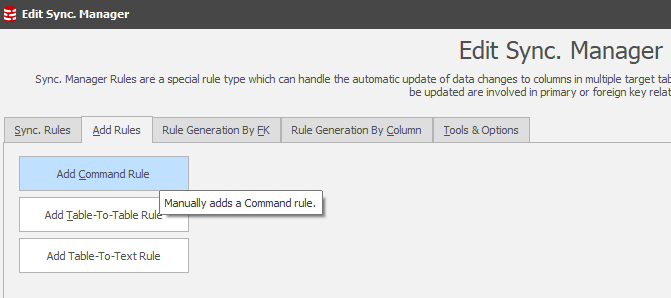
CTL-A / CTL-C the panel content. Our next step is to create Data Masker Command Rules within the Sync Manager to create and drop the indexes at the appropriate times. Close the index management panels and return to the Sync Manager main page. In this, you’ll find the option to Add Rules and it’s a “Command Rule” which we want to generate.
Note: Before you choose this option you should remember that Data Masker builds new rules in the Rule Block within which you are currently focused. This holds true for the Sync Manager as well. Since the objective is to create a rule which will act as a Pre-Processor, located in an early-running / low order rule block, it’s important to position accordingly:
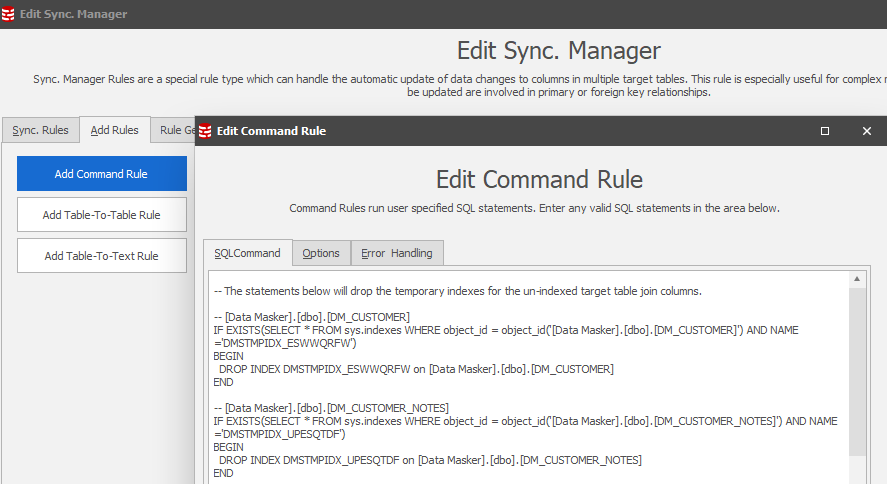
Once in this position the “Add Rules” tab is chosen and “Add Command Rule” is selected:
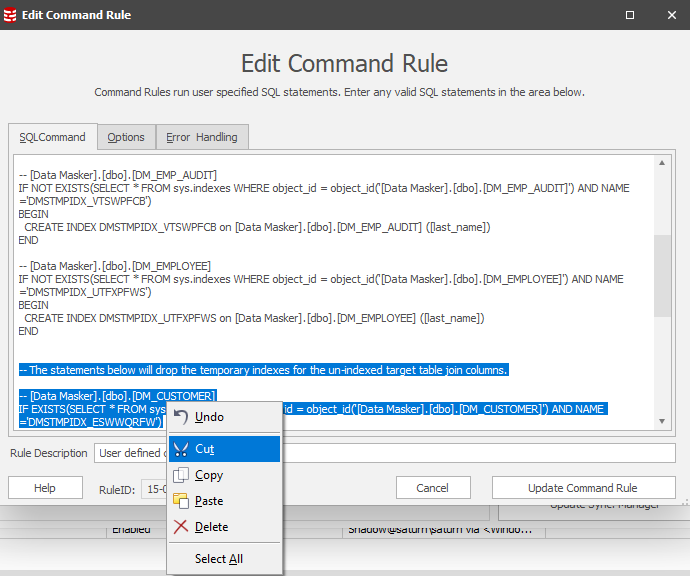
From here, it’s a simple paste operation of the SQL Statements captured in the index generation script. It’s important to remember, however, that these statements create AND drop so the latter statements should be cut:
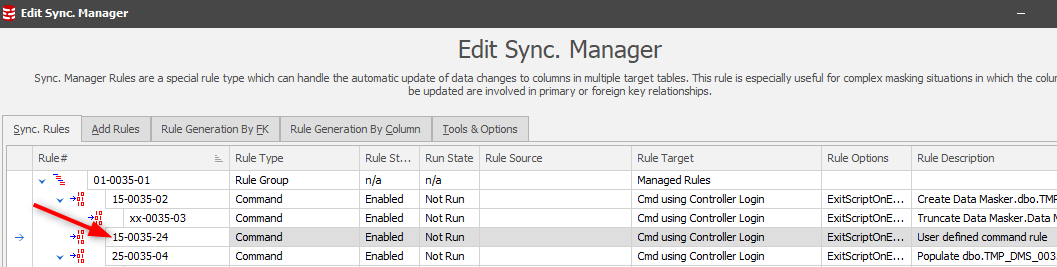
Update the Command Rule and it will position in the running order:
Data Masker does not need to know of the presence of this index (it’s the Optimizer which will use it) so there is no need to refresh the table and index metadata in the masking set.
In reviewing the work flow the Sync Manager now creates the indexes in support of the operation so it’s now important to drop them at the appropriate moment – the end of the work flow.
The last rule in the Sync Manager is that which drops the staging table and it’s located in rule block “75” by default. This is the Post-Processing rule block and is an ideal rule block to create the Command Rule which drops the indexes created in the Pre-Processing section of the rule. Locate on this rule and repeat the Add Rules process, this time pasting in the index drop statements which will be in the clipboard:
This will result the new Command Rule in the appropriate place in the work flow:
![]()
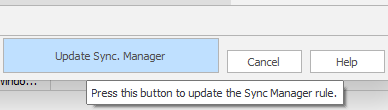
Update the Sync Manager rule:
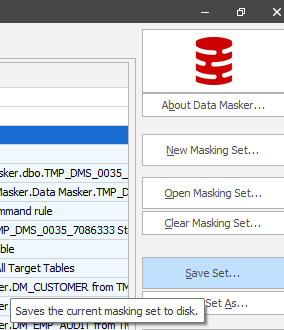
Now is a very good time to “Save Masking Set”:
Test running the rule
The best tab to monitor rule execution is the Rule Statistics tab. Switch to this, locate on the rule and expand each of the elements to see the work flow. Right Mouse Button / Run rule. You’ll then see the execution and corresponding stats displayed:
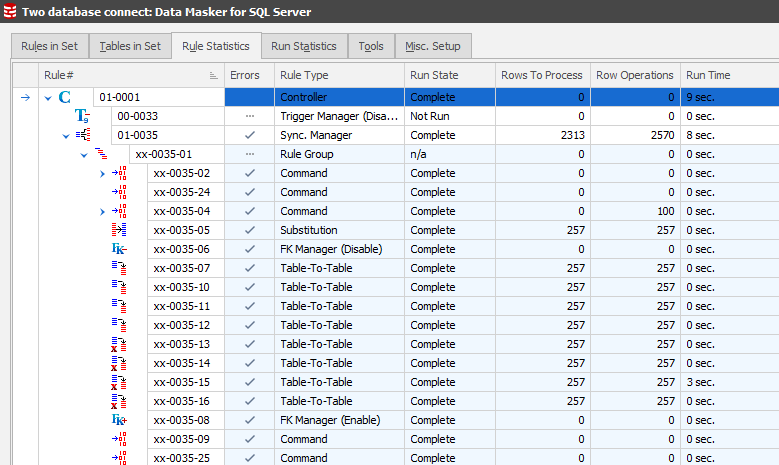
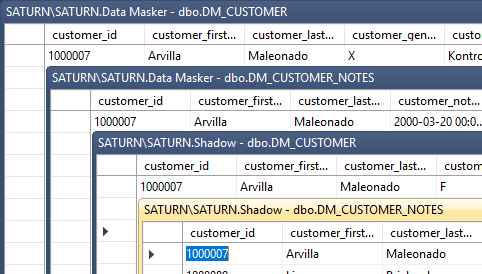
The result is that our focus client “Arvilla Samela” is now “Arvilla Maleonado” throughout the two databases:
This Tech Tip is published as part of a group of tips designed to help you get the most from Redgate’s Data Masker. Other tips which may be of help when addressing this topic are:
Adding more database or schema connections (Rule Controllers) to an existing masking set
Can I make a Substitution rule faster?
Can I make a Table-to-Table rule faster?
How and where does Data Masker report when you run a masking set?
About Command Line Automation
This documentation contains proprietary information and is protected by copyright law.
Copyright © 2026 Red Gate Software Limited. All rights reserved


