6.1 Deploying Your Changes via GitHub Actions
Published 06 September 2024
Now that you've committed your migration scripts to the hosted repository, it's time to set up continuous integration and deployment (CI/CD) using GitHub Actions. This setup allows your database changes to be automatically applied across all environments, ensuring a smooth deployment process.
Tip: These YAML pipelines read from the Flyway project to know the locations of the target databases! When provisioning your databases, we updated the connections in Flyway Desktop to point to the newly created databases. If the pipeline encounters issues finding a database, double-check that your Flyway project has the correct and working connections to these databases. Refer back to Provisioning your Databases for more details and troubleshooting tips.
Step-by-Step Guide
Navigate to GitHub Actions
- Go to your GitHub repository and click on Actions in the top menu. You will likely need to enable actions on the repository before carrying on, as seen below.
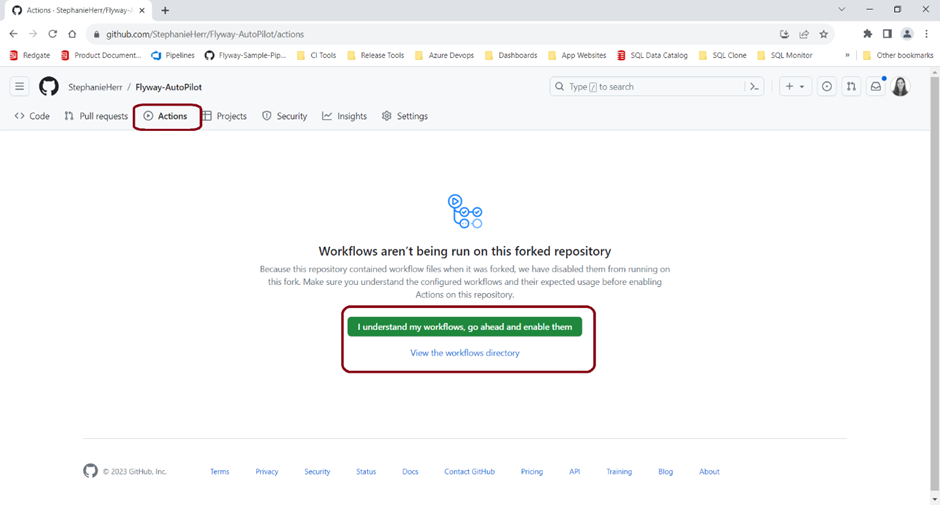
- Go to your GitHub repository and click on Actions in the top menu. You will likely need to enable actions on the repository before carrying on, as seen below.
Locate the Workflow Files
- The repository is already set up with multiple workflows designed for different operating systems.
- In the repository’s file structure, navigate to the
.github/workflowsfolder. Inside, you will find several YAML scripts clearly labeled with an OS suffix based on the operating system of your self-hosted runner (e.g.,windows.yml,linux.yml).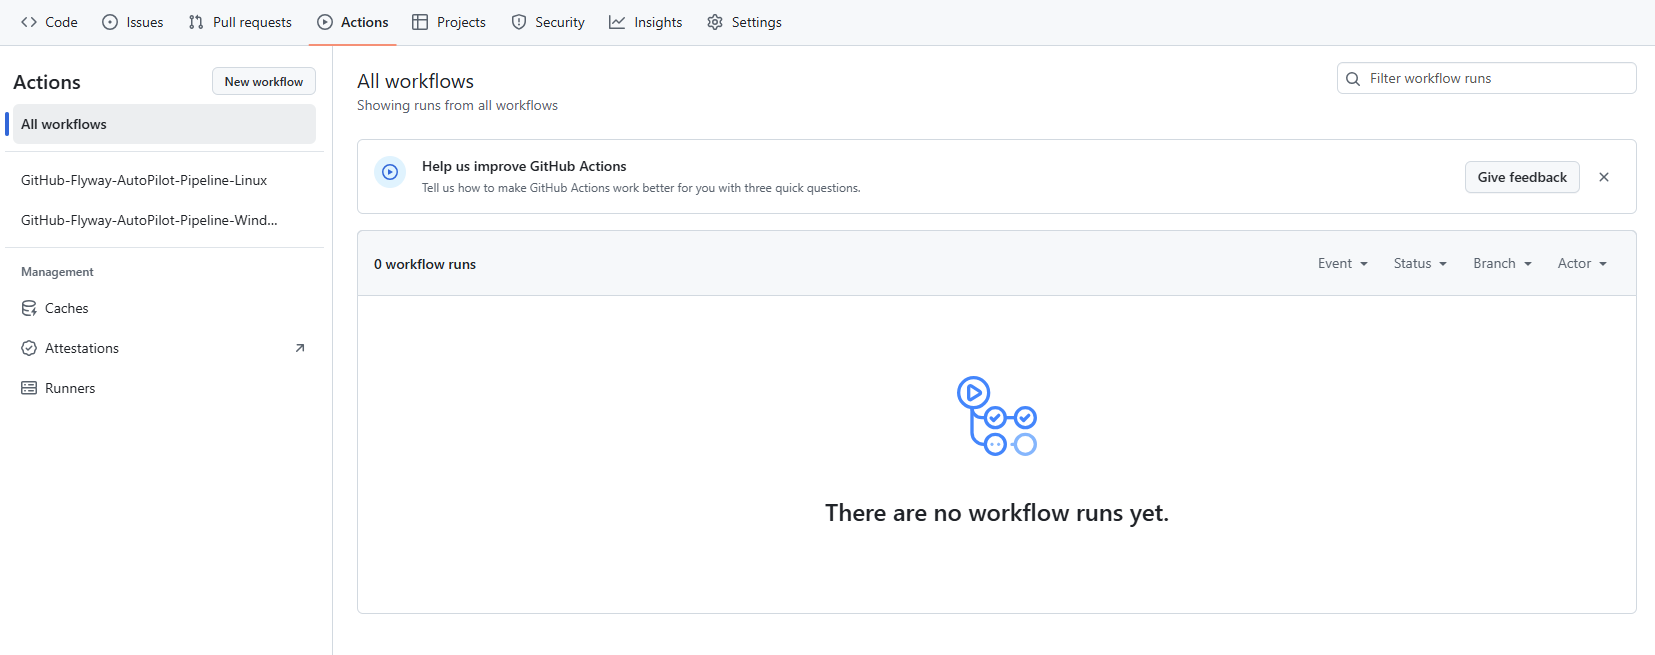
- Do not run any workflows yet—we need to configure the runner and license first.
Configuring Your Self-Hosted Runner
- Add a Self-Hosted Runner
- Navigate to Settings in your GitHub repository.
- In the left-hand menu, click on Actions > Runners and select New self-hosted runner.
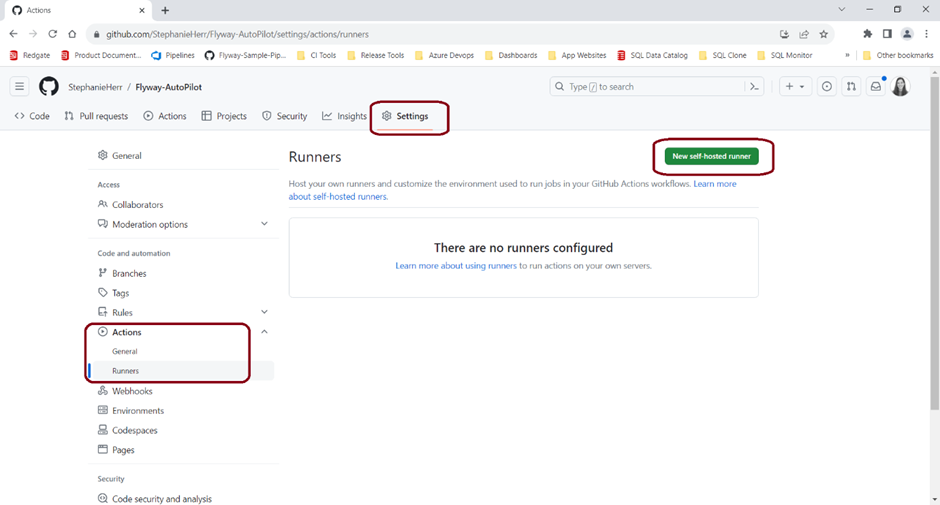
- Follow the instructions provided for your specific operating system (Windows, Linux, or macOS) to set up the runner.

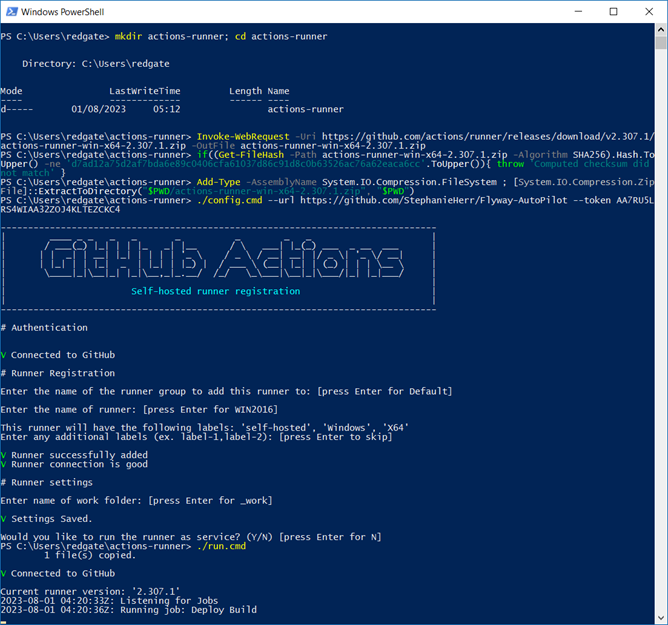
- Once installed, this runner will serve as the environment that runs the Flyway commands in your CI/CD pipeline.
Adding a Personal Access Token (PAT)
- Set Up a Personal Access Token (Click here for more details)
- A valid Flyway License is required in order to authenticate Flyway within a pipeline. The most secure and industry standard way of doing this is through setting up a Personal Access token, linked to your Redgate Portal account.
- Step 1: Navigate to https://identityprovider.red-gate.com/personaltokens
- Step 2: Login with your Redgate Portal account
- This should link to the Redgate Account used when starting your trial within Flyway Desktop.
- If you're still unaware which account to use, navigate back to Flyway Desktop and validate which account was used or sign up for a new trial.
- Step 3: Click '+ New Token' to create a new Personal Access Token
- Ensure you save this somewhere, like a password manager, as there's no method of seeing the token again in future.
- Treat this token just like any other secure password you use. If the token is lost, or compromised, simply choose to revoke the token and create a new one.
- Step 4: Navigate to the Redgate Portal website (Where you can see all licenses linked to your account) - https://portal.red-gate.com/licenses
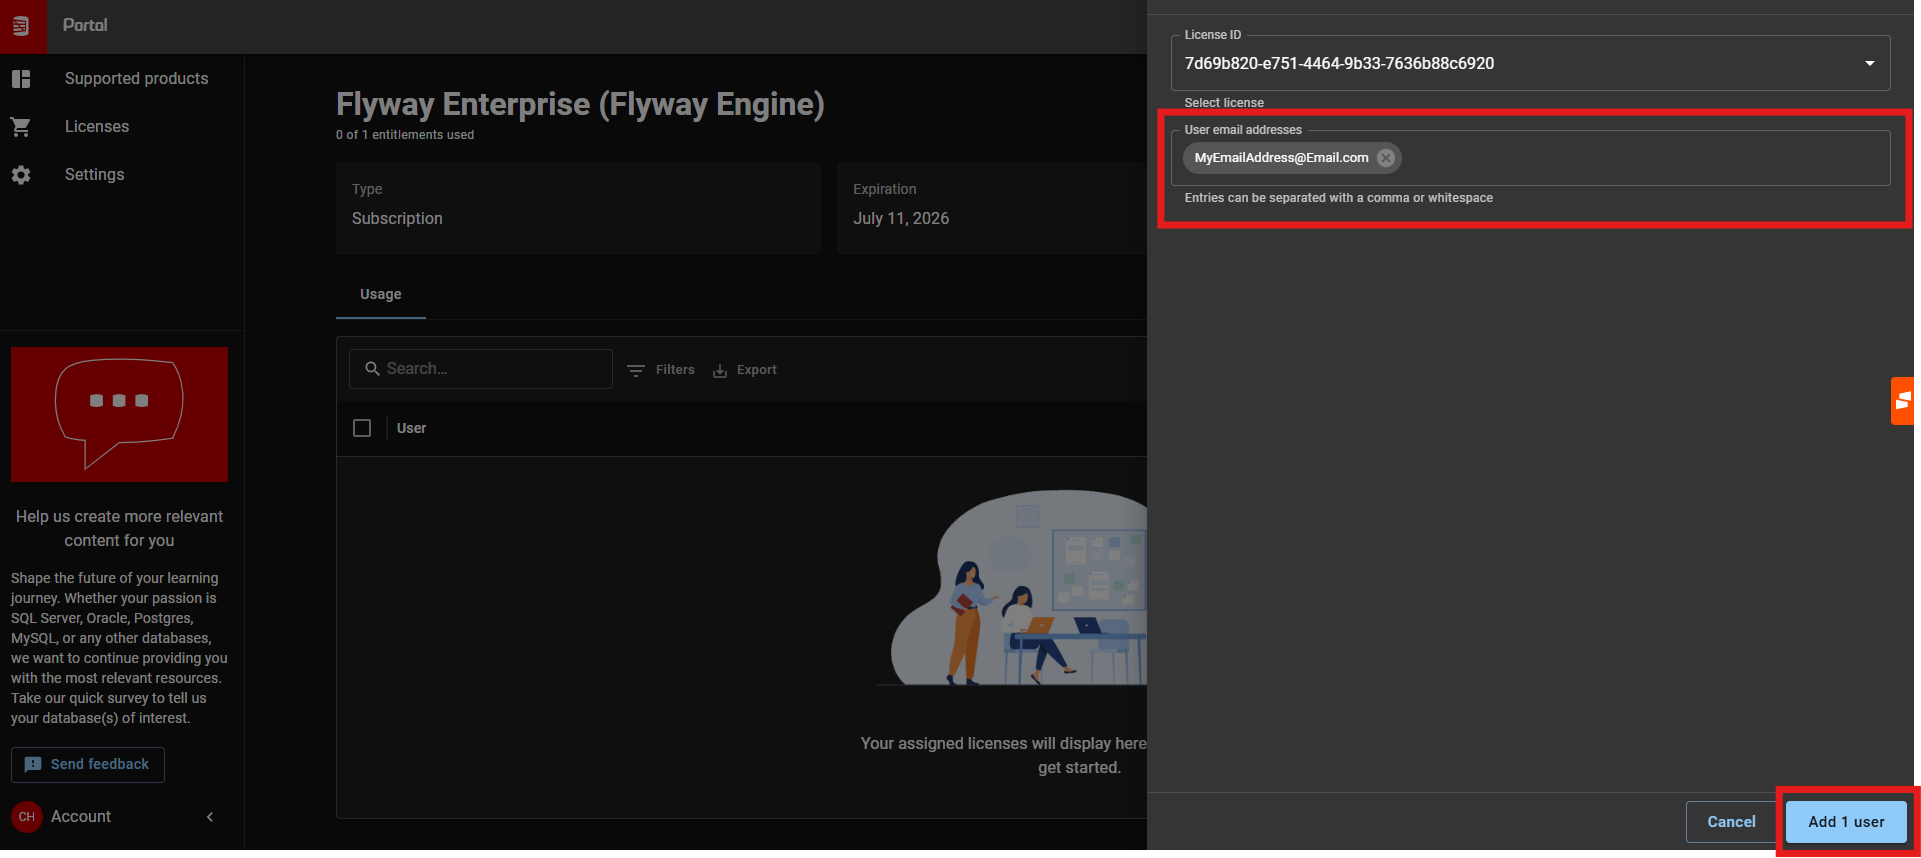
- Step 5: Select Flyway Enterprise from the list (You may need to select 'Licenses on the left hand side menu to see it)
- If the Flyway Enterprise trial was started through Flyway Desktop, your Email Address will automatically have been allocated to the license 'Flyway Desktop Enterprise'.
- Step 6: Ensure the license is allocated to your email address. To do this, click '+ Allocate' > Enter your email address > Click Add User'
- Note - Flyway CLI License Keys (Which start FL01) are still valid and can be used within pipelines. However, these are now deprecated, therefore Redgate recommends moving to PATs as described above. Reach out to the Autopilot team at flywayap@red-gate.com if you need any further details.
- In your GitHub repository:
- Go to Settings > Secrets and variables > Actions on the left-hand menu.
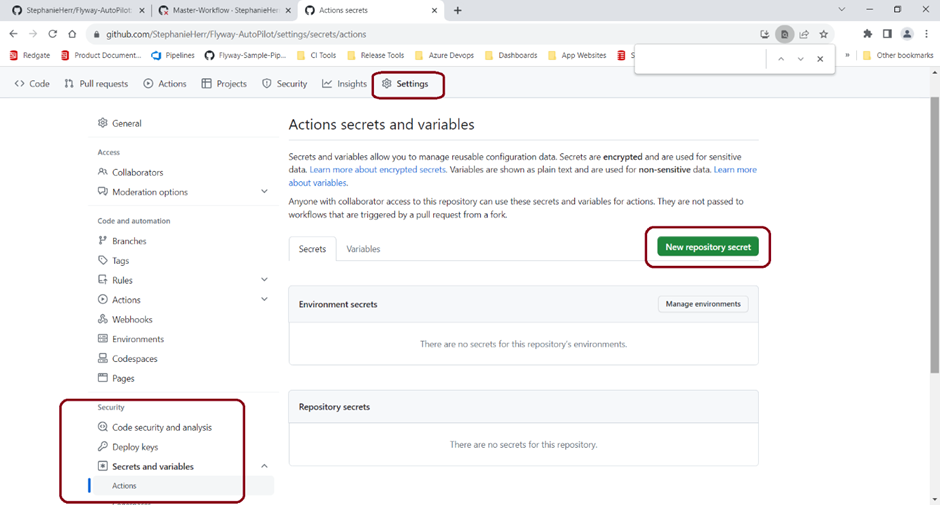
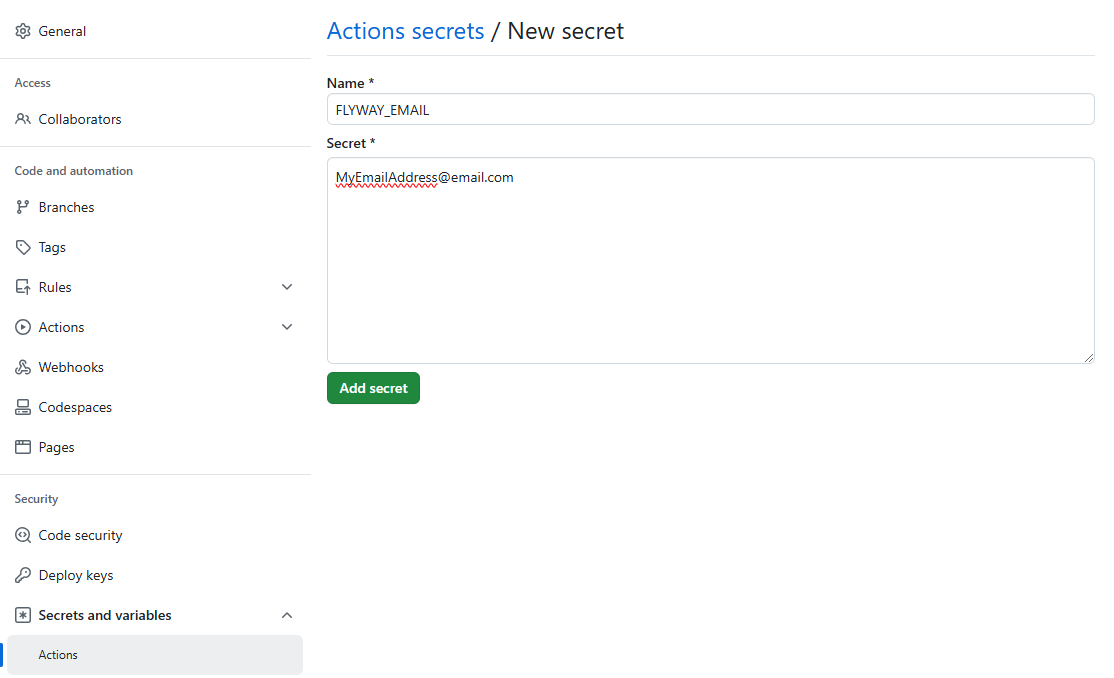
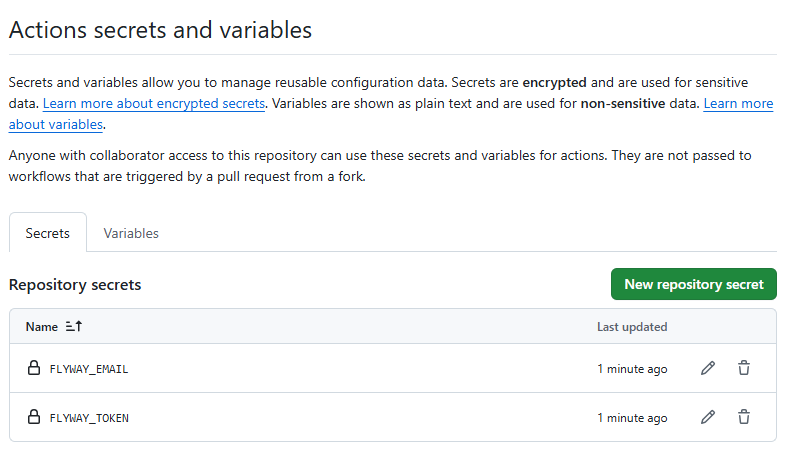
- Click New repository secret and create two secrets. The names as as follows:
- FLYWAY_EMAIL
- This should contain your Redgate Portal email address used in the PAT creation steps above
- FLYWAY_TOKEN
- This should contain the secure PAT created in the section above. This token should be treated like any other password, thus added a secret in GitHub for security
- FLYWAY_EMAIL
- See below for an example of adding a secret.
- Go to Settings > Secrets and variables > Actions on the left-hand menu.
- A valid Flyway License is required in order to authenticate Flyway within a pipeline. The most secure and industry standard way of doing this is through setting up a Personal Access token, linked to your Redgate Portal account.
Configuring the Environments
Like the PATs above, it's equally important to store Environment specific connection details in a secrets manager as well. To do this, once again navigate to Settings → Secrets and Variables → Actions.
For the purposes of this Autopilot setup, there are a number of Repository Secrets that can be passed into the YAML pipeline. All of which are optional, details of which can be found below, depending on the authentication method chosen for your target database.
Repository Secrets
| Name | Example Value | Description |
|---|---|---|
| TARGET_DATABASE_USERNAME | MySecureUsername | OPTIONAL - By default for SQL Server projects, Windows Auth is used for database connections. Which makes this variable redundant and can be left empty. For other authentication types, it's important to specify the User account used by Flyway to connect to the target database |
| TARGET_DATABASE_PASSWORD | MySecurePassword | OPTIONAL - By default for SQL Server projects, Windows Auth is used for database connections. Which makes this variable redundant and can be left empty. For other authentication types, it's important to specify the Password for the above User account used by Flyway to connect to the target database |
| CUSTOM_PARAMS | -X | OPTIONAL - By default the database connection details are taken from the project Flyway.toml and the above user/password variables (Where relevant). However, there are times where additional custom Flyway parameters may be required. For example, enabling Flyways debug functionality which is enabled by passing -X on the command line. Other examples could be providing a custom URL that takes precedent over the URL in the toml. |
| FLYWAY_AUTH_DISABLED | false | OPTIONAL - This is an optional variable that will disable the Flyway Authentication step if set to true. This is valuable for scenarios where offline permit activation is utilized, which results in the Auth variable then becoming unnecessary. |
| FLYWAY_CLI_INSTALL | false | OPTIONAL - By default this check is off, with value false or empty. Set to true to enable a Flyway CLI validation on the runner, which will validate Flyway is installed and if not will download and install to the desired version (Default being latest available release). |
Editing the Workflow Files
- Configure the Workflow
- Open the
.github/workflowsfolder and locate the YAML file that matches the operating system of your self-hosted runner (e.g.,windows.ymlfor Windows-based runners). - The workflows are pre-configured to use the environment details configured through Flyway Desktop, stored in the flyway.toml project file. Therefore, use the 'Migration Scripts' tab in Flyway Desktop to validate these by clicking 'Manage target databases'.
- This was done in an earlier section, however head to Provisioning Your Databases for more details.
- The majority of customizations will be done within Environment Secrets in section above. Which means that the YAML pipeline in most cases, won't need updating. However, there are a few caveats detailed below:
- Hosted Agents - When a GitHub hosted agent is used, this typically means a vanilla Windows or Linux machine is spun up to deploy the pipeline on each run. In this scenario, the Flyway CLI WILL need to be installed for the pipeline to run. To deal with this, simply change the variable 'FLYWAY_CLI_INSTALL_CHECK' to 'true'

- Open the
Running the Workflow
Run the Workflow
- After setting up the runner and editing the workflow file, go back to the Actions tab in GitHub.
- Select the appropriate workflow (e.g.,
windows.yml) and click Run workflow.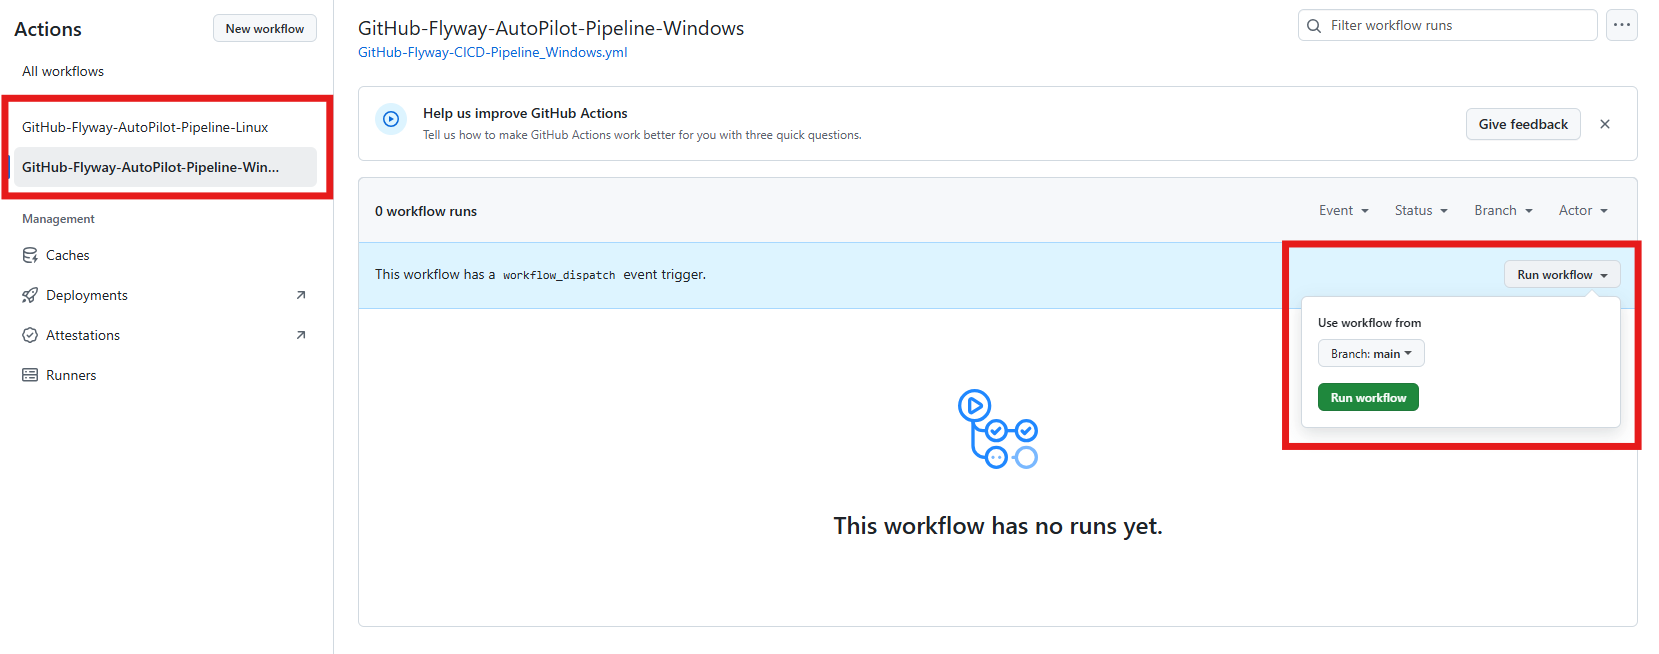
Monitor the Workflow
- Once the workflow starts, you can click on the workflow run to monitor its progress. It may show as Queued if the runner is not yet available.
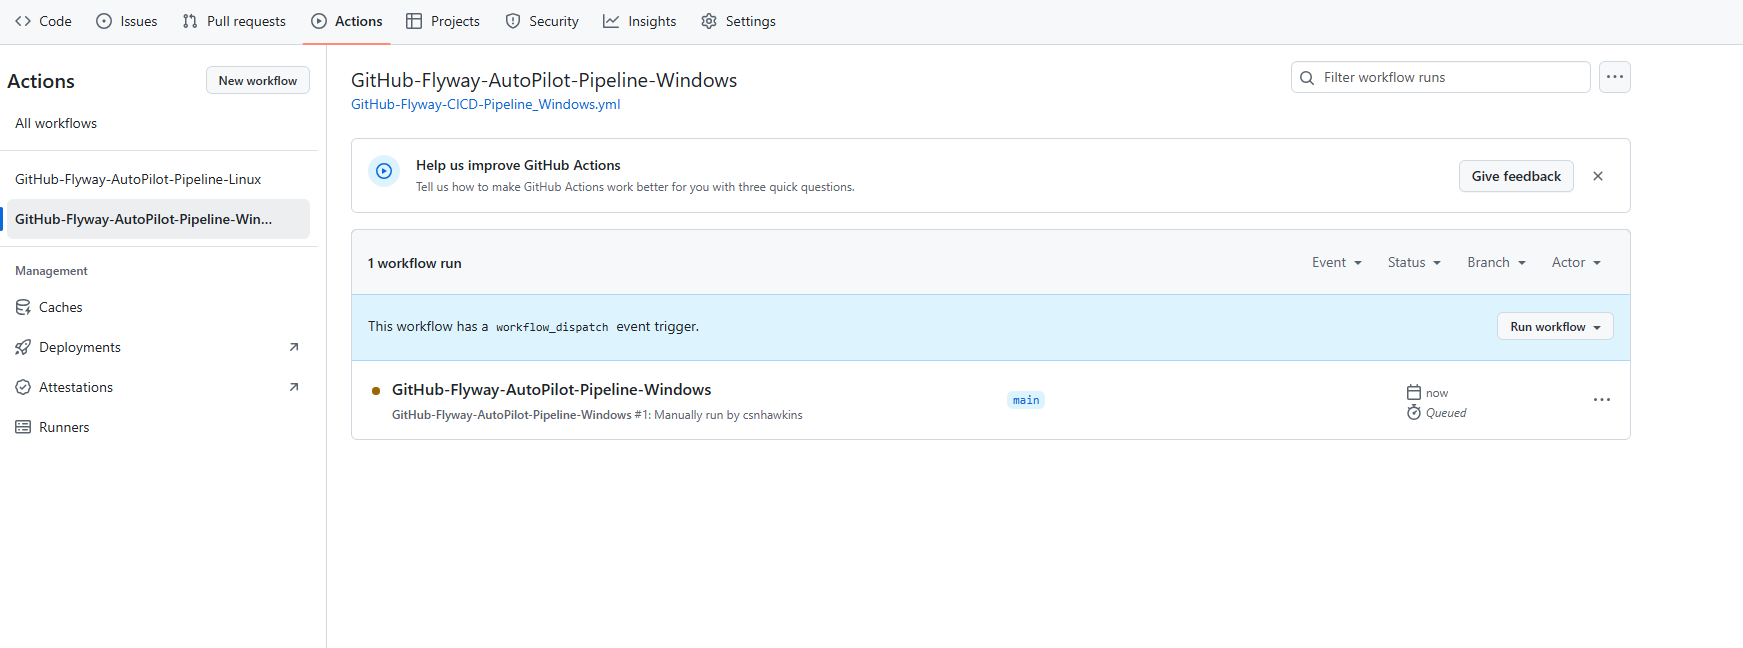
- Make sure the runner is correctly installed and active, as it will execute the Flyway commands for the pipeline.
- Once the workflow starts, you can click on the workflow run to monitor its progress. It may show as Queued if the runner is not yet available.
Check Logs and Output
- Click on the individual jobs within the workflow (such as Deploy Build) to view detailed logs of the Flyway commands being executed.
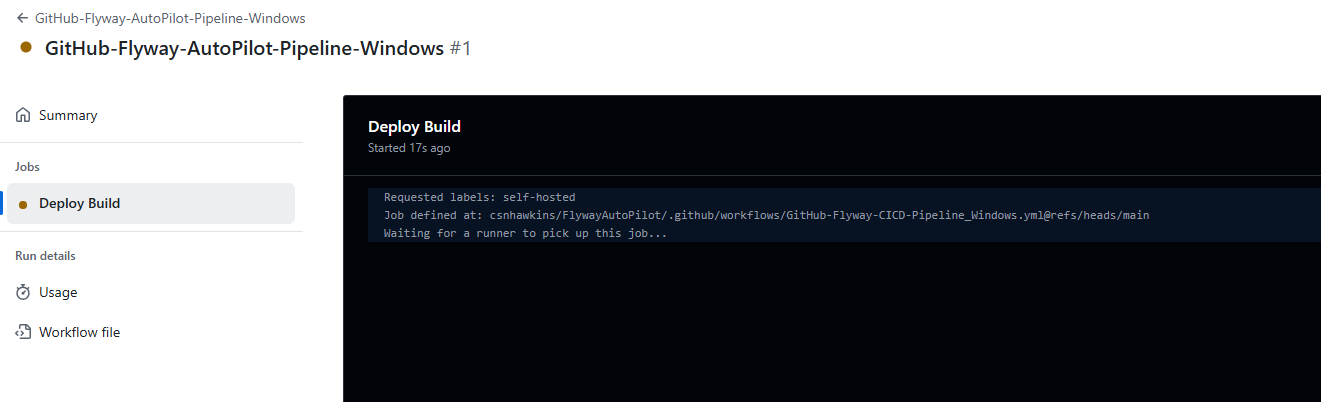
- You should see the Flyway commands running to apply your migration scripts and any database changes detected.
- Click on the individual jobs within the workflow (such as Deploy Build) to view detailed logs of the Flyway commands being executed.
Post-Deployment
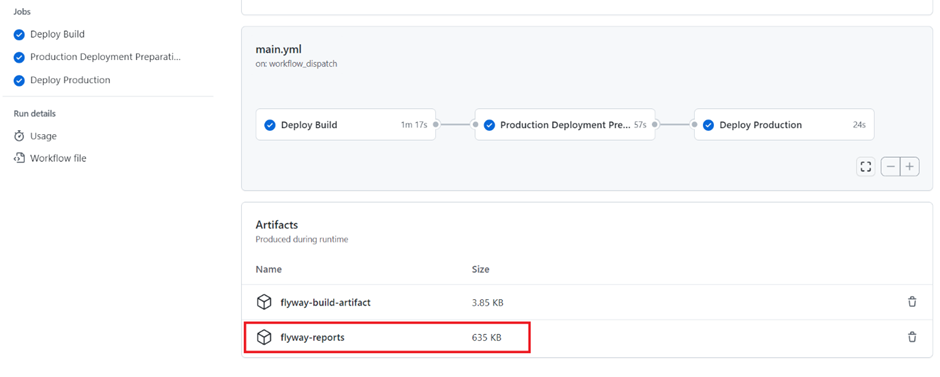
- Review Deployment Reports
- After the workflow completes, check the deployment reports generated by Flyway. These will show the status of your migrations, any changes that were successfully applied, and any drift or errors detected.
- The reports will either be part of the workflow output or accessible directly in the repository.
Next Steps
Now that you’ve set up your end-to-end Database DevOps process with Flyway, it’s time to dive in! Start creating interesting changes within Flyway Desktop and watch as they are version-controlled in your chosen Git tool. Then, follow these changes as they flow automatically through each environment, complete with detailed check reports showing all pending updates. With Flyway, you’re on your way to becoming a Database DevOps expert!


