Quickstart - Flyway Desktop
Published 22 May 2023
This brief tutorial will teach you how to get up and running with Flyway Desktop. It will take you through the steps on how to configure it and how to write and execute your first few database migrations.
This tutorial should take you about 5 minutes to complete.
Note: This Quickstart is using the Flyway Desktop GUI. Everything below can also be accomplished directly with the Flyway command-line. If you prefer command lines, please see this Quickstart Guide for the Flyway Command-line.
Prerequisites
Install Flyway Desktop, which includes the Flyway CLI.
Configure Flyway Desktop
- After installing, search for Flyway Desktop from the Start menu, which launches the following:

- Click on New Project...
- In the New project details dialog, specify the following:
- Project Name: Quickstart Flyway Desktop
- Project Location: select the location you want to save the project folder
- Create new project folder in this location: leave selected if you want to create a folder within the project location select above
- Database Engine: SQLite
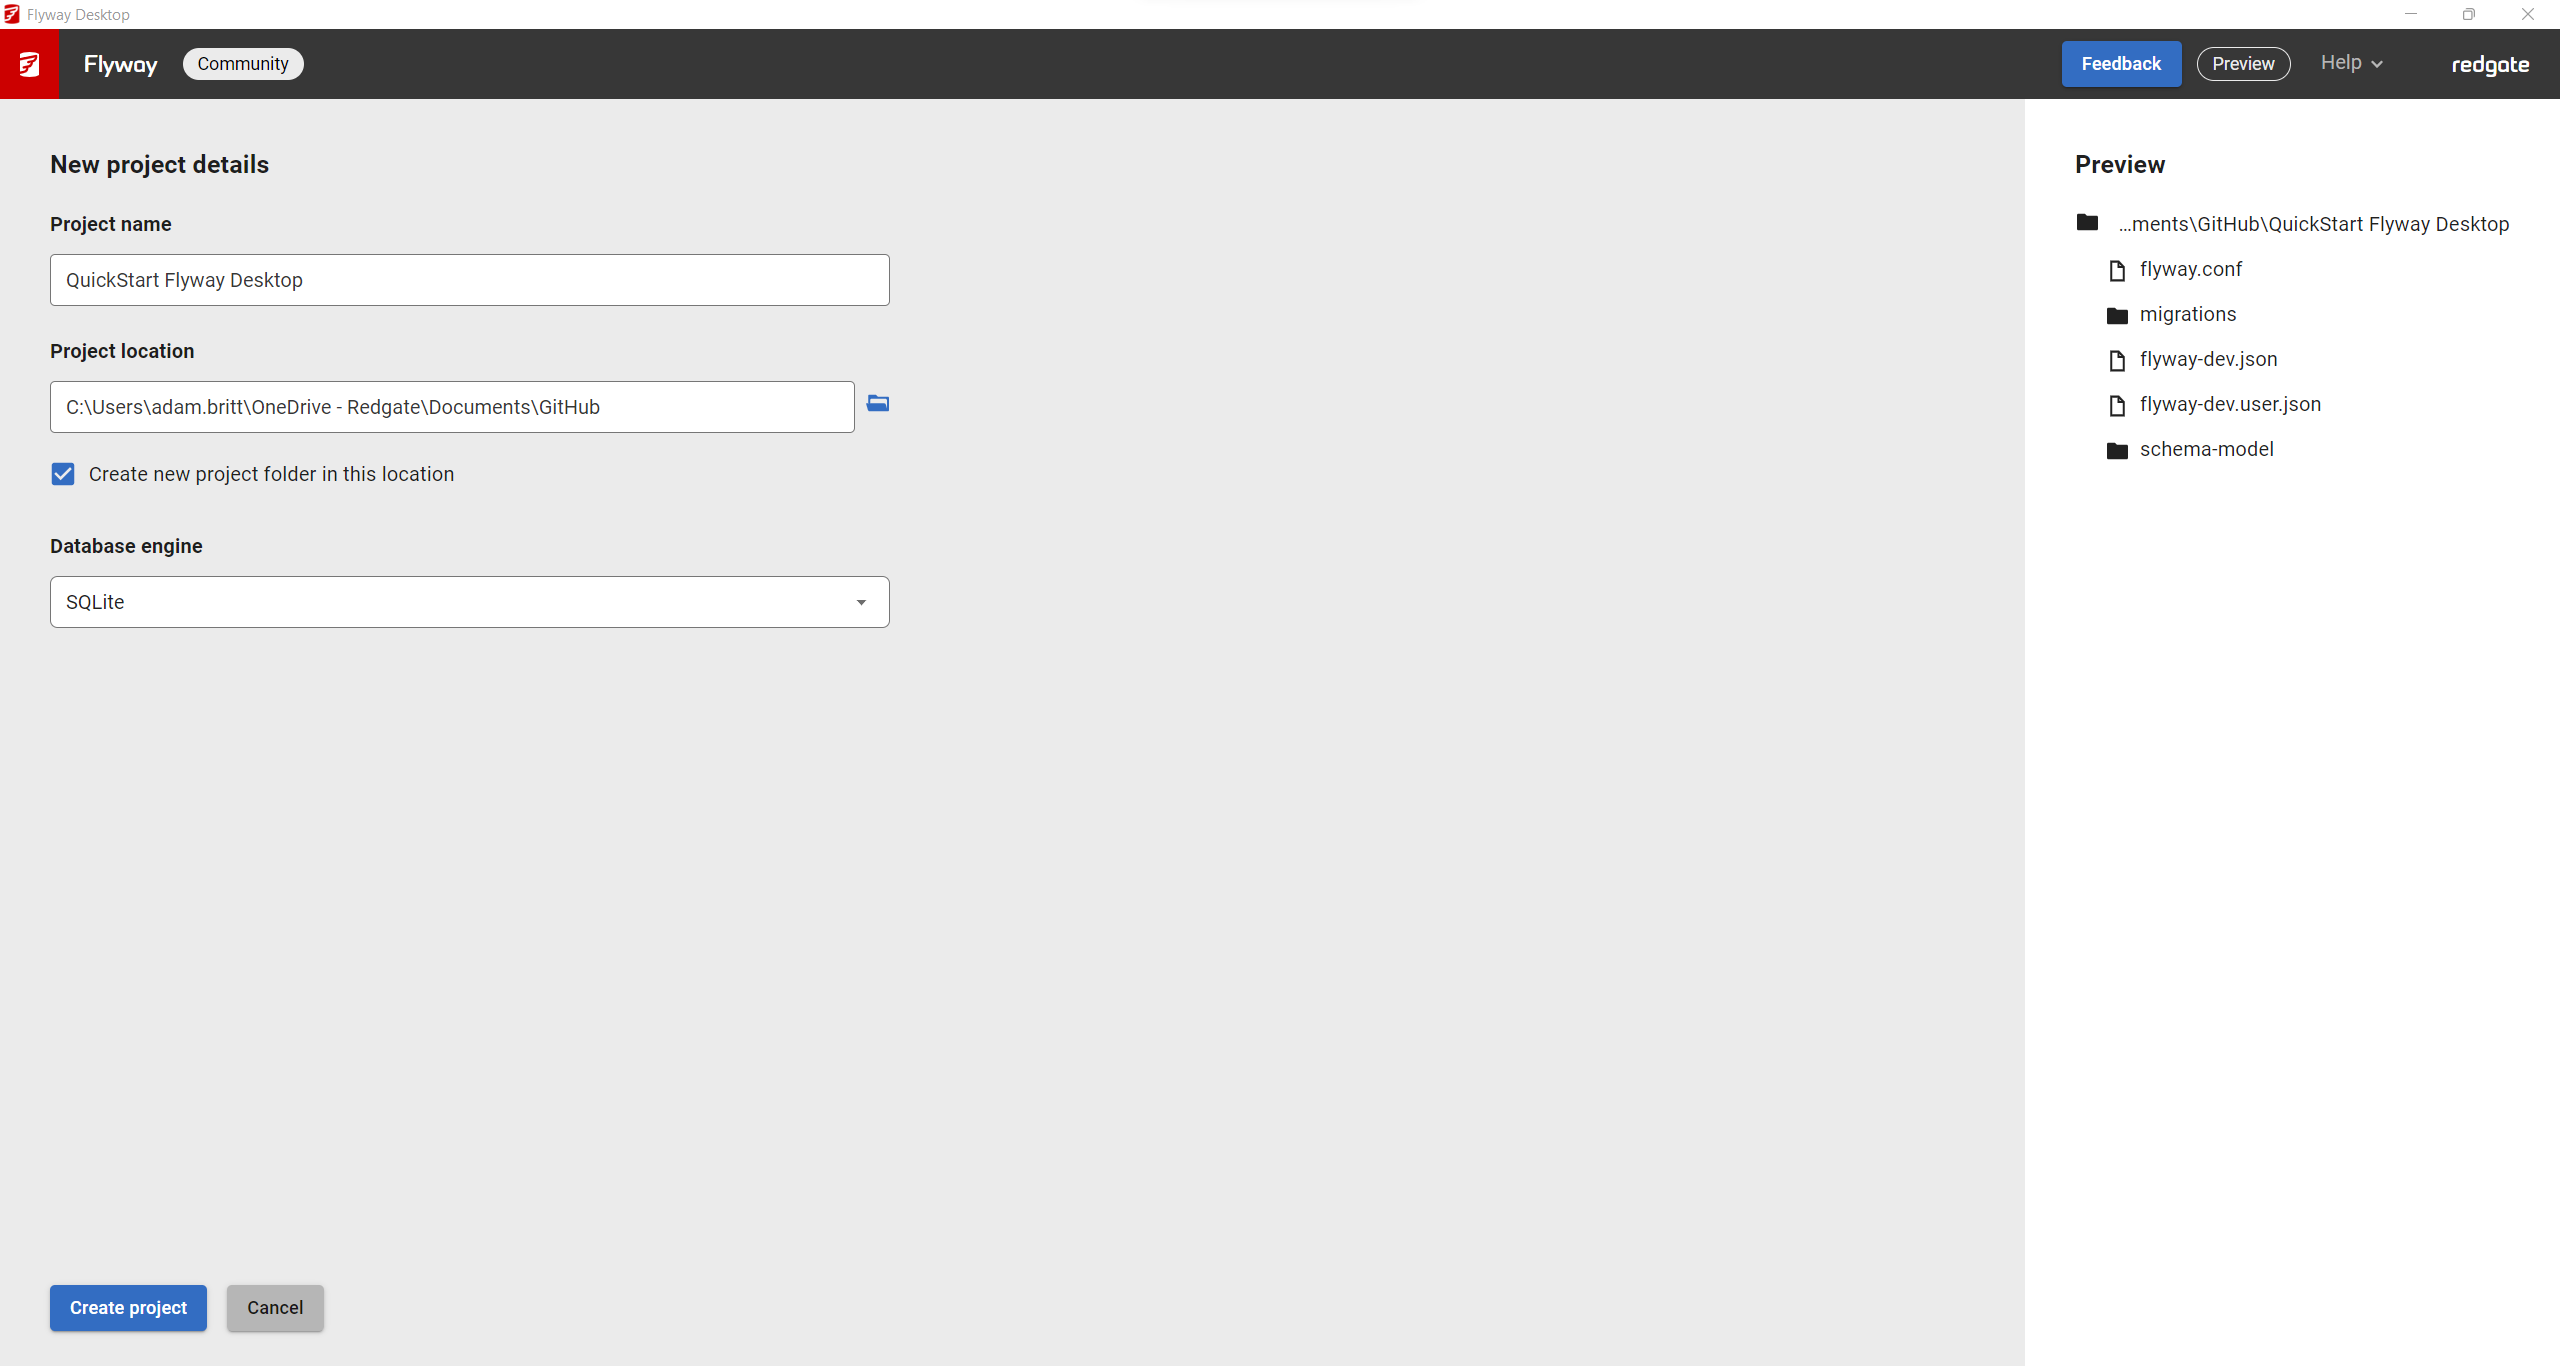
- Click Create project at the bottom, which will bring you to the Migrations tab:

- Next, specify your target database that you want to work with. Press Add target database on the right:

- Enter the following details in the connection form:
- Display Name: Development
- Username: <Blank for the SQLite example>
- Password: <Blank for the SQLite example>
- JDBC URL: jdbc:sqlite:FlywayQuickStartFWD.db
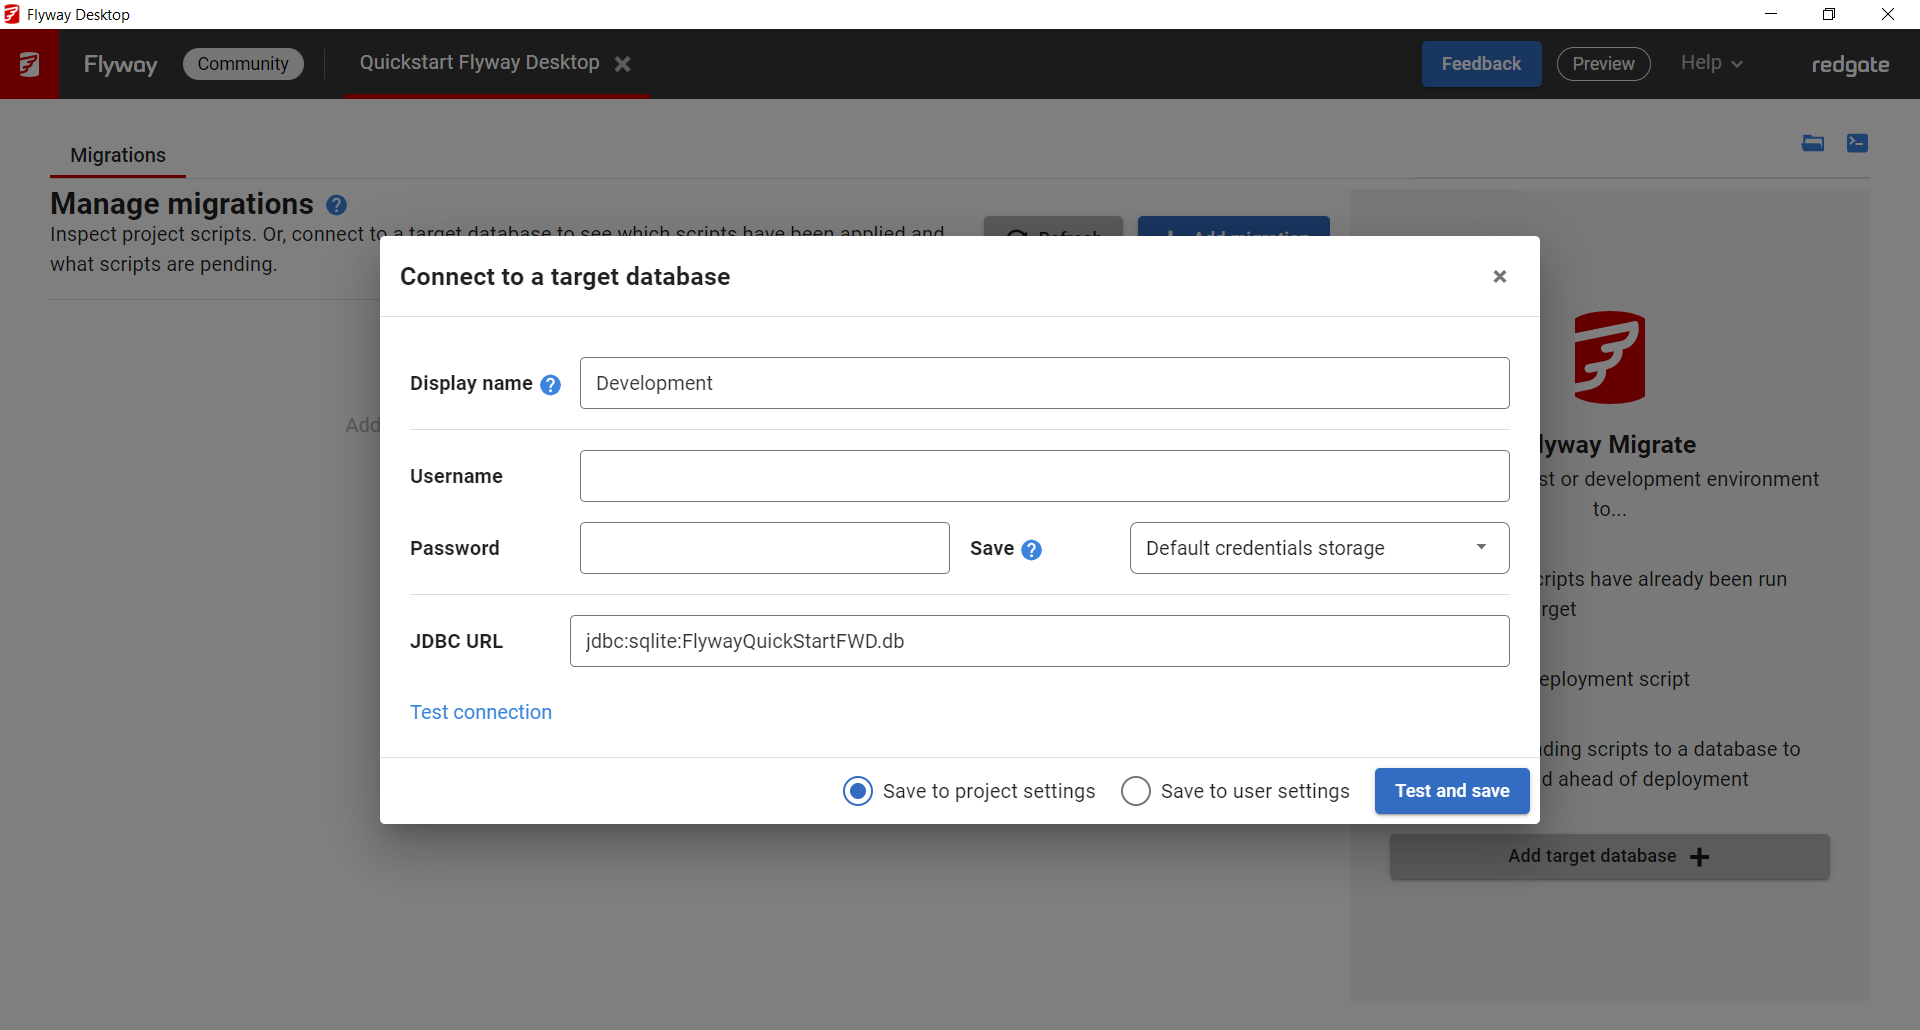
- Leave Save to project settings selected and click Test and save.
Working with migration scripts
Now that you created your project and configured your target database, you can add your first migration script.
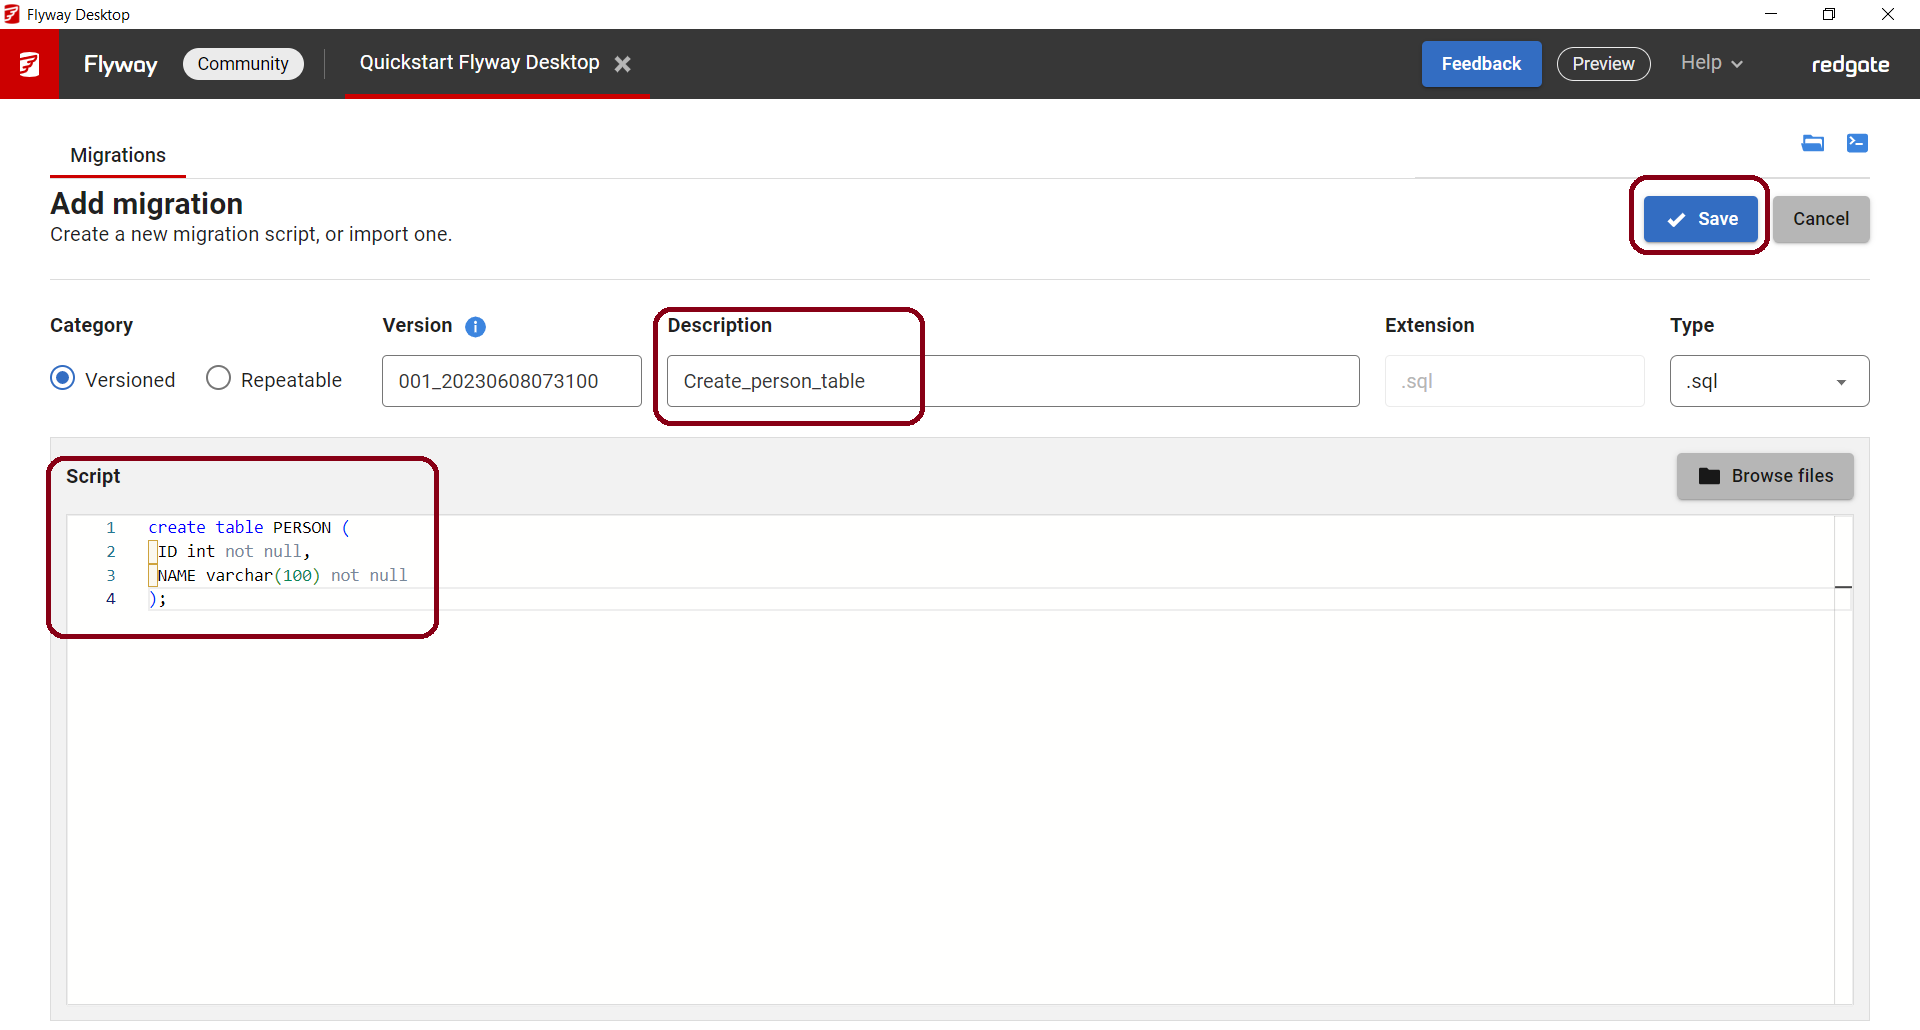
- On the Migrations tab, click + Add migration.

Enter the following details:
- Category: Versioned (should already be selected)
- Version: This defaults to 001_yyyymmddhhmmss. The timestamp is included by default to prevent multiple users from having the same exact version number.
- Description: Create_person_table
- Script:
create table PERSON (
ID int not null,
NAME varchar(100) not null
); Click Save.
Now it is time to run your first migration.
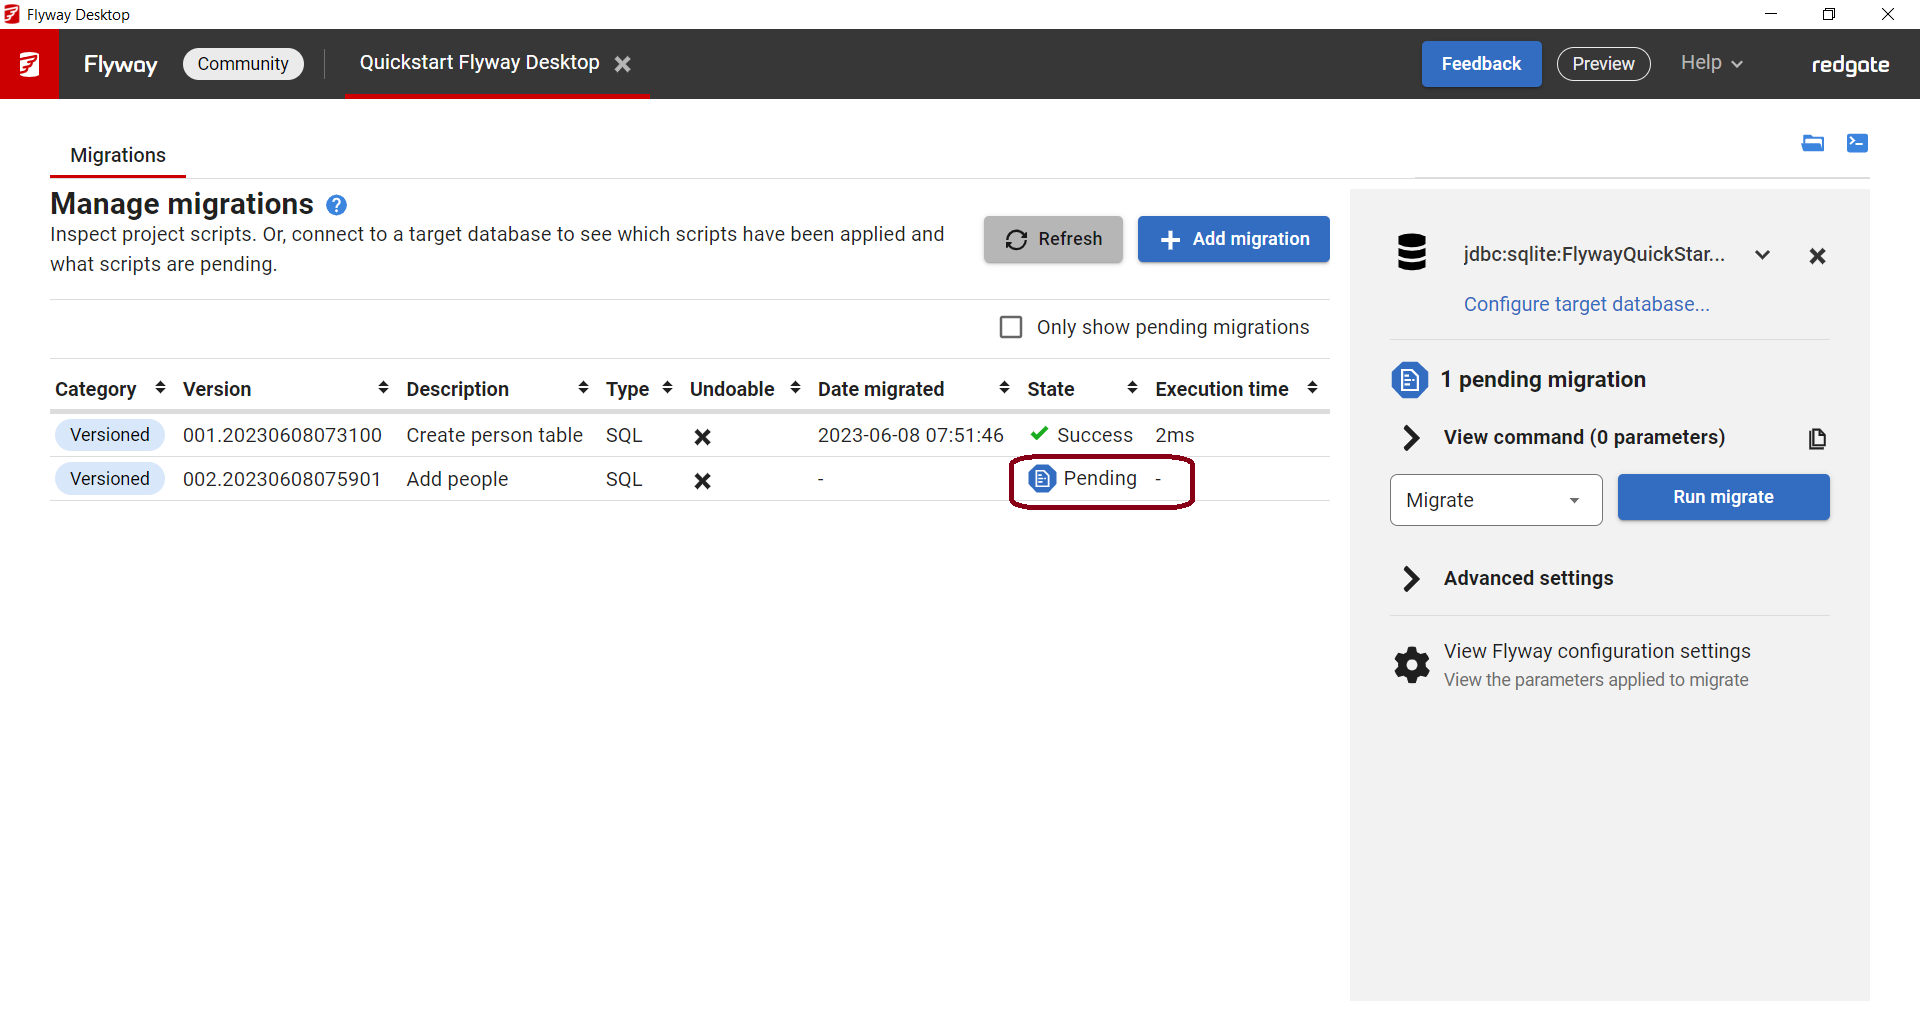
- On the Migrations tab, you should see the script you just added in a Pending State.

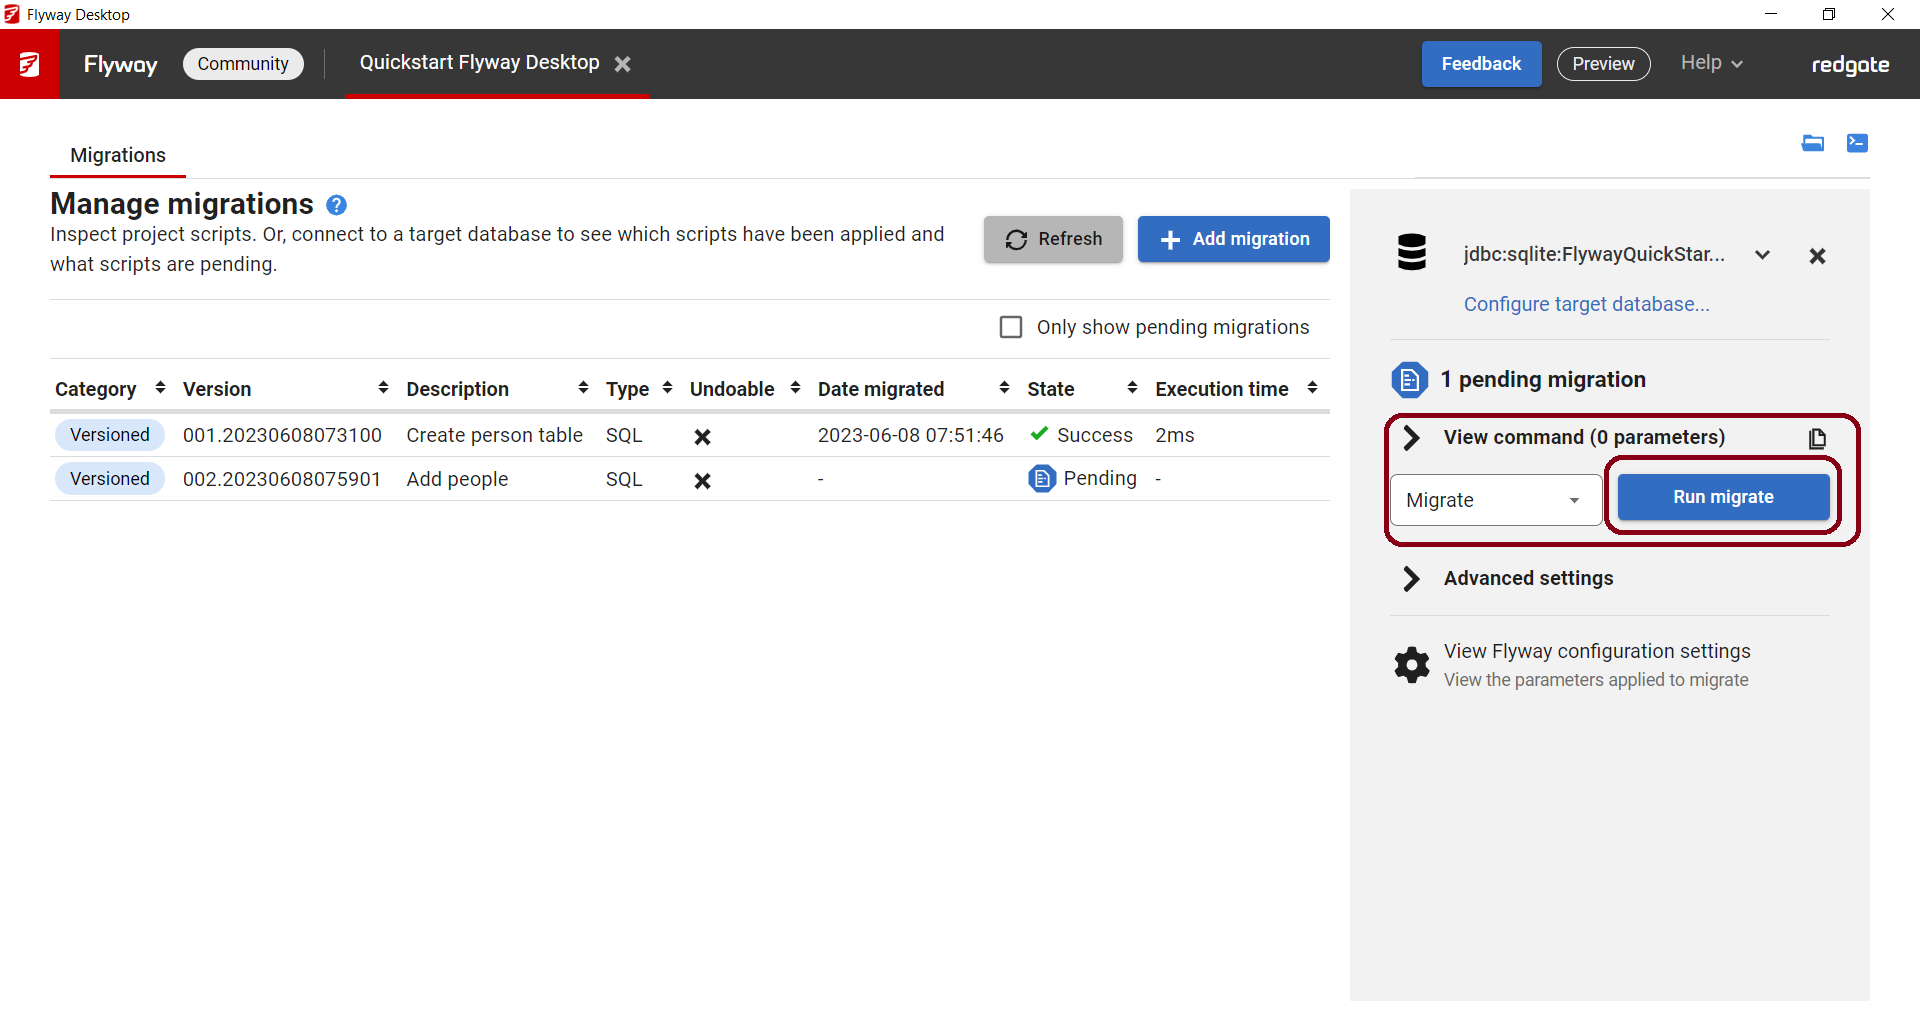
- The available Flyway commands appear in the drop down on the right. Make sure Migrate is selected in the drop down and click Run migrate.

- If you wanted to see the actual flyway command line that will execute, expand the View command (x parameters) first. We hope this helps you learn the different CLI syntax if you ever want to automate this in a CI/CD system.
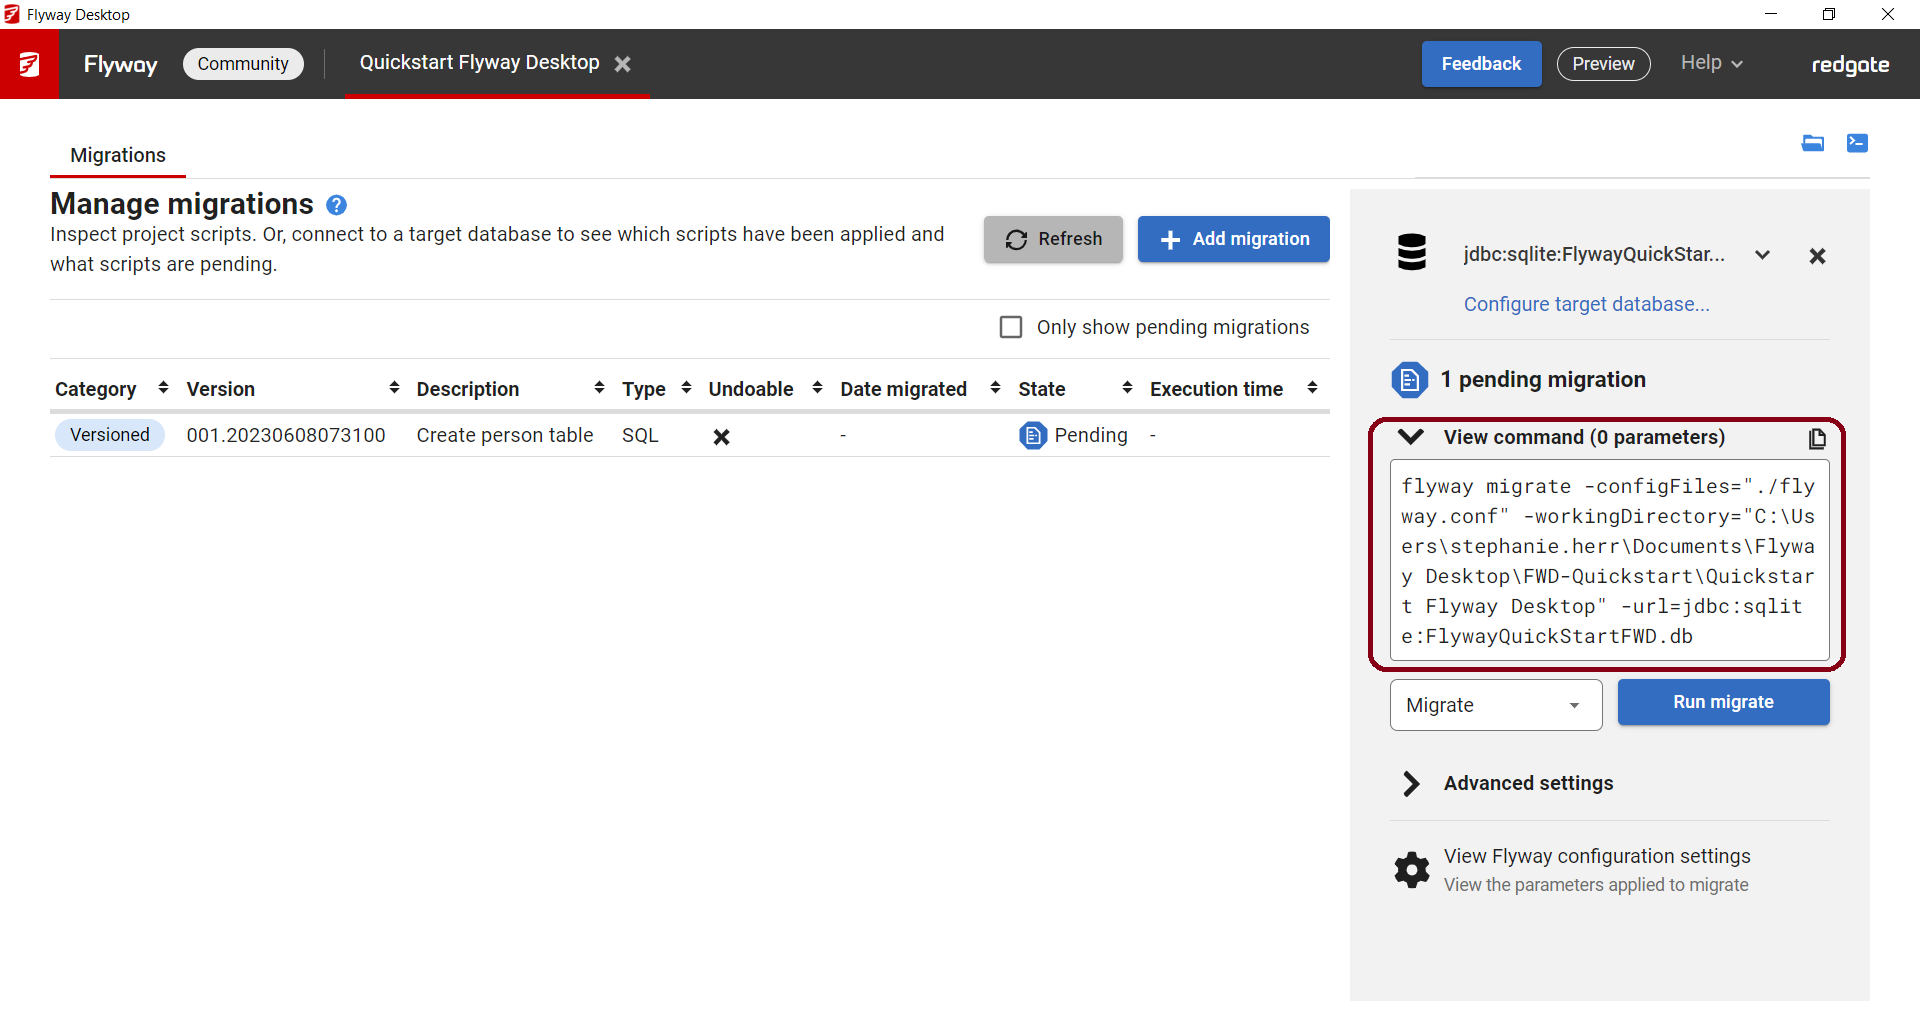
- If you wanted to see the actual flyway command line that will execute, expand the View command (x parameters) first. We hope this helps you learn the different CLI syntax if you ever want to automate this in a CI/CD system.
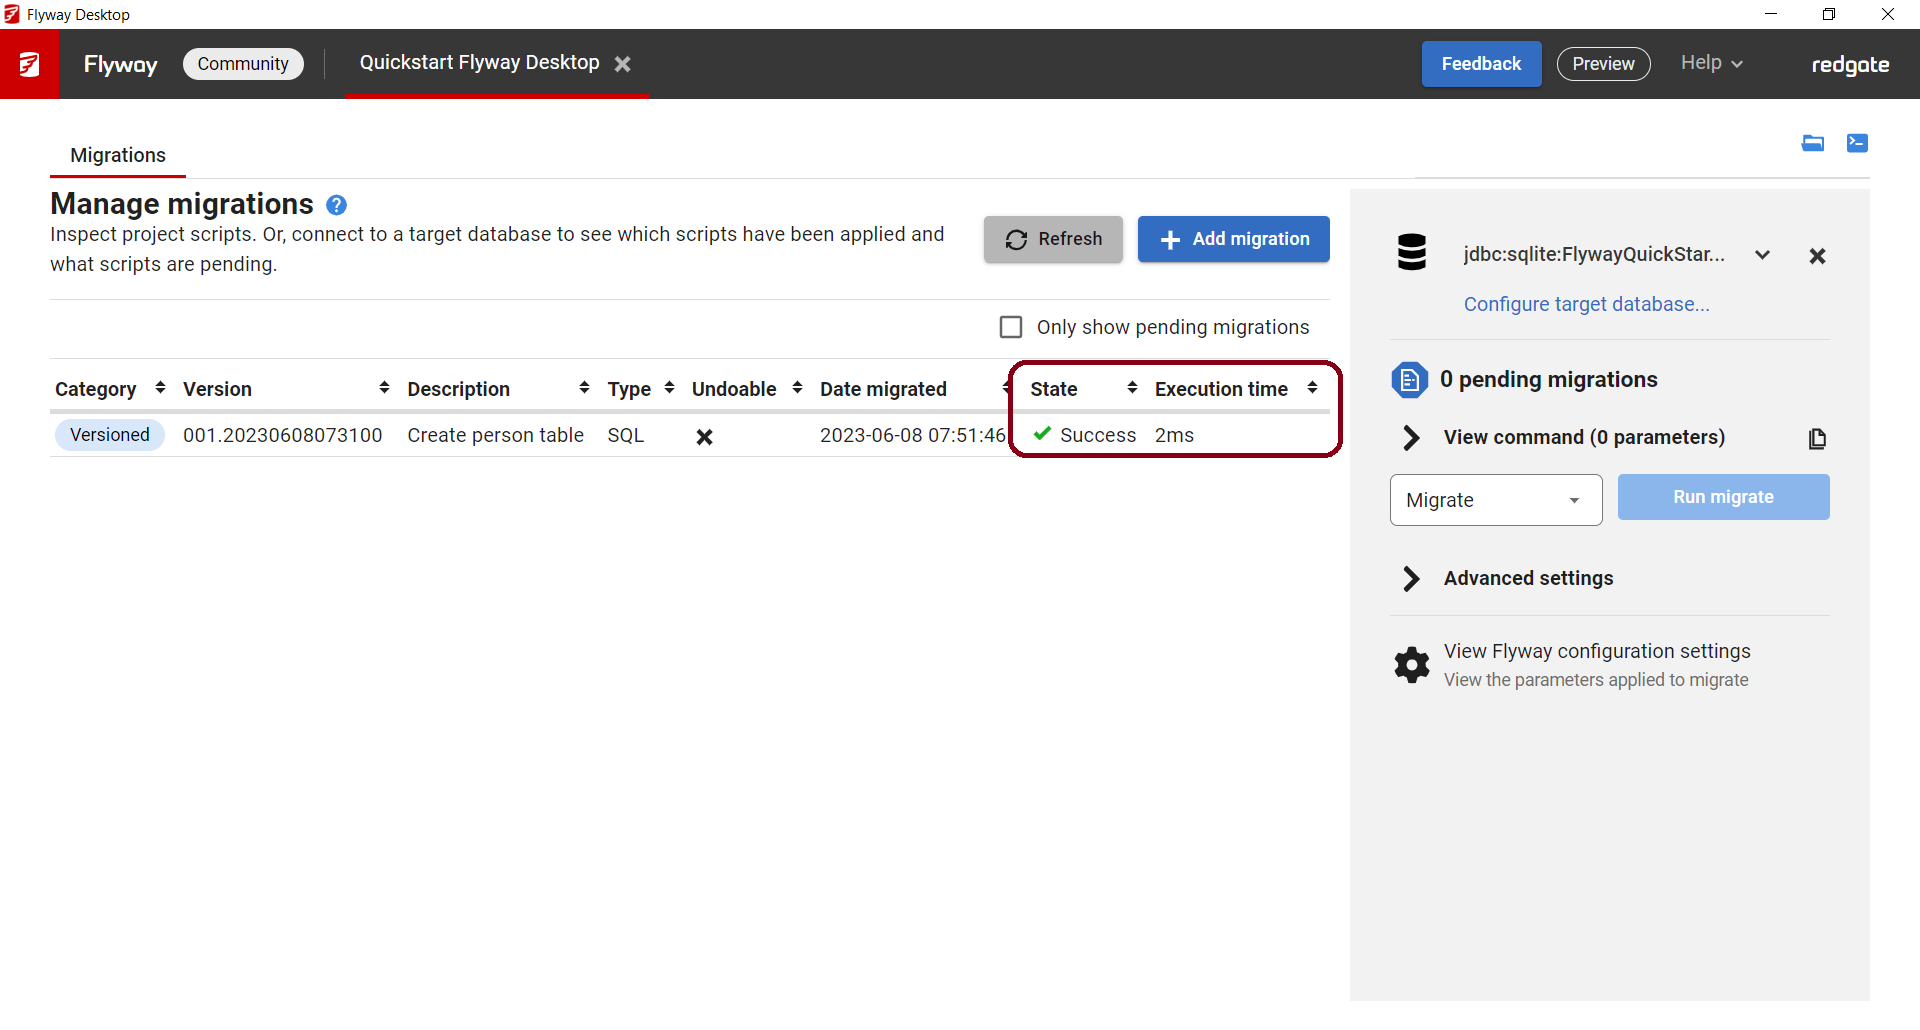
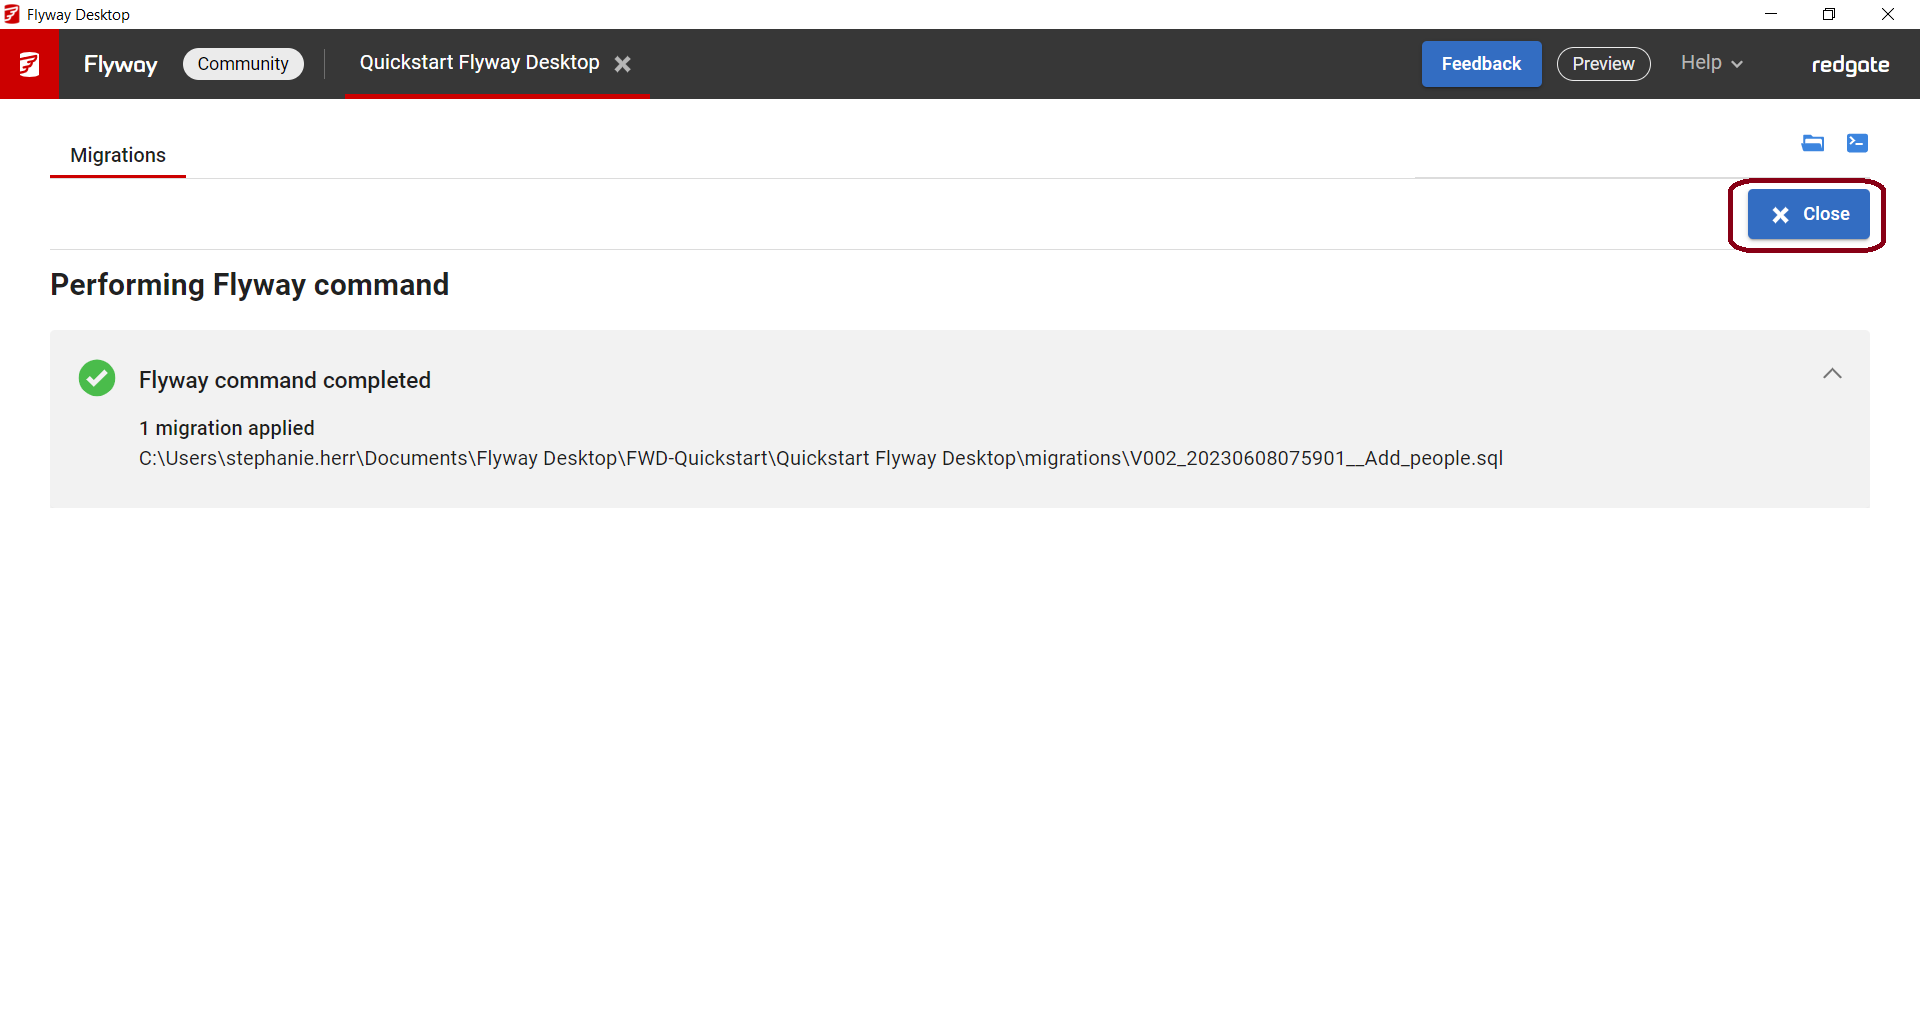
- Flyway Desktop should show the migration was successful.
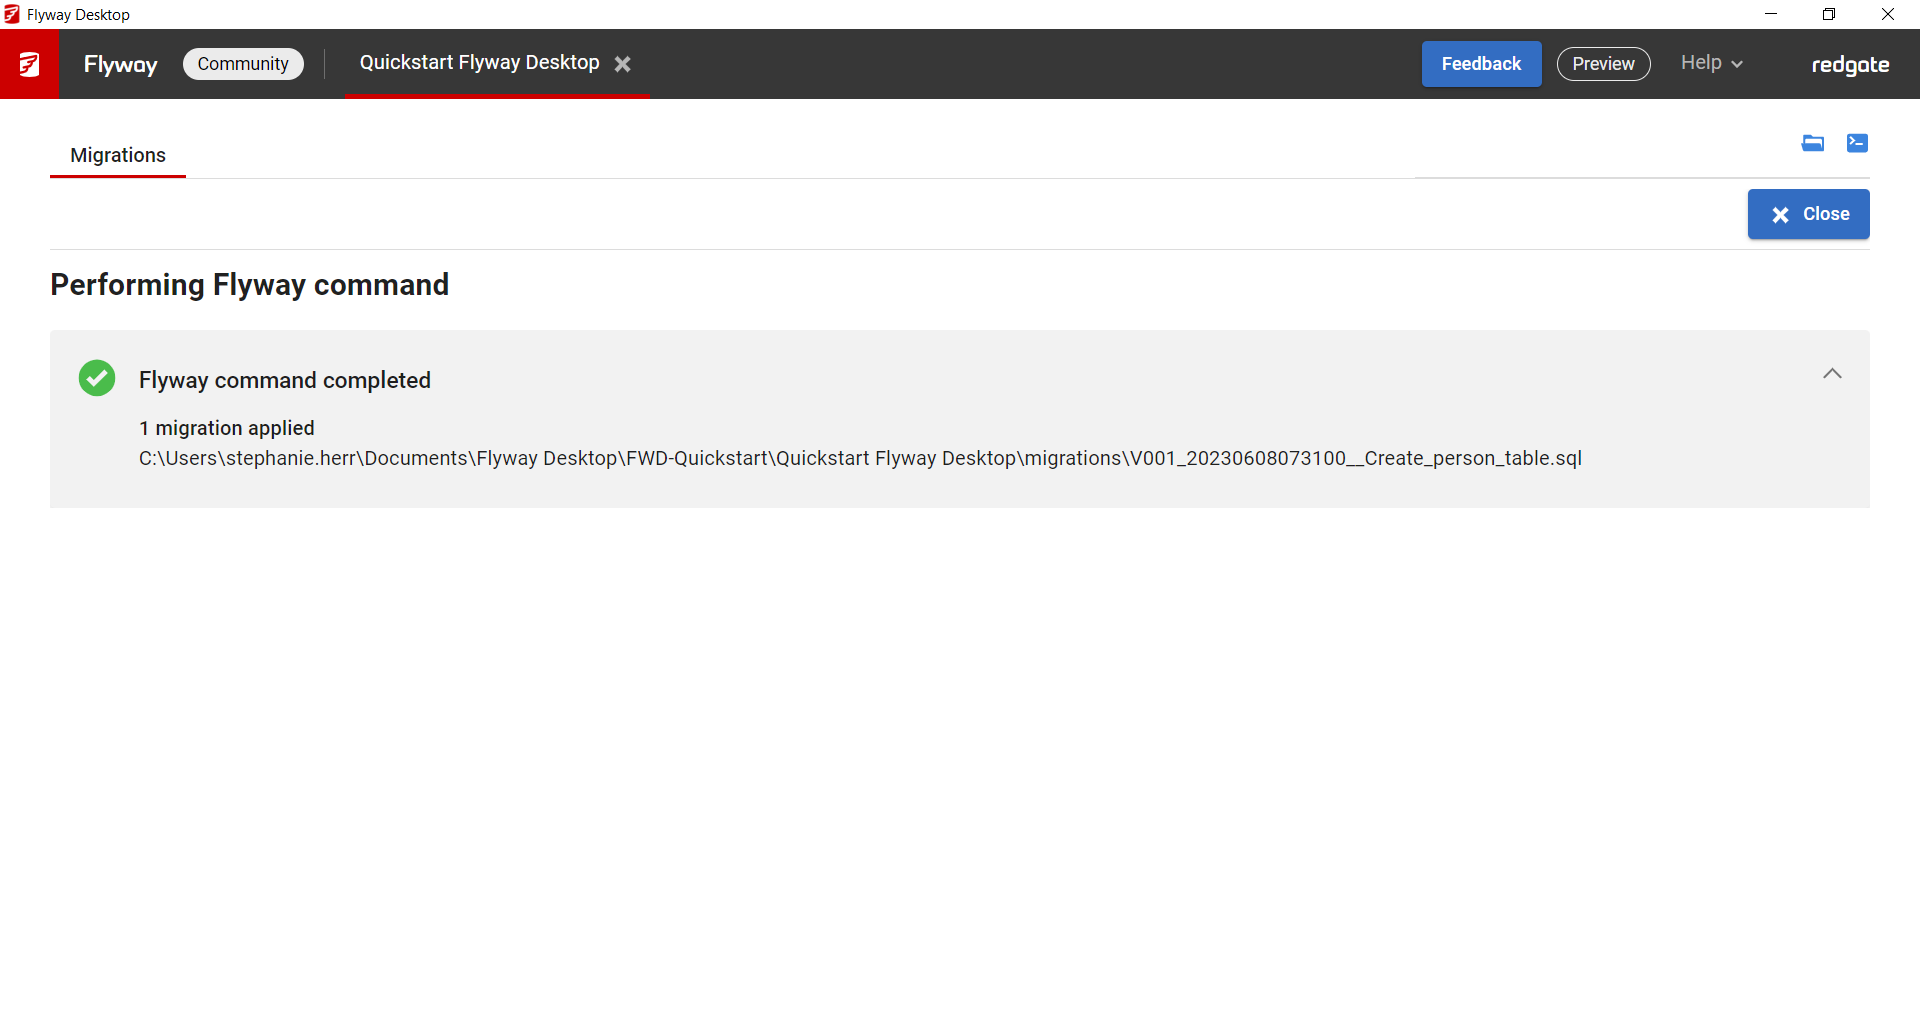
- Click Close. You can now see the migration's state is Success and the time it took to execute this migration script against the target database.
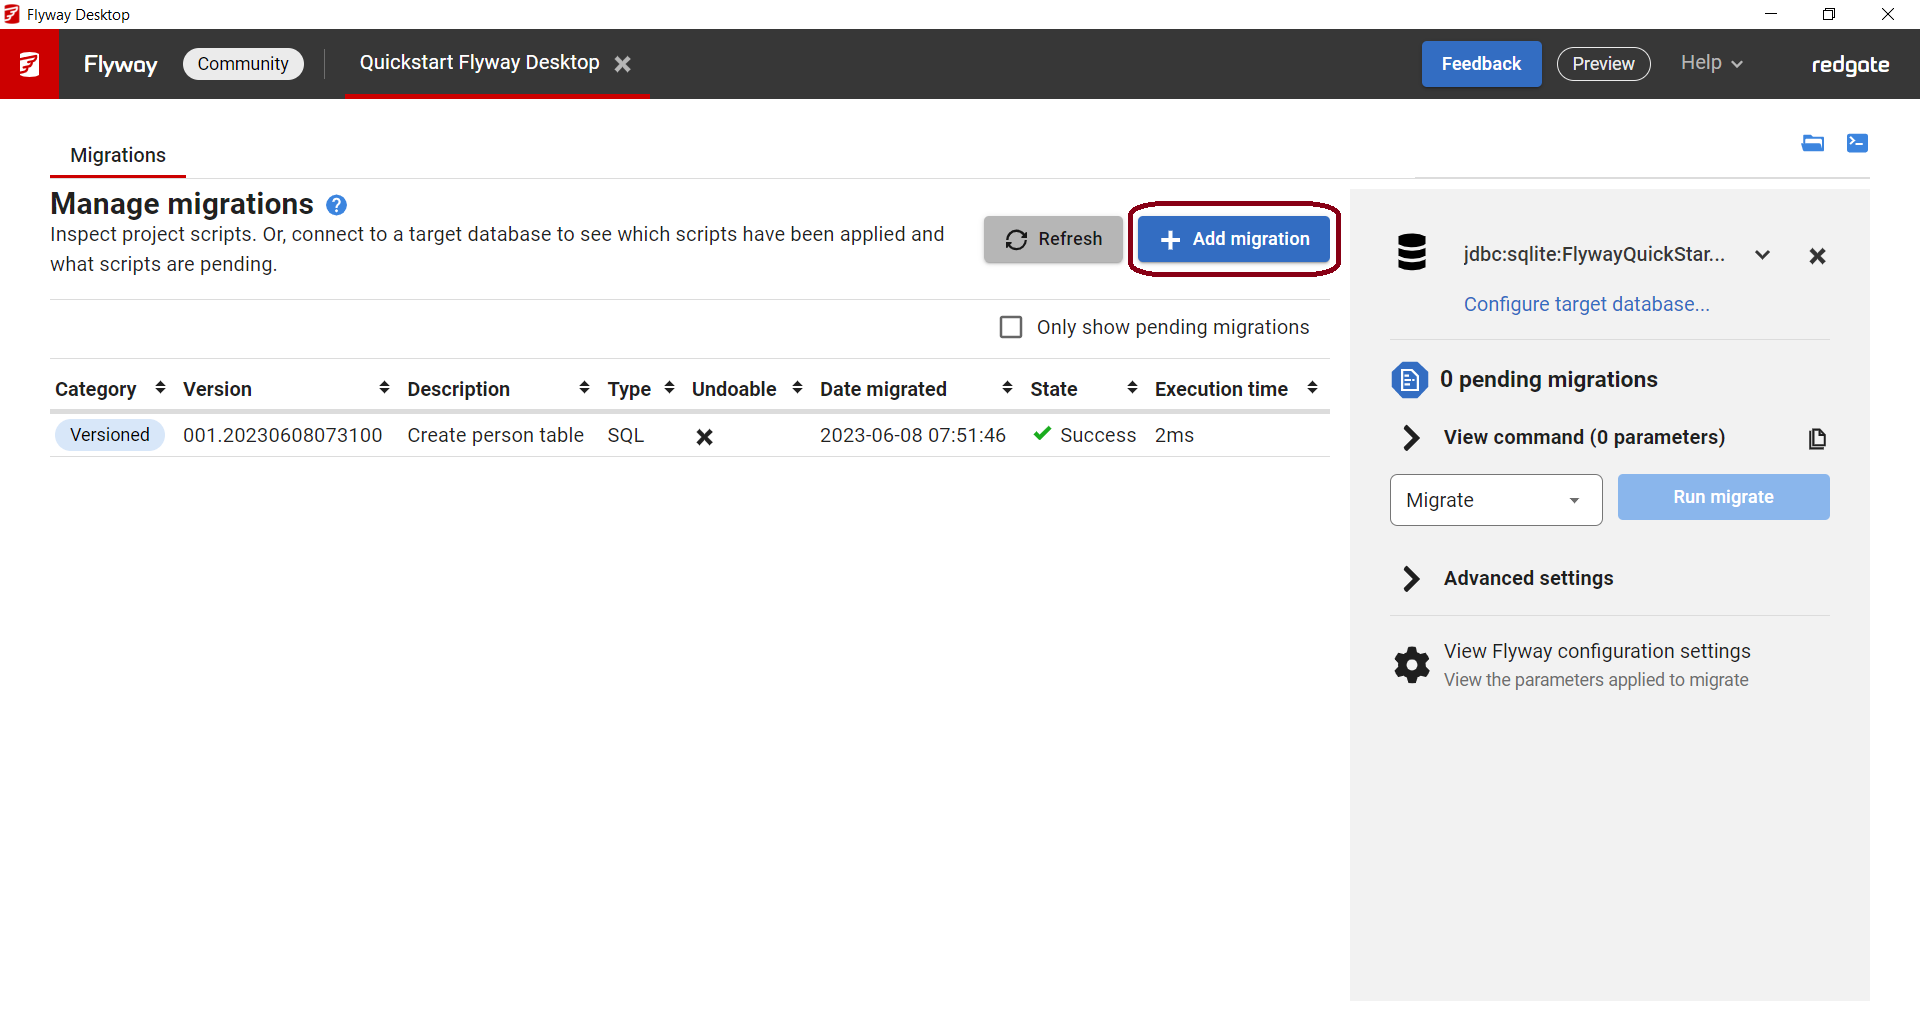
- Let's repeat this process to add a second migration script. Click + Add migration.
- Enter the following details:
- Category: Versioned (should already be selected)
- Version: This defaults to 002_yyyymmddhhmmss. If you changed this above, it should just increment by 1.
- Description: Add_people
- Script:
insert into PERSON (ID, NAME) values (1, 'Axel');
insert into PERSON (ID, NAME) values (2, 'Mr. Foo');
insert into PERSON (ID, NAME) values (3, 'Ms. Bar'); - Press Save.

- This new migration should have a Pending state since it has not been applied to our target database yet.
- Again, the available Flyway commands appear in the drop down and you can view the CLI command on the right. Make sure Migrate is selected in the drop down and click Run migrate.
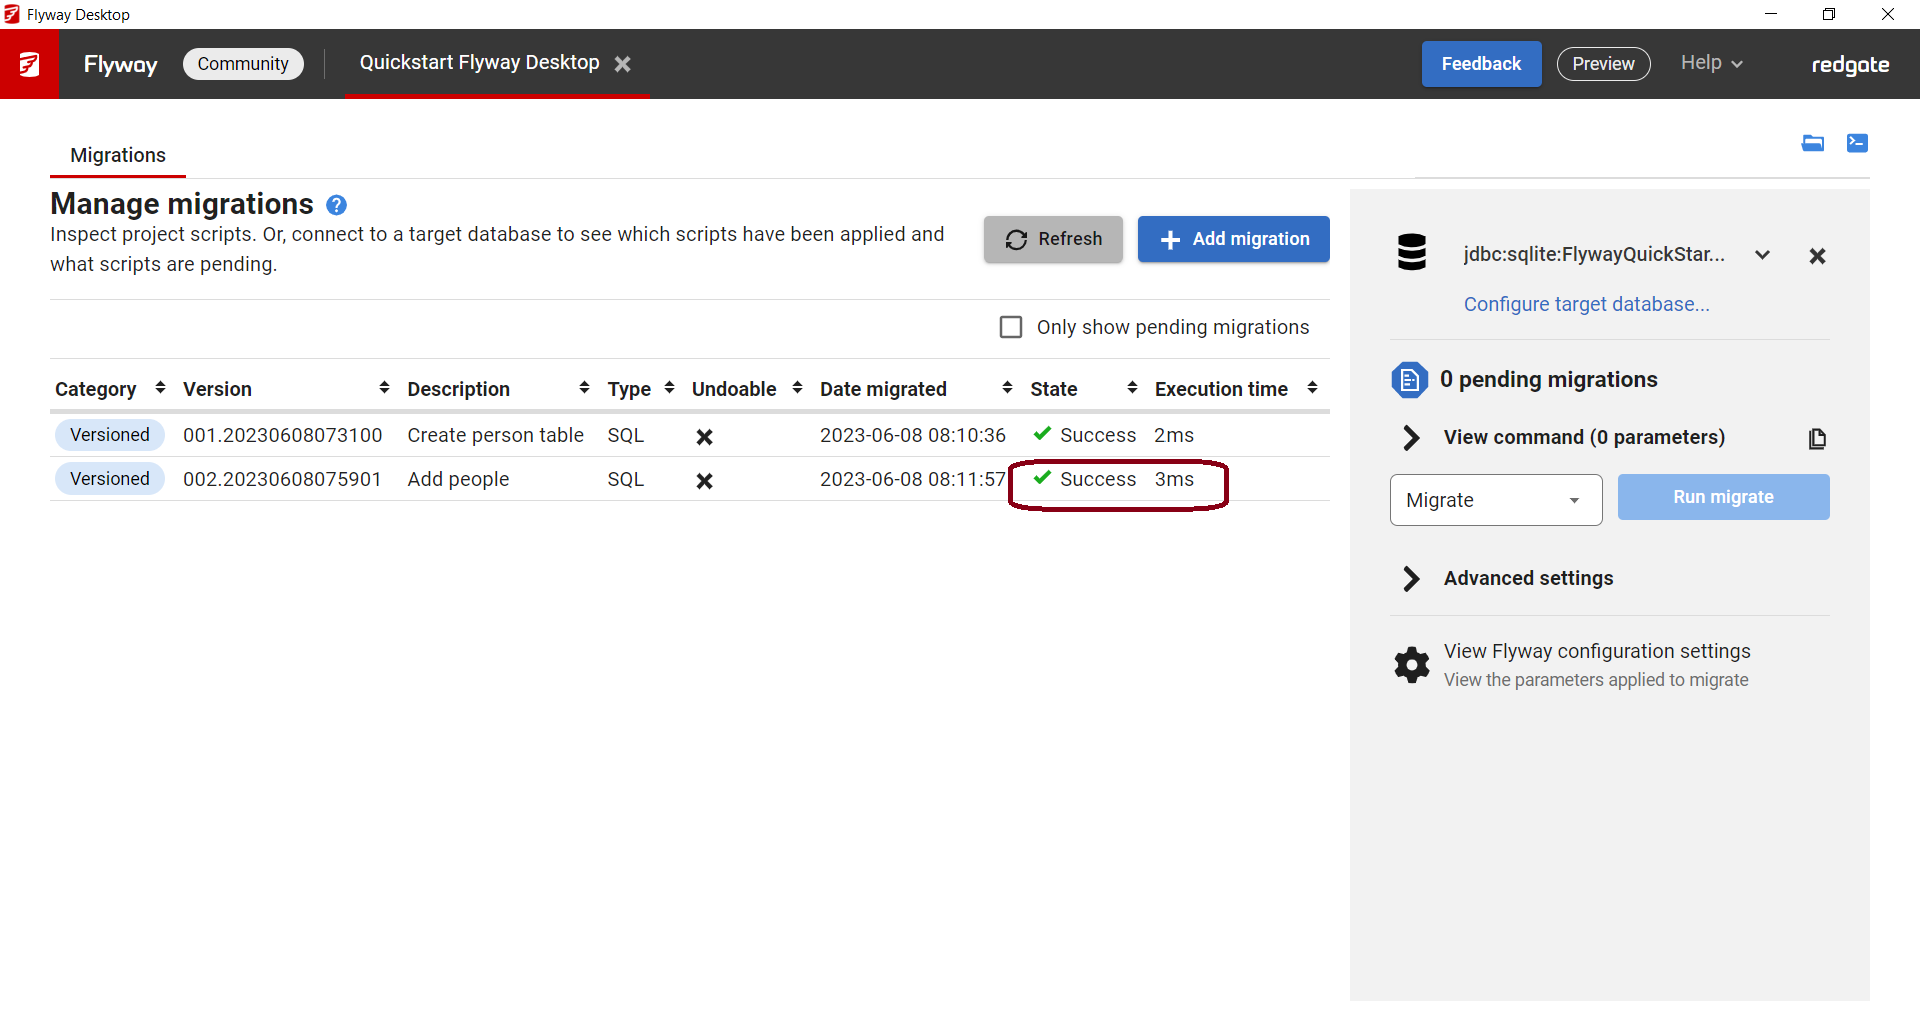
- Flyway Desktop should show the migration was successful. Click Close.
- Now, the second migration has a Success state and you can see the time it took to execute this migration script against the target database.
- To view the migration scripts on disk, click the blue folder in the top right.

- This brings you to the project folder. Double click on the migrations folder to see your 2 scripts.
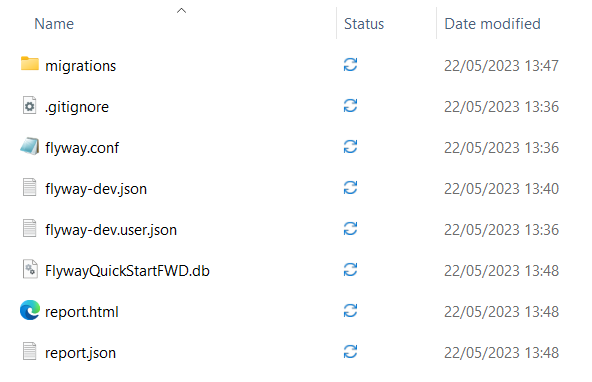 →
→ 
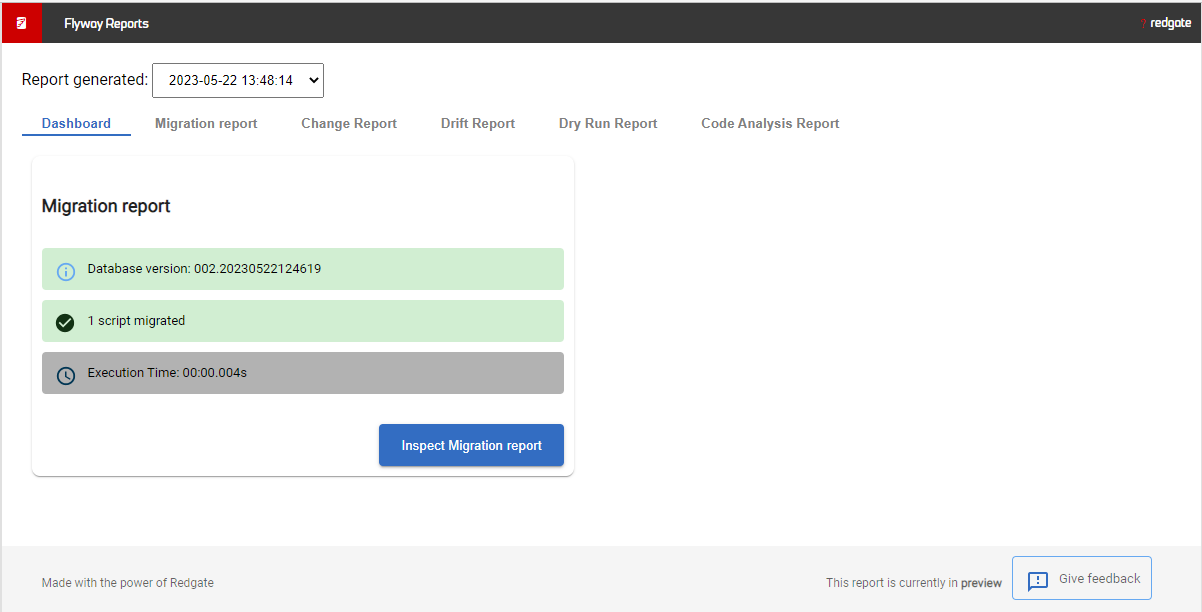
- If you go back up one level to the project folder, you can access a migration report. Open report.html.
- The Dashboard shows details of the migration script that was just executed:
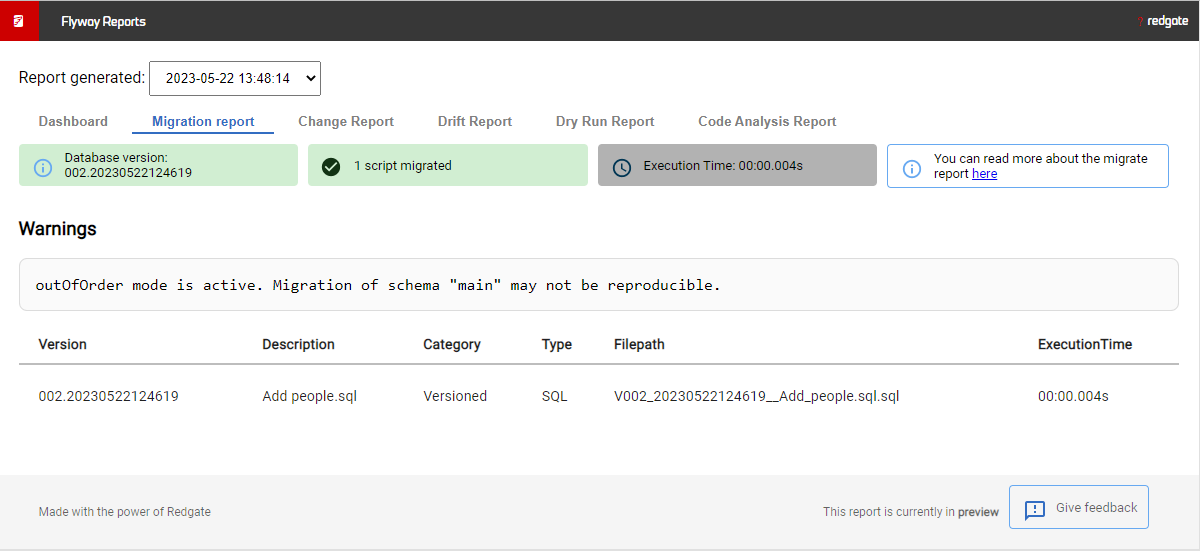
- Click onto the migration tab to see the following view
Configure connection details for the CLI
- To make using the CLI easier, go back to the project folder. Remember, you can use the blue folder
 in the upper right of Flyway Desktop.
 - Edit the
flyway.conf file:flyway.url=jdbc:sqlite:FlywayQuickStartFWD.db
flyway.user=
flyway.password=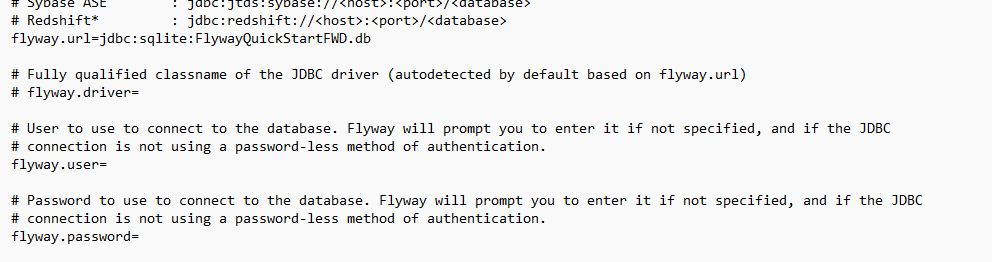
- In Flyway Desktop, use the command prompt
 at the top right to open a command prompt.
 - Run flyway info to see how this works in the CLI:
> flyway info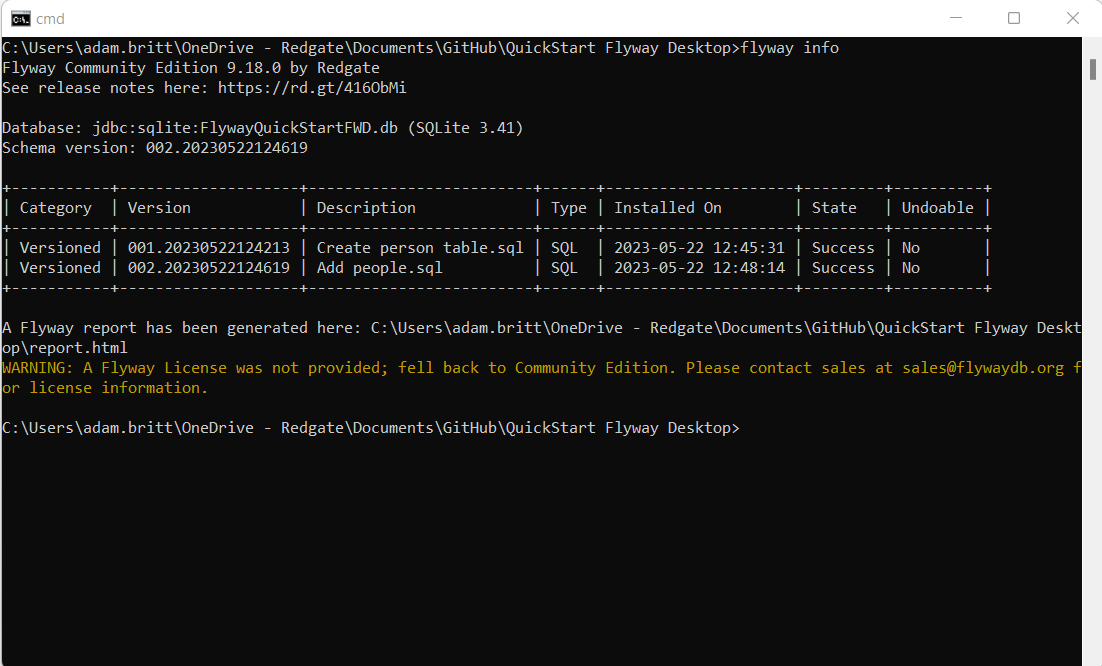
Summary
In this brief tutorial we saw how to:
- Install the Flyway Desktop and the Flyway CLI
- Create a project and configure the database connections
- Add a few migration scripts into our project and execute them on the target database
- See how the flyway info CLI command works
Next Steps
- Learn more about Flyway Desktop
- Watch a quick video about Flyway Desktop in the Flyway Community edition on Redgate University


