Managing users on Redgate Monitor SaaS
Published 16 February 2026
Users on your SaaS Monitor instance are managed through your Redgate ID account: https://www.red-gate.com/account/
You can choose to either using your company's Single Sign-on (SSO) or manage your users directly through Redgate ID.
To set up SSO follow the instructions in the Redgate ID documentation for Single sign-on for Redgate apps.
Before you get started
You will need a couple of things to administer your Redgate Monitor SaaS users namely: A Redgate ID and associated Organization.
If you do not have a Redgate ID you will need to create one. Follow the instructions here.
Once you have a Redgate ID, go to http://portal.red-gate.com/ and create an organization id. Go to Settings on the left panel, and click Create under "Create organization". You will require to enter an organization name. If you don't see the settings option on the left panel, try sign out and back in to portal.red-gate.com.

Granting Admin access to Redgate Monitor SaaS environments
The first user (including yourself) will require the role "Monitor SaaS admin" to access your instance of SaaS monitor (See below for how to do this). You can invite any other desired users to be part of the organization.
Select change roles for the users you want to be admins in Redgate Monitor SaaS, then select Change roles from the actions drop down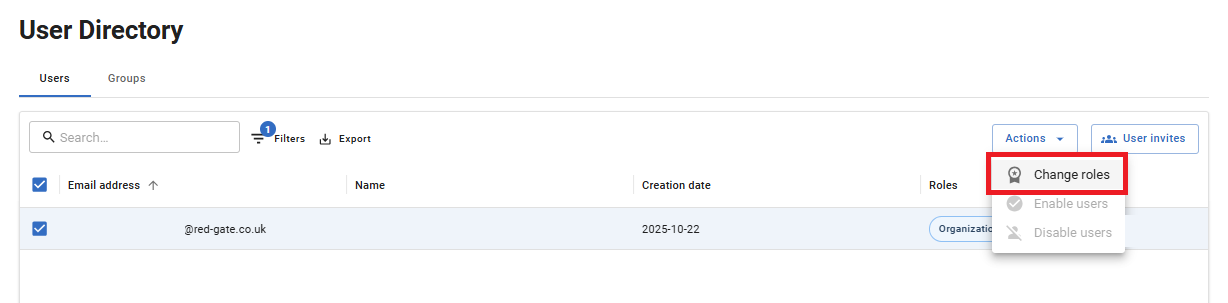
In the next screen add the Monitor SaaS admin role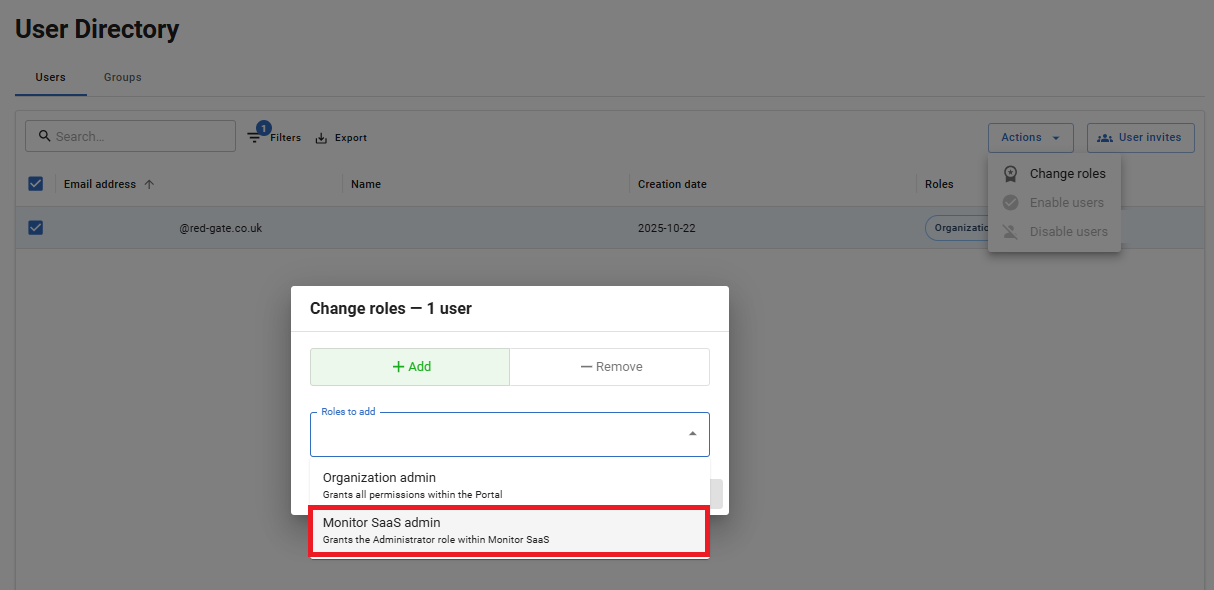
You will need to be an organization admin to manage your users. See Requesting the organization admin role.
Users are required to be part of the organization in Redgate ID to be able to access the Monitor SaaS portal. Admin users also require the role “Monitor SaaS admin” to be given to them inside the Redgate ID organization.
Managing non admin users
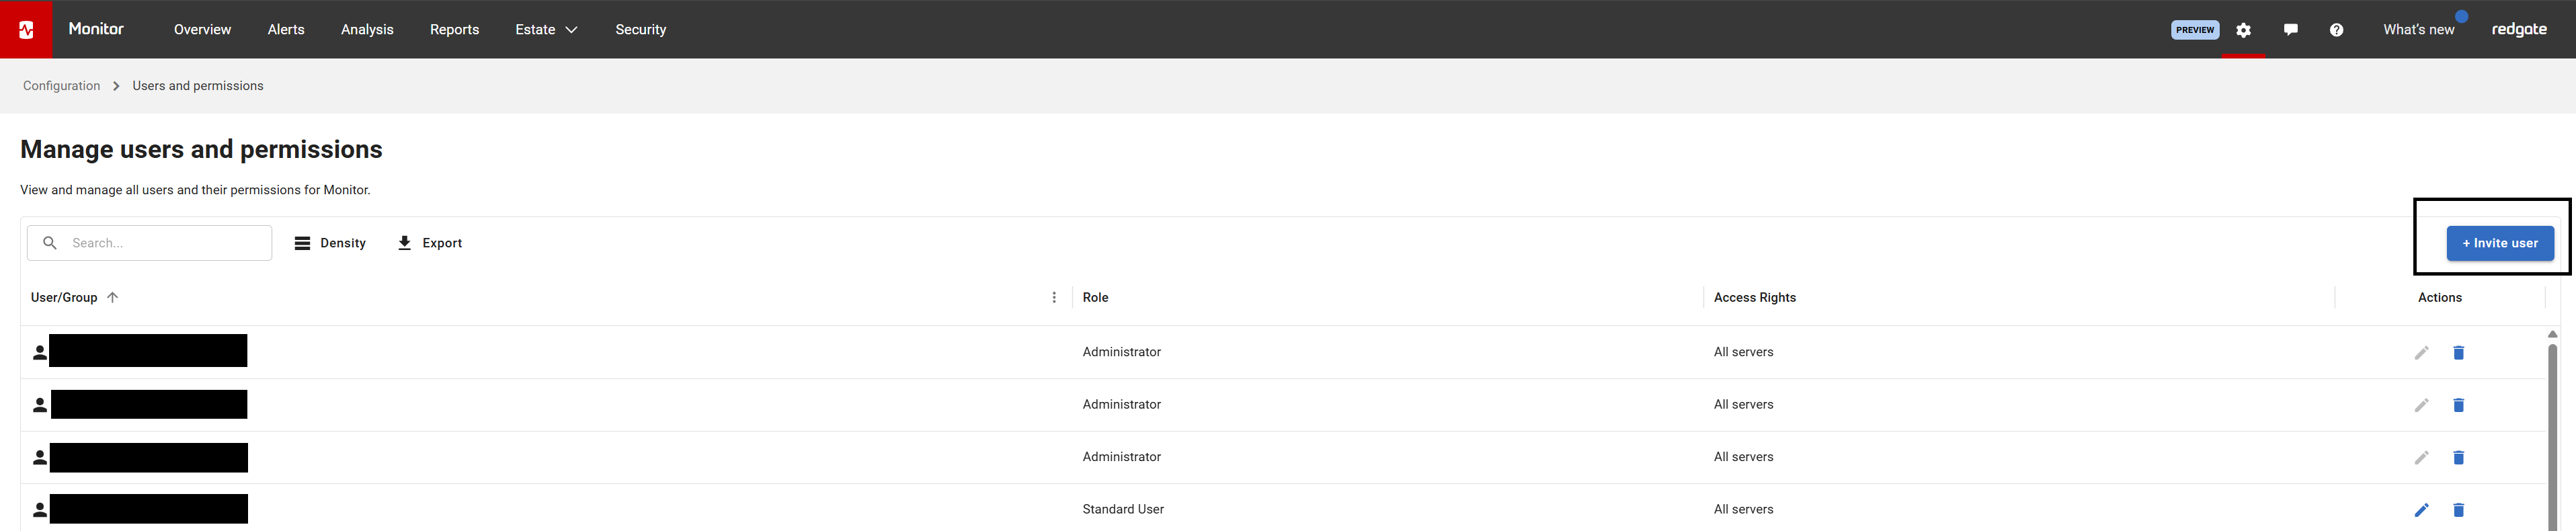
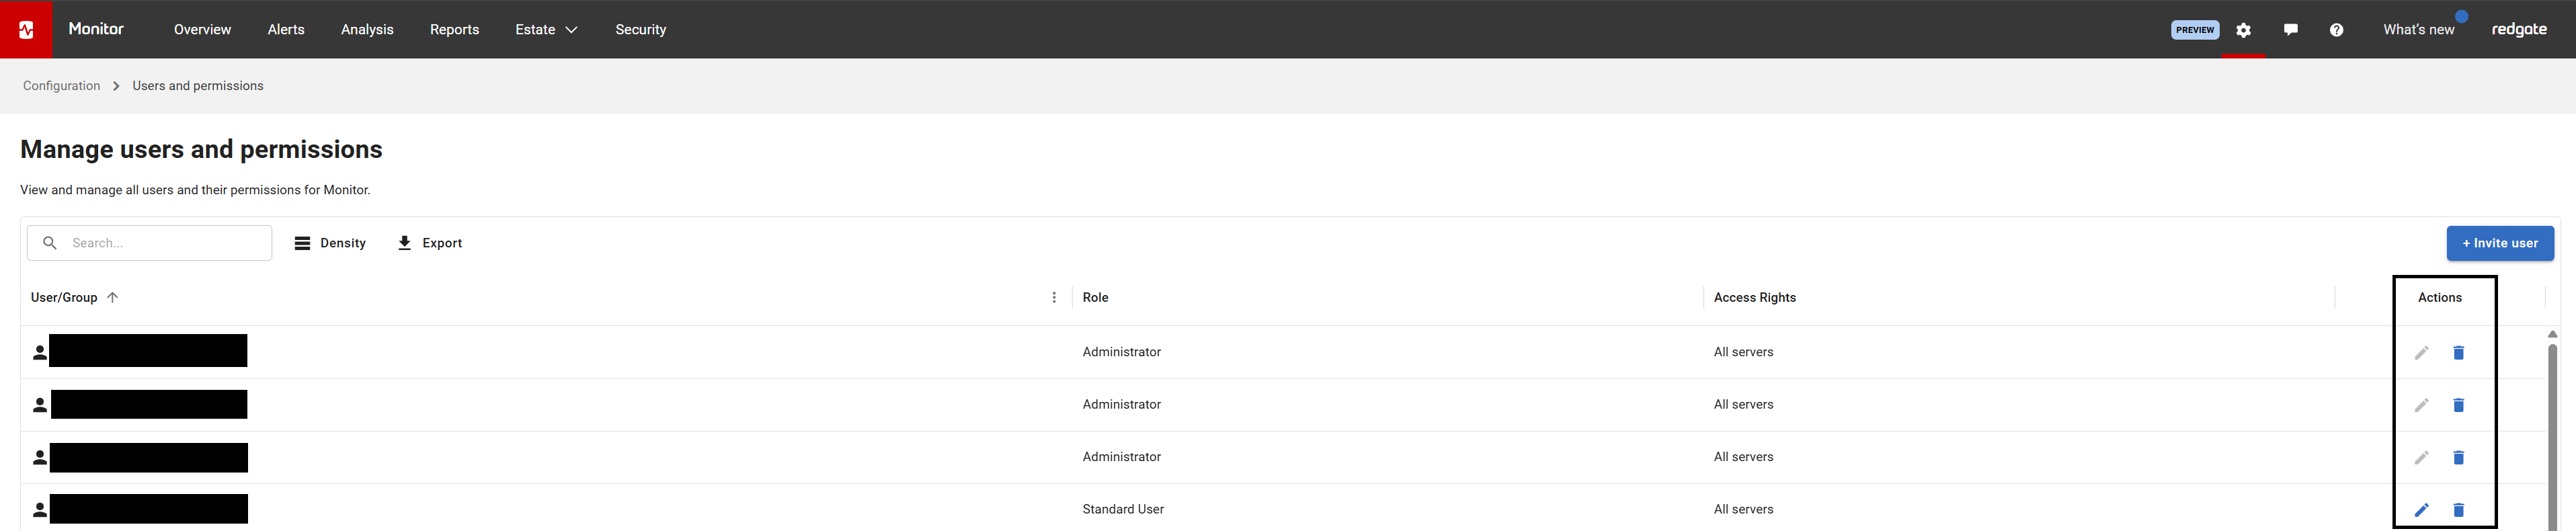
For non admin users, admins can invite them to Monitor SaaS and manage the servers the users can view from the “Manage users and permissions” page. To access the page, go to /Configuration and click on “Manage users and permissions”.

To add a new user, click the Invite button.
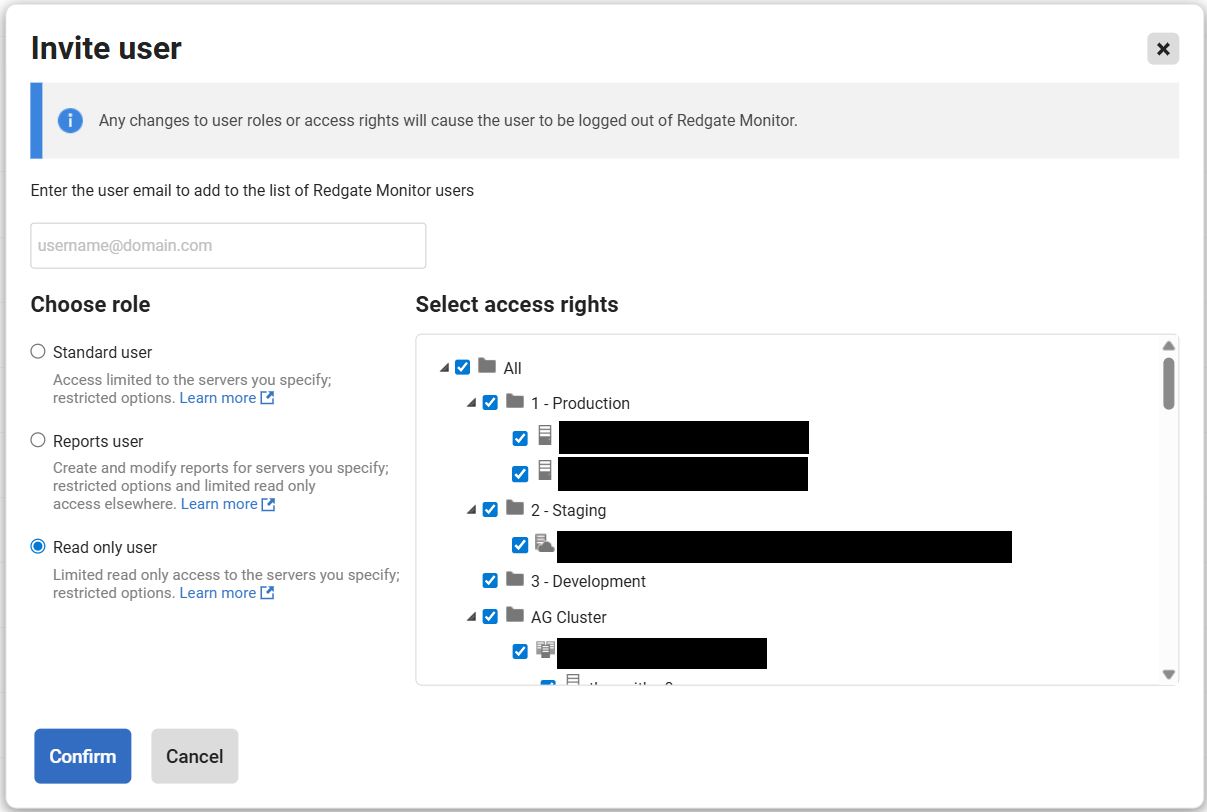
Enter the email address of the user you wish to invite to Monitor SaaS.
Choose the role you wish to give the user and select the servers they are allowed to see.
Click Confirm to send the invite to the user.
After clicking Confirm the new user will appear in the Manage users and permissions page. The new user will receive an invite from Redgate ID telling them how to log in to Monitor SaaS.
From the Manage users and permissions page you can also edit what servers a user can see, and their permissions and delete users who no longer use Monitor SaaS.
Currently only non admin users can be edited within the application.
Multi-Factor Authentication
Monitor SaaS Platform requires users to be set up with either single sign on (SSO) or multi-factor authentication (MFA). If you have chosen to manage users directly through Redgate ID and haven't set SSO up, the users will need to configure MFA for their accounts within Redgate ID. If they don't, the users will be prompted to do so, when they login to Monitor SaaS Platform.
To set MFA up, each user will need to go to their Redgate ID account via portal.red-gate.com, and click on their profile picture at the bottom left corner and then click Manage Login.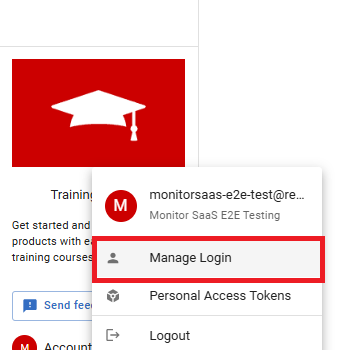
The users will be redirected to page below, where they will need to click Manage multi-factor authentication option.
Finally the users will be redirected to a page with step-by-step instructions on how to set MFA up. Once MFA is set up, the user will be allowed to log in to the SaaS Monitor instance.
This documentation contains proprietary information and is protected by copyright law.
Copyright © 2026 Red Gate Software Limited. All rights reserved


