Enabling host monitoring for RDS instances
Published 28 March 2024
IAM role support was added in Redgate Monitor v14.0.5. If you are using an older version of v14, please see the relevant documentation for v13.
Host monitoring for RDS instances covers host metrics relating to disk capacity & usage, memory usage, and Operating System process information. These metrics are only available through the Enhanced Monitoring feature of Amazon RDS. If you want the full monitoring experience for machine metrics you should enable the enhanced monitoring in your Amazon RDS SQL Server or PostgreSQL instances. Be aware that Enhanced Monitoring might incur extra charges - check the RDS Enhanced Monitoring documentation for more information.
AWS API authentication methods
As a security best practice, AWS recommends using an IAM role over long-lived credentials. See the Amazon AWS IAM documentation for more information.
Following the principle of least privilege, the below sections describe the specific IAM permissions required for monitoring purposes. In particular, it is explicitly recommended to not use the AWS root user.
There are two methods of authenticating with the AWS API via Redgate Monitor.
- IAM role - using an explicit role Amazon Resource Name (ARN) to assume a role, or through a role that is attached directly to your EC2 instance running Redgate Monitor's Base Monitor (known as an instance profile).
- IAM user - using a long-lived access key and secret key
Creating an AWS IAM role (instance profile)
This method requires that you have a Base Monitor running on an AWS EC2 instance, and the Base Monitor EC2 instance is located on the same AWS account as the RDS instances you wish to monitor.
If your EC2 instance is in a separate account then you should follow the IAM role (assume role on EC2) guide.
If you are running your Base Monitor outside of AWS then you should follow the IAM user guide.
Here is some information about how to create an IAM role with AWS API access that will attach directly to your EC2 instance as an instance profile. For full guidance, please consult the Amazon AWS IAM documentation.
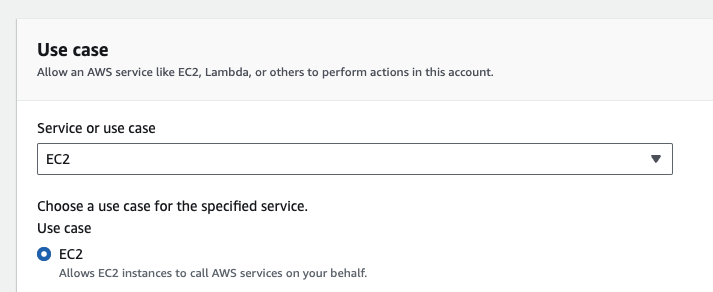
- When creating your IAM role, make sure you choose AWS service as the trusted entity type, and EC2 as the use case. This will allow you to add the role as an instance profile to your Base Monitor.

- If you want to use an AWS managed policy then add the AmazonRdsReadOnlyAccess policy to the role. If you are setting up IAM authentication for PostgreSQL you should select the policy you created in that guide. If you want to create your own custom policy then you will need to allow the actions in the table below. To verify that your role is set up correctly, use the IAM Policy Simulator and select the new role then choose the actions in the table below and press "Run Simulation" - they should all return "Allowed".
Action When needed rds:DescribeDBInstances All RDS instances cloudwatch:GetMetricData rds:DescribeDBClusters For Aurora clusters logs:GetLogEvents When enhanced monitoring is enabled 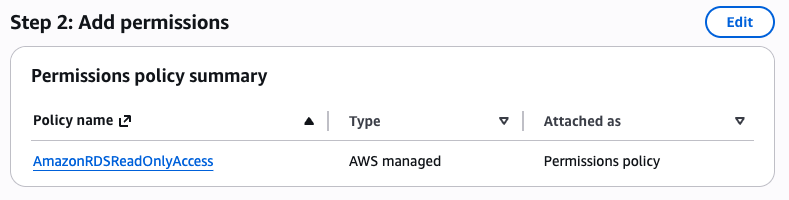
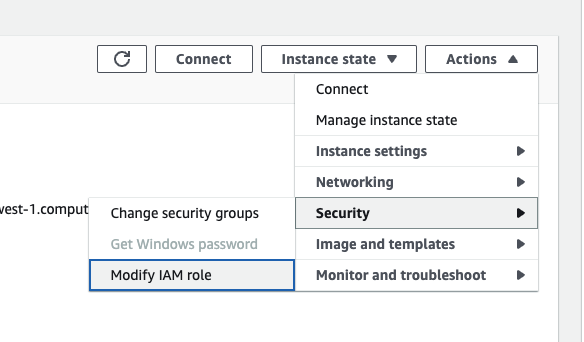
- After you have created the role with the permissions as above, you can attach the role by navigating to the details page for the EC2 instance running the Base Monitor service and clicking Actions > Security > Modify IAM Role in the top right of the pane.
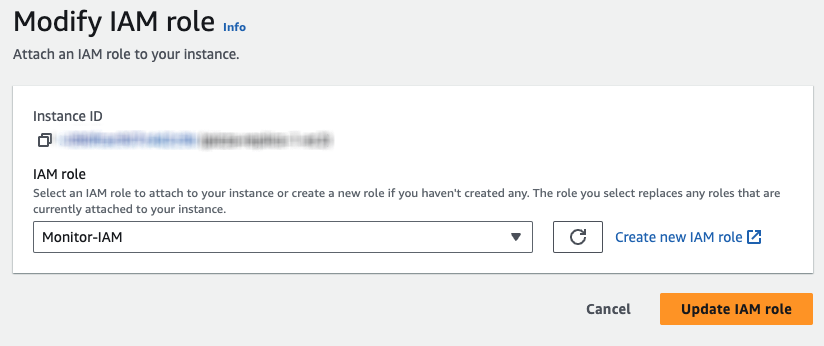
- You should be able to attach your newly created role to the EC2 instance. Note that you may need to restart your EC2 instance for the IAM role to attach if it does not come into effect after some time.
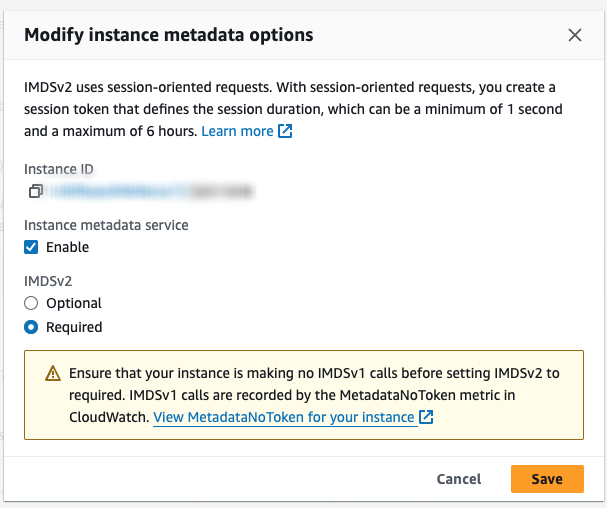
- You should make sure that your EC2 instance has instance metadata enabled under Instance settings > Modify instance metadata options
- Check that you have not set any of the following environment variables on your Base Monitor EC2 instance:
AWS_EC2_METADATA_DISABLED,AWS_ACCESS_KEY_ID,AWS_SECRET_KEY,AWS_PROFILEandAWS_DEFAULT_PROFILE. Setting any of these could prevent the role from being used as the credential provider.
Using IAM instance profile credentials in Redgate Monitor
- When adding your RDS-based instance to Redgate Monitor or editing an existing instance's credentials, toggle enable host monitoring

- Fill out the region and identifier if it has not been correctly parsed from your RDS host address.
- Leave the Role identifier blank. Redgate Monitor will automatically use the role you have attached to your EC2 instance.
Creating an AWS IAM role (assume role on EC2)
This method requires that you have a Base Monitor running on an AWS EC2 instance, and that your Base Monitor EC2 instance is not located in the same AWS account as the RDS instances you wish to monitor.
If your Base Monitor EC2 instance is on the same account as the RDS instances you wish to monitor then we recommend using the IAM role (instance profile) guide.
If you are running your Base Monitor outside of AWS then you should follow the IAM user guide.
Here is some information about how to create a trust relationship between your source Base Monitor EC2 account and the destination RDS instance account by creating an IAM role on each account which reference each other. For full guidance, please consult the Amazon AWS IAM documentation.
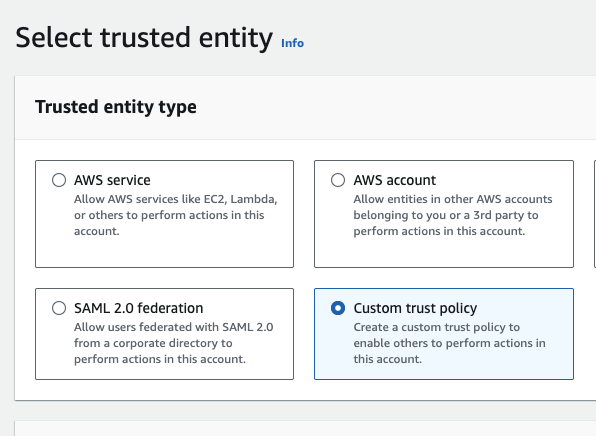
- On the AWS account that holds the RDS instance you wish to monitor (destination account), create an IAM role and select custom trust policy as the trusted entity type and enter the Account ID that holds your EC2 instance.
External ID and MFA is not required as we expect that the source and destination accounts are controlled by the same party.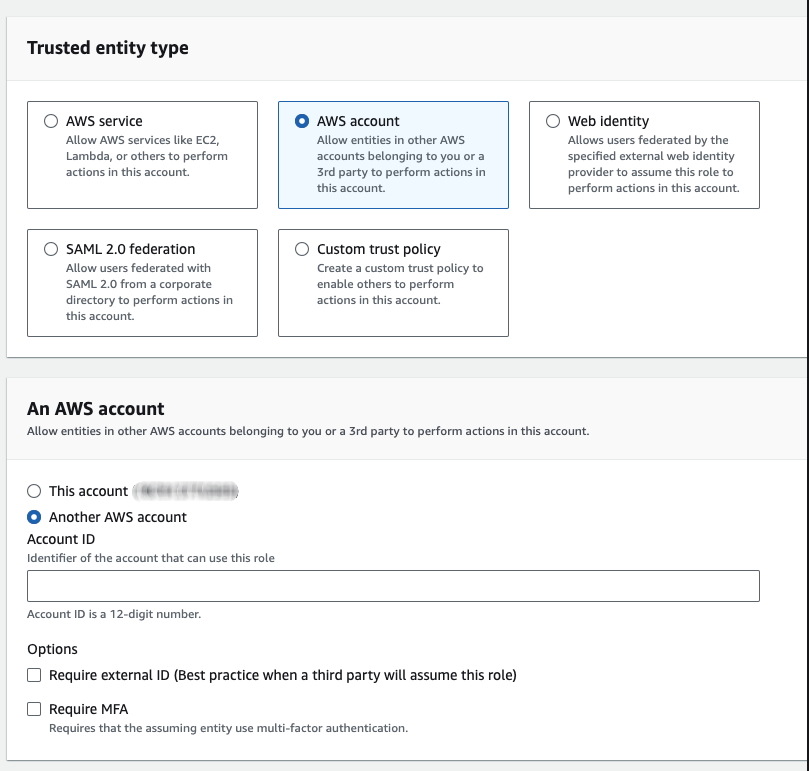
- If you want to use an AWS managed policy then add the AmazonRdsReadOnlyAccess policy to the role. If you are setting up IAM authentication for PostgreSQL you should select the policy you created in that guide. If you want to create your own custom policy then you will need to allow the actions in the table below. To verify that your role is set up correctly, use the IAM Policy Simulator and select the new role then choose the actions in the table below and press "Run Simulation" - they should all return "Allowed".
Action When needed rds:DescribeDBInstances All RDS instances cloudwatch:GetMetricData rds:DescribeDBClusters For Aurora clusters logs:GetLogEvents When enhanced monitoring is enabled - After creating this role, take a note of its ARN as this will be used later by Redgate Monitor. This can be found in the Summary for the role.
- On the AWS account that holds the Base Monitor EC2 instance (source account), create an IAM policy using the JSON mode in the policy editor with the following
AssumeRolepermissions. Replace DESTINATION_ROLE with the ARN from the previous step: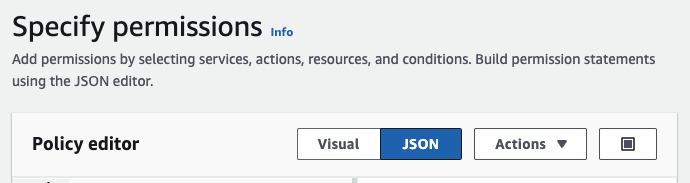
{ "Version": "2012-10-17", "Statement": [ { "Effect": "Allow", "Action": "sts:AssumeRole", "Resource": "DESTINATION_ROLE" } ] } - Continuing on the source account, create the second IAM role. This time you should select AWS service as the entity type and EC2 as the use case.
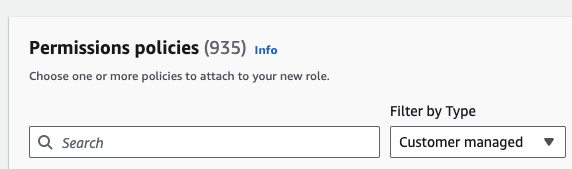
- When adding permissions to this role, you should select the AssumeRole policy you created earlier in step 4. You can find this by filtering by customer managed
- You should now attach the role to your Base Monitor EC2 instance following steps 4-7 outlined in the IAM role (instance profile) guide.
- Optionally, if you wish to make the trust relationship stricter, you can edit the trust identity of the role on your destination account so that only the EC2 instances using the role you have created on your source account can assume it. You can do this by selecting the custom trust policy and providing the following JSON, replacing SOURCE_ROLE with the ARN of the role you attached to the Base Monitor instance:
{
	"Version": "2012-10-17",
	"Statement": [
		{
			"Effect": "Allow",
			"Principal": {
				"Service": "ec2.amazonaws.com",
				"AWS": "SOURCE_ROLE"
			},
			"Action": "sts:AssumeRole"
		}
	]
}
Updating trust policies can take some time to come into effect. If you are sure the updated trust relationship is correct but are still receiving a "role is not authorized" error when attempting to monitor your instance, please wait 10-15 minutes and retry.
Using IAM assume role credentials in Redgate Monitor
When adding your RDS-based instance to Redgate Monitor or editing an existing instance's credentials, toggle enable host monitoring
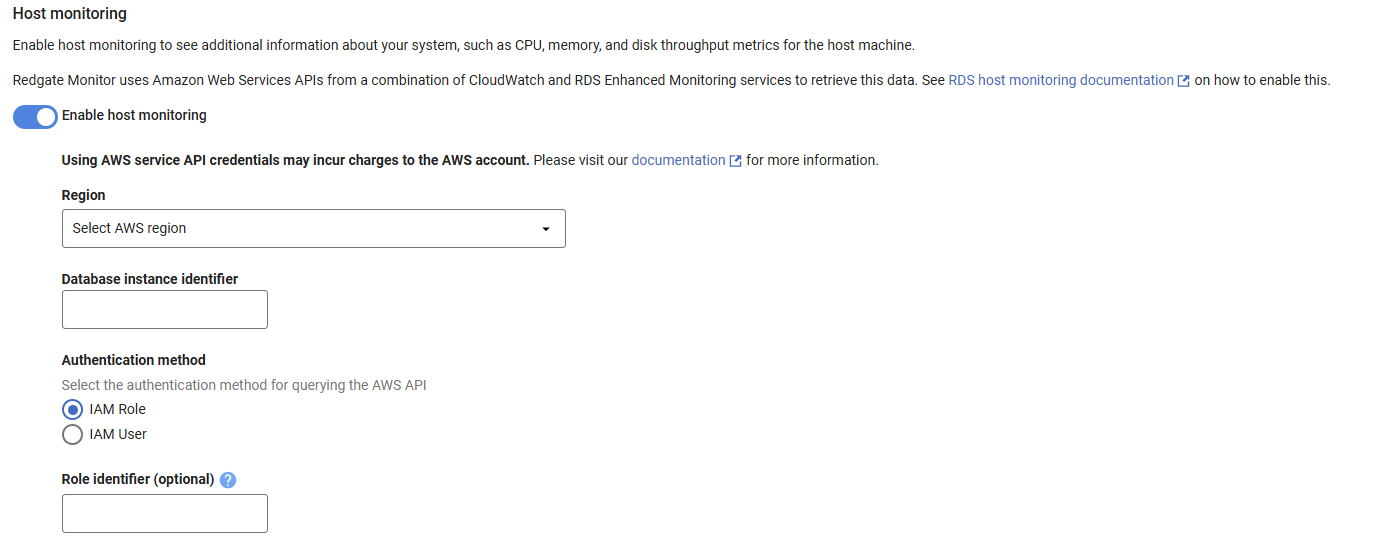
Fill out the region and identifier if it has not been correctly parsed from your RDS host address.
In Role identifier enter the ARN of the role that you created for the destination account in step 3 of the IAM role (assume role on EC2) guide above.
An IAM user must be created on the same AWS account as the instance that you intend to monitor.
If you would prefer to monitor an instance on a separate AWS account from your IAM account then you should use IAM role assumption.
Creating an AWS IAM user
Here is some information about how to create an IAM user with AWS API access. For full guidance, please consult the Amazon AWS IAM documentation.
- Browse to the IAM > Users section of the AWS portal to create a new user.
- When setting the permissions, select Attach existing policies directly. If you want to use an AWS managed policy then add the AmazonRdsReadOnlyAccess policy to the user. If you are setting up IAM authentication for PostgreSQL you should select the policy you created in that guide. If you want to create your own custom policy then you will need to allow the actions in the table below. To verify that your user is set up correctly, use the IAM Policy Simulator and select the new user then choose the actions in the table below and press "Run Simulation" - they should all return "Allowed".
Action When needed rds:DescribeDBInstances All RDS instances cloudwatch:GetMetricData rds:DescribeDBClusters For Aurora clusters logs:GetLogEvents When enhanced monitoring is enabled 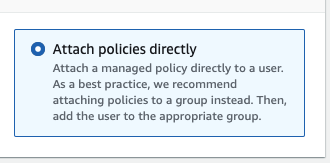
- After creating the user you will get a notification with a link to view the user. Use this to access the user's details.

- While in the user detail page, navigate to the Security credentials tab and press Create access key.

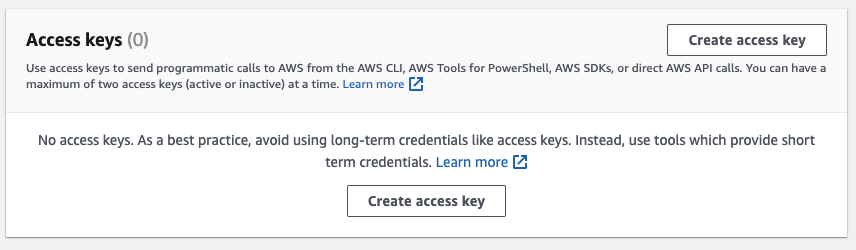
- Select "Third-party service" as the use-case for the access key.
- At the end of the creation process, you'll get access to the Access key ID and Secret access key. Make sure you save them to enter them later in Redgate Monitor.
Using IAM user credentials in Redgate Monitor
- When adding your RDS-based instance to Redgate Monitor or editing an existing instance's credentials, toggle Enable host monitoring.

- Enter the access and secret key for the IAM user that you have set up according to the steps above.
Endpoints that need to be accessible to the base monitor
A base monitor must be able to make outbound https requests to AWS service endpoints. If the base monitor is running on-premises or on a locked down EC2 instance then you may need to manually provide outbound access to the following endpoints.
| Endpoint | When necessary |
|---|---|
| The database instance itself | Always |
| rds.<region>.amazonaws.com | |
| monitoring.<region>.amazonaws.com | |
| logs.<region>.amazonaws.com | When enhanced monitoring is enabled |
| sts.<region>.amazonaws.com | When using IAM role auth and it is necessary to assume another role |
Replace <region> with the AWS region (e.g. us-east-1)
When monitoring instances in multiple regions you will need to allow access to the endpoints in each region.
Proxy configuration for Base Monitors running on EC2
If you are using a proxy to route web requests within your network then your EC2 Base Monitor will have to be configured to bypass this proxy to access the EC2 instance metadata service which runs on all EC2s at 169.254.169.254.
This should be done depending on how your proxy is configured normally.
If you have previously configured the Base Monitor service configuration file with proxy settings (see the Proxy Configuration in Redgate Monitor article for more details), then you need to add the following bypass list entry:
<defaultProxy address=<your_proxy> useDefaultCredentials="true" bypassLocal="true">
    <bypassList>
      <add address="169.254.169.254"/>
    </bypassList>
  </defaultProxy>
Otherwise, you should be able to override any existing system level proxy configuration by setting the environment variable NO_PROXY, which can contain a comma separated list of host names or IP addresses, to include the EC2 metadata service at 169.254.169.254.
AWS API usage and charges
Here's the list of AWS API endpoints used by Redgate Monitor:
| AWS Product | API Action | Usage (per RDS instance monitored) | Requires enhanced monitoring? |
|---|---|---|---|
| CloudWatch | GetMetricData | 7 metrics retrieved in a single request per minute (8 for Aurora) | No |
| CloudWatch Logs | GetLogEvents | 1 request per minute | Yes |
| RDS | DescribeDBInstances | 1 request per minute | No |
| DescribeDBClusters | 1 request per minute for Aurora clusters | No | |
| Security Token Service | AssumeRole | 1 request per 15 minutes where explicit IAM role auth is being used | No |
You can check the Amazon CloudWatch pricing page to see how much the requests would cost for the region where your RDS instances are located.
Amazon AWS might charge for storing CloudWatch logs and for data transfer, these charges are not covered here as it might change depending on your CloudWatch configuration for keeping historic data and the data transfer charges will depend on whether your Base Monitor or Redgate Monitor installation will be hosted in AWS EC2 and if it will be within the same region of the monitored RDS instances.
Example scenario
Consider 5 Amazon RDS SQL Server instances being monitored 24x7 for a period of 30 days using a base monitor hosted on an EC2 instance in the same AWS account.
This is just an example to demonstrate how you can get an estimation of your requests charges, refer to the AWS documentation to get real up-to-date values.
GetMetricData
Calculating the total amount of GetMetricData requests for the given estate size for 30 days:
5 RDS instances * 1,440 minutes per day * 30 days = 216,000 GetMetricData requests
In this example, we'll consider that the GetMetricData is billed $0.00001 per metric requested, i.e. $0.01 per 1,000 metrics requested (price for US East region at the time of this writing).
7 metrics requested * $0.00001 per metric = $0.00007 per GetMetricData request
We then have the price for GetMetricData requests:
216,000 GetMetricData requests * $0.00007 per GetMetricData request = $15.12 (total for 5 RDS instances)
GetLogEvents
As part of this example, requests to GetLogEvents API endpoint are not charged by AWS, so:
5 RDS instances * 0 billable request per minute * 1,440 minutes per day * 30 days = 0 billable requests
DescribeDbInstances
As part of this example, requests to DescribeDbInstances API endpoint are not charged by AWS, so:
5 RDS instances * 0 billable request per minute * 1,440 minutes per day * 30 days = 0 billable requests
The total estimate price of AWS API requests would be $15.12


