Setting up Azure AD as your identity provider
Published 12 April 2023
This guide aims to go through the main configuration steps required for Azure AD to be used as an identity provide for redgate Clone.
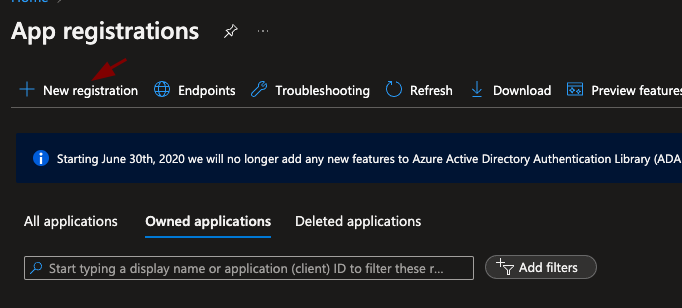
Step 1. Register a new application in Azure.
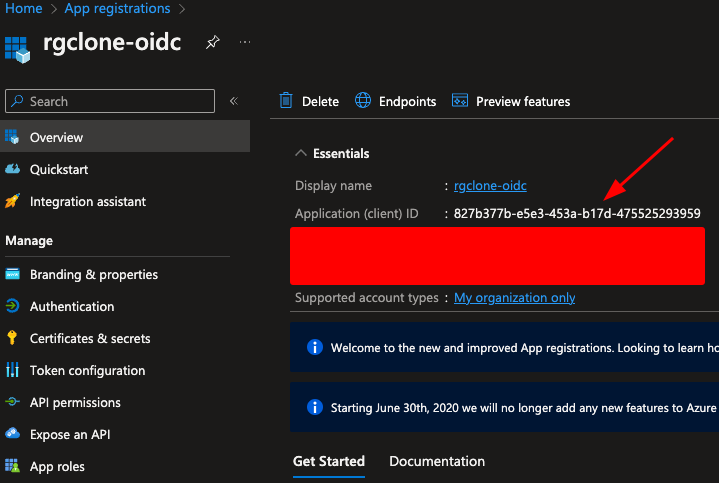
Step 2. After setting up the app registration, you should take a note of the Client ID as this will be used again below, and in both the client ID and Audience configuration values in the redgate Clone Admin Console.
Step 3. Take a note of the OIDC config path by clicking the Endpoints button and copying the URI from the OpenID Connect metadata document field.

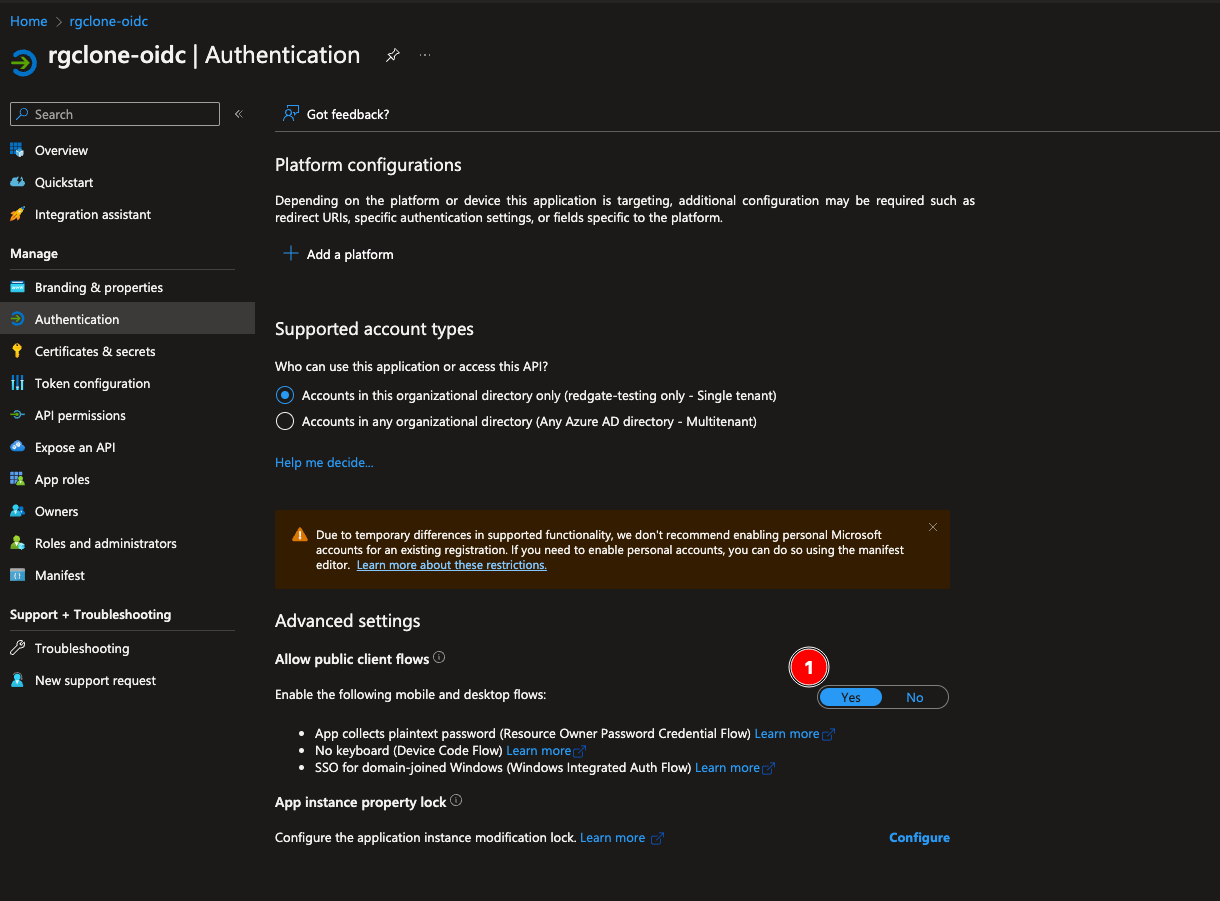
Step 4. In the authentication section under Advanced settings, enable the Allow public client flows option.
Step 5. Expose an API. The default/minimal options for these settings will be sufficient. Use the Client ID (see Step 2 above) as the authorized client application.
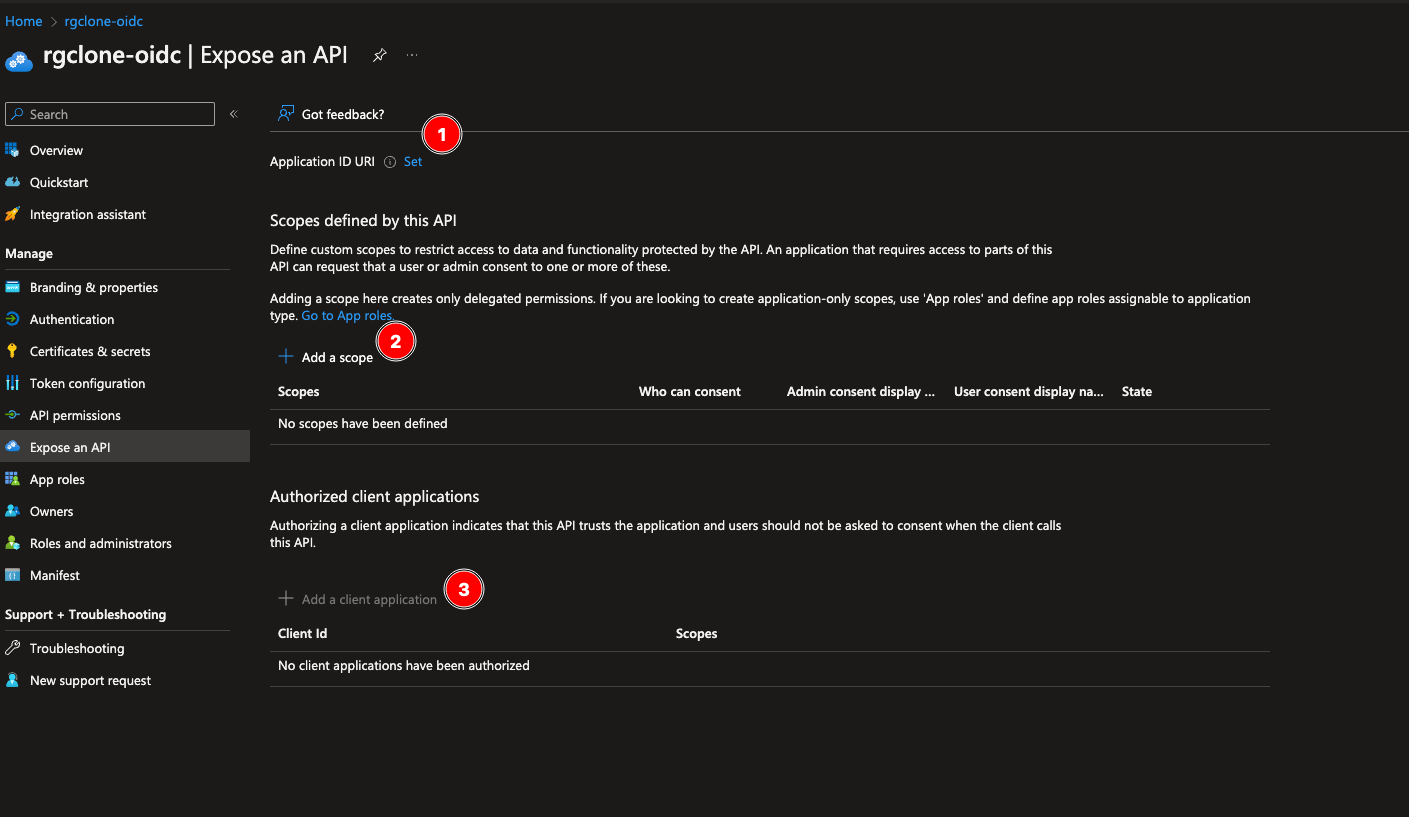
Step 6. On the Expose an API screen, take a note of the defined scope, as this will need to be added to the additional scopes configuration in the redgate Clone Admin Console.

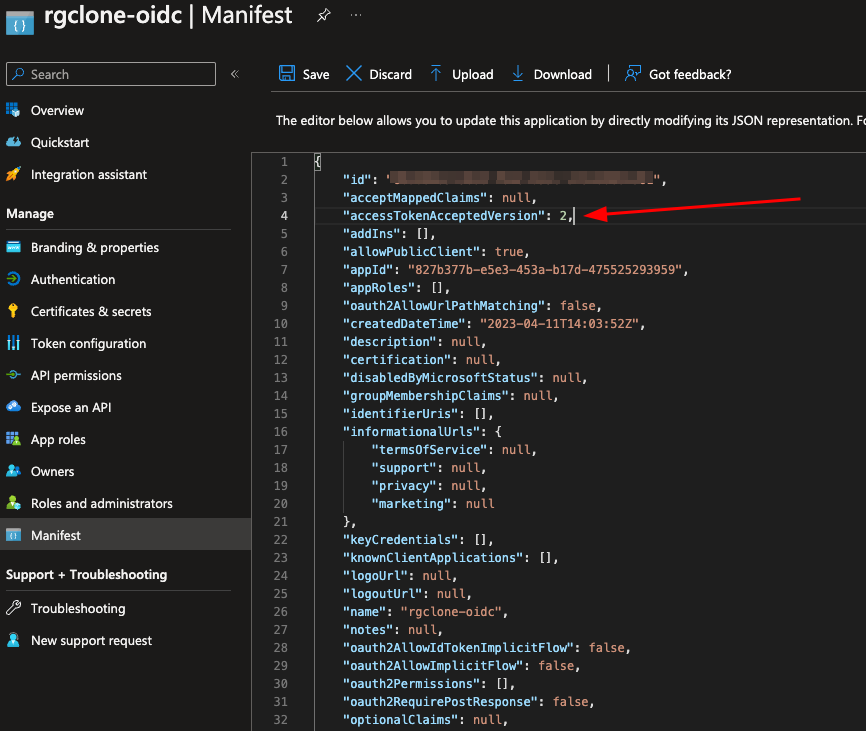
Step 7. In the app's Manifest page, make sure the option accessTokenAcceptedVersion is set to 2.
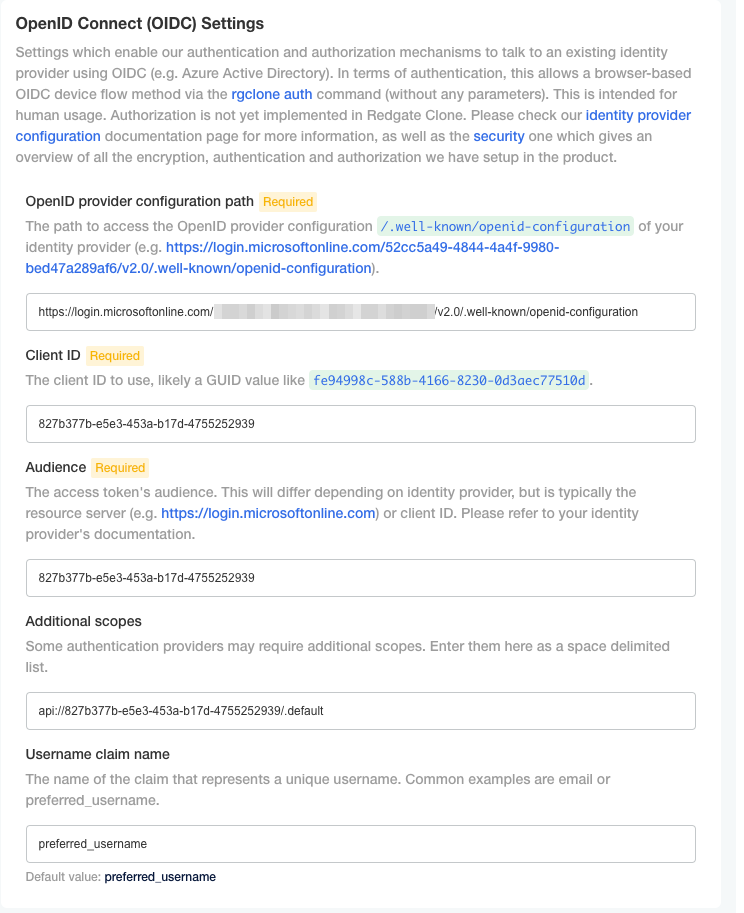
Step 8. Configure the OIDC settings in the redgate Clone Admin Console using the values from Step 2, Step 3, and Step 6 in their respective fields.
In this example our final settings would become as follows:
This documentation contains proprietary information and is protected by copyright law.
Copyright © 2026 Red Gate Software Limited. All rights reserved


