Setting up Okta as your identity provider
Published 12 April 2023
This guide aims to go through the main configuration steps required for Okta to be used as an identity provide for redgate Clone.
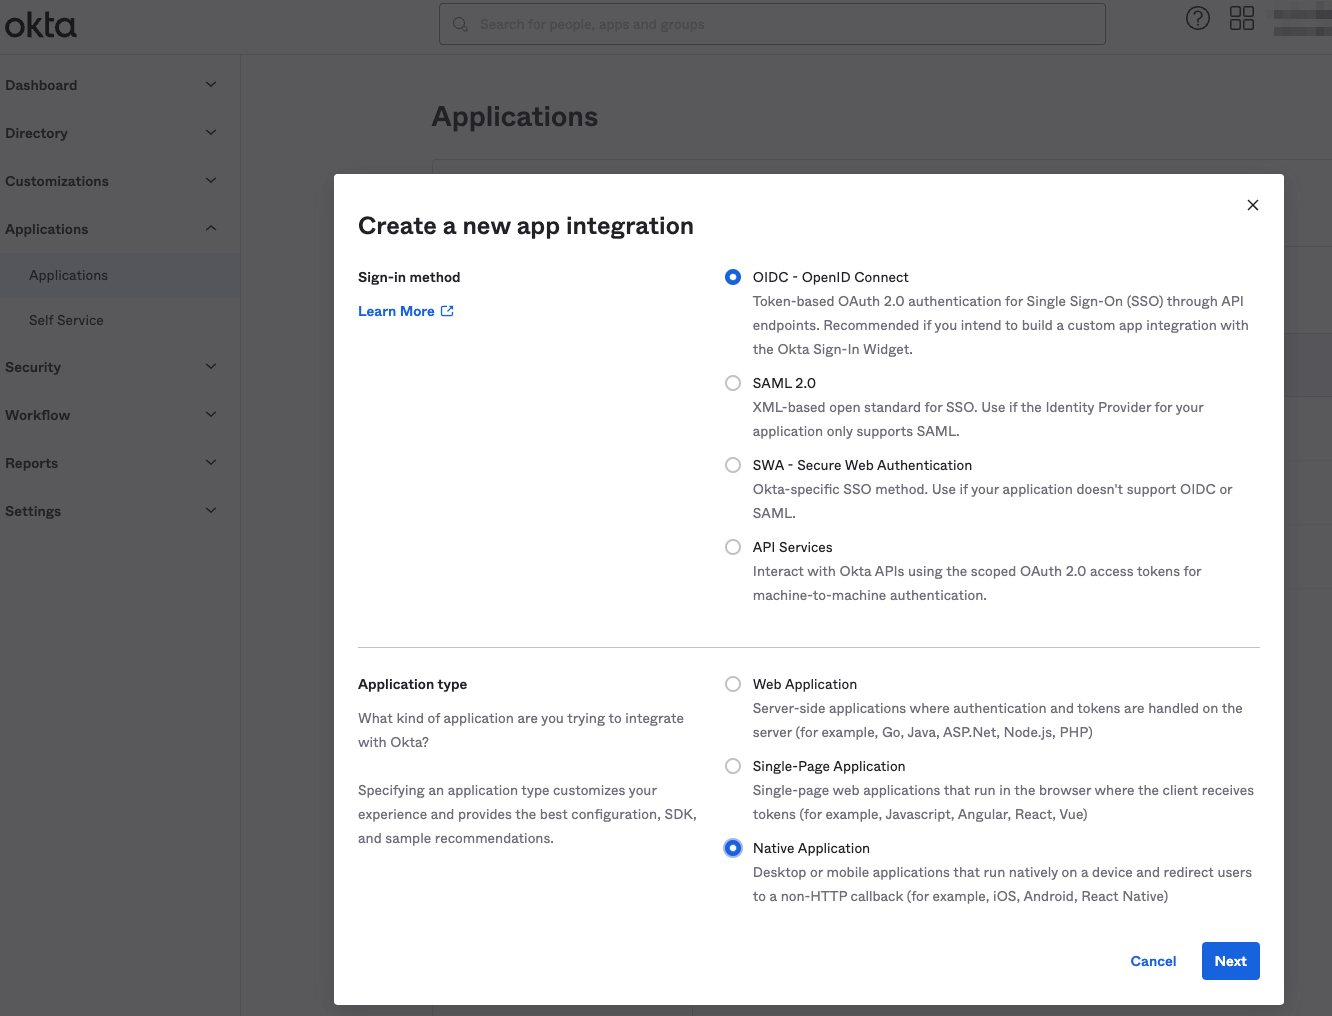
Step 1. Create a new app integration within Okta (in the Applications sidebar menu item). Select OIDC as the sign-in method, and Native Application as the application type.
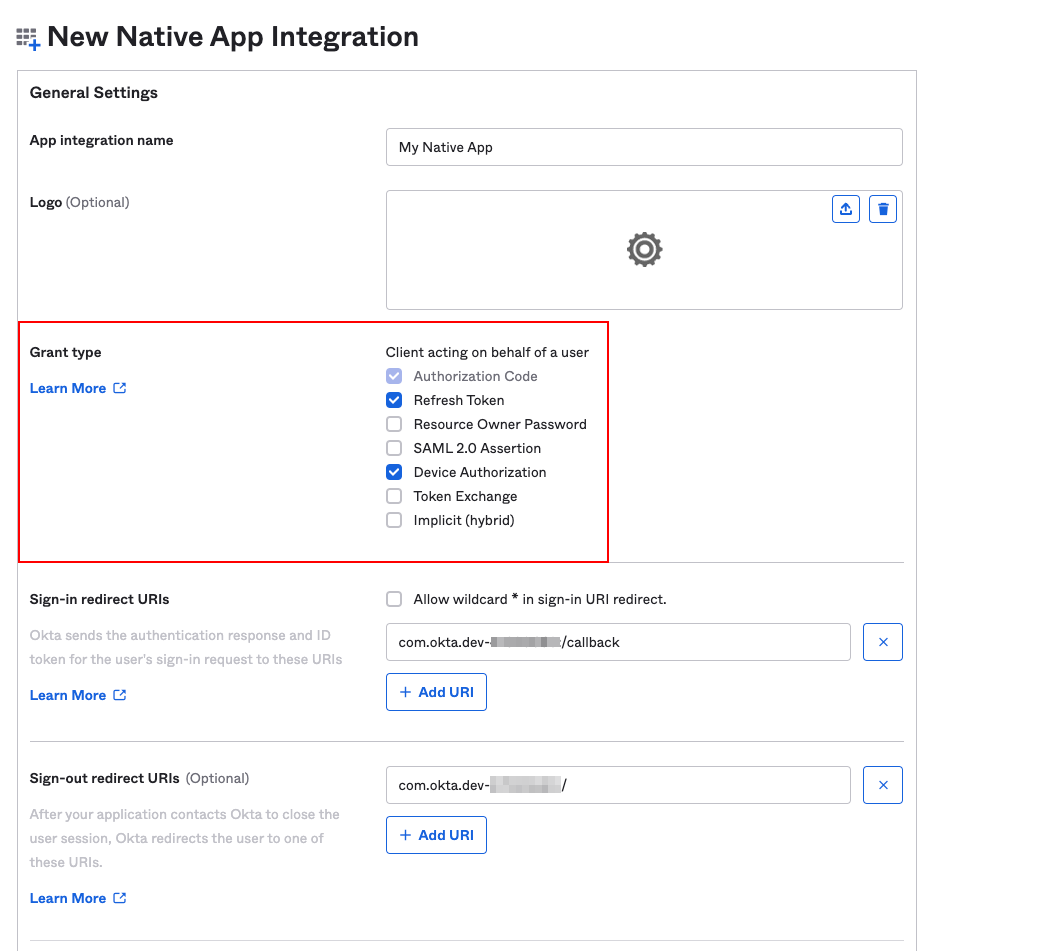
Step 2. Configure the app integration to use device-flow by enabling Device Authorization as a grant type. You should also enable Refresh Token. At this point you can also set up Assignments to determine who in your organisation will have access redgate Clone through OIDC.
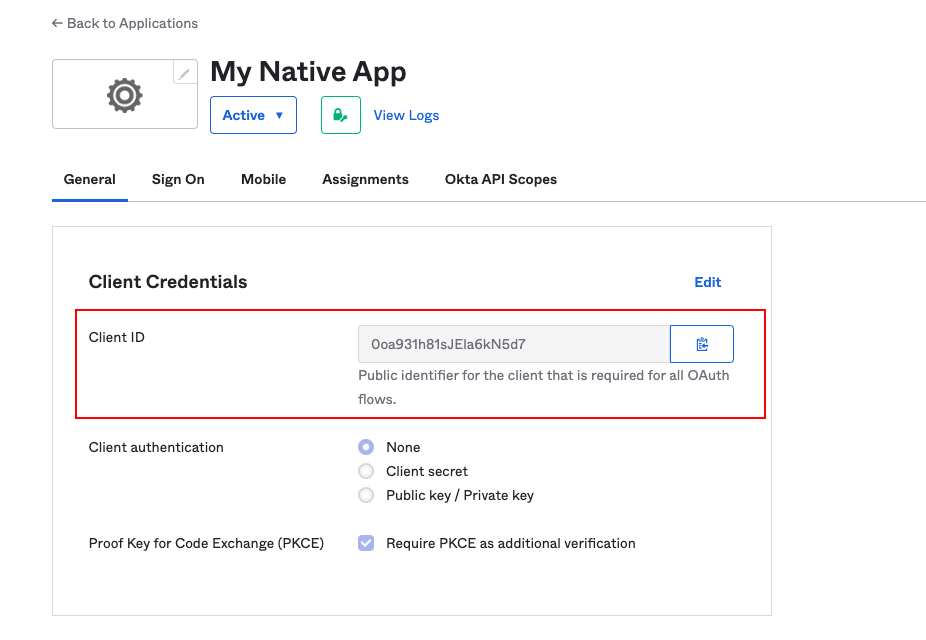
Step 3. After configuring your new app integration, you should take a note of the Client ID as this will be required to configure the identity provider on the redgate Clone Admin Console.
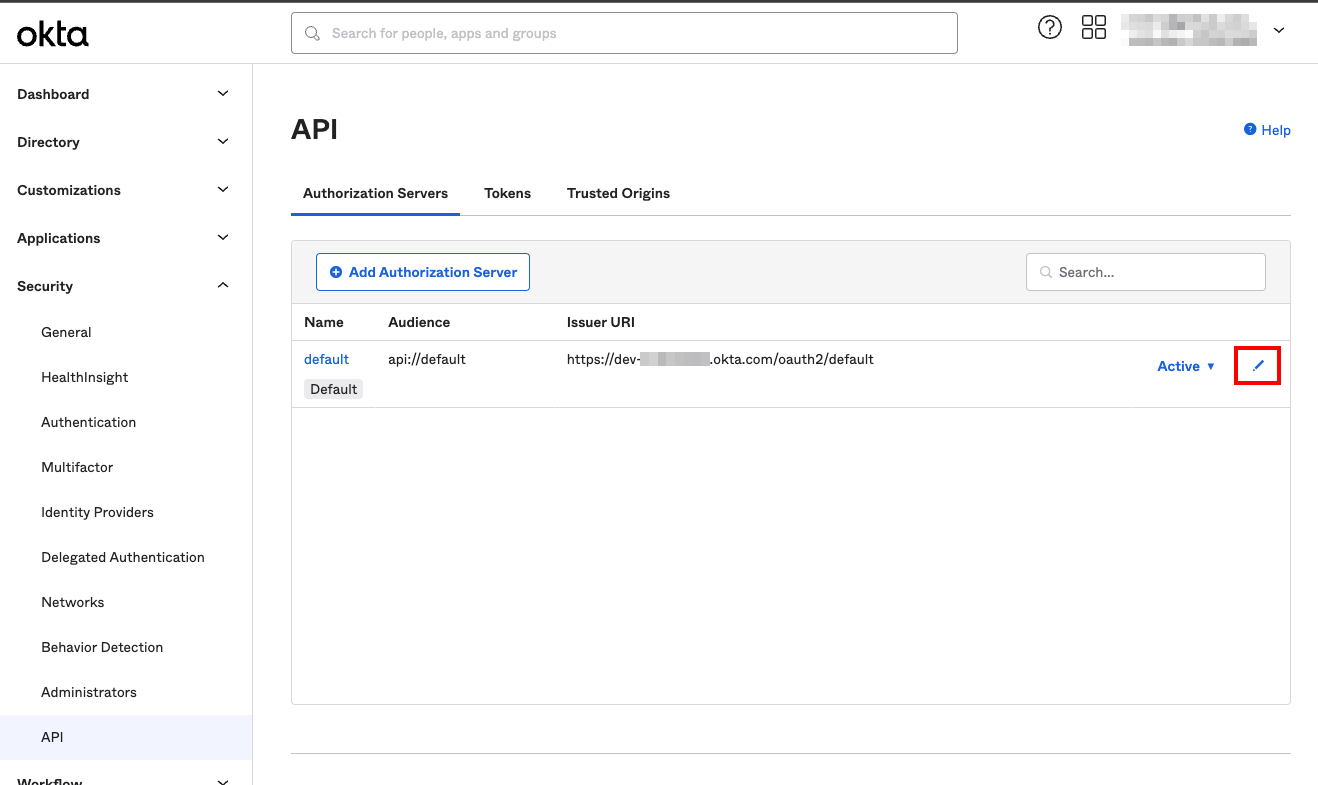
Step 4. At this point you must configure your API authorization server to allow device-flow authentication. Under the Security → API sidebar menu item, you can either create a new authorization server or use an existing one. This guide will assume you choose to edit an existing server, in this case the default provided by Okta. Press the pencil icon to edit the server.
Step 5. Take a note of the Metadata URI as this will be required to configure the identity provider on the redgate Clone Admin Console.
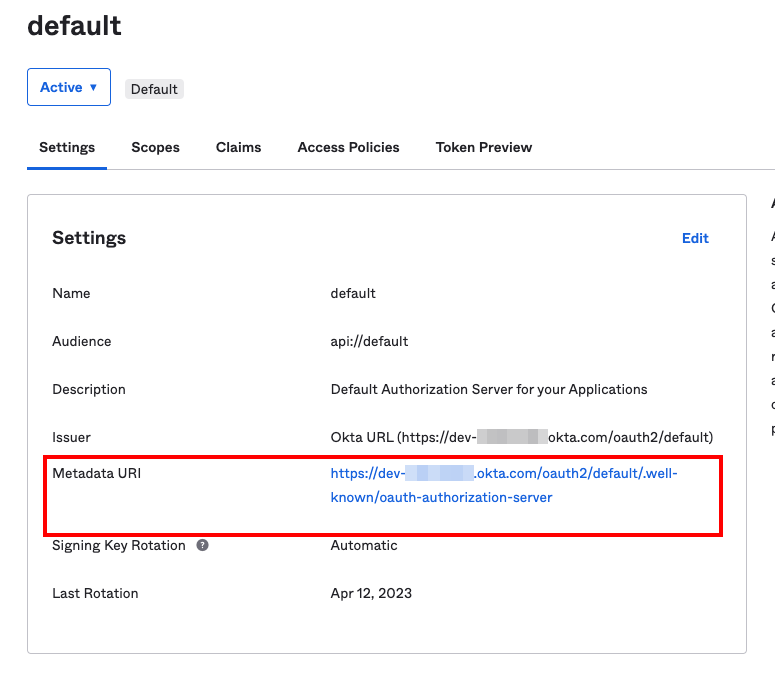
Step 6. Take a note of the Audience as this will also be required to configure the identity provider on the redgate Clone Admin Console.

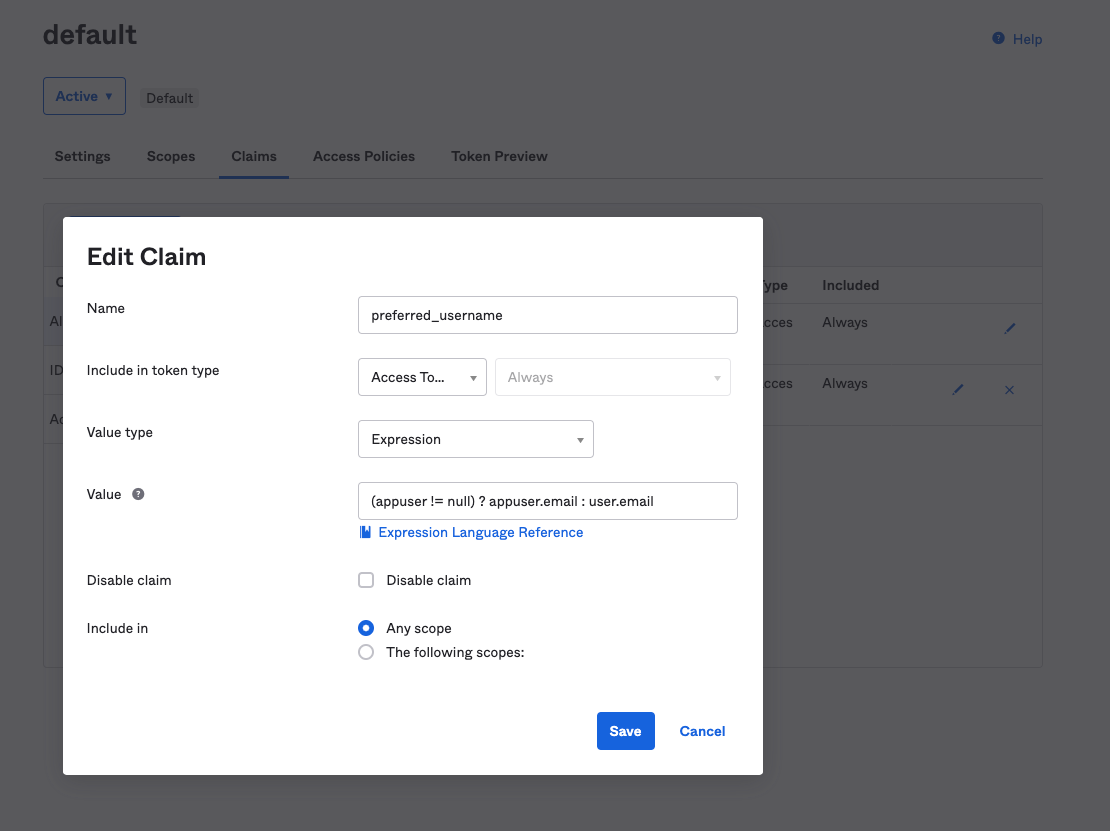
Step 7. While using Okta as your identity provider, If you wish to use e-mail as the display name for redgate Clone users then the simplest way is by adding the preferred_username claim within the claims tab. This is the default configuration within redgate Clone, however, you can modify the claim name to anything you would like in the Admin Console, for example email may be more suitable in this case.
In this case, the claim name should be set to preferred_username and the value should be the expression (appuser != null) ? appuser.email : user.email
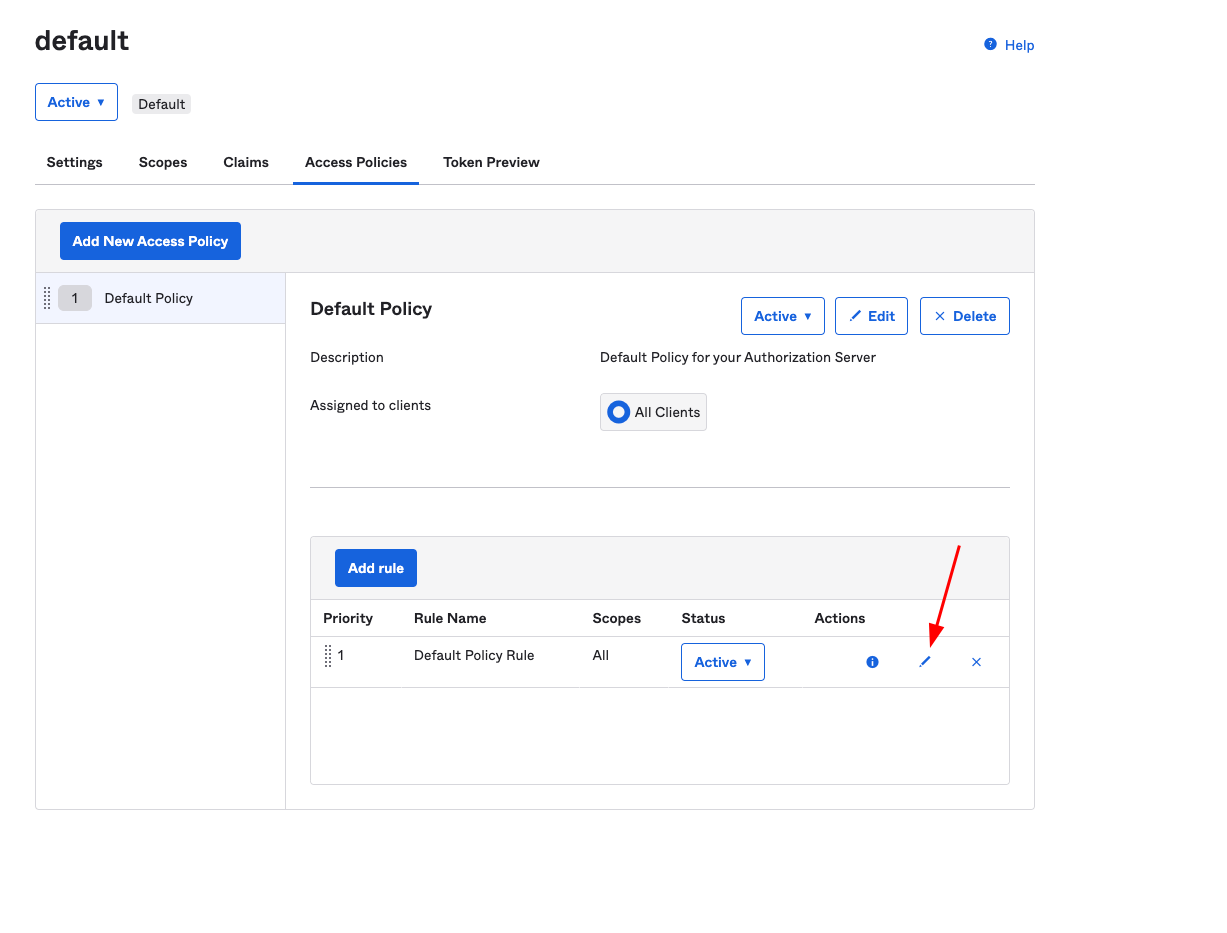
Step 8. Edit the policy rule that you intend to use for the authorization server in the Acess Policies tab. This will be the Default Policy Rule for the default server.
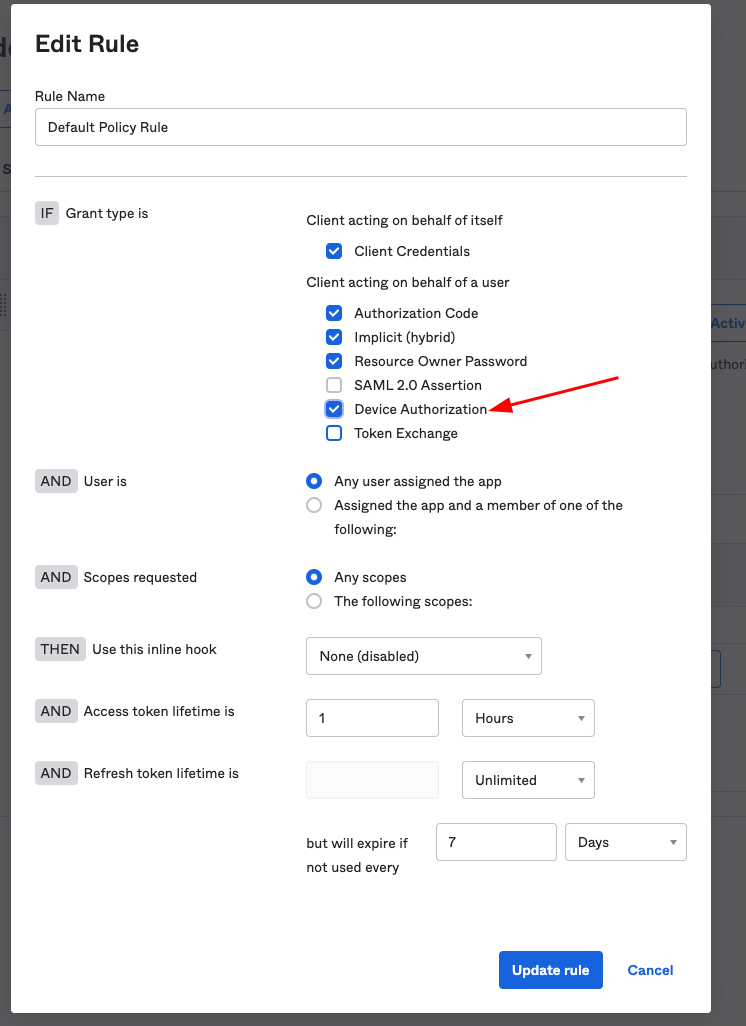
Allow the Device Authorization grant type by checking its box within the policy rule settings.
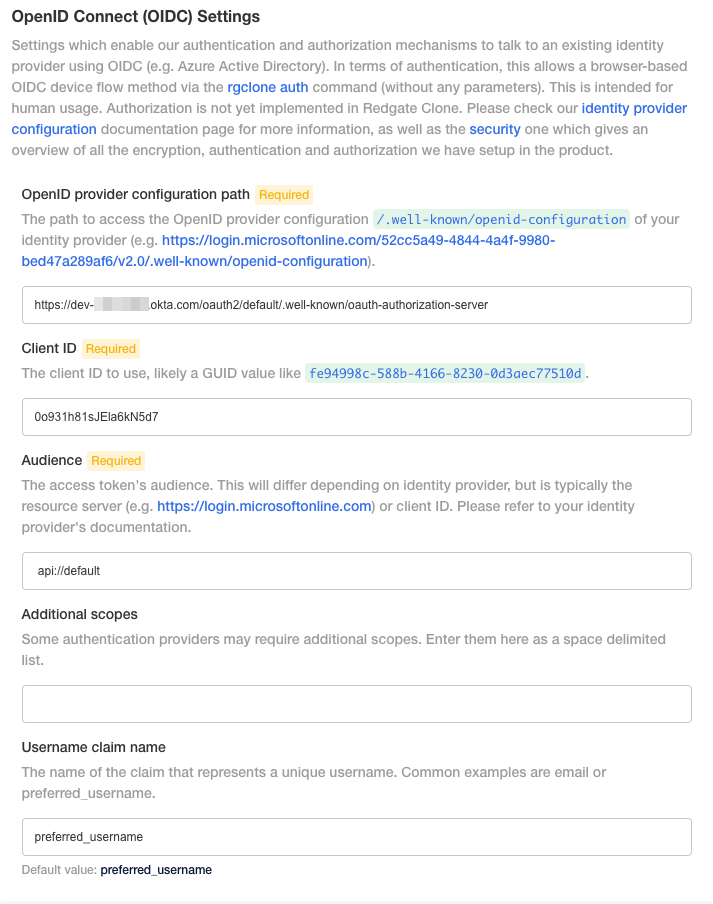
Step 9. Configure the OIDC settings in the redgate Clone Admin Console using the values from Step 3, Step 5 and Step 6 (and potentially Step 7 if you have customized your username claim) in their respective fields.
In this example our final settings would become as follows:
This documentation contains proprietary information and is protected by copyright law.
Copyright © 2026 Red Gate Software Limited. All rights reserved


