Enable Oracle Support
Published 03 November 2022
To quickly and reliably host database instances required for data containers Redgate Clone uses Docker images. The Docker image for Oracle data containers needs to be built locally and uploaded to the built-in container registry.
The following steps will guide you through building the Oracle Docker image and pushing it to the in-the-cluster container registry.
Contents
Prerequisites
- Command line with access to the Redgate Clone cluster Kubernetes context.
- This can be the VM that hosts Redgate Clone, or
- (Recommended) Any other machine which can execute
kubectlcommands (e.g. You can runkubectl get namespaceto see if you get the output containingredgate-clone-appnamespace)
- To allow for pods to pull an image from an internal docker registry, the networking rules must allow access to port 9632. You should only allow that port when the source is an IP address of a Kubernetes node.
Instructions
The instructions below uses 19.3.0 standard edition (non-pluggable), but should also apply to the express edition.
Important notes
- Redgate Clone currently only supports Oracle version 19.3.0 (also known as 19c) standard/enterprise and express.
- At the moment we are only supporting non-pluggable (non-cdb) Oracle variant.
- You will have to provide the installation binaries of Oracle Database (only for the edition you are going to install)
- Make sure you use the Linux x86-64 binary. DO NOT rename it.
- DO NOT uncompress the binaries.
Download Binaries
- Open the Oracle Network Technology page.
- Choose the version you want to download, and download the Linux x86-64 version of it. We will be downloading 19.3 - Enterprise Edition. These binaries work for standard or enterprise versions. Edit the
ORACLE_EDITIONin the yaml below.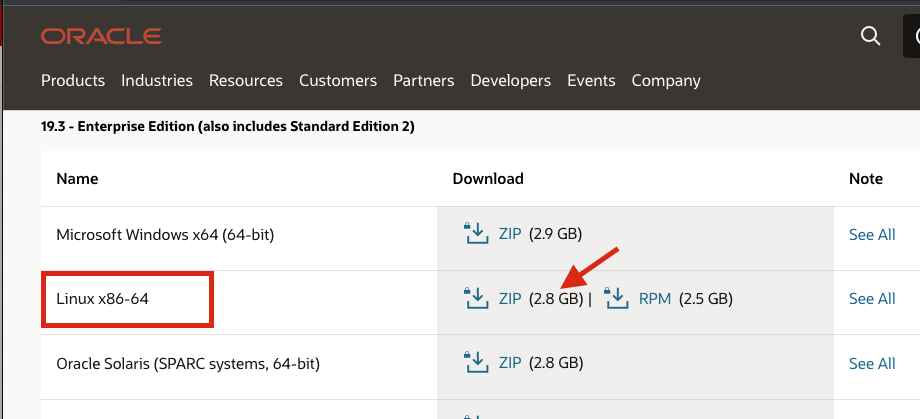
- You will be asked to agree to their license agreement and sign in.
Note: If you don't have an account, Sign Up for it, and repeat these steps.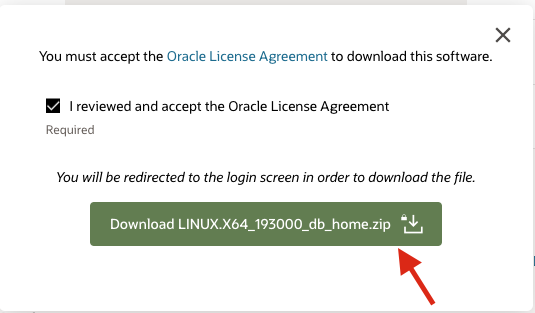
Move the downloaded file to the Redgate Clone file-share, in a directory called
oracle-binaries.
Note: the file-share is configured in the Backup Storage settings in the Admin Console.
Edit Kubernetes Job YAML file
Create a file on your local machine called deploy-oracle.yaml. Copy the YAML below into it. This defines a Kubernetes job that we will run later.
deploy-oracle.yaml
apiVersion: batch/v1
kind: Job
metadata:
  name: deploy-oracle
  namespace: redgate-clone-data
spec:
  backoffLimit: 0
  ttlSecondsAfterFinished: 86400
  template:
    metadata:
      labels:
        app: docker
    spec:
      nodeSelector:
        redgate.com/cloning-oracle-node: "true"
      restartPolicy: Never
      initContainers:
        - name: create-lockfile
          image: busybox
          command: ['sh', '-c', 'touch /liveness/job.live']
          volumeMounts:
            - name: liveness
              mountPath: /liveness
      containers:
        - name: docker-daemon
          image: docker:20-dind
          securityContext:
            privileged: true
          volumeMounts:
            - name: daemon-storage
              mountPath: /var/lib/docker
            - name: certs
              mountPath: /certs
            - name: liveness
              mountPath: /liveness
          env:
          - name: DOCKER_TLS_CERTDIR
            value: /certs
          livenessProbe:
            exec:
              command:
                - stat
                - /liveness/job.live
          resources:
            requests:
              memory: 4Gi
              cpu: 500m
        - name: builder
          image: proxy.replicated.com/proxy/redgate-enterprise/redgateplatform.azurecr.io/cloning/oracle-builder:latest
          imagePullPolicy: Always
          workingDir: /oracle
          command: ["/bin/bash"]
          args:  ["-c", "/oracle/build-in-cluster.sh"]
          env:
          - name: DOCKER_HOST
            value: tcp://localhost:2376
          - name: DOCKER_TLS_CERTDIR
            value: /certs
          - name: DOCKER_TLS_VERIFY
            value: "1"
          - name: DOCKER_CERT_PATH
            value: /certs/client
          - name: ORACLE_EDITION
            value: se
          - name: FILESHARE_PATH_TO_ORACLE_BINARIES
            value: ./oracle-binaries
          volumeMounts:
            - name: certs
              mountPath: /certs
            - name: docker-secret
              mountPath: /dockersecret
            - name: fileshare
              mountPath: /fileshare
            - name: liveness
              mountPath: /liveness
          resources:
            limits:
              memory: 4Gi
              cpu: 500m
      imagePullSecrets:
        - name: cloning-capability-app-registry
      volumes:
      - name: daemon-storage
        emptyDir: {}
      - name: certs
        emptyDir: {}
      - name: liveness
        emptyDir: {}
      - name: fileshare
        persistentVolumeClaim:
          claimName: fileshare-smb-share
      - name: docker-secret
        secret:
          secretName: docker-secret
To select the edition of Oracle you would like to be used, open the file and edit the ORACLE_EDITION environment variable.
Possible values are:
| Value | Description |
|---|---|
| se | Standard Edition |
| ee | Enterprise Edition |
| xe | Community Edition (not currently supported) |
Deploy Kubernetes Job
The Kubernetes YAML file will create a job in the Redgate Clone cluster called deploy-oracle in the redgate-clone-data namespace.
This will install Oracle support by using the Oracle binaries you downloaded earlier to build an Oracle Docker image and push it to the cluster's internal container registry.
Use kubectl to deploy the YAML file.
kubectl apply -f ./deploy-oracle.yaml
The job should take around 30 minutes to complete. To check that the job completes successfully, you can monitor the deploy-oracle job. This can be done in various ways, such as via k9s or via kubectl.
The example below shows how to use kubectl to wait for the job to complete and delete it if it succeeds:
kubectl wait --for=condition=complete job/deploy-oracle --timeout=1h --namespace redgate-clone-data && \
kubectl delete job/deploy-oracle -n redgate-clone-data
That's it! At this stage you should have an available Oracle image in the built-in container registry.
As the next step, we do recommend to go and try creating an empty data image and empty data container to verify the installation (see Data Image Definition Examples on how to create valid yaml file)
This documentation contains proprietary information and is protected by copyright law.
Copyright © 2026 Red Gate Software Limited. All rights reserved


