Configuring DLM Dashboard to use HTTPS
Published 04 September 2015
1. Create a certificate
To use HTTPS with DLM Dashboard, you'll need to create a certificate on the machine DLM Dashboard is running on. You may need to ask your system administrator to help you create a certificate. The certificate must be created on the machine DLM Dashboard is running on. If you aren't using this machine, you'll need to remote access the machine to follow these steps:
- Open Microsoft Management Console (mmc.exe), running as administrator (right-click and select Run as administrator):

- From the File menu, select Add/Remove Snap-in.
- From the list of available snap-ins, double-click Certificates.
- In the Certificates snap-in dialog window, select Computer account and click Next.
- Select Local computer and click Finish.
- Click OK to close the Certificates snap-ins dialog.
This machine now has a certificate for DLM Dashboard to use.
2. Configure Windows
Now you need to configure Windows to use that certificate with DLM Dashboard:
- In the navigation pane of Microsoft Management Console, open the Certificates folder: Console Root>Certificates (Local Computer)>Personal>Certificates
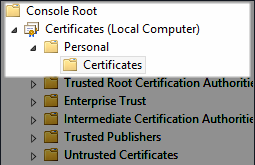
- A list of certificates is displayed in the right hand pane.
- To open the new certificate, double-click the entry with your machine name (eg INT-EXAMPLE.red-gate.com).
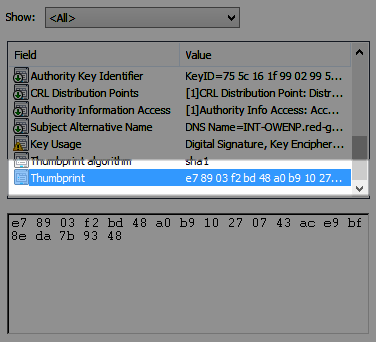
- Select the Details tab.
- From the list of details, select Thumbprint.
- Make a note of the value displayed at the bottom of the window (you'll need this in step 8):
Open a command prompt window (cmd.exe) running as administrator.
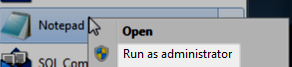
To do this, right-click on the Start menu entry and select Run as administrator:
Run
netshthenhttpso that your command prompt looks like this:netsh http>
Copy the following command, replacing:
certhashwith your certificate thumbprint value, without spacesipportwith 0.0.0.0, followed by an available port numberappidwith a new GUID. See Globally-Unique Identifier (MSDN).
add sslcert certhash=e28903f2bd48a0b910219543ace9bf8e487b93da ipport=0.0.0.0:443 appid={00112233-4455-6677-8899-AABBCCDDEEFF}- Run the command.
Windows now uses this certificate for connections to the new port number.
3. Configure DLM Dashboard
Now you need to configure DLM Dashboard to use the new port number and HTTPS:
- Open a text editor, running as administrator (right-click and select Run as administrator):
- Create a new file
- Save it as UserSettings.config in the folder C:\Program Files (x86)\Red Gate\DLM Dashboard 1\WebServer\bin\Release
If that folder doesn't exist, save the file in C:\Program Files (x86)\Red Gate\SQL Lighthouse 1\WebServer\bin\Release In the file, copy and paste the following:
<?xml version="1.0" encoding="utf-8"?>
<appSettings>
    <add key="Owin.Urls" value="https://*:443/" />
</appSettings>
Edit the value of
Owin.Urlsto:- replace the port number with the new port you want to use
- make sure the hostname protocol is
https://
Open a command prompt window (cmd.exe) running as administrator.
To do this, right-click on the Start menu entry and select Run as administrator:
Run the following command, replacing the URL with the
Owin.Urlsvalue from step 5:netsh http add urlacl url="https://*:443/" user="NT SERVICE\RedGate.SQLLighthouse.WebServer"
Open Windows Services (services.msc) and restart the DLM Dashboard Web Server service (Right-click on the service and choose Restart).
Once the DLM Dashboard Web Server has restarted, you can access DLM Dashboard using HTTPS on the hostname and port you specified.
This documentation contains proprietary information and is protected by copyright law.
Copyright © 2026 Red Gate Software Limited. All rights reserved


