Installing the server components on a SQL Server cluster
Published 13 February 2013
You can install the SQL Backup Pro server components on all SQL Server instances in a cluster at the same time. If you have a SQL Backup Pro multi-server license, you can then activate SQL Backup Pro on all of the nodes.
When you install the server components on a cluster, the SQL Backup Agent service application is clustered so that it can run backup and restore operations on whichever cluster node is active. In addition, the following registry keys in the HKEY_LOCAL_MACHINE\SOFTWARE\Red Gate\SQL Backup entry are replicated:
- BackupSettingsGlobal\<instance name>
- BackupSettings\<instance name>
These registry keys contain details of saved SQL Server settings, templates, and other resources that are specific to SQL Backup Pro.
SQL Backup Pro scheduled backup jobs, scheduled restore jobs and log shipping jobs are replicated by the SQL Server instance.
It is also possible to install the server components on a SQL Server cluster unattended using the command line. For more information, see Installing the server components from the command line.
Prerequisites
For the installation, you will need to know:
- The account name and password of the administrator for all cluster nodes.
- The account name and password that the SQL Backup Agent service application will run as; you are recommended to use a domain account rather than a local or built-in account.
Before you install the SQL Backup Pro server components for the first time, consider the following:
- On which clustered instance do you want to install the components?
- Do you want to use the Windows authentication of the account the SQL Backup Agent service runs as, or a separate SQL Server authentication?
The recommended method for installing the server components on a cluster involves running SQBServerSetup.exe from one of the clustered machines on which the components will be installed. When you install in this way, more information is provided if a problem occurs (particularly for post-installation checks). Note that, from SQL Backup 6.3, it is no longer possible to use the SQL Backup graphical user interface (GUI) to remotely install server components to clustered servers.
Upgrading from a previous release
If you are upgrading from a previous release of the SQL Backup Pro server components to SQL Backup Pro 7, prior to installation you must do the following:
- Ensure that no existing SQL Server Agent jobs involving SQL Backup Pro tasks are running, and none will execute during the installation process.
- Ensure that no backup processes that use SQL Backup Pro are running, and none will start during the installation process.
- Ensure that you have uninstalled SQL Backup version 4.x installed on any of the servers.
- In the Cluster Administrator or Failover Cluster Management tool, disable the SQL Backup Resource. This prevents the cluster from being failed over if there is a problem with the SQL Backup Agent during the upgrade process.
Installing using SQBServerSetup.exe
To install SQL Backup Pro on a SQL Server cluster, copy SQBServerSetup.exe to the active node on the cluster, and run the program.
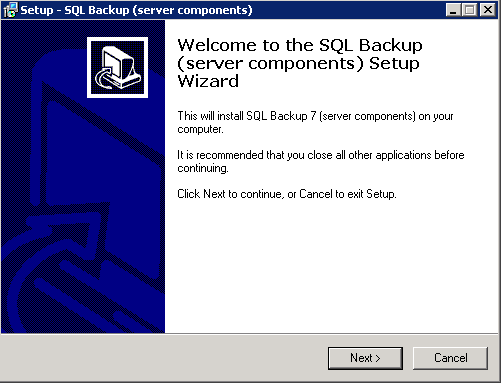
1. Welcome page
The following page is displayed:
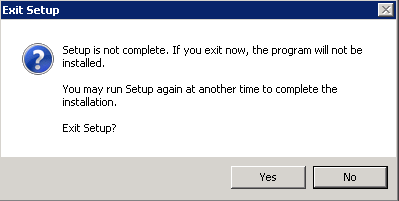
You can cancel the installation at any time prior to the files being copied by clicking Cancel. The following dialog box will be displayed. Click Yes to cancel the installation; no files will be installed.
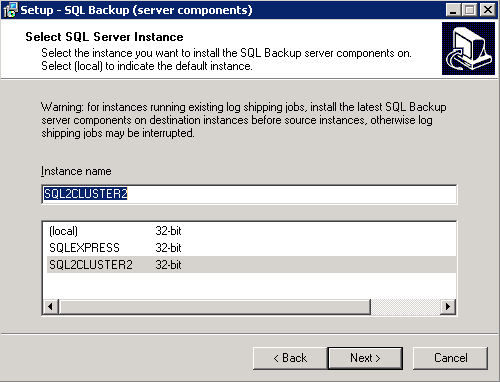
2. Selecting instances
When you click Next on the Welcome page, a list of available instances is displayed. The list contains instances local to the computer from which you are running the setup program, and clustered instances for the SQL Server cluster that the computer is participating in.
The information in the lower pane indicates which architecture the SQL Server instance is using: 32-bit, 64-bit, or Itanium. For example, a SQL Server 2000 instance running on a 64-bit computer is listed as using 32-bit architecture because the SQL Server instance runs in 32-bit mode.
If you are upgrading the components to the same major version of SQL Backup Pro (for example, from version 7.0 to 7.1), SQL Backup Pro remembers the previous settings and takes you straight to the Ready to Install page of the wizard (step 7) when you click Next.
3. Cluster installation options
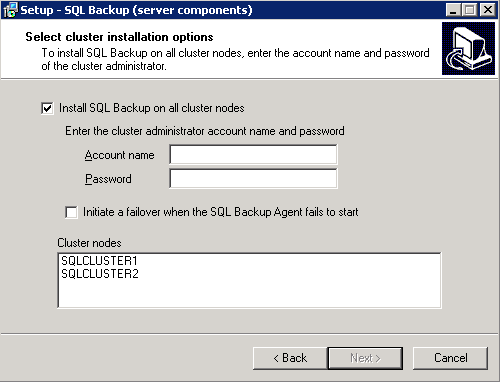
The Setup wizard detects that the SQL Server is part of a cluster, and provides the option to install SQL Backup Pro on all the cluster nodes. If the check box is cleared, the server components are not installed as a clustered resource and you must configure the cluster manually (see Installing manually on Windows Server 2003 and Installing manually on Windows Server 2008). You are recommended to select the check box and let the installer configure the server components as a clustered resource for you.
You must then enter the account name and password for a user that is an administrator on all nodes on the cluster (a cluster administrator).
The Setup wizard also provides the option to automatically fail over to another cluster node if the SQL Backup Agent service cannot be started. You are recommended to clear this check box if you do not want all the resources in the group to failover. (Note that this option is not available if you are upgrading the server components.)
Cluster nodes lists all computers that are participating in the clustered SQL Server instance. In this example, there are two nodes: SQLCLUSTER1 and SQLCLUSTER2.
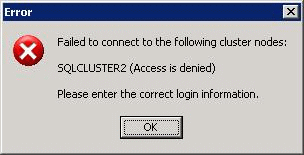
When you click Next, the account name and password are checked on all the cluster nodes. If any of the nodes cannot be correctly authenticated, an error message is displayed. In the example below, the authentication information was valid for SQLCLUSTER1 but not for SQLCLUSTER2.
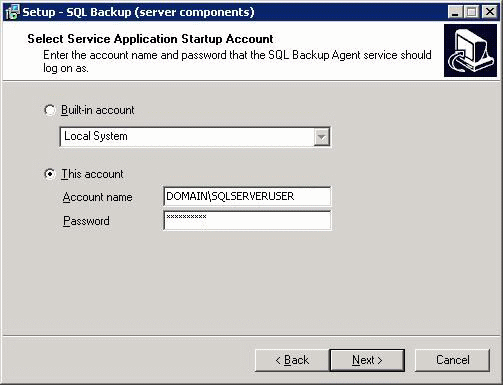
4. SQL Backup Agent service application credentials
For any new installation, the installer requires information about which account the SQL Backup Agent service application will run as. The SQL Backup Agent performs SQL Backup Pro backup and restore operations, maintains the SQL Backup Pro activity history, and communicates information to the SQL Backup Pro GUI.
A Built-in account can be any account from those listed in the wizard. By default, this is Local System, but it can also be Local Service or Network Service.
For a clustered installation, you are recommended to use a domain account rather than a built-in account; select This account and enter the credentials. The Setup wizard checks that:
- The account name and password are correct.
- The account has sufficient permissions to run as a service, including the Log on as a service permission. If this permission has not been granted, the SQL Backup Pro installer will attempt to grant the permission. For information on the permissions required for the SQL Backup Agent service, see Permissions.
If the credentials are not valid, an error message is displayed:
5. SQL Server authentication mode
For any new installation, the SQL Backup Agent service application needs to know whether to connect using the Windows authentication of the account it runs as, or to use a separate SQL Server authenticated account.
You can check the authentication details that you have entered by clicking Test. The Setup wizard tests that the account has sufficient SQL Server permissions (the SQL Backup Agent service application requires sysadmin privileges). If it has sufficient permissions, the following message is displayed.
If any other message is displayed, the credentials you have entered are incorrect, or the account does not have sysadmin privileges.
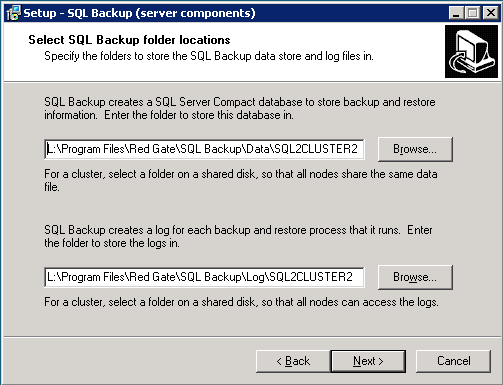
6. Data store location
SQL Backup Pro stores data about backup and restore operations in a SQL Server Compact database. This information includes error and warning messages and various statistics such as compression details. SQL Backup Pro also creates a log for each backup or restore process that it runs.
Specify locations on a shared disk that are accessible by all nodes in the cluster to store the database and logs. The location must be specified as a local path (for example, E:\SQLBackupData\(local)\), and not as a UNC path (for example, \\server\share\(local)\).
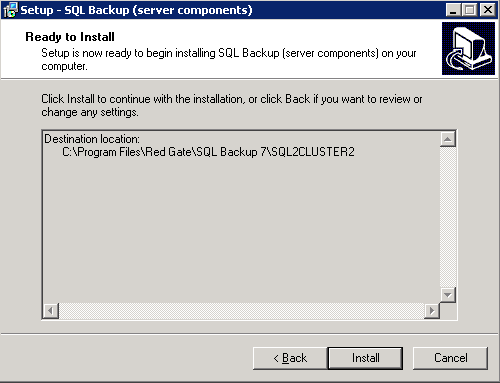
7. Installation location
A summary is displayed, showing the location in which the server components will be installed. By default this is %ProgramFiles%\Red Gate\SQL Backup 7\<instance name> or %ProgramFiles (x86)%\Red Gate\SQL Backup 7\<instance name>.
This is the last point at which you can cancel the installation. When you click Install, the Setup wizard will install the SQL Backup Pro server components.
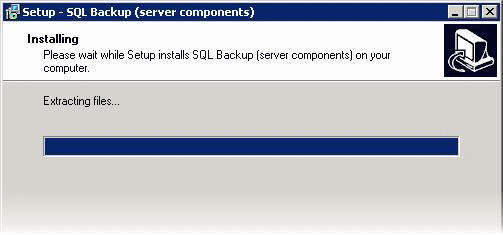
8. Installation progress
The progress of the installation is displayed.
The installer performs the following tasks:
- If the SQL Backup Agent service application is currently running, it is taken offline. Any backup or restore operations that are in progress are stopped.
- The server components are installed to the specified location on disk.
- Registry settings for the SQL Backup Agent service application are generated. These can be modified later using the SQL Backup Pro GUI.
- The SQL Backup Agent service application is created with the supplied credentials.
- For the cluster:
- The installer is copied to the same location on each of the computers in the cluster in turn. The SQL Backup Pro server components are installed with the same settings as the current computer.
- The service is registered with the Cluster Administrator, and the registry keys are added to the clustered resource so that they will be copied between computers in the cluster and are always available to SQL Backup Pro.
- Finally, the installer attempts to start the service.
If there are any problems during installation (such as the service failing to start), a warning message is displayed to inform you of the problem. For example:
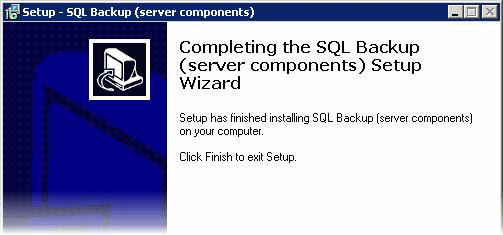
9. Installation summary
When the installation has completed, the completion page is displayed.
The server components should now be correctly installed on the cluster. If any warnings were displayed during the installation (in stage 8), you can resolve them now by following the instructions in the message.
Once the upgrade process is successfully completed, re-enable the SQL Backup Resource in the SQL Server Service.
Activating on clusters
Once you have installed the server components, you will need to activate SQL Backup Pro on the cluster. For general information about licensing, see Licensing. In addition, note the following points:
- You must have a multi-server license key. You can review your serial numbers at http://www.red-gate.com/myserialnumbers
- You must use the Product Activation wizard. This is installed in your %Program Files%\Red Gate\SQL Backup 7 folder. Alternatively, you can start the program from the SQL Backup Pro GUI; on the Tools menu, select Utilities > Product Activation.
