Worked example - using a scripts folder as a data source
Published 04 June 2013
This worked example demonstrates the use of a scripts folder when comparing and deploying databases. A scripts folder contains SQL script files representing a database's structure and, optionally, data.
For more information, see: Working with scripts folders.
In the example, the Super Sprocket Company has a SQL Server database that contains a number of tables, views, stored procedures, and other database objects. The Super Sprocket Company's development team has been given the task of making a number of changes to the structure of the database and updating the production server.
A copy of the production database has already been restored to an empty database, ready for development. To ensure no untested changes are made to the production database, they will also save its schema as a scripts folder.
You can follow the example on your own system, if you are using SQL Compare Professional edition. You will need access to a SQL Server to do this.
If you have not already followed the Comparing and deploying two databases worked example, you are recommended to do so before starting this worked example.
This example has four steps:
- Set up the databases
Create the example databases on your SQL Server. - Set up the comparison
Specify the data sources you want to compare. - Select objects to deploy
Review the results and select the objects you want to deploy. - Create a deployment script
Create a script to update the production database.
1. Set up the databases
The worked example uses the following databases:
- SprocketProduction is the production database
- SprocketDevelopment is the modified version of the database containing the updates
To create these databases on your SQL Server:
- If they already exist, delete the databases SprocketProduction, and SprocketDevelopment from your SQL Server.
- Click here to download the SQL creation script for the databases.
- Copy the script, paste it in your SQL editor, and run it.
The databases and their schema are created.
2. Set up the comparison
Development on the copy of the production database proceeds, and at some point a milestone is reached; the next version is ready to be tested. The development team compares the modified database with the production database schema. To ensure no untested changes are made to the production database, they save its schema as a scripts folder.
Creating a scripts folder before deployment preserves the current state of the production database. It can be checked into source control, providing history and allowing you to revert any changes.
To do this, set up a comparison project:
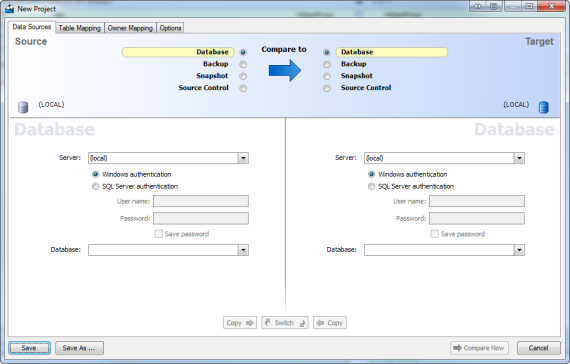
- Click (New Project).
If an unsaved project is currently open, you will be prompted to save when you clickThe Project Configuration dialog box is displayed:
- Under Server, select the server you're using.
- Under Source, select Database, and in the Database box type or select SprocketDevelopment.
SprocketDevelopment is the new version of the database, following a development cycle.
You must now create a scripts folder representing the schema of the production database.
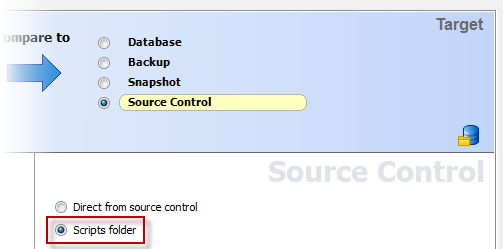
- Under Target, select Source Control, then select Scripts folder:
- Click Create schema scripts:
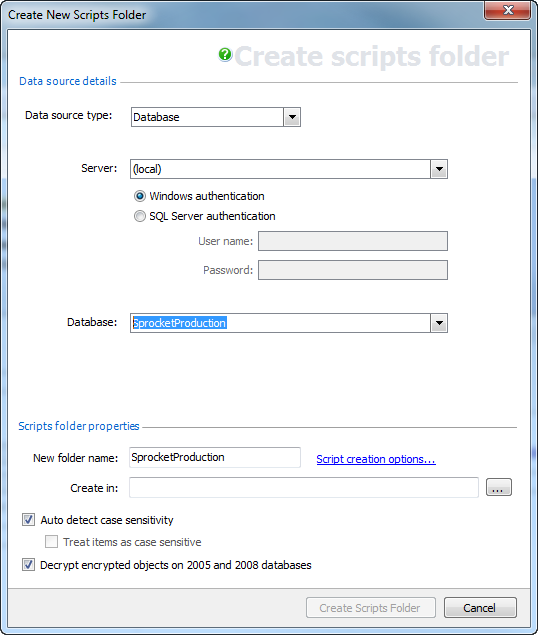
The Create New Scripts Folder dialog box is displayed:
- Ensure that the Data source type is set to Database.
- Type or select SprocketProduction in Database.
If the database is not displayed in the Database list, right-click in the Database box and click Refresh, or scroll to the top of the list and click Refresh. - Click in the New folder name box. SQL Compare automatically supplies a name for the scripts folder.
The default value is the name of the data source.
In this example, use the default name SprocketProduction.
In Create in, type the path for the folder you want to create, or click Browse to browse to its location. - If you are using a source control system, this may be the folder designated as your working folder.
- Click Create Scripts Folder.
The schema is saved in the specified folder as a set of object creation script files.
The folder you created is now shown as the target of the comparison on the Project Configuration dialog box. - Click Compare Now.
A message dialog box is displayed. If you selected the Close dialog box on completion check box last time you ran a comparison, SQL Compare closes this message dialog box automatically.
3. Select objects to deploy
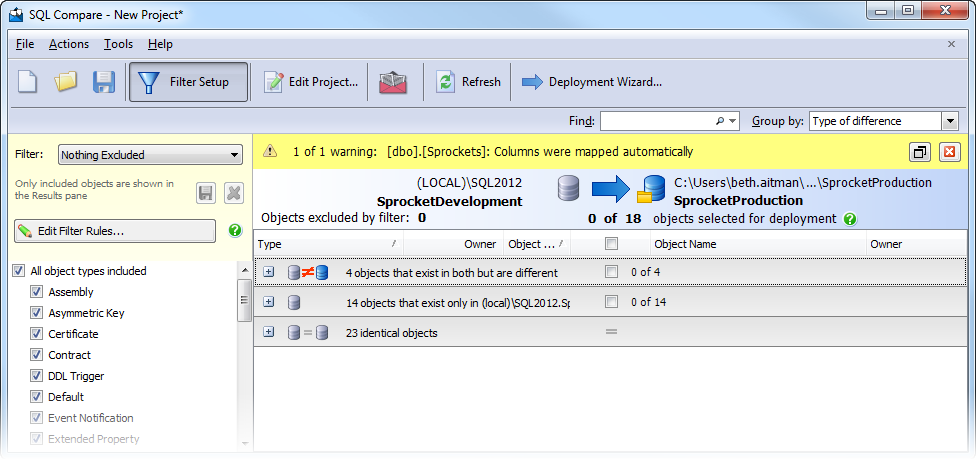
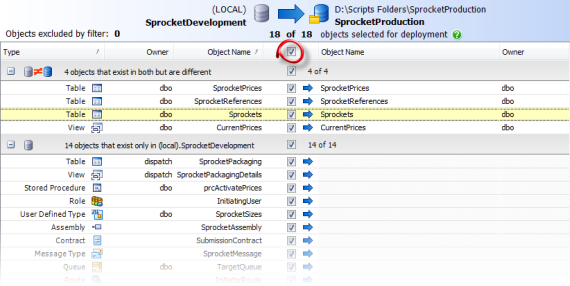
The comparison results are displayed in the main window:
To update the production database, you must create a deployment script. Verify that all the objects you want to modify are present in the comparison results, and select them for deployment.
To search for objects, type the search text in the Find box. SQL Compare searches object names and owner names.
In this example, search for all objects that contain "price" by typing price in the Find box.
The objects are now grouped by whether they match or do not match the find text. To clear the Find box, click the button; all the objects are displayed.
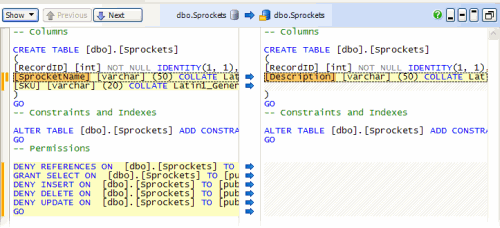
You can view a side-by-side, color-coded listing of the differences in the object creation scripts, by clicking an object. For example, if you click the Sprockets table, you can see the differences for this table:
The two versions of the line are shown one on top of the other in the Line Differences bar. This is especially useful when the lines are too long to view all the text; you can see more of each line in the Line Difference bar. If the Line Differences bar is not displayed, click and select Line Differences
For full details of how to use the comparison results window, see:
In this example we will deploy all objects.
In the central column of the upper (Results) pane, select the top level check box to include all objects in the deployment:
4. Create a deployment script
When you have selected the objects to deploy, click Deployment Wizard.
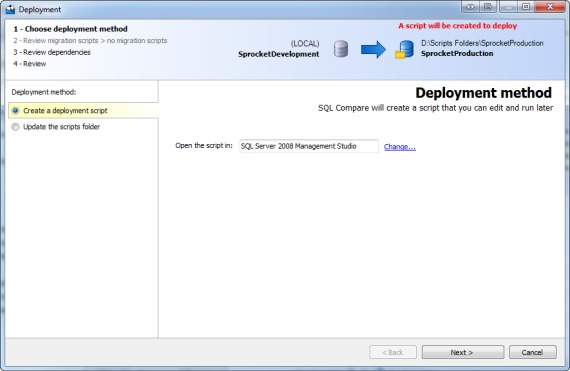
1. Choose deployment method
When a scripts folder is the target, you can:
- Create a deployment script to update the database from which the scripts folder was created
- Modify files in the scripts folder directly
In this example, we will create a deployment script. The script can then be run on the production database to update it with the development changes.
- Ensure that Create a deployment script is selected.
- Click Next.
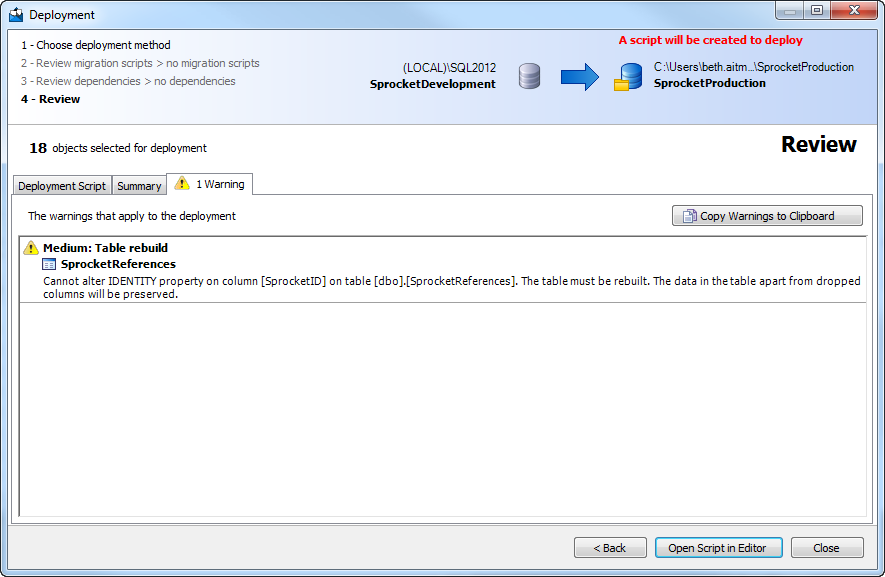
The Warnings tab is shown:
2. Review script
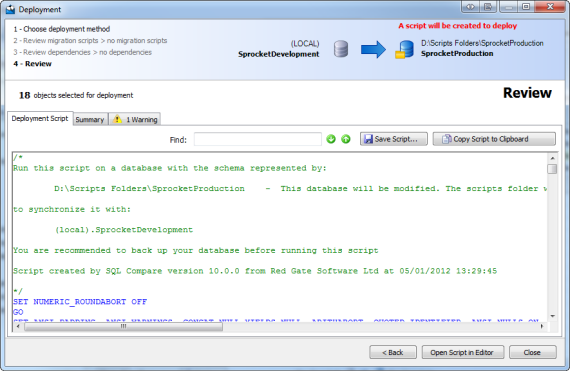
When you have reviewed the script, you can open it in your SQL editor, or save a copy of the script.
- Click Open Script in Editor.
The script is opened in your default SQL editor, and can be run on the SprocketProduction database to update it with the development changes:
- Run the script.
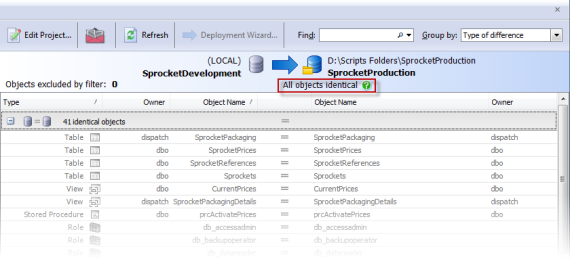
To verify that the deployment was successful, set up a new project comparing SprocketDevelopment andSprocketProduction.
If you have not saved the project, you will be prompted to do so when you click
It is not necessary to save the current project.
As the databases are now identical, All objects identical is shown in the direction bar:

