Using Octopus Deploy with SQL Change Automation Core
Published 04 July 2018
This functionality requires MSBuild Tools version 12 or greater.
Packaging your database project
After using Visual Studio to create your SQL Change Automation database project and import your database (if pre-existing), set the GenerateOctopusNuPkg property to true in the .sqlproj file for the project.
If you already specify RunOctoPack=True property in your Continuous Integration setup, this option does not need to be enabled.
Choose Deploy to the default instance on the Tentacle option if you intend to install a Tentacle on each of your target SQL Server hosts (more about local vs remote deployments later in this article).
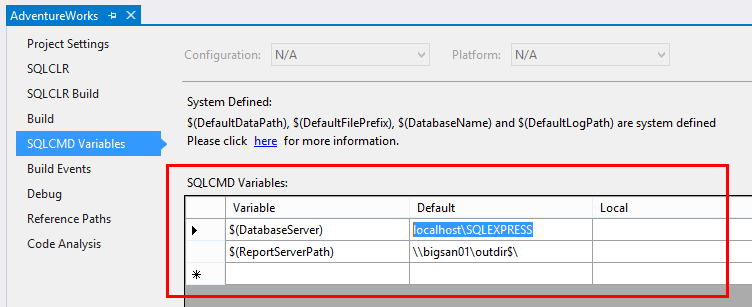
In effect this option sets the DatabaseServer variable to (local), however if your SQL Server instance has a specific name, you can optionally add a value for the DatabaseServer variable on the Using Octopus Deploy with SQL Change Automation Core tab:
NuSpec file template for Octopus compatible NuGet package
Fill in this template with the relevant details, then add it to your SQL Change Automation project with the .nuspec file extension. See here for more information.
Octopus NuSpec template
<?xml version="1.0"?>
<package xmlns="http://schemas.microsoft.com/packaging/2010/07/nuspec.xsd">
 <metadata>
 <id>****GUID****</id>
 <title>****TITLE****</title>
 <!-- The version number will be retrieved from the Assembly Information
 specified on the SQLCLR tab within project properties. -->
 <version>1.0.0</version>
 <authors>Your name</authors>
 <owners>Your name</owners>
 <licenseUrl>http://yourcompany.com</licenseUrl>
 <projectUrl>http://yourcompany.com</projectUrl>
 <requireLicenseAcceptance>false</requireLicenseAcceptance>
 <description>This database deployment package was generated by SQL Change Automation using OctoPack.</description>
 <releaseNotes>This release contains the following changes...</releaseNotes>
 </metadata>
</package>
Deploy to the default (local) instance on the Tentacle
If you intend to install a Tentacle on each of your SQL Server machines, use the OctoOptionDeployToLocalInstance property to deploy to the (local) instance.
If you need to specify an instance name, add the $(DatabaseServer) variable to SQLCMD Variables instead i.e. localhost\\INSTANCE
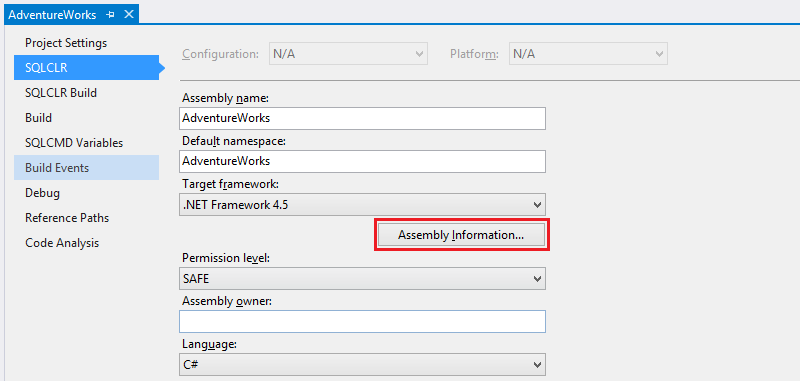
(Optional step) If you intend to use the Assembly Info patcher in TeamCity, you will need to add assembly information to your project. To do so, switch to the the SQLCLR tab, and click Assembly Information to generate an AssemblyInfo.cs file:
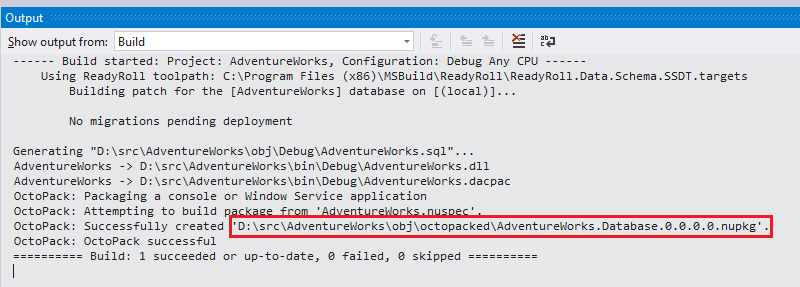
Now switch to the Release configuration and Build the solution to test packaging of your database project:
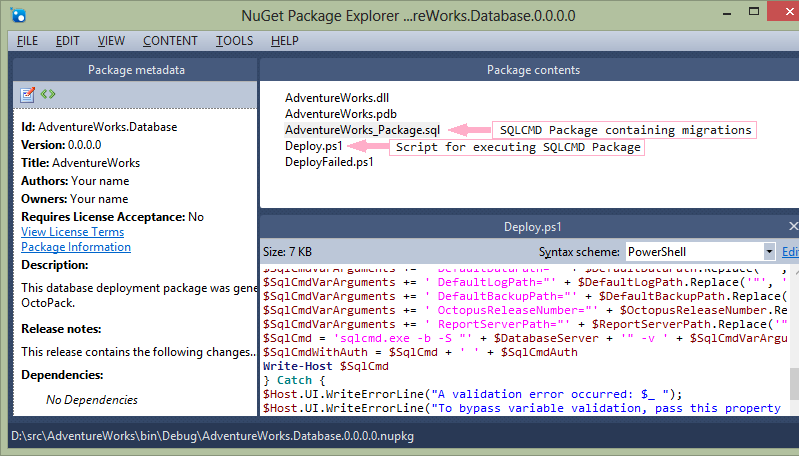
Opening up the generated package using NuGet Package Explorer will reveal a handful of deployment assets:
Performance tip: Once you have configured your database project for Octopus packaging, feel free to un-check the Octopus Deploy-compatible NuGet package output option in project settings. This will result in much faster Visual Studio builds (don't worry, the package will still be generated during Continuous Integration).
Automating your solution build
You can choose any Continuous Integration server to automate the build of your SQL Change Automation database project, but the Octopus plug-in for TeamCity makes integrating the packaging and deployment of your application and database components incredibly easy.
Add the following build step to a new or existing build configuration/plan:
Runner type: MSBuild
Build file path: (solution or project file path)
MSBuild platform: x86 (32-bit)
MSBuild version: .NET Framework 4.0 (or later)
MSBuild tools version: 4.0 (or later)
System Properties:
∙ RunOctoPack = True (only needed if not using the TeamCity Octopus plugin)
∙ OctoPackPackageVersion = e.g. %build.number% (only needed if not using the TeamCity Octopus plugin)
∙ OctoPackTargetsPath = path to the OctoPack.targets file, specify it only if you want to use a different version of the OctoPack than the one bundled into the SQL Change Automation (optional)
∙ TargetServer = [Prod SQL Server Instance] (optional, see below)
∙ ShadowServer = [Test SQL Server Instance] (optional, see below)
Optional system properties
Specify the TargetServer and ShadowServer properties if you would like to include a preview of your deployment within Octopus:
- TargetServer: Target instance of SQL Server to generate the preview against. Typically this will be the SQL Server instance in your Production environment. Read (db_datareader membership) and VIEW DEFINITION permission is required within the target database(s).
- ShadowServer: An instance of SQL Server where SQL Change Automation may create a temporary copy of your database based on the project sources and produce a schema snapshot file to use as the basis of report generation. Typically this will be an instance of SQL Server in a Development environment.
If the ShadowServer property is not specified, the following message will be output during deployment within Octopus: Skipping snapshot deployment as a snapshot file could not be found Until the property is added, report generation will not be available however the deployment of your scripts themselves will be unaffected. More information
Build-time dependencies
Before you can build SQL Change Automation projects, you'll need to do one of the following:
- install SQL Change Automation on your build agent (server), or
- install or include the SQL Change Automation.MSBuild NuGet package in your solution
For more information, see Installing on your build agents.
As part of your build configuration, you will need to ensure that the NuPkg artifacts (produced during build) are made available to Octopus via a NuGet feed. Read more about how to integrate TeamCity with Octopus.
Packaging with TFS Build
Please see the Octopus documentation if you would like to build and package your solution with Team Foundation Server.
Setting up package deployment
The packaging steps above should have resulted in your database being packaged and served up to your chosen NuGet feed.
Within Octopus Deploy, add a new step to your deployment process, specifying the NuGet package ID from your NuSpec file:
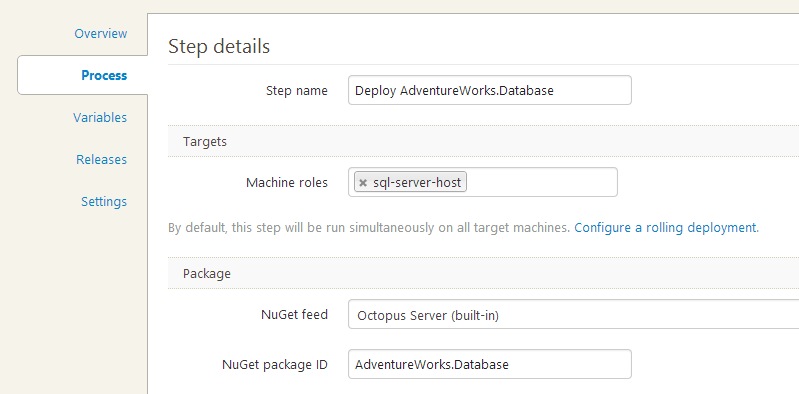
In this example, we're assuming that you've installed a Tentacle (deployment agent) onto each of your target SQL Server machines, enabling a local database deployment. More about local vs remote database deployments later.
Specifying the Database Server/Name (optional)
By default, SQL Change Automation will deploy to the default SQL Server instance on the Tentacle, using the database name specified in your .sqlproj file. However this can be overridden by adding the following variables to your Octopus project:
- DatabaseServer: The target SQL Server server/instance
- DatabaseName: The name of the target database
Scope the variables appropriately to provide a different server name or database name for each target environment. You may want to do this if, for example, you want to deploy from a central Tentacle, or if you need to deploy multiple copies of a database to the same SQL instance.
By default, Windows Authentication is used to connect to your database server. This means that the account that the OctopusDeploy Tentacle service is configured to run-as needs to have access to your target SQL Server instances.
If you would prefer to use SQL Server Authentication instead, add the following variables within your Octopus project:
- UseWindowsAuth: False
- DatabaseUserName: (username)
- DatabasePassword: (password)
Creating a release
From the Project Overview page, click Create Release and select the appropriate package version.
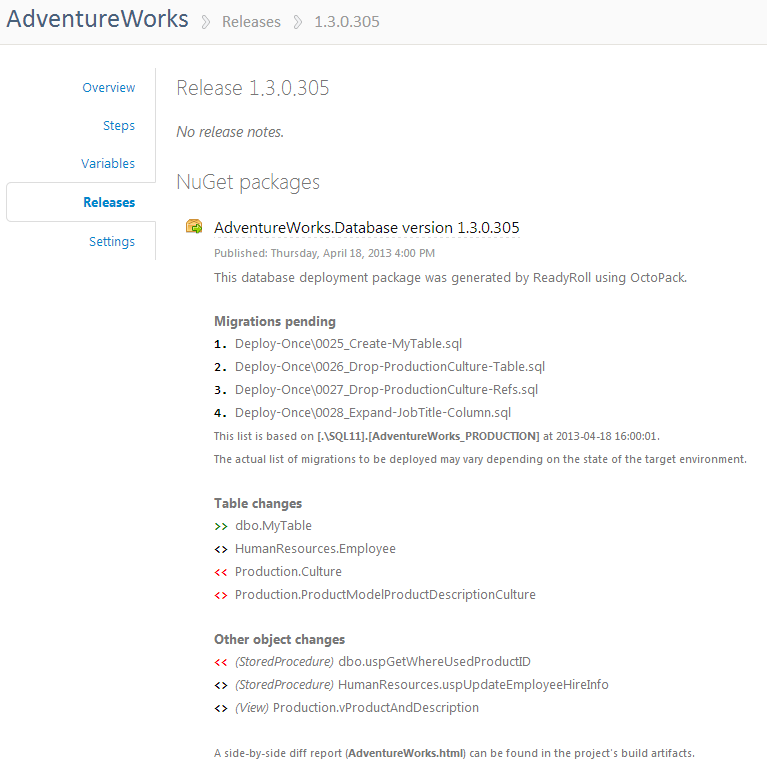
If you enabled deployment previews in your build configuration, the release contents should give you a list of pending changes:
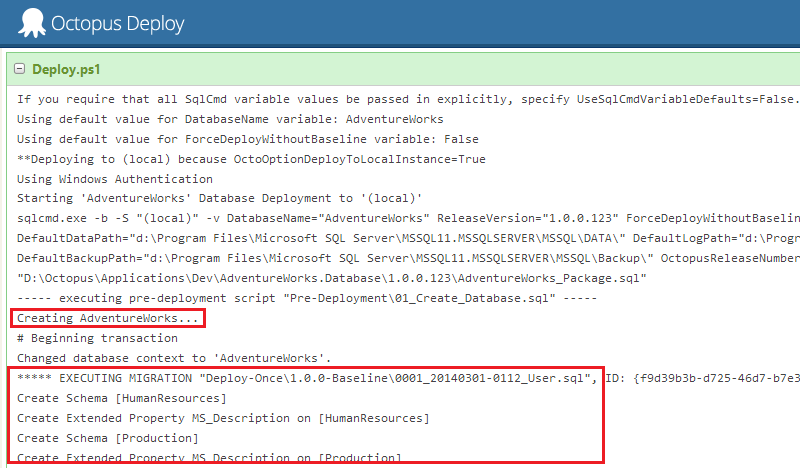
Click Deploy this Release and select an environment to deploy to. If the database doesn't exist on the target SQL Server instance, it will be created and then all migrations will be executed.
If you switch to the Task Log, you’ll see the output from your database deployment:
When you're ready to deploy onto other environments, including Production, click Promote to... [Environment]. The exact same set of migrations will execute against your upstream environment, giving you a predictable deployment outcome every time.
This documentation contains proprietary information and is protected by copyright law.
Copyright © 2026 Red Gate Software Limited. All rights reserved


