Deploying assemblies in Visual Studio
Published 15 August 2019
Download the sample project ClrTestDB.zip (8 kB).
Getting started
Start by creating a solution with two new projects:
- A C# Class Library project named ClrTestLib.csproj
- A SQL Change Automation project named ClrTestDb.sqlproj
Within the class library project, add a file called UserDefinedFunctions.cs with the following content:
UserDefinedFunctions.cs
using System;
using System.Collections.Generic;
using System.Data.SqlTypes;

public partial class UserDefinedFunctions
{
    [Microsoft.SqlServer.Server.SqlFunction]
    public static SqlString HelloWorld()
    {
        return new SqlString("Hello world!");
    }
}
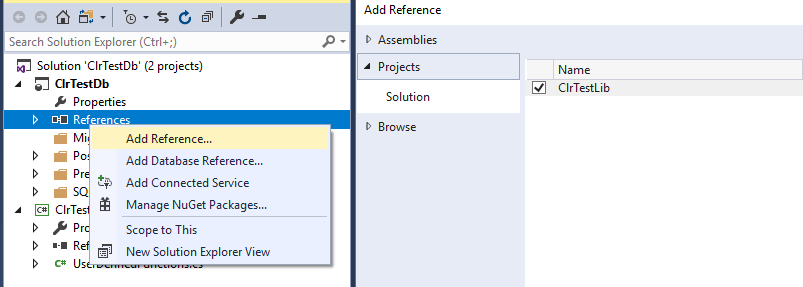
Now add a project reference from your SQL Change Automation project to your class library
Set the Copy Local property to True for the newly-added reference (this copies the assembly to the SQL Change Automation project at build time)
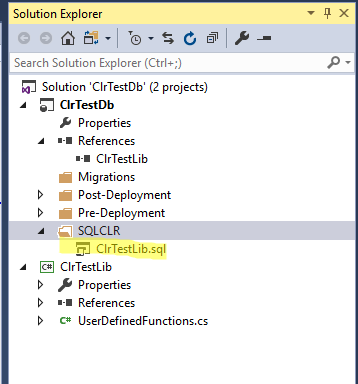
Next we'll create a re-usable script to deploy the assembly to the database. Start by adding a new folder called SQLCLR to the root of your SQL Change Automation project:
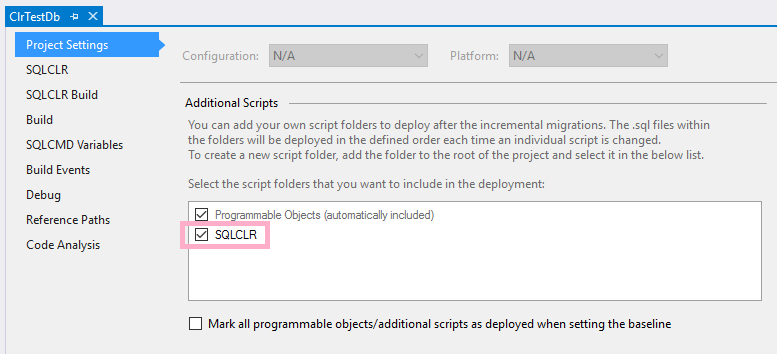
Include the new folder in the database deployment by opening the project designer and scrolling down to the additional scripts section. Check the item matching the name of the folder you just added
Using the Solution Explorer, right-click the SQLCLR folder and add a script called ClrTestLib.sql. The following metadata should be included at the top of the script:
ClrTestLib.sql
-- <Migration InlineDependencies="true" />
This metadata indicates that the script contains dependency references that should be serialized (that is replaced with the contents of the dependent files) at build time.
Complete the script by adding statements to DROP and CREATE your assembly and associated CLR functions/procs:
ClrTestLib.sql
-- <Migration InlineDependencies="true" />
GO

IF OBJECT_ID('[dbo].[HelloWorld]') IS NOT NULL
BEGIN
  DROP FUNCTION [dbo].[HelloWorld]
END

IF EXISTS(select 1 from sys.assemblies where name = 'ClrTestLib')
BEGIN
  PRINT N'Dropping [ClrTestLib]...';
  DROP ASSEMBLY [ClrTestLib];
END
GO

PRINT N'Creating [ClrTestLib]...';
CREATE ASSEMBLY [ClrTestLib]
  AUTHORIZATION [dbo]
  FROM "{ClrTestLib}";

ALTER ASSEMBLY [ClrTestLib]
  ADD FILE FROM "{ClrTestLib.pdb}"
  AS N'ClrTestLib.pdb';
GO

PRINT N'Creating [dbo].[HelloWorld]...';
GO
CREATE FUNCTION [dbo].[HelloWorld] ( )
 RETURNS NVARCHAR (4000)
AS
 EXTERNAL NAME [ClrTestLib].[UserDefinedFunctions].[HelloWorld];

GO
PRINT 'Result from [dbo].[HelloWorld]: ' + [dbo].[HelloWorld]();
GO
Ensuring your script is idempotent
Note that the CREATE ASSEMBLY statement contains a special token, enclosed in quotes and braces:
CREATE ASSEMBLY [ClrTestLib]
AUTHORIZATION [dbo]
FROM "{ClrTestLib}";
The "{ClrTestLib}" token – which in this case refers to the assembly name – will be replaced with a serialized copy of the assembly at build time. Be sure to include the file extension if you wish to deploy files other than assemblies (for example, .pdb files, as in the above example).
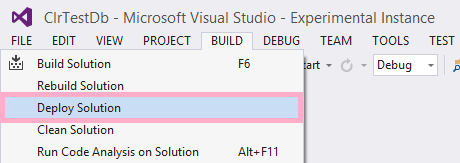
To deploy the assembly and related files to the database, click Deploy Solution in the Build drop-down menu
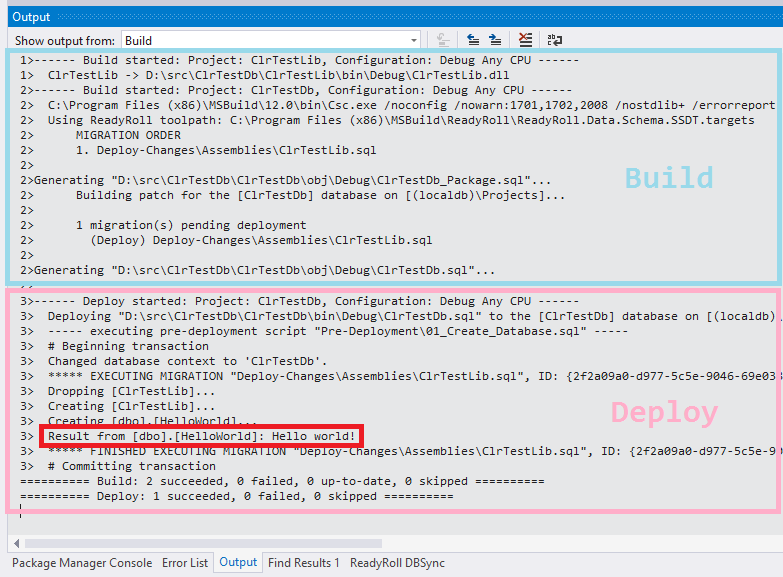
The output window will show the assembly being built and subsequently deployed to the database
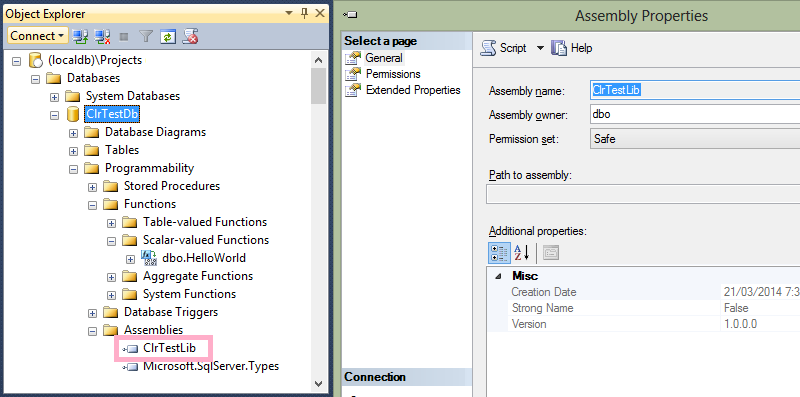
Switching over to SQL Server Management Studio (SSMS) reveals the two objects created by the deployment:
Upon subsequent deployments, you’ll notice that your script is executed each time you perform a clean build of your solution. This is because the CLR compilation process results in a different assembly being created with every build, even if the code itself hasn’t changed.
Conversely, during an incremental build/deployment, your script may not be executed as a result of artifact caching (this is normal MSBuild behavior).
Packaging and deploying to remote servers
When it comes to packaging your assemblies for deployment to other environments, SQL Change Automation will automatically include all artifacts within the ClrTestDb_Package.sql file (provided you have the SQLCMD Package (.sql) output option enabled in Project Settings). Deploy the package file within SSMS to target database servers, or via the accompanying PowerShell script.
