Setting up a project with an existing database in Visual Studio
Published 19 August 2019
In this scenario, we’ll set up a new SQL Change Automation project for an existing database in Visual Studio. Specifically, we’ll:
- Set up an example database, AdventureWorks
- Create a new SQL Change Automation project within Visual Studio
- Set up a new development database
- Baseline the development database from AdventureWorks
- Make changes to the development database, and generate migrations for the SQL Change Automation project
Setting up AdventureWorks
Create an AdventureWorks database matching your version of SQL Server.
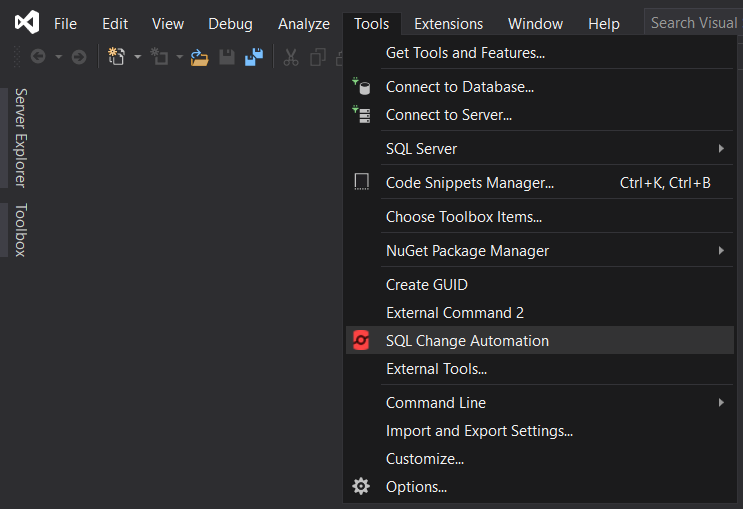
1. Open SQL Change Automation
In Visual Studio, start SQL Change Automation by clicking on SQL Change Automation in the Tools drop-down menu.
This will open the SQL Change Automation window if it is not already open.
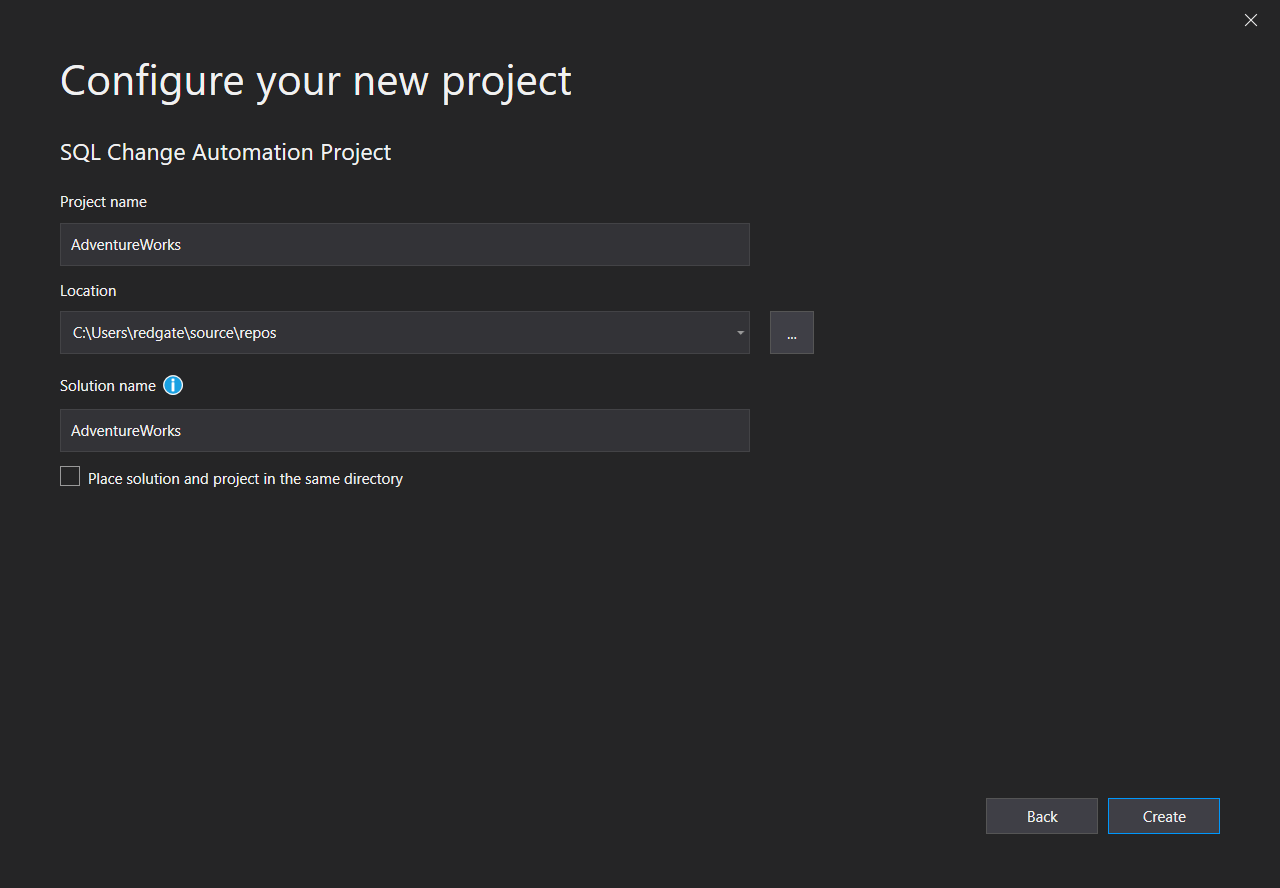
2. Create a new project
Click Create Project… to create a new project. This will open the Visual Studio project configuration wizard.
Once this project is created the SQL Change Automation setup wizard will open. Click Get Started.
3. Development database connection configuration
Click create a new database in the development section. This will create a database with the name of your Visual Studio project.
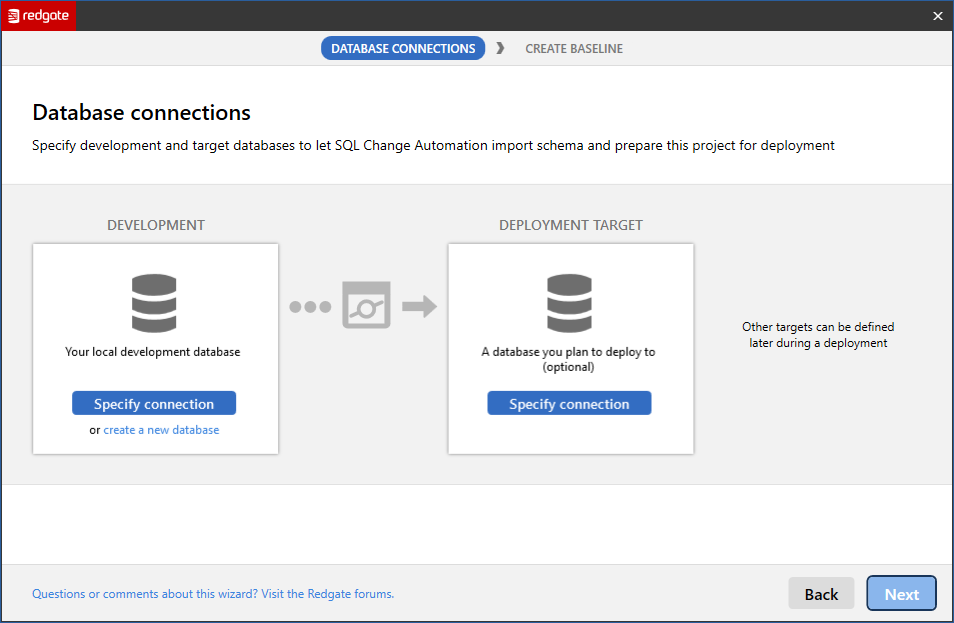
4. Deployment target database connection configuration
The deployment target database is the one you are developing changes for. It will be used to generate a baseline. This process is read-only and no changes will be applied to it.
We’re going to create a baseline from the AdventureWorks database.
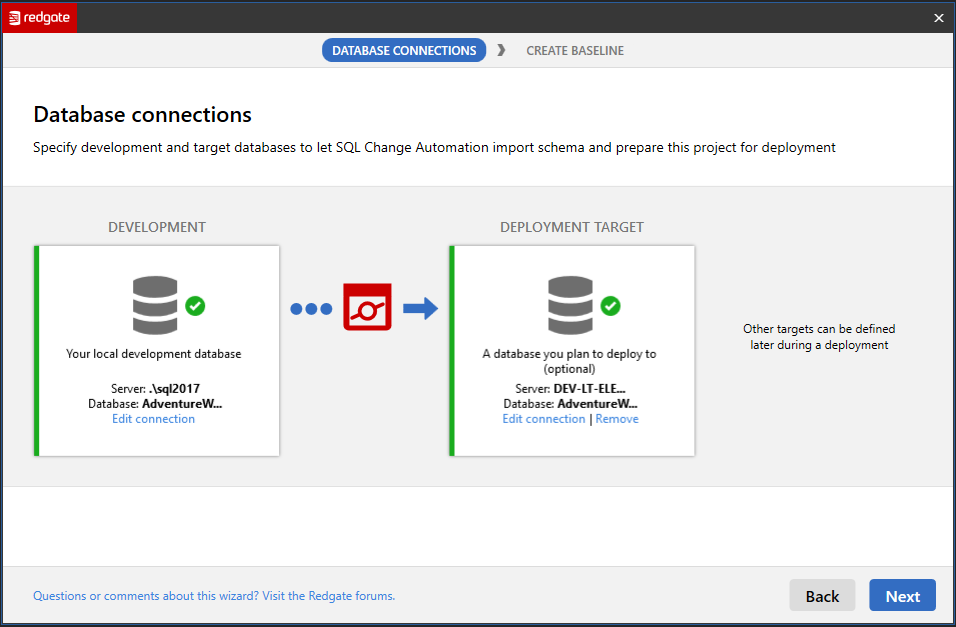
Click Specify connection, and specify credentials for the AdventureWorks database. Click Next and then Create Baseline to begin the baseline process.
The schema of the deployment target will be read in order to create a baseline schema. This will not modify the deployment target in any way.
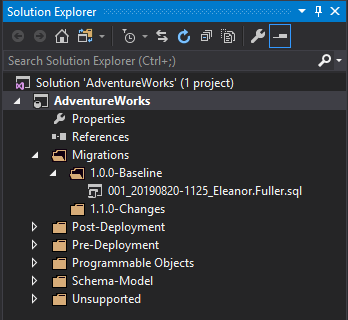
Click Connect to database... and specify credentials for the AdventureWorks database. Click Create project to begin the baseline process, this will:
- Create two folders – 1.0.0-Baseline and 1.1.0-Changes, under the Migrations directory
- Import the schema of your deployment target into the 1.0.0-Baseline folder as a migration script
- This is a deployable representation of the schema – by running this script on an empty database you can re-create the schema of your deployment target
- Populate the offline schema model (OSM)
- This is a static representation of the schema on your deployment target
- You will be prompted to enable programmable objects later on in the process
5. Deploy Project
Once the baselining process has completed, you will have a baseline script generated for you underneath your new AdventureWorks project in the Solution Explorer. This script has all the changes ready to apply to your development database. To execute the script against the database in SQL Change Automation, you can either open this script and click Deploy Project at the top-right, or click Deploy Project from the SQL Change Automation window.
In this example, we have an unsupported programmable object, which requires modification if we want it to be handled as a programmable object in the database project.
Next steps
- You can now capture changes made to the development database in the SQL Change Automation project. See generate migrations.
- There’s no need to make any changes to AdventureWorks itself - all development work can occur on your development database.
- When you want to deploy your changes from your development database to AdventureWorks, you can use the PowerShell cmdlets. See automated deployments.
This documentation contains proprietary information and is protected by copyright law.
Copyright © 2026 Red Gate Software Limited. All rights reserved


