Suppressing alerts
Published 04 February 2020
About alert suppression
If maintenance is carried out on your server, either at regular intervals or at a scheduled date and time, you may want to change SQL Monitor behavior to prevent alerts or alert notifications during those times. To do this you can create one or more alert suppression windows.
An alert suppression window allows you to choose a schedule, one or more monitored servers, and how alerts for those servers should be suppressed.
Creating an alert suppression window
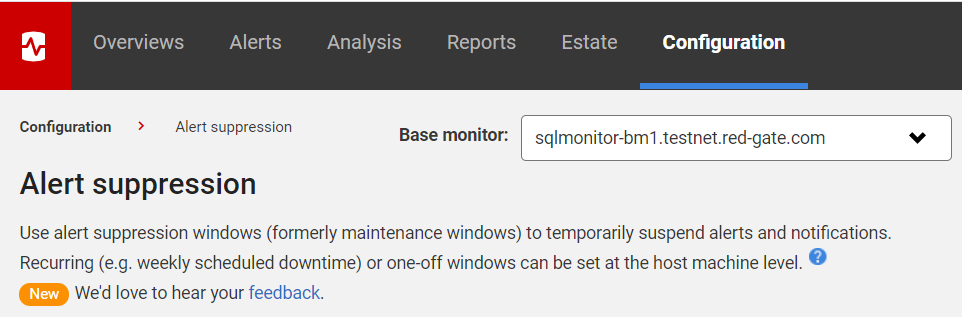
- Go to the Configuration tab and under Alerts and Metrics, select Alert suppression.
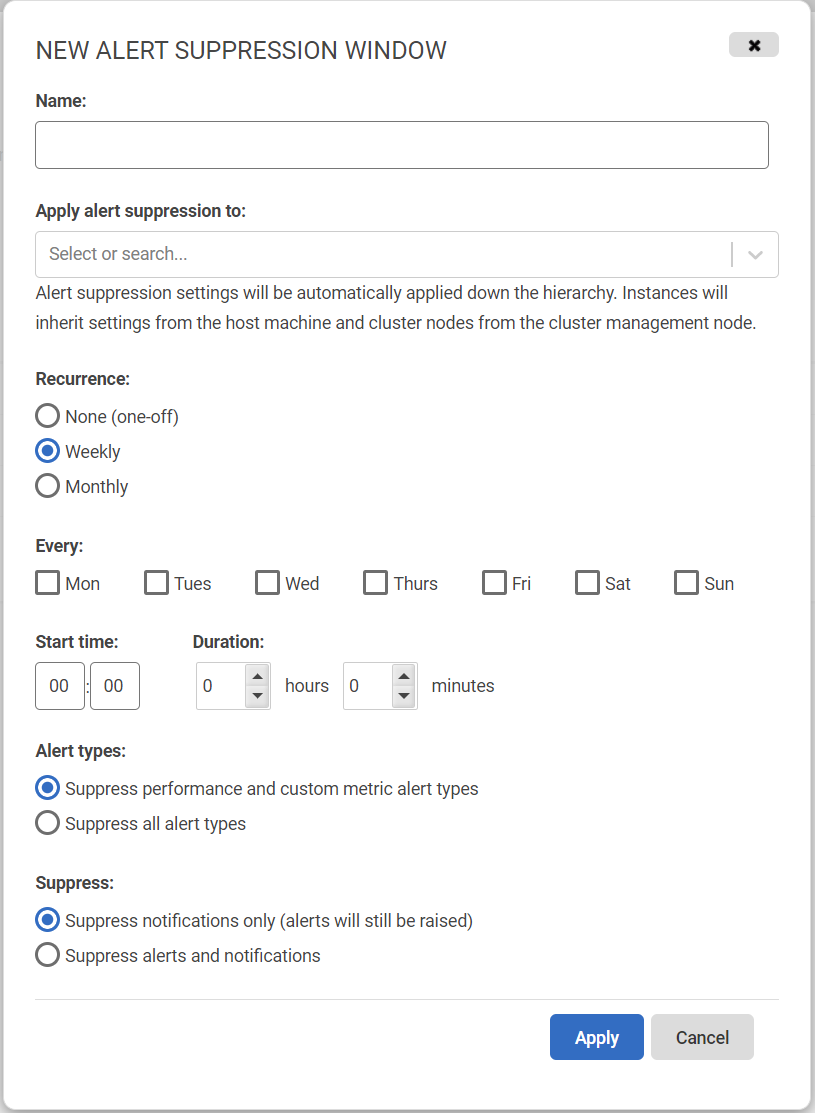
- Click on New window and the following dialog will appear:
Editing an alert suppression window
- Go to the Configuration tab and under Alerts and Metrics, select Alert suppression.
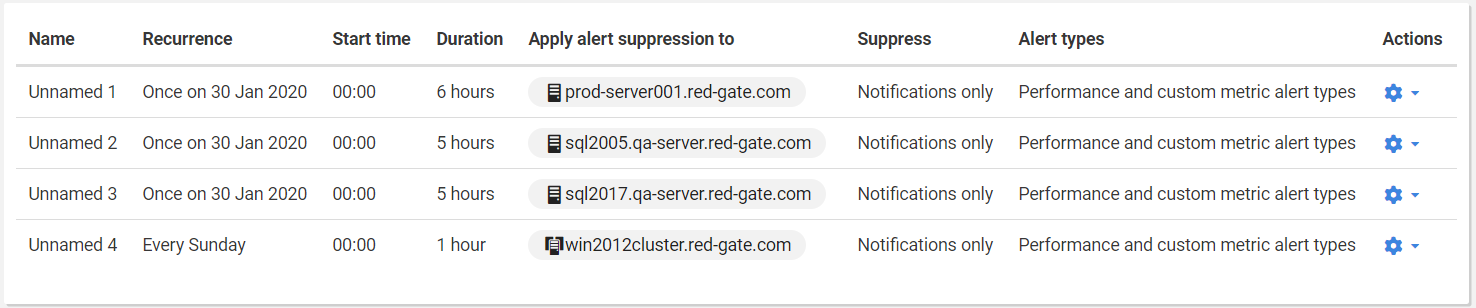
- Find the window you want to edit in the grid. The latest created windows will be displayed in the top:
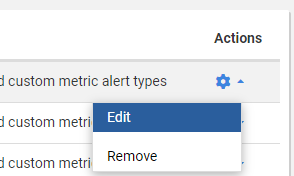
- Click the cog icon in the Actions column, for the window you desire to edit, and then, click in the Edit link:
- This will display the same dialog from the creation with the window's data populated.
Removing an alert suppression window
- Go to the Configuration tab and under Alerts and Metrics, select Alert suppression.
- Find the window you want to remove in the grid. The latest created windows will be displayed in the top:
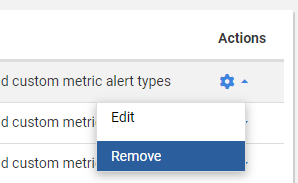
- Click the cog icon in the Actions column, for the window you desire to remove, and then, click in the Remove link:
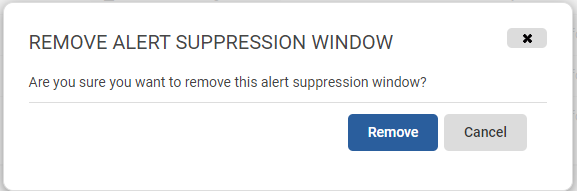
- A model will appear confirming that you want to remove the window. To confirm it, click the Remove button:
The alert suppression windows belong to a single base monitor. In case you have an environment with multiple base monitors you will see a drop-down in the top right corner of this page indicating which base monitor you're currently managing.
Alert suppression window dialog
This is a details explanation of each of the field you will find in this dialog:
- Name: Unique name for the alert suppression window.
Apply alert suppression to: Drop-down with the servers to which the window will be applied to. Check Applying alert suppression to servers.
- Recurrence: Indicate the cadence of repetition for the window. Check Windows recurrence.
Start time: Two input fields indicating hour and minute, in a 24-hours format, in which the window will be active. By default, this field will be 00:00, indicating that the window will start at midnight of the selected day(s).
The start time uses the same time zone as the Base Monitor.Duration: Contain hours and minutes fields. This indicates the period of time in which the window will be active for the specified days starting at the specified start time.
The window might be active for a period of time slightly longer or shorter than the duration specified. When a window is saved, the system takes into account it "end time", which will be the start time plus the duration.
This means that, if the window is set to start at 20:00 with a duration of 6 hours, the "end time" will be 02:00 of the following day (20:00 plus 06:00). If during this period, there is a daylight saving change in the Base Monitor's time, this will be ignored by the window, which will be active until 02:00 of the following day.- Alert types: Indicates which kinds of alert will be affected by the maintenance window. The options are:
- Suppress performance and custom metric alert types: If selected, will make the window to be applicable to any custom metric alerts and performance-related alerts.
- Suppress all alert types: If selected, will make the window to be applicable to all alert types.
- Suppress: Indicates the behaviour of the window for the affected alert types when it is active. This action will only be applied over the alert types indicated in the "Alert types" field. The options are:
- Suppress notifications only (alerts will still be raised): If selected, will suppress alert notifications. The alerts will still be raised.
- Suppress alerts and notifications: If selected, will suppress the alert generation and, consequently, no notifications will be generated. This option combined with the "Suppress all alert types" from the "Alert types" field will effectively stop all alert generation for the window
Applying alert suppression to servers
When creating or editing a window, you can select one or more servers. The following types of items can be selected: cluster, machine, SQL Server, Azure SQL Server and Azure SQL Database.
You can also create an alert suppression window with an empty servers list. You can add servers to that window at a later moment. If you add a server to a window that should be already active, this will take immediate effect on the newly added server.
For example, if you create a window without servers that will be active from "13:00" of the current day for 7 hours (until 20:00), and at 14:00 you add a server to it, that window will take effect over that server until 20:00 of that day (or until you remove the server again from that window).
Selecting a parent element will apply the alert suppression to its child elements. In the following image, selecting the machine "is-sql2017.testnet.red-gate.com" would suppress alerts generated in both of its SQL Server instances, "sql2017ci" and "sql2017cs":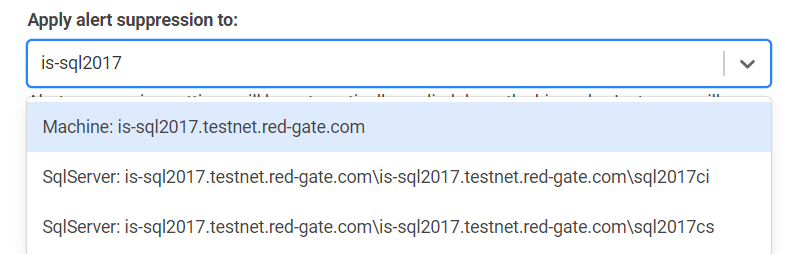
Selecting a cluster machine node will not suppress the alerts of its SQL server instances. This is an exception to the behavior where windows applied to parent nodes will also take effect in its child nodes. You can still select the top-most cluster, which will suppress the alerts of all its child servers.
Windows recurrence
Regarding windows recurrence, there are 3 possible options:
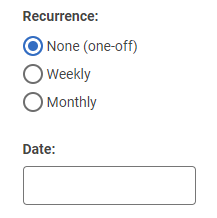
None (one-off)
When this option is selected, you will see a Date. This field indicates when the window will take effect. The window will be active from the selected date at the selected start time. After the specified duration, the window will no longer be active. This option is intended for scenarios where there is scheduled maintenance that is not part of a recurring process.
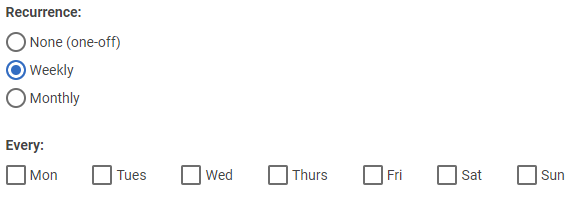
Weekly
This option will provide a set of checkboxes where you can select in which days of the week the window will be active. This will create a window that will be active every week in the selected days from the start time.
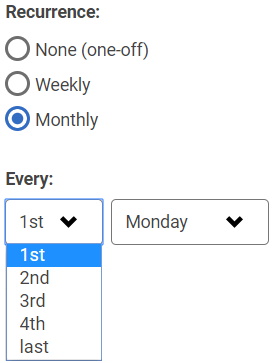
Monthly
This option will provide 2 drop-downs where you can select the relative day of the month in which the window will be active. This allow you to make choices like "Second Tuesday of every month month" or "Last Sunday of every month".
Example
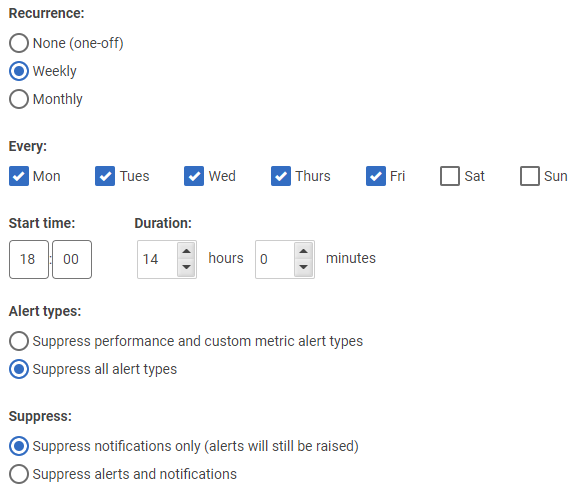
Snoozing notifications outside business hours
You could create a window to suppress notifications from all alert types from Monday to Friday after working hours. You could select all the desired weekdays, and then, in the Start time field, you could select 18:00 and the Duration could be 14 hours. This window would take effect Monday to Friday from 18:00 until 8:00 of the following day. This means that the window would also be active from midnight to 8:00 on Saturday.
Here is how this window configuration would look like:
This documentation contains proprietary information and is protected by copyright law.
Copyright © 2026 Red Gate Software Limited. All rights reserved


