Microsoft Entra
Published 19 November 2020
Visit entra.microsoft.com
Create an app registration
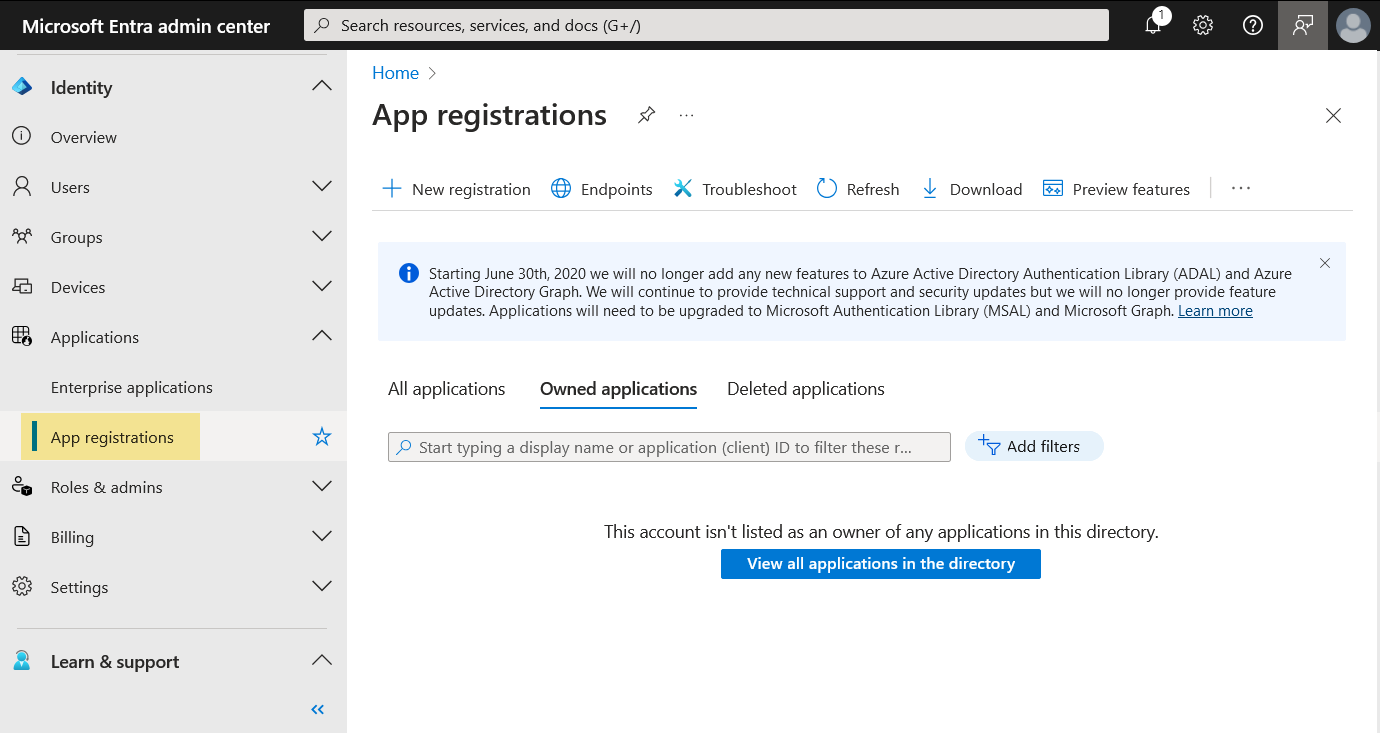
Expand the Applications section in the menu on the left and select App registrations.
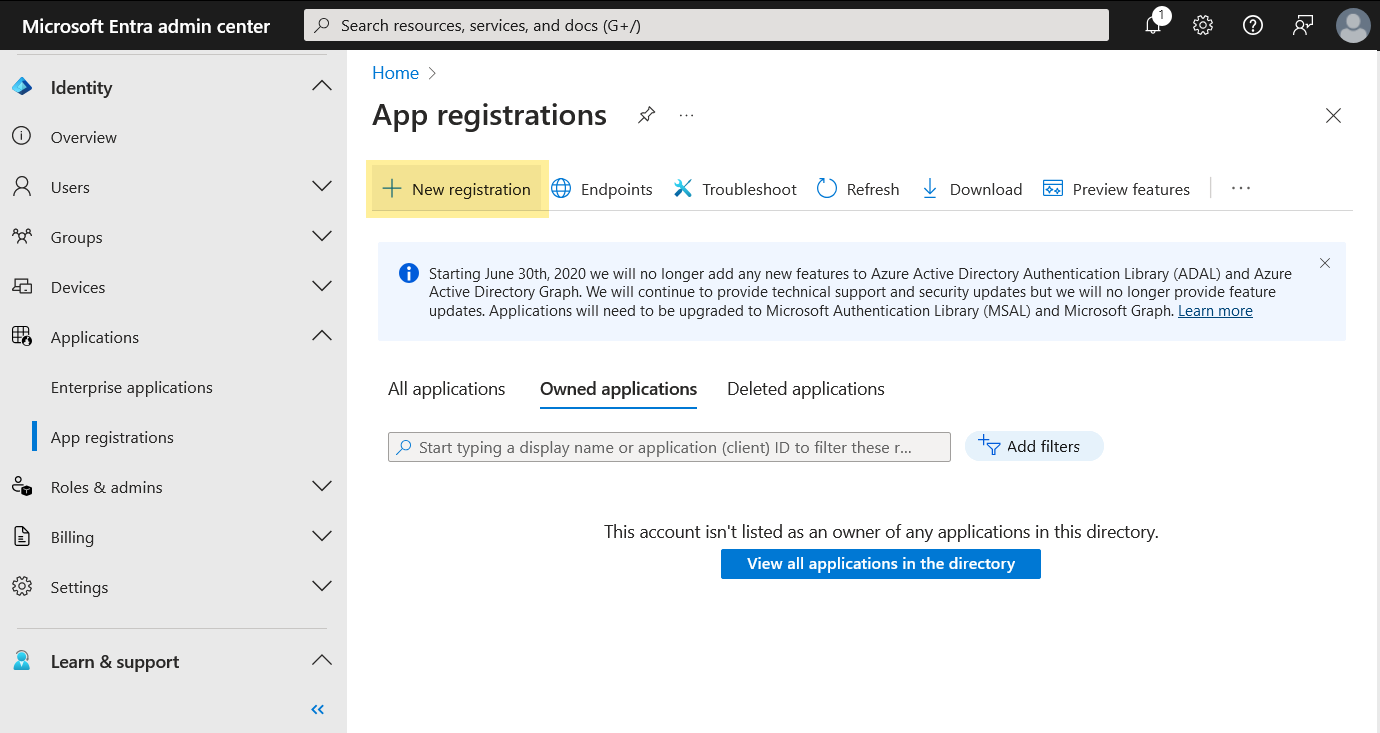
Click New registration on the App registrations page.
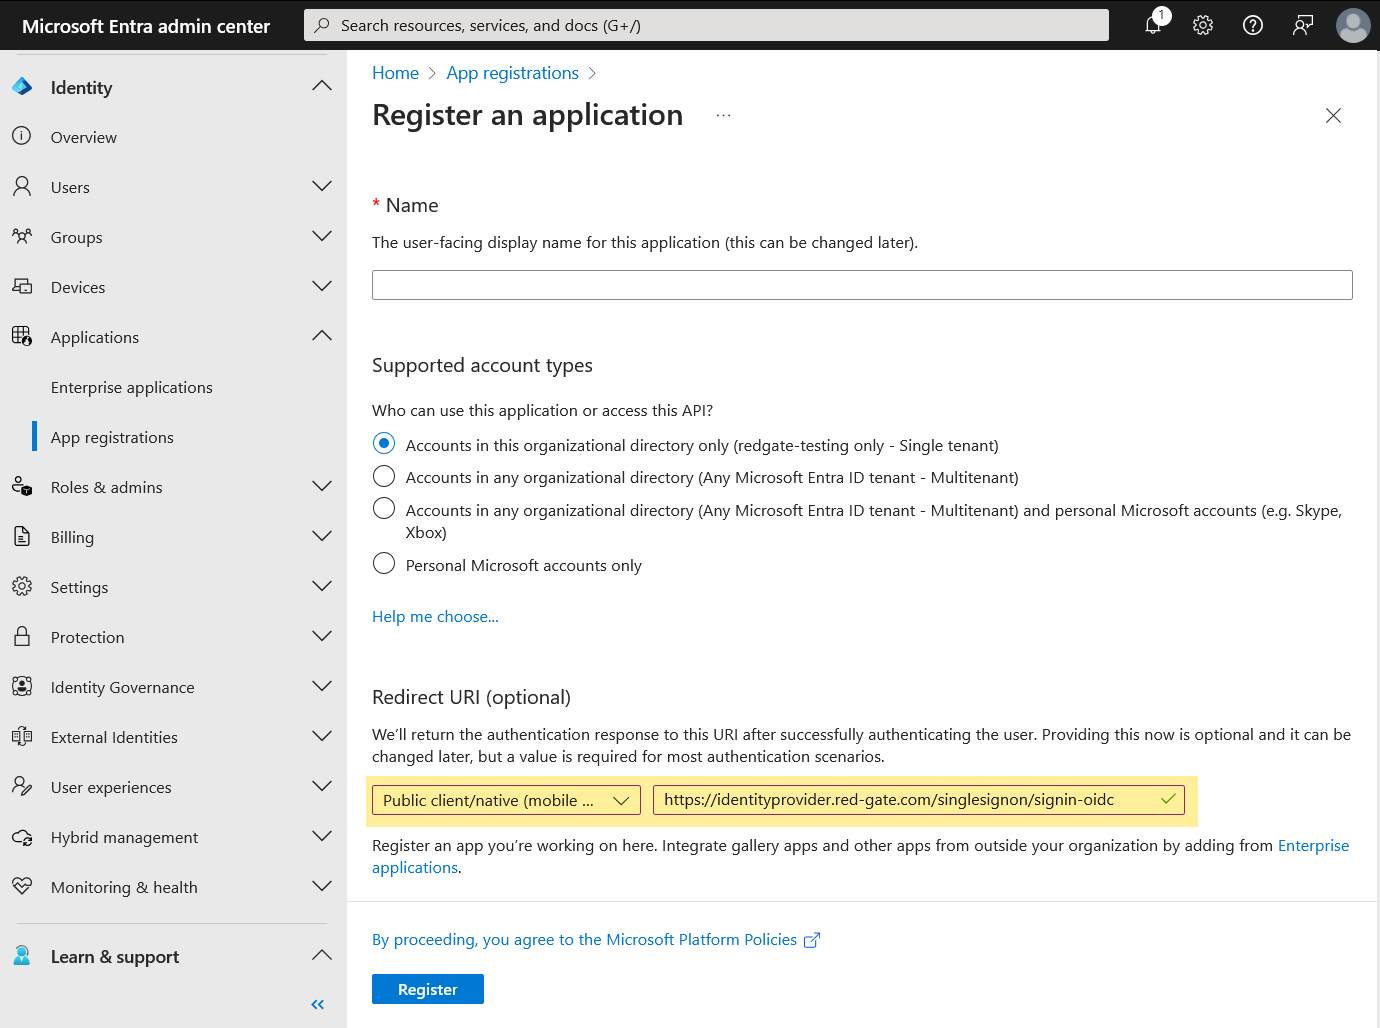
Enter a name of your choice and choose as appropriate from the supported account types.
In the Redirect URI section choose Public client/native (mobile & desktop) and enter https://identityprovider.red-gate.com/singlesignon/signin-oidc
Then click Register.
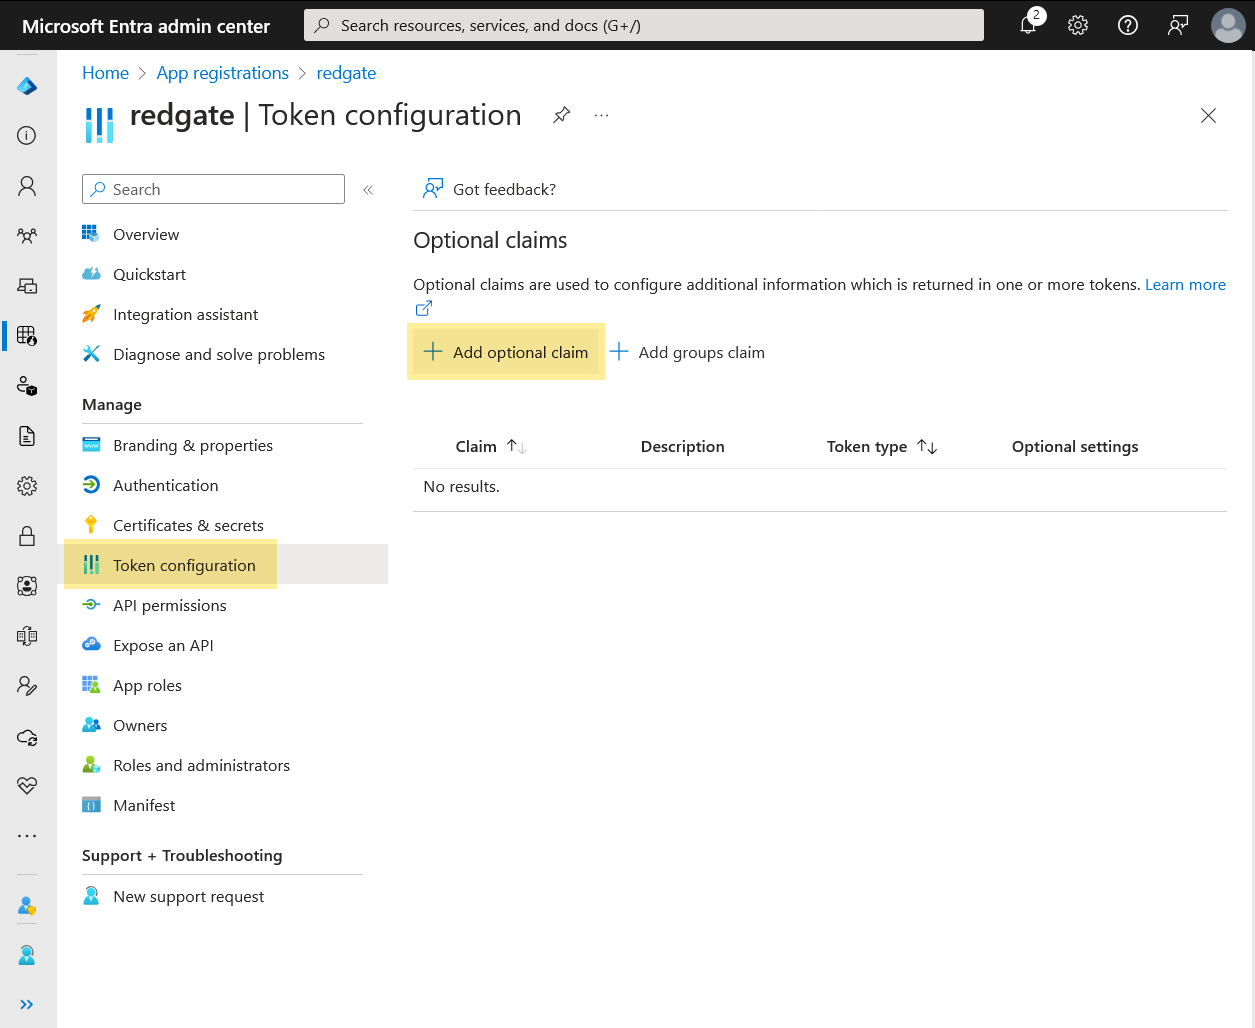
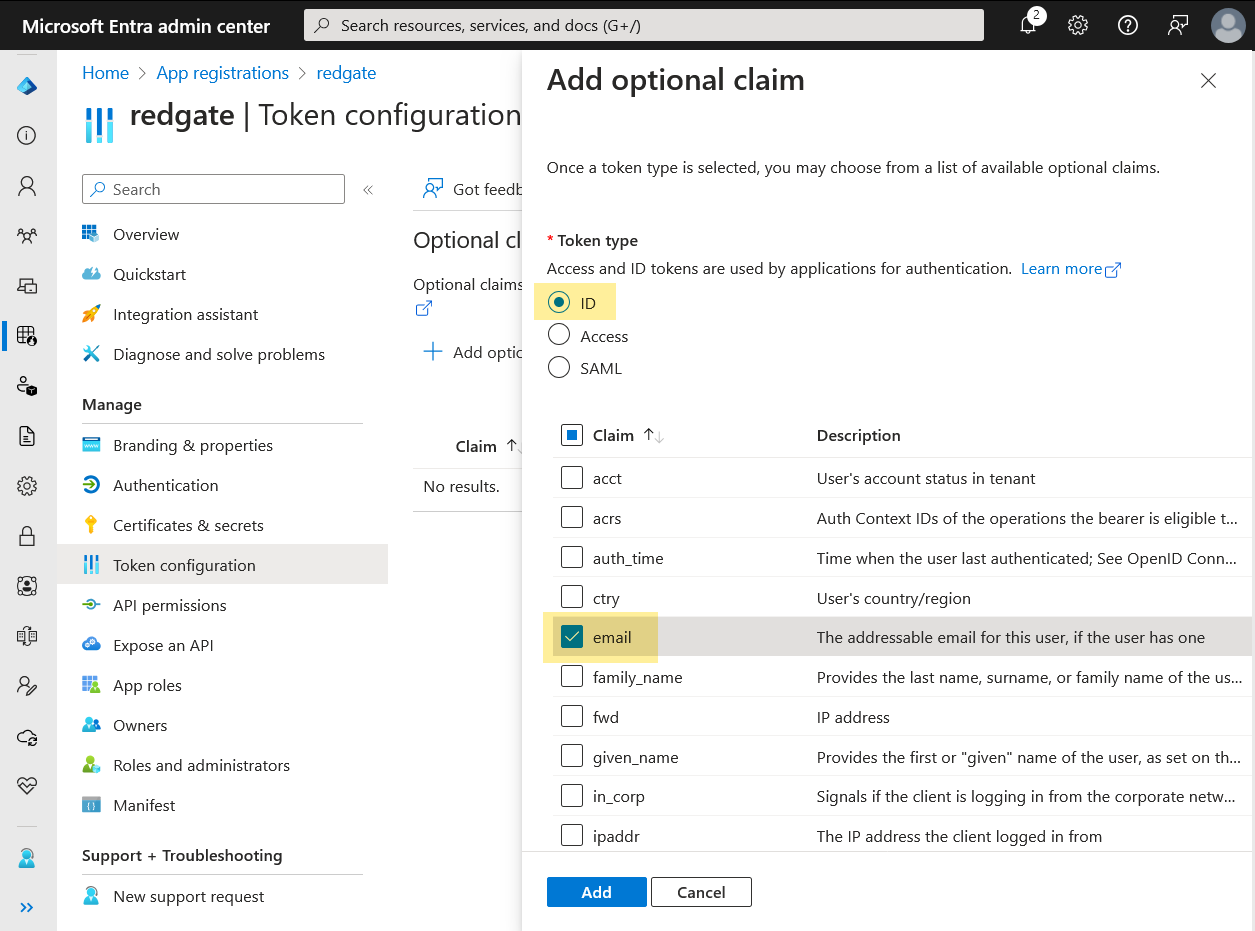
Choose Token configuration from the menu on the left and then click the Add optional claim button.
Select ID as the Token type and then enable email in the table below.
Then click Add.
In the popup dialog enable Turn on the Microsoft Graph email permission.
Then click Add.
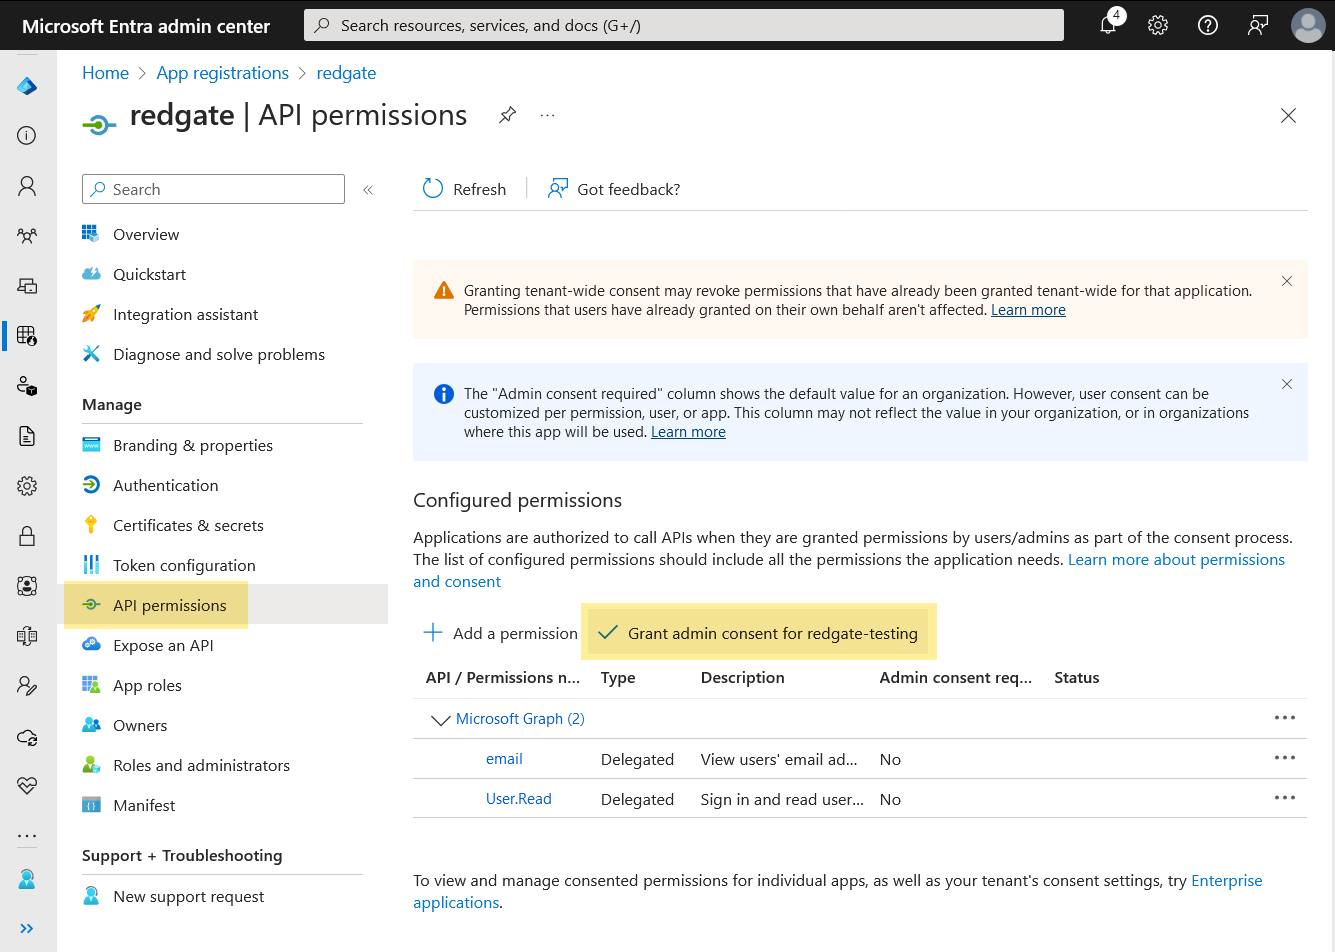
Choose API permissions from the menu on the left.
Click the Grant admin consent for ... button.
Click the Yes button in the confirmation dialog.
Configure SSO in the Redgate Portal
See the Single Sign-on documentation for further details.
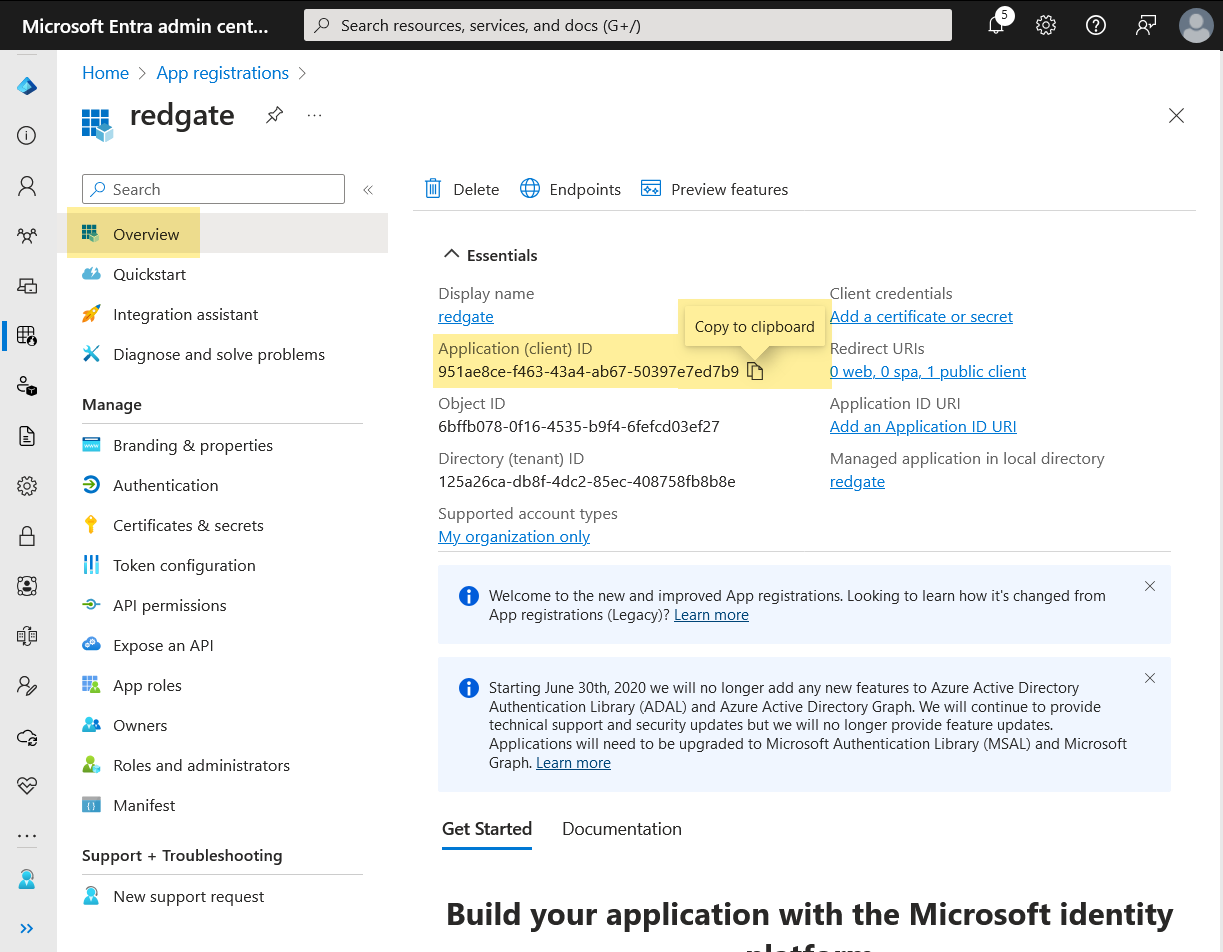
Choose Overview from the menu on the left.
Copy the Application (client) ID value and paste it into the Redgate Portal as the Client ID.
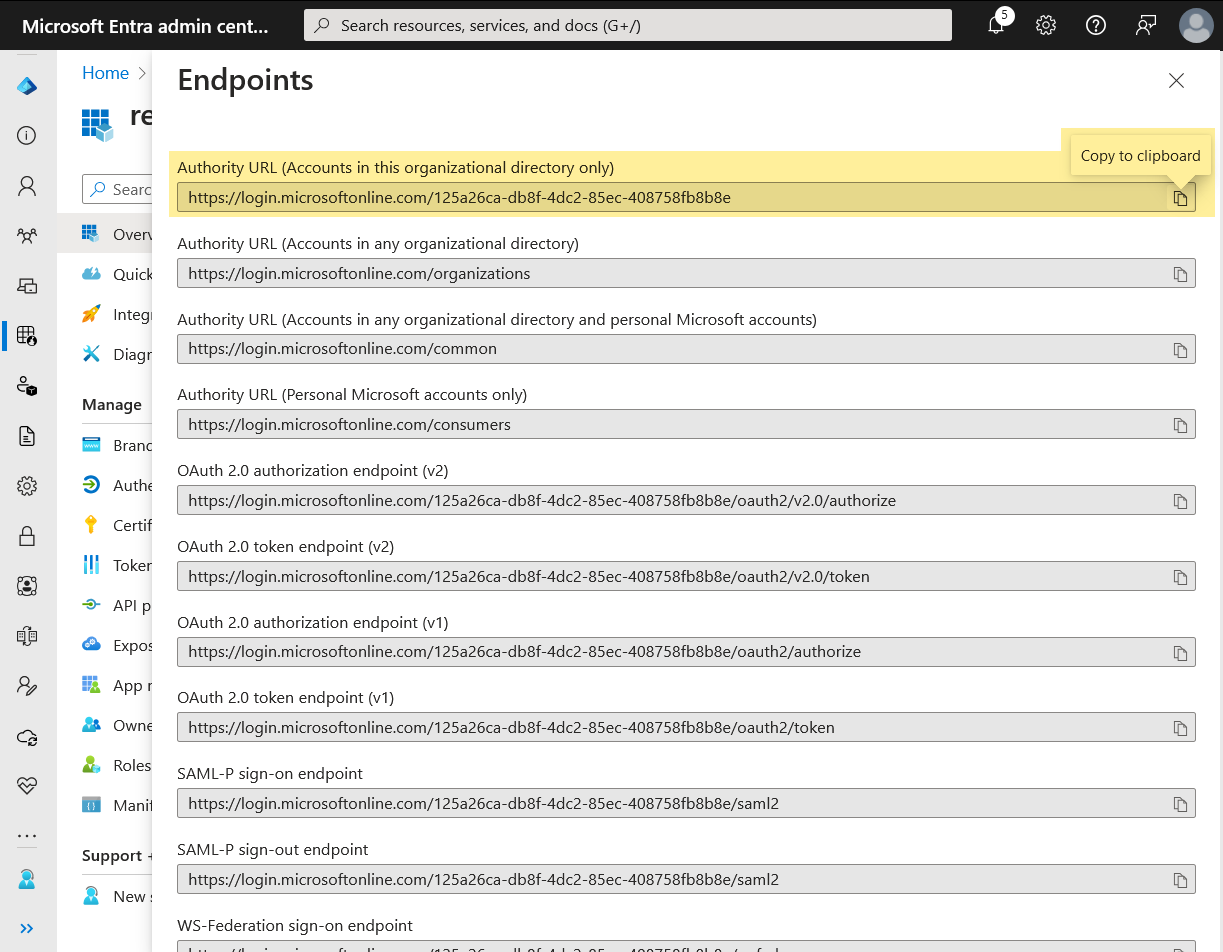
Click the Endpoints button at the top of the page.
Copy the Authority URL value and paste it in to the Redgate Portal as the Issuer URL.
Done
You can now continue with the SSO configuration in the Redgate Portal and click Test without saving to confirm the configuration is correct.
If Entra blocks your test stating You cannot access this right now you may need to configure a client secret.
