Use the TFS Build plugin
Published 20 July 2016
Use VSTS addon for newer TFS versions
This tutorial is only for TFS versions before TFS 2015 update 2. If you have a more recent TFS version, you should be using the VSTS Build and VSTS Release extensions instead.
This tutorial takes you through each stage of setting up a database deployment pipeline using TFS and Redgate tools.
You'll use the DLM Automation TFS Build plugin to build, test, sync and publish a NuGet package to your release management tool.
Most of this tutorial describes how to set up TFS and SQL Source Control. If you're only interested in learning how the DLM Automation TFS Build plugin works, start from step 6, Create a DLM Automation project file.
1. Install software and download demo files
Make sure you have the following:
- Access to Team Foundation Server (TFS) 2010, 2012, or 2013. This tutorial series uses TFS 2012.
Visual Studio 2010, 2012, 2013 or 2015. This tutorial series uses Visual Studio 2012.
For details of which TFS and Visual Studio versions can work together, see Compatibility between Team Foundation clients and Team Foundation Server (MSDN article).If you want to publish test results in MSTest format, you'll need to have Visual Studio Premium, Ultimate or Test Pro installed on the machine running your build agent.
- SQL Server Management Studio (SSMS) 2008 (RTM, SP1, SP2, R2, R2 SP1, and R2 SP2), 2012, or 2014 (CTP2)
- Access to a SQL Server 2012 or 2014 instance with common language runtime (CLR) integration enabled. For more information, see Enabling CLR integration (MSDN article). This tutorial uses SQL Server 2012.
- Redgate SQL Source Control on the same machine as SSMS. See SQL Source Control
- The WidgetShop demo files. Download the WidgetDevelopmentDatabaseCIDemo.zip file, and extract the contents.
- .NET 4.6 or later installed on your local machine. You may need to install it from the Microsoft Download Center if it's not already installed.
- DLM Automation installed on the machine running the build agent. See Installing (DLM Automation documentation).
- Redgate's DLM Automation TFS Build plugin installed on the machine running the build agent. See Setting up the TFS Build plugin.
2. Create a team project in TFS
- In Visual Studio, click Connect to Team Foundation Server:
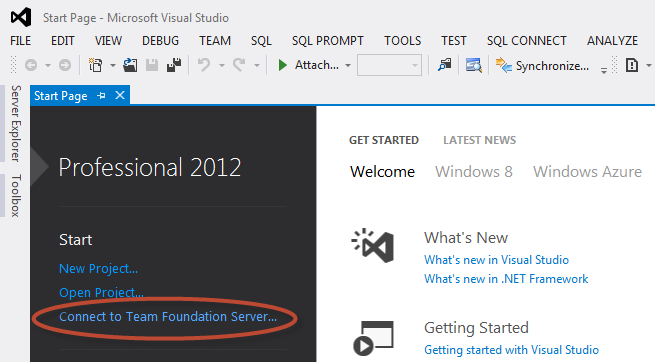
- Select or add your TFS server and then click Connect.
For details of how to connect to an instance of TFS for the first time, Connect to Team Projects in TFS (MSDN article) From the File menu, select New > Team Project. The Specify Team Project Settings page is displayed.
- Enter the project name WidgetShop:
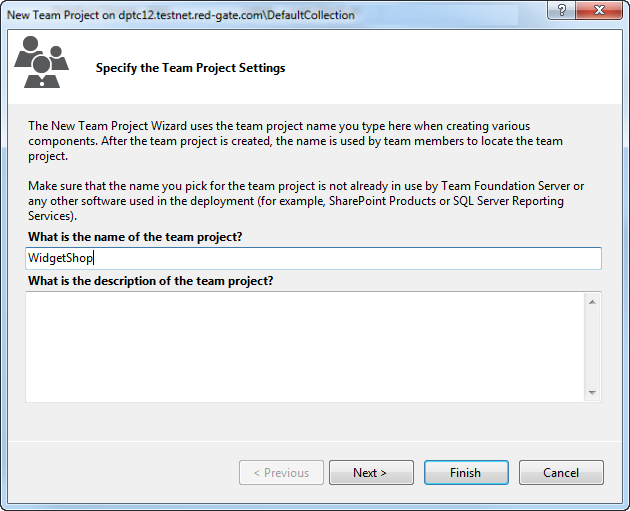
- Click Next.
- On the Select a Process Template page, leave the default process template selected and click Next.
- On the Specify Source Control Settings page, select Create an empty source control folder and click Next.
- On the Confirm Team Project Settings page, click Finish to start creating the project.
Once creation is complete, the Team Project Created page is displayed. - Click Close.
3. Set up version control for the project
- In Visual Studio, open Source Control Explorer and select WidgetShop.
- Click Not mapped to create a workspace mapping:
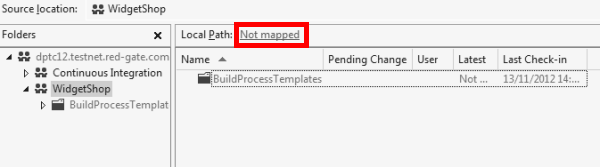
The Map window is displayed. - Select a local folder to map the $/WidgetShop root to, for example D:\tfs\WidgetShop:
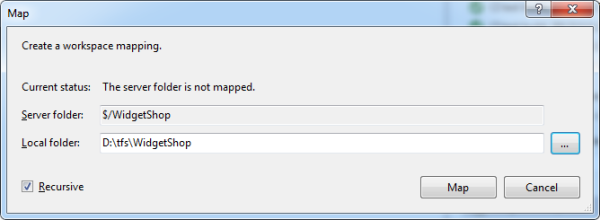
- Click Map. The following message is displayed:
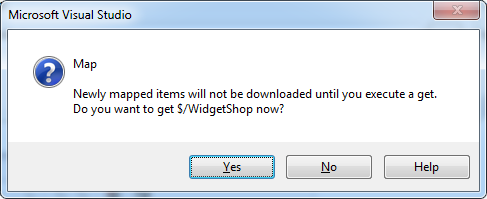
- Click Yes to check out the contents of the WidgetShop project to your local folder.
- Open the local folder you mapped the version control location to, and copy the downloaded WidgetShop folder to it (extracted from the downloaded WidgetDevelopmentDatabaseCIDemo.zip you installed at the start).
This folder contains the database scripts folder that's been created for you using SQL Source Control (WidgetShop > Database > ScriptsFolder). You'll create the DLM Automation project file in this folder later.
- In Visual Studio, use the Source Control Explorer to add the files you've just copied to version control. To do this, right-click on WidgetShop and select Add Items to Folder.
- On the Add to Source Control dialog, select every item, and click Next.
- Select every item on the Items to add and click Finish.
The added folders are listed in Source Control Explorer. - Right-click on WidgetShop and select Check In Pending Changes.
- In Team Explorer, click Check In:
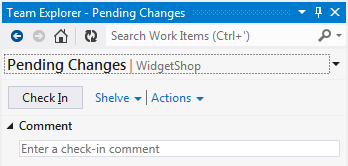
The files you need are now in TFS version control and using SQL Source Control.
If your TFS build agent is on a different machine, you'll need to install DLM Automation on that machine.
4. Create databases
Create two databases:
the WidgetDevelopment database that you'll use for shared development in this tutorial.
a blank database called WidgetCI. Once you've configured the sync step, WidgetCI will be updated automatically every time a change is made to the WidgetDevelopment database.
Create the development database:
Open SQL Server Management Studio (SSMS).
From the File menu, select Open > File.
Browse to the WidgetDevelopment.sql file (extracted from the WidgetDevelopmentDatabaseCIDemo folder) and click Open.
Click Execute to create the WidgetDevelopment database.
Create the WidgetCI database on a local server:
In SSMS, click New Query.
Execute the following SQL query to create the WidgetCI database:
CREATE DATABASE WidgetCI
GO
USE WidgetCI
GO
ALTER DATABASE WidgetCI SET TRUSTWORTHY ON
5. Link the development database to version control
Use SQL Source Control to link the WidgetDevelopment database to TFS version control. We're using the dedicated developer model, so each developer has their own copy of the database. For more information, see Database development models.
- In SSMS Object Explorer, right-click on the WidgetDevelopment database and select Link database to source control.
- On the Link to source control page under Source control system, select Team Foundation Server (TFS).
- Enter the server URL, for example: http://mytfsserver/tfs
- In the database folder text box, browse to the scripts folder located at WidgetShop > WidgetShop > Database > ScriptsFolder
- Under Development model, select Dedicated database.
- Click Link.
- Once the link to source control has been confirmed, click OK.
- Click the Commit changes tab. We want to check in every object in the list, so select the check box at the top of the list:
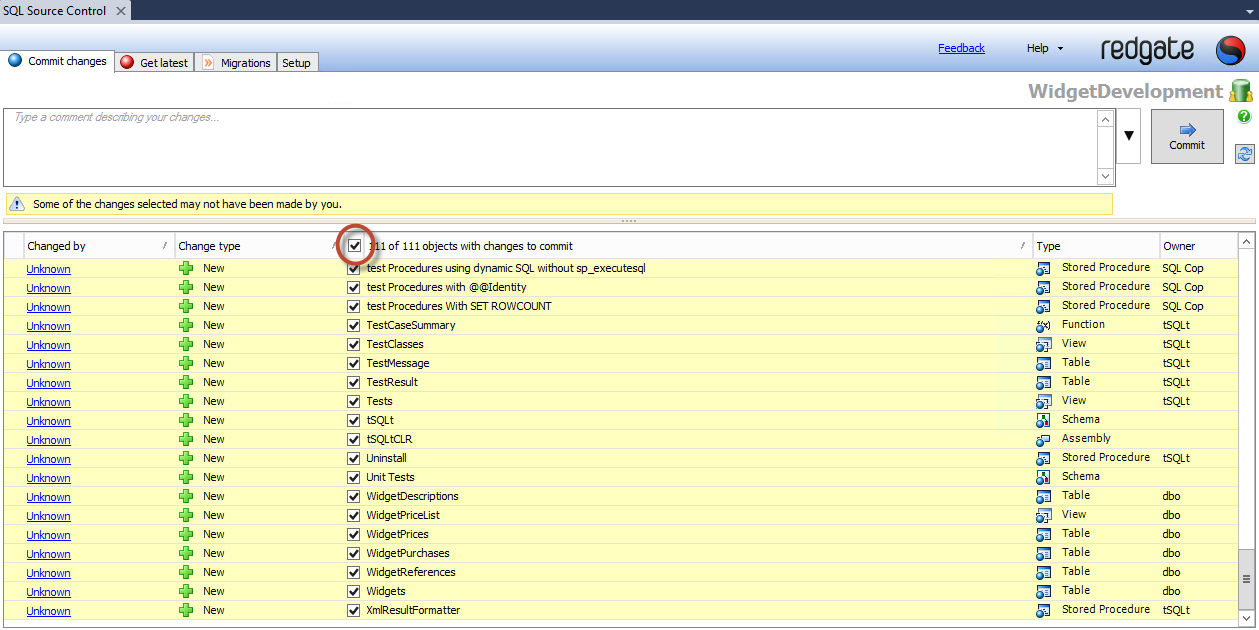
- Enter a comment to describe the changes you're about to check in, for example, new database files added.
- Click the Commit button. After a few seconds, a message confirms that changes are committed.
6. Create a DLM Automation project file
Create a DLM Automation project file in the WidgetShop database scripts folder. This folder was created by SQL Source Control.
- In Visual Studio, from the DLM Automation menu, select Set up DLM Automation:
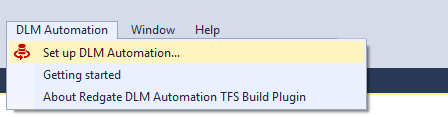
Browse to WidgetShop > WidgetShop > Database > ScriptsFolder. The folder name is displayed in the DLM Automation project name text box:
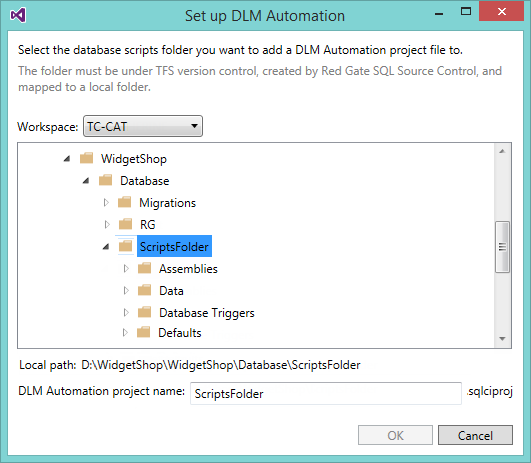
Rename the project CIsteps and click OK.
You've created the DLM Automation project, but it's not checked in yet. You'll do that once you've edited the continuous integration steps.On the CIsteps.sqlciproj page, at the Package name text box, replace CIsteps with WidgetShopLatest.
This is the name of the NuGet package DLM Automation is going to create. It must be unique and can't contain spaces.When you're thinking of a package name to use in your own environment, bear in mind that it's going to be deployed to other databases. A generic name that describes what you're deploying is better than one that's specific to the build step itself, or the database. For example, if your database is called Development, this wouldn't make sense as a package name deployed to your production database.
At the Version text box, use the default version number 1.0.0.

TFS manages minor increments to package versions by adding a fourth digit during the TFS build process. In this example, the package version will be 1.0.0.1.
7. Add DLM Automation Build steps
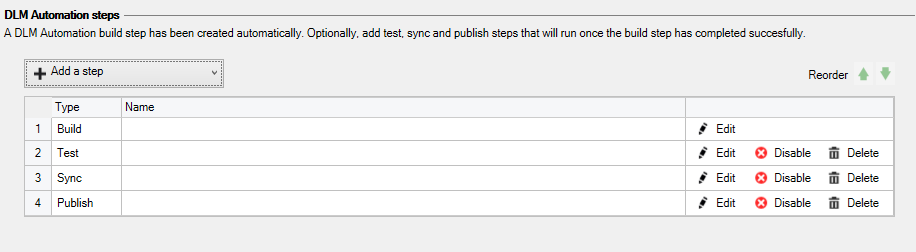
DLM Automation supports four steps that perform different continuous integration tasks; build, test, sync and publish. When you created the CIsteps.sqlciproj file, a build step was created automatically and added to the DLM Automation steps table:
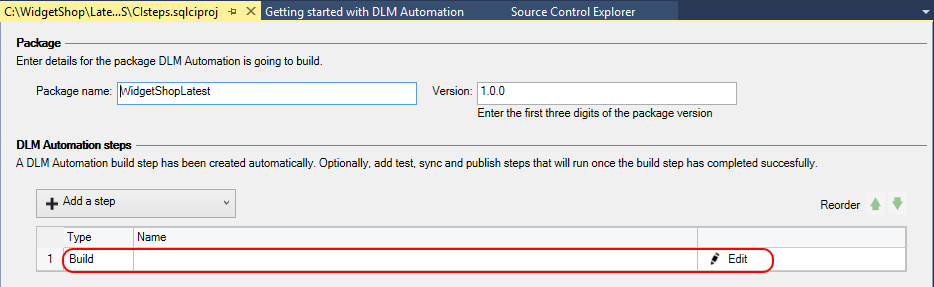
Each project can only have one build step. This step will validate the creation script and generate the NuGet package. As part of this validation, DLM Automation creates a temporary version of the database using LocalDB, which is dropped once the build is complete.
If you want to change any of the default settings, you can edit the build step:
In the DLM Automation steps sections, from the Build step row, click Edit.
If you're using Redgate's DLM Dashboard (version 1.4.4.313 or later), DLM Automation can send schema information to it every time the build step runs. Under the DLM Dashboard integration section:
- Enable the Send schema information to DLM Dashboard check box.
- Enter the name or IP address of the machine hosting DLM Dashboard.
- Enter the DLM Dashboard port number. The default port is 19528.
- recognizes the deployed schema from the information DLM Automation sent during the build step
- adds the schema to its list of recognized schemas, with the name <packageId-packageVersion>, for example, WidgetShop1.0
- labels the schema with the DLM Automation icon

- labels the schema as an update
 , not drift
DLM Automation can include SQL Doc database documentation in the NuGet package that it builds. To select this option, under Database documentation, enable the Include database documentation check box.
Including database documentation will increase the size of the NuGet package and the time it takes to build, particularly for large databases.
The documentation is stored in db > docs > main.html in the NuGet package. If you're using DLM Dashboard version 1.6.3 or later and have set up DLM Dashboard integration, you can also view the documentation directly from DLM Dashboard. See DLM Automation integration (DLM Dashboard documentation). For help understanding SQL Doc documentation, see What's in the documentation?
As part of the validation process, DLM Automation creates a temporary version of the database using LocalDB, which is dropped once the build is complete. If you want to run full-text queries against your tables, you'll need to use a different temporary database because LocalDB doesn't support Full-Text Search. For more information on LocalDB, see SQL Server 2014 Express Local DB (MSDN article). To specify a temporary database:
Click the Advanced tab.
Select SQL Server.
Enter the details of the temporary server in the fields that appear.
- When you've finished editing the build step click OK.
- Click Save.
At this stage you could check in changes and configure the TFS build definition, then make a change to the local copy of the database and trigger a build.
Add a test step
If you want to publish test results in MSTest format, you'll need to have Visual Studio Premium, Ultimate or Test Pro installed on the machine running your build agent.
Add a test step so that every time there's a new build of the WidgetDevelopment database, DLM Automation will create a temporary version of the database using LocalDB and run tSQLt tests (such as static analysis, unit or integration tests) against it.
Test data is generated using SQL Data Generator and added to the temporary database. We've provided a SQL Data Generator file that's already configured to generate data that's meaningful to the rows, columns and tables in the WidgetDevelopment database. It's in the WidgetTestData.sqlgen file that you extracted from the downloaded WidgetDevelopmentDatabaseCIDemo.zip file.
The database schema for WidgetDevelopment already includes four basic SQL Cop tests that will run against the temporary database and check for:
- procedures named SP_
- procedures using dynamic SQL without sp_executesql
- procedures with @@Identity
- procedures with SET ROWCOUNT
There's also a unit test in the schema that checks for email addresses in the Contacts column. Once the tests are complete, DLM Automation generates test reports for review and the temporary database is dropped.
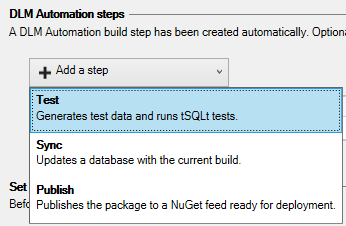
- In the DLM Automation steps section, from the Add a step drop-down list, select Test:
The Add test step dialog is displayed. - In the tSQL tests section, leave Run every test selected.
If you only wanted to run tests in a single class, or a single test within a class, you'd select Run a specific test or class and enter [testclass].[testname]. - Select the Generate test data check box.
- Select Use a SQL Data Generator project file and browse to WidgetShop > WidgetShop > Database > WidgetTestData.sqlgen. This was the file created for you and provided in the WidgetDevelopmentDatabaseCIDemo.zip file.
The location must be relative to the CIsteps.sqlciproj file. - Leave Stop the TFS build process if this step fails selected.
This makes sure additional stops are only run if the test step is completed without errors.
The dialog should look similar to this:
- Click Add. The test step is added to the DLM Automation steps table:

- Press Ctrl+S to save changes.
If you've already configured the TFS build definition, you can now:
- Check in changes to the DLM Automation project file.
- Update your local copy of the database and check in changes to trigger a build.
- Click Open Drop Folder. The NuGet package, test reports file and logs are displayed.
Add a sync step
Add a sync step that will update an existing database with the contents of the WidgetDevelopment database after the build and test steps have been completed successfully.
- In the DLM Automation steps section, from the Add a step drop-down list, select Sync.
- Under Database server, at the Server text box, browse to the SQL Server instance where the WidgetCI database is located.
WidgetCI was the database created when you completed the instructions in Creating databases. - Leave SQL Server authentication selected and enter your username and password.
- Click Test connection. This should verify that DLM Automation can access the server on which the sync database exists.
- From the Database drop-down list, select WidgetCI.
The dialog should look similar to this: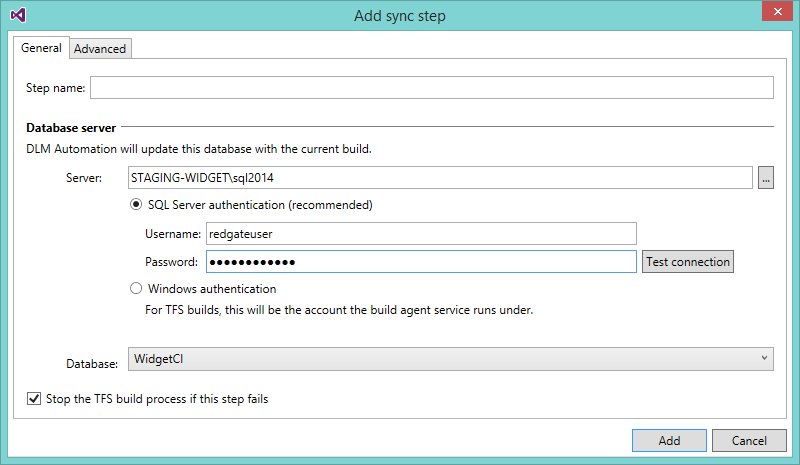
- Click Add. The sync step is added to the Additional steps table.
- Press Ctrl+S to save changes.
If you've already configured the TFS build definition, you can now:
- Check in changes to the DLM Automation project file.
- Update your local copy of the database and check in changes to trigger a build.
- In SSMS, open the WidgetShopCI database to verify that it's been synchronized.
Add a publish step
Add a publish step that will publish the package to the NuGet feed of a release management tool such as Octopus Deploy.
- In the DLM Automation steps section, from the Add a step drop-down list, select Publish.
At the URL text box, enter the fully-qualified URL for your NuGet feed.
If you're using a private NuGet feed, enter the API key.
Click Add. The publish step is added to the Additional steps table:
Press Ctrl+S to save changes.
If you've already configured the TFS build definition, you can now:
- Check in changes to the DLM Automation project file.
- Update your local copy of the database and check in changes to trigger a build.
- Check your NuGet feed to verify that the WidgetShopLatest_1.0.0.1.nupkg file has been published.
8. Check in changes
Once you've finished editing the DLM Automation project file, check it into version control:
In Visual Studio, go to Source Control Explorer
Select the CIsteps.sqlproj file located in WidgetShop > WidgetShop > Database > ScriptsFolder, right-click and select Check in Pending Changes.
Enter a comment and click Check In.
To reopen the project file, browse to it using Source Control Explorer.
9. Configure the TFS build definition
Include the DLM Automation project file in the TFS build definition in Visual Studio.
These steps describe how to include the DLM Automation project file in a new TFS build definition. You can include the file in an existing build definition by following the instructions from step 3 onwards.
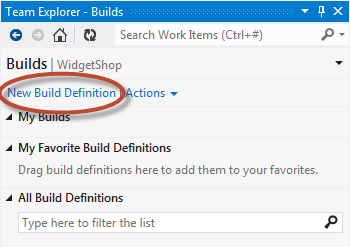
- In Team Explorer, click
 Home and then click Builds.
 Click New Build Definition, if your are using TFS 2015 click New Xaml Build Definition:
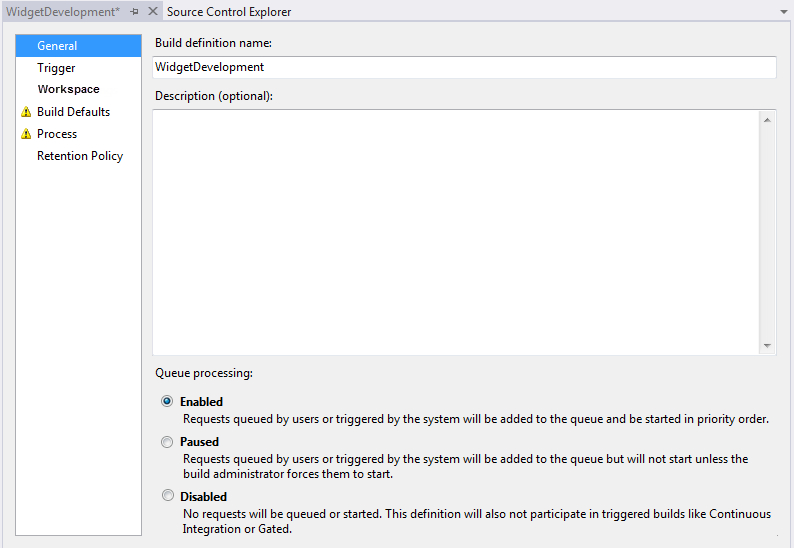
- Click General and in the Build definition name text box, type WidgetDevelopment.
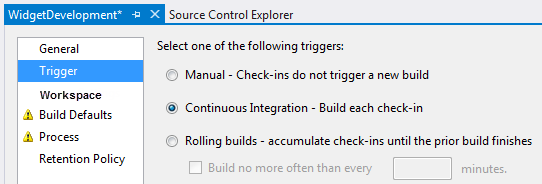
- Click Trigger and select Continuous Integration:
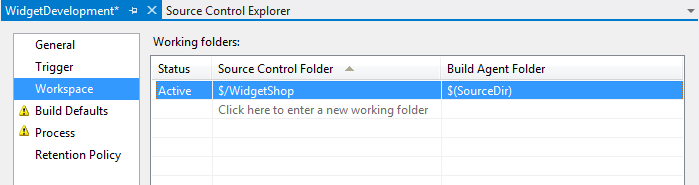
- Click Workspace. Make sure the $/WidgetShop source control folder is displayed. If it isn't:
- click in the Source Control Folder field, and then browse to and select the WidgetShop folder.
- Click OK.
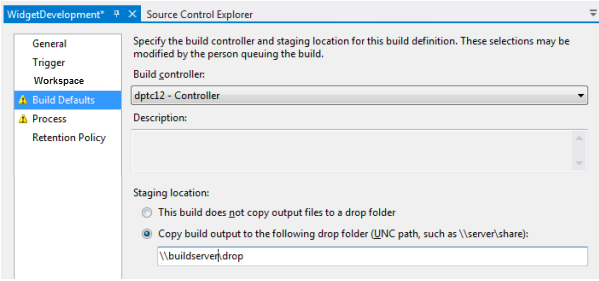
Click Build Defaults. Under Staging location, select Copy build output to the following drop folder and enter the shared location that you want to use as your drop folder.
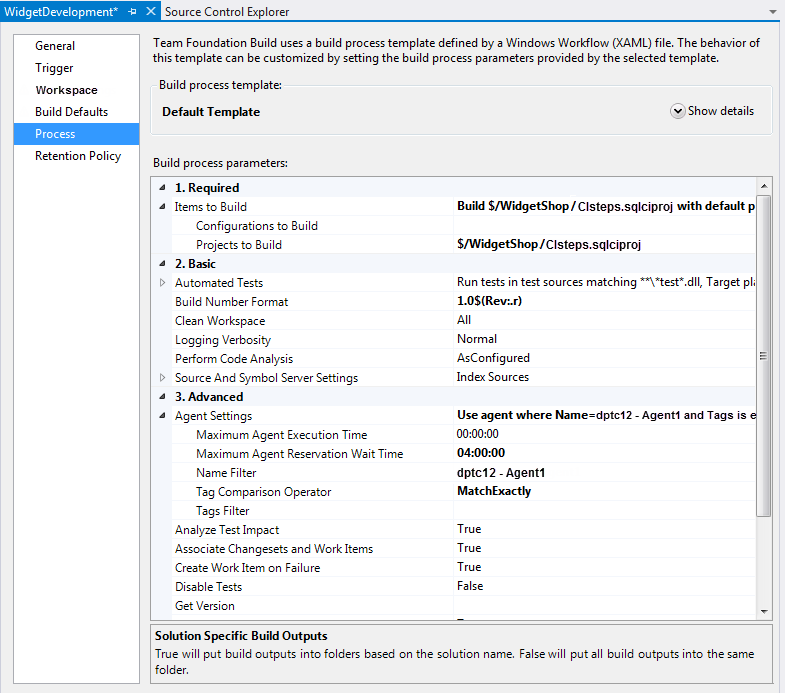
Click Process. Under 1. Required > Items to Build > Projects to Build, browse to and select the CIsteps.sqlciproj file.
You'll need to filter the Browse dialog to show Items of type: MSBuild Project files (*.*proj).
The page should look similar to this:
- Press Ctrl+S to save the build definition.
You can now update your local copy of the database and check in changes to trigger a build.
Verify that the NuGet feed in your release management tool contains the latest package.
This documentation contains proprietary information and is protected by copyright law.
Copyright © 2026 Red Gate Software Limited. All rights reserved


