What's new in Version 6?
Published 21 March 2018
Data Masker Version 6 will soon be ready for General Availability. This is the culmination of a significant re-engineering process which incorporates new underlying libraries providing better control and retention of the panel displays and their defined or user adjusted characteristics. It has also allowed us to add rule based functionality, for instance the ability to clone a rule which has been an often-requested feature.
The core functionality remains the same and the approach to building masking rules is equally consistent. There are subtle changes within this build which we’ll explore now.
The User Interface
The immediately noticeable difference is that Data Masker has been re-skinned in “The Bezier” style.
The Rules in Set, Tables in Set and Rule statistics tabs have all changed to improve usability and the understanding of the masking process.
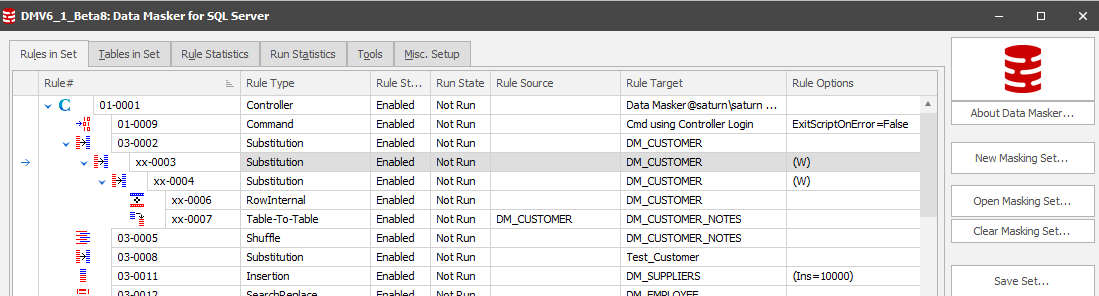
Rules in Set
The core functions of creating, saving and executing a masking set remain consistent. There has, however, been a relocation of the buttons at the bottom of this tab to make the New Rule context more prominent:

- New Rule – there’s no change to the action this performs, it’s made more visible
- Clone Rule – select an existing rule and copy it, allocating a new rule number and positioning the rule in the same rule block as the originating rule. Be aware that it will go to the bottom of the rule block within which the originally cloned rule resides:

The benefit of cloning a rule is to quickly pick up a rule structure which may need to be repeated with other replacement datasets, where clauses and sampling or both.
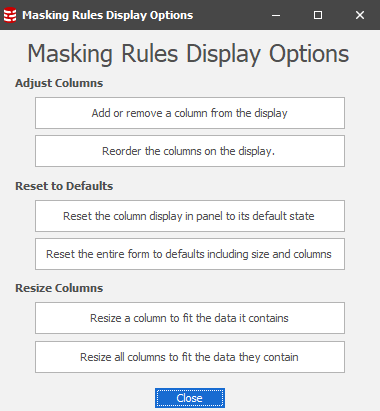
- The Options button. This presents a panel which is, predominantly, a mini-help on how to manage columns in the core display tabs. The Reset to Defaults option will, however, do exactly as it says it will do with no confirmation.
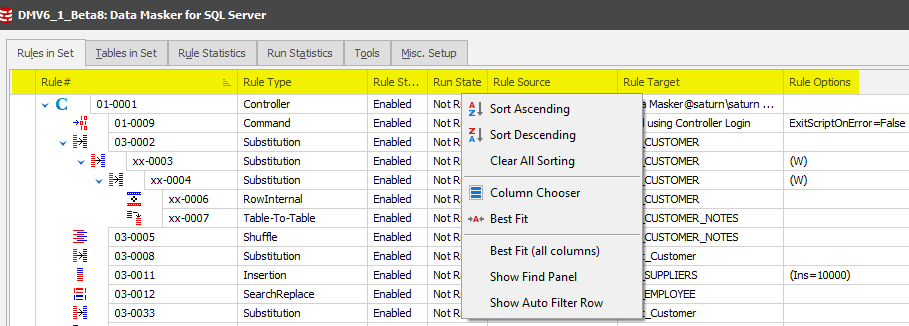
A Right Mouse Button action over the column headers will lead you to further column management including the ability to select other columns appropriate for the display:
Column Chooser displays the columns which are available but not displayed by default:
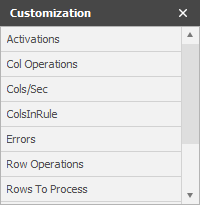
Many of these additional columns are, in fact, displayed in the Rule Statistics tab but this gives you the option to fetch everything together in one panel of your choice. Double-clicking any of these items will incorporate it into the display and you have the option of repositioning columns with a simple drag and drop operation. Data Masker will record the last known configuration and will re-present the panel in the same format when opened again.
You can now also highlight a Rule Controller and Run Rule which will run all rules in that specific controller. Extending upon this, you can also multi-select rules in a Controller and run them. This can help make restart easier in the event of a rule failure.
Tables in Set Tab
Following on to the ability to add columns to each of the tabs, the Tables in Set tab has been reformatted to add further stats of interest:
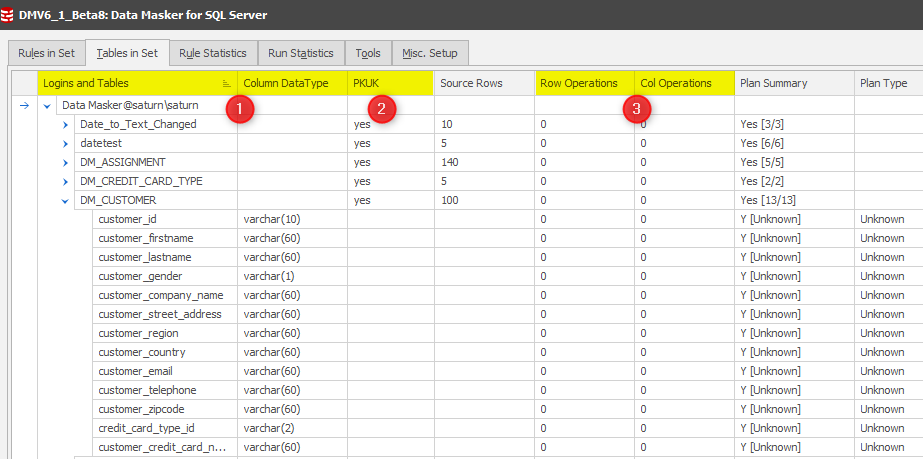
- The Table names and DataTypes have been separated for readability purposes.
- A new column PKUK has been added. Data Masker for SQL Server requires the presence of a unique row identifier as provided by a primary or unique constraint. Portraying this as early as possible notifies the masking set developer that a key (for instance an Identity Column) will need to be added for the masking operation to execute. Should this go unnoticed, Data Masker will error on the rule execution with a dialogue which leads you to create an Identity Column and assign it as a Primary Key.
- Row and Column Operations. In the example above the masking set has been executed. The Rule Statistics tab also contains these values, amongst others. The benefit of displaying these values in this panel is that when you are building your masking set (perhaps driven by the masking plan option on the right of this panel) you can easily see which tables have had rules executed against them. Remember that building a masking set is an iterative process so you can scroll up and down this tab and make your decisions on your next rule definition, if not already defined by your masking plan.
Rule Statistics Tab
Following the same approach as the previous two tabs, above, additional statistics have been added to this context:
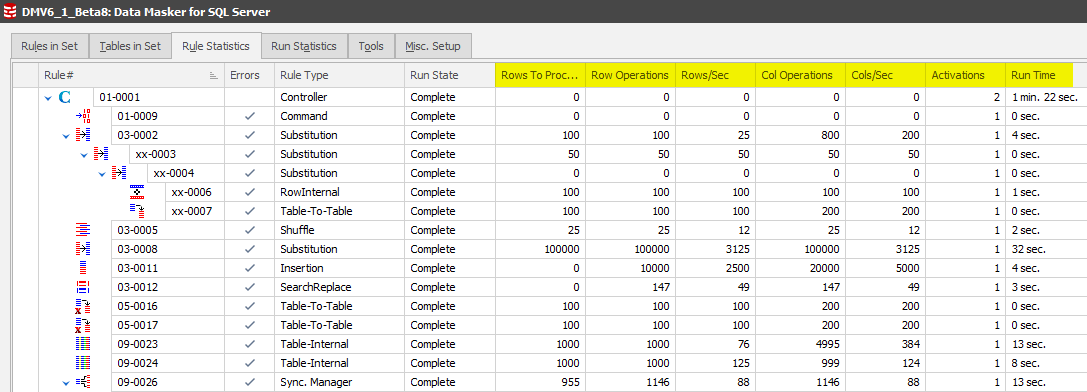
The column headers are self-explanatory.
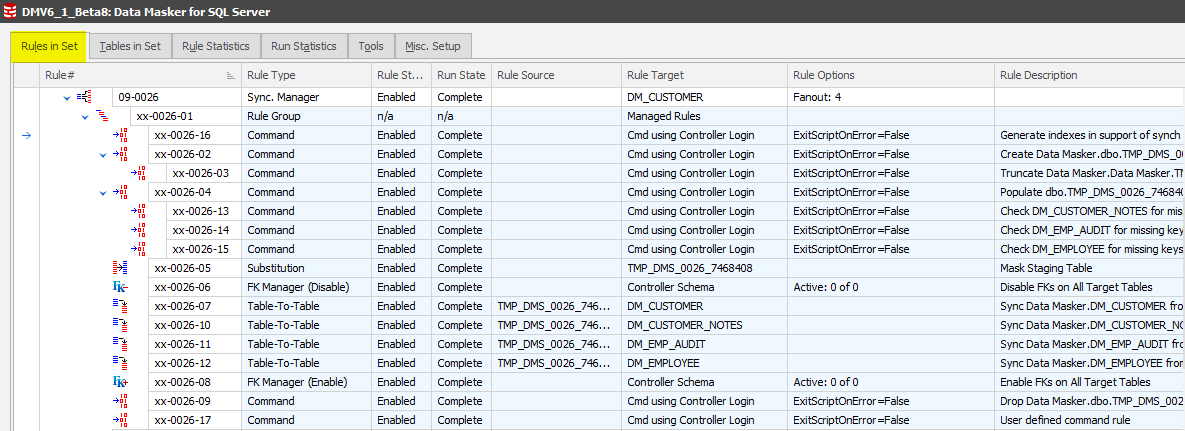
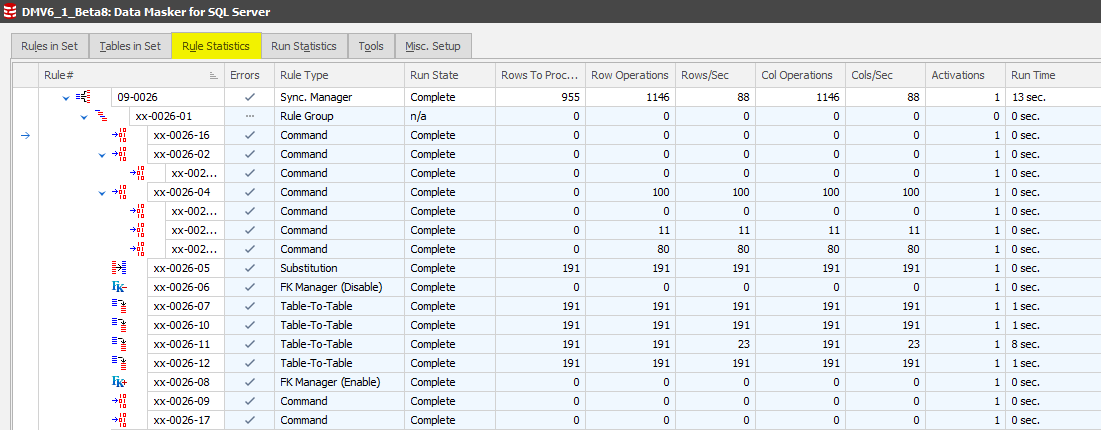
Synchronization Manager Rules in Set and Rule Statistics displays
There’s been a major change to the way that Synchronization Managers are displayed in the Rules in Set and Rule Statistics tabs. They are now expanded by default (and readily collapsible) with the rule elements gray-shaded. This approach means that you do not have to edit the manager rules for detail and run statistics as you would in version 5.
Changes to the Synchronization Manager
The Run Statistics tab has been removed from the Synchronization Manager panel since it is now displayed at the higher level.
The Add Rule context has been extended to include the ability to add further Command Rules into the Synchronization process.
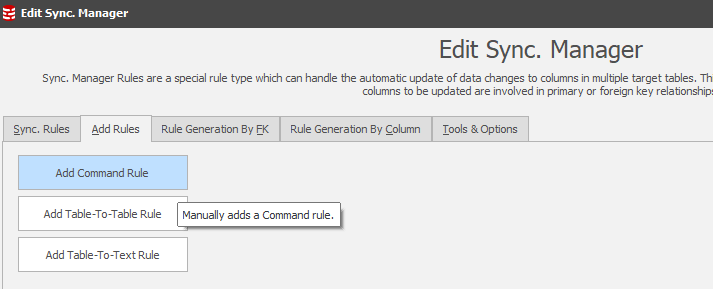
One of the key reasons we may wish to add Command Rules is centered upon the indexing strategy of the tables being synchronized from the temporary staging table. The Synch Manager’s Tools option will identify non-indexed join conditions (this was also in Version 5) but, in the past, the Command rules to support the operation had to be created outside the Synch Manager – in the main rules in set context.
Note: The new Command Rule will adopt the rule or rule block number currently in focus as its own rule block number. This allows you to position these rules anywhere within the Synch Manager.

A similar rule to drop the indexes would then be configured under rule block 75 (the staging table drop rule block) since it’s important to revert the database structure back to the way it was originally.
In support of this method of operation the Check for Un-Indexed Table-To-Table Rule Targets has been modified to separately provide the index create and drop statements:
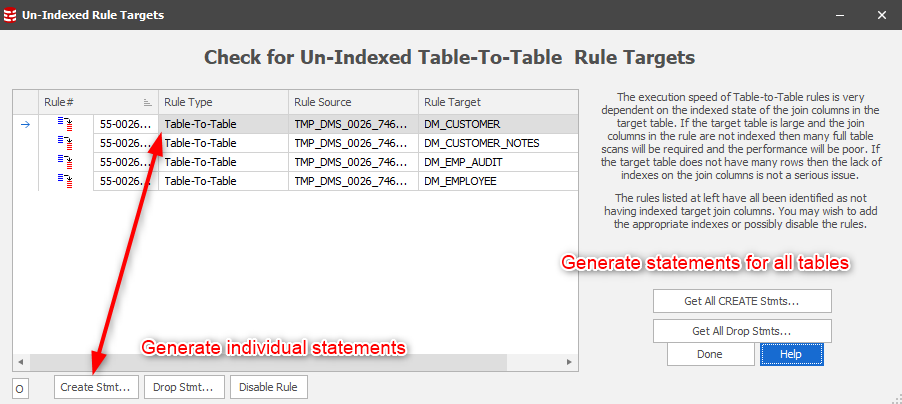
The key benefit of this approach is that you can fully instrument the Synch Manager process without leaving the context as you had to in Version 5.
Introducing “O S T C”
Wherever there is a table hierarchical display (Tables in Set, Column Finder) there’s now the ability to expand or colapse at the Options, Schema, Table and Column level:

Upgrading from Version 5 to Version 6
The structure of the masking set has been changed to facilitate the new feature-set. This means that masking sets generated prior to Version 6 will need to be converted using the utility provided in the Tools tab.
Because of this new structure the file extension of Version 6 masking sets has been changed to .DMSMaskSet.
This approach allows Version 5 and Version 6 to co-exist on a system to facilitate an orderly migration of the masking sets.
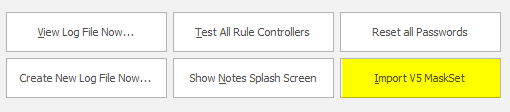
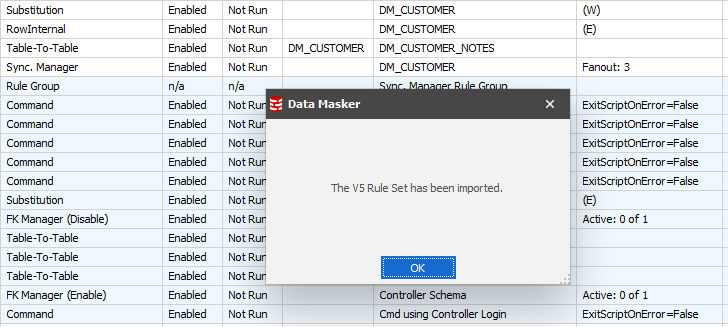
On choosing this option you will be presented with a file selection dialogue. Navigate to your V5 Masking Sets directory and choose your first set for conversion. Obviously, the time taken to convert the set is determined by the size of the set but it won’t be long before you’re presented with confirmation of the conversion:
It’s now simply a question of “saving the masking set as” into the new Data Masker V6 Masking Sets directory.
Note: If you have created batch files or command lines to execute Data Masker V5 you MUST modify these to reflect the new executable and masking set directories.
An additional approach to batch execution
When executing previous versions of Data Masker from the command line or in a script the tool would “pop-up” the UI during the execution unless a /Min option was defined in the command line arguments.
Since Data Masker is now part of Redgate’s SQL Provision bundle we’ll see closer and closer integration between the two offerings. As a first step, Data Masker can be called by SQL Clone’s script execution capability.
Note: You still need to develop your data masking rules and save your masking set in an accessible location to SQL Clone. In addition, it is a good idea to ensure that this directory is regularly backed up.
With this implementation, Data Masker will run in a “headless” mode so it will not “pop-up” during execution. This is accomplished by calling a separate program which is in the Program Files/Red Gate/Data Masker for SQL Server program directory:

The DataMaskerCmdLine program requires the creation of a parameter file which is structured:
-- Sample Parameter file for Data Masker Command Line
-- usage: start /wait Datamasker.exe PARFILE=C:\MaskingSets\SamplePARFILE.txt
--
LOGINSUB=DummyLogin@DummyServer[DummyDatabase]||DataMasker/DataMasker@N2KBUILD-PC\N2KTEST1[DMTest]
LOGINSUB=XXXLogin@XXXServer[XXXDatabase]||DBSSourceUser/DBSSourceUser@N2KBUILD-PC\N2KTEST1[DBSSource]
MASKSET=C:\Net2000\DMS_TestSets\CmdTestWithSubParams.DMSSet
AUTORUN=true
AUTOEXIT=true
DMSSUBVALUE00=DM_INVOICE_LINE_HISTORY
DMSSUBVALUE05=TESTUSER
Note: To facilitate SQL Clone replacing login details this structure has an alternate parameter which does not require the presence of the Dummy login details which Data Masker uses for parameter substitution. For example, the LOGINSUB can now be replaced with a SIMPLELOGINSUB parameter. It is important to note that there can only be one SIMPLELOGINSUB parameter and if it is used then the LOGINSUB parameters are not permitted.
In terms of execution, this means that masking sets executed from SQL Clone’s script execution context can only address one database. If you need to address multiple databases in the server, you should sequence as many Data Masker executions as there are databases in the masking plan with each database being masked in isolation. This has the inherent restriction, therefore, that cross database synchronization cannot be achieved if the masking set is executed under SQL Clone’s script executor.
The core DataMasker.exe routine retains the full batch execution capabilities as found in Version 5.
The Audit table has been replaced
In previous versions an Audit table was auto-created to record the execution of a masking operation. The objective was that this record could transport with the database wherever it may ultimately be deployed.
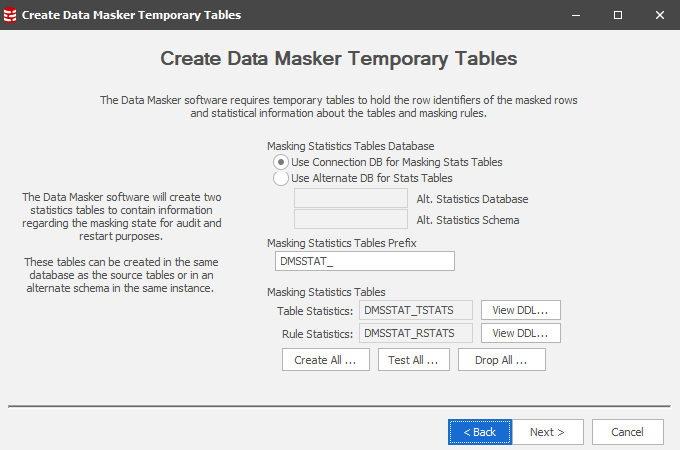
In Version 6 this one table has been replaced by two new tables – a Rule Stats table and another for Table Stats. These are configured within the New Masking Set wizard and should be created from the outset. Like the audit table if these tables are not present they will be auto-created. What’s different is that we can now specify which database in the server these tables are created. It’s quite possible that the user will create a statistics database and funnel stats from each database’s masking operations to this database. It is for this reason that the Masking Statistics Table Prefix can be set, generally to a value which reflects the Rule Controller’s database name or a reflection thereof.
New Reports and Report Options
With the replacement of the Audit table by the Rule and Table Stats tables the reporting mechanism has been equally divided.
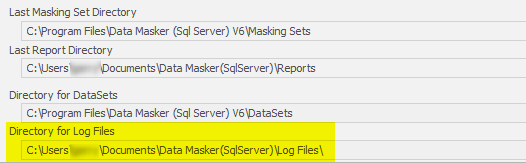
There are three approaches to reporting. The first is that the Rule and Table Stats are always reported to the Logfile which is generated in the Data Masker Directory for Log Files:
This approach is also in Version 5.
The second approach is that reports can be auto-emitted to a directory of choice. This is one of the best approaches since it ensures that every time a masking rule or masking set is run then a record is created of the action.
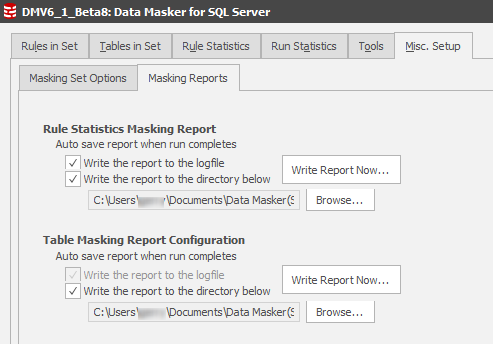
Again, this was in Version 5 but the position of these report locations was somewhat camouflaged within the core Misc Setup Options sections. They are now far more visible with easier control.
Finally, reports can be generated after an interactive rule or masking set execution using either the Write Report Now… buttons as indicated above or by using the options in the Tools Tab:
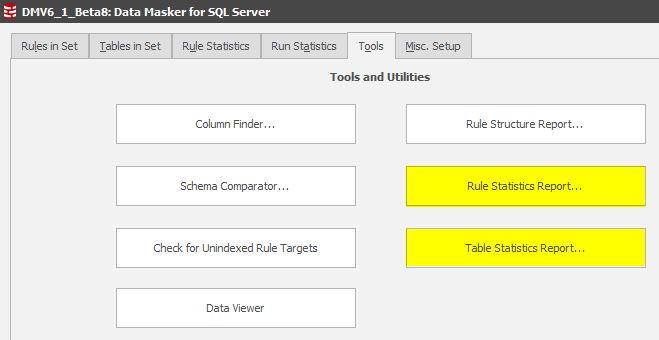
The Rule Structure Report has not changed.
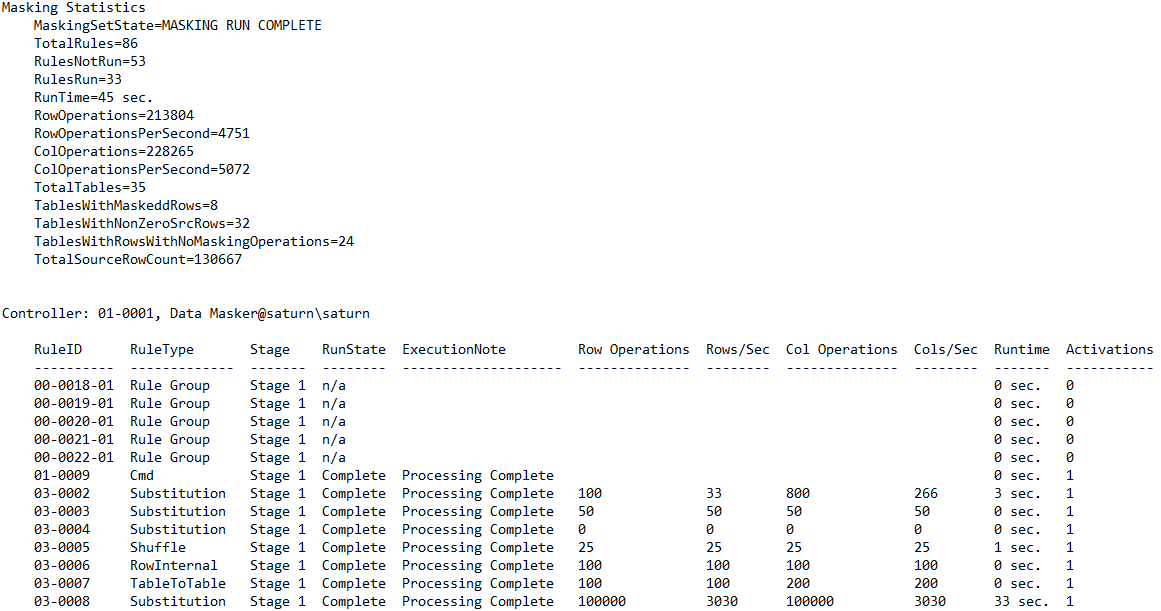
The Rule Statistics Report Format has slightly changed and delivers better cumulative statistics as well as detailed rule execution:
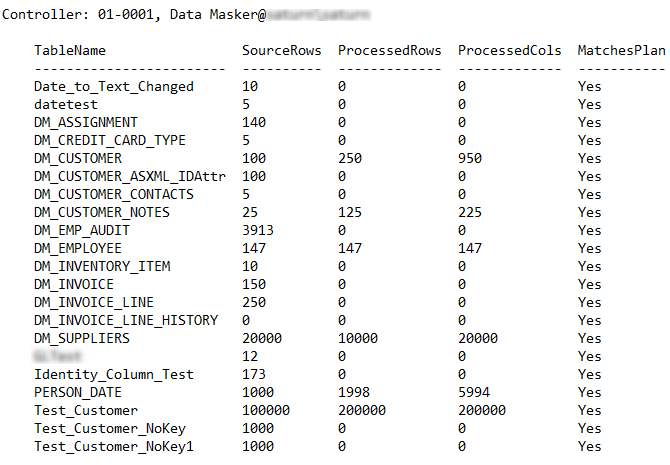
The Table Statistics Report is new and as well as showing the cumulative masking set statistics it displays the rows in table (as stored by the masking set) the rows processed with the plan match.
Other Changes to the Tools Tab
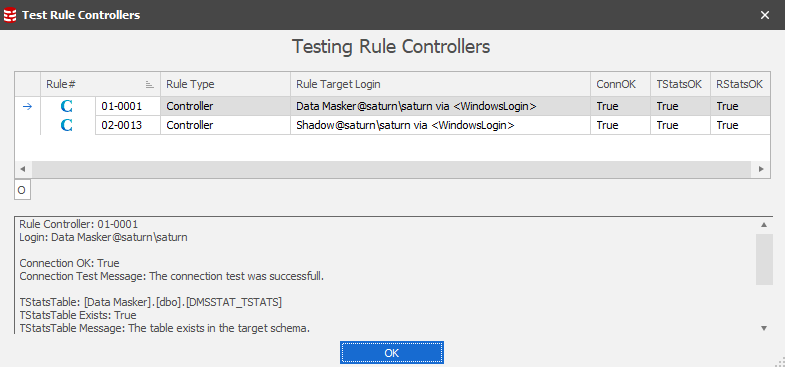
A new feature has been added to test all Rule Controllers in the masking set:

The benefit of this option is to confirm that the database can be connected to and therefore confirming that passwords haven’t changed nor access permissions. The test will also check for the presence of the Rule and Table Statistics tables in the database(s).
The Audit Reflector rule has been removed from the New Rule panel.
This functionality was implemented at the request of a larger customer (in deployment terms, 60+ databases) who wanted to copy all audit tables to a centralized repository. The Audit Reflector performed this task, but no other client used it. Given that the requesting client is no longer under support the decision was taken to remove the functionality from Data Masker for SQL Server and, ultimately, Data Masker for Oracle.
Changes to the “Hidden Switches” (this section will evolve to a Tech Tip for RG internal consumption initially, perhaps general availability)
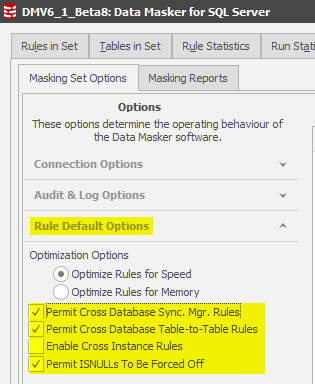
The hidden switches are a feature which disables certain functionality unless the client instigates dialogue with the support or pre-sales support team. In Data Masker Version 6 the switches are configured as:
Background on these switches
The reason behind inhibiting these capabilities is one of concern that the client does not make false assumptions.
As a generic example consider the case where there are two databases (Controllers) configured in the same masking set. The core data in the (let’s call it) driver database is masked and then we want to synchronise these changes across to the second (subsidiary) database in the Server. That’s exactly what the Cross Database Table-to-Table Rule will do so why can’t you use it whenever you choose?
The answer is that we want you to “stop and think” and the same holds true for each of the rule types with a switch on them.
Remember that each Rule Controller contains a record of all triggers, indices and constraints and that each are either managed automatically (triggers) or we have an option to manage them (Command Rules for index management, Constraint Rules for constraints). The fact of the matter is that these controls are at the Rule Controller level. They do not span databases or servers/instances. If the Cross Database or Instance functionality were enabled by default you may be in danger of encountering a trigger, constraint or index on the far side which you may not have considered. It’s for this reason that the Cross-DB Command Rule was instrumented so that you could, for instance, disable a trigger on the far side, perform a synchronization action and then re-enable the trigger with a subsequent Cross DB Command Rule.
But there’s something else….
How sure are you in any table to table action that you are masking every column and row in the table which you are targeting? If there’s ever any doubt, then a wise decision would be to Null or Empty all rows on the target side prior to any synchronization practice. It is the Cross DB Command Rule which will allow you to do this.
Error Management
As with Version 5, the error management displays are consistent:
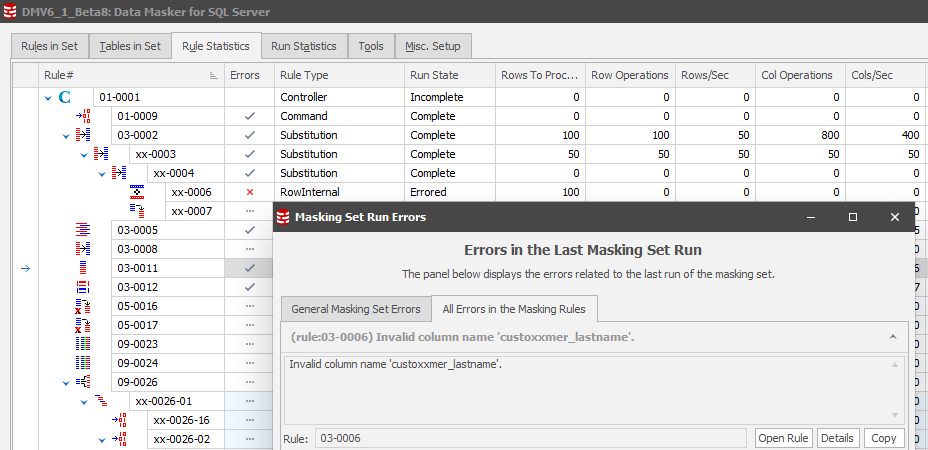
Version 6, however, introduces further information by selecting ![]() which will present a three-tab display including the Rule Code:
which will present a three-tab display including the Rule Code:
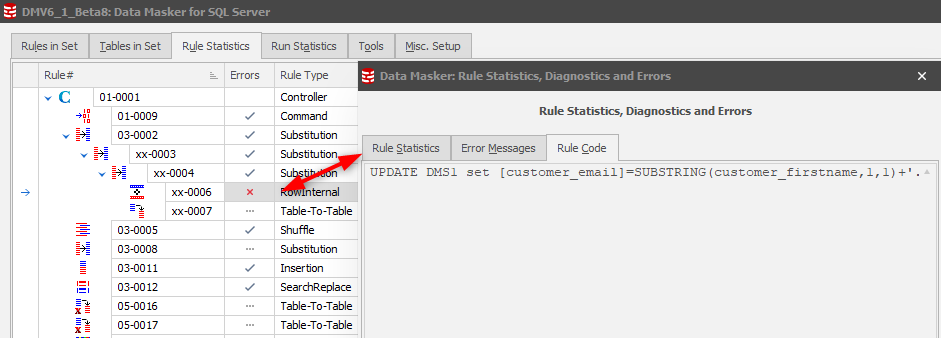
This also replaces the View Code option which was available on the Version 5 Rule Statistics tab/ Right Mouse Button action.
Still to be added to Version 6 (as at 20 February, 2018)
The Bulk Rule Generator has not been implemented yet. This facility allows a Row-Internal Synch rule (and ONLY that rule type) to be auto-replicated for every table which has the same column against which the action should take place.
The Cross-DB Table Mover and Cross-DB Table-to-Table techniques are also yet to be implemented.
The Range Splitter Manager is not there yet.
The Masking Plan Report has yet to be implemented in the Tables in Set tab.
This documentation contains proprietary information and is protected by copyright law.
Copyright © 2026 Red Gate Software Limited. All rights reserved


