Database Unit Testing
Published 01 March 2022
Redgate sponsors the following open source database unit testing frameworks:
tSQLt
tSQLt adds additional objects to your database that Flyway Clean cannot remove. To remedy, add the following beforeClean call back script to your migrations folder, which runs tSQLt's own uninstall script before Flyway's clean operation begins.
beforeClean__Uninstall-tSQLt.sql
IF OBJECT_ID('tSQLt.Uninstall','P') IS NOT NULL
BEGIN
	print 'Uninstalling tSQLt'
	Exec tSQLt.Uninstall;
END
There are two options that can be adopted when using tSQLt with Flyway:
- Manage the tSQLt framework and tSQLt tests using Repeatable scripts
- Separate out tSQLt into its own project
For both options ensure that your project settings ignores tSQLt, which is the default for new projects created in Flyway Desktop.
Then, include a step in your pipeline to run the tSQLt tests and extract the report (see below).
Option 1 - Manage the tSQLt framework and tSQLt tests using Repeatable scripts
- Create a separate migrations-tsqlt folder and place tSQLt.class.sql inside, renaming it to R__tSQLt.class.sql
- Add R__tSQLt.class.sql.conf to the same folder containing a single line: executeInTransaction=false
- Edit your flyway.conf and include your tsqlt migrations folder as a location, eg: flyway.locations=filesystem:migrations,filesystem:migrations-tsqlt
- Create R__myUnitTests.sql and place your tSQLt tests in there.
- Ensure that in upstream environments where you don't want to include tSQLt or the tests, eg to deploy to production or to run flyway -changes and -drift checks against production, to remove migrations-tsqlt from your flyway.locations
Option 2 - Separate out tSQLt into its own project
Create a second project to specifically target the tSQLt tests.
- Step 1 - Change the Flyway Desktop configuration settings to include only tSQLt objects
- Within the root of the project directory, open the 'flyway-dev.json' file and update or add the IgnoreTSQLT JSON snippet as per this sample configuration file:
Flyway Dev - Full Example Flyway-dev.json
{
  "version": "2.0",
  "id": "e6285c15-1e6a-4a57-a61b-8cd42c1cd96c",
  "name": "Example Project (Unit Tests)",
  "databaseType": "SqlServer",
  "development": {
    "scriptsFolder": "./schema-model"
  },
  "deployment": {
    "flywayConfFiles": [
      "./flyway.conf"
    ],
    "targetDatabases": [
      {
        "schemas": [],
        "displayName": "Example Database (Shadow)",
        "connectionProvider": {
          "type": "UsernamePassword",
          "url": "jdbc:sqlserver://localhost;databaseName=ExampleDatabase_Shadow;encrypt=true;integratedSecurity=true;trustServerCertificate=true"
        }
      }
    ]
  },
  "developmentDatabase": {
    "displayName": "Example Database (Development)",
    "connectionProvider": {
      "type": "UsernamePassword",
      "url": "jdbc:sqlserver://localhost;databaseName=ExampleDatabase_Dev;encrypt=true;integratedSecurity=true;trustServerCertificate=true"
    }
  },
  "capabilities": {
    "comparison": {
      "options": {
        "IgnoreTSQLT": false
      }
    }
  }
}- Step 2 - Update the 'Filter.scpf' in the project root directory to include only tSQLt related objects, filtering out all other objects using the following as an example: Filter.scpf
- Step 3 - Flyway Desktop - In Schema Model save all tSQLt related objects to your project
- Step 4 - Flyway Desktop - Create a migration script that encompasses all tSQLt objects (Ensure this is a versioned migration script, as opposed to a baseline script)
- Create the versioned migration script with a version number above 1. For example 'V999__tSQLt_Unit_Tests.sql'. Doing this will avoid conflicting with any baseline version of 1.
- Step 5 - Flyway Desktop - Commit all changes to VCS
Running tSQLt as part of a CI/CD Pipeline
Now that we have created our project, and have a migration script that encompasses all of our tSQLt Objects, we can choose to deploy this script onto a build database to allow for Unit Testing inside of a CI/CD Pipeline.
Above we can see we created our script that encompasses our , we do not however want to run this script on any environment where tSQLt should not be present, e.g. a Build or Test stage. For this reason, we need to create a way to make sure this script is only run in specific environments.
In this tutorial, we will maximise the use of a Build stage by integrating these tests, allowing us to not only validate our migration scripts and undo scripts but also run tests against this temporary environment, to detect any issues that will prevent further testing or deployments, ideally saving time.
To do this we must create a config file for the migration script we just made by creating a conf file with the same name as the script that encompasses our tSQLt objects, "V99_tSQLt_Unit_Tests.sql.conf" which tells Flyway that this script should be ignored by all environments other than Build.

V999_tsqlt_redgate.sql.conf
shouldExecute=${environment}==buildThe next step is to create our Build stage in our CI/CD pipeline, making sure it Validates all of our migration scripts, runs our tSQLt Tests, and validates all our Undo Scripts.
This example uses Azure DevOps, and the code for the build stage is contained in its own 'Build.yml' file stored in the repository.
This file, can either be created and stored in a separate 'templates' repository or should be in its own 'templates' folder, e.g. 'templates/build.yml'.
build.yml
parameters:
- name: stage
default: Build
- name: displayName
default: Deploy Build
- name: executeBuild
default: true
- name: targetCredentials
default: ''
- name: pipelineParameters
default: ''
stages:
- ${{if eq(parameters.executeBuild, true)}}:
- stage: Build
pool: $(AGENT_POOL)
displayName: ${{parameters.displayName}}
jobs:
- job: Build
variables:
- group: ${{parameters.targetCredentials}}
- group: ${{parameters.pipelineParameters}}
- group: redgate_global_vars
steps:
- script: '$(FLYWAY) clean info -url="$(target_database_JDBC)"' # Cleans Build DB.
failOnStderr: true
displayName: 'Clean Build DB'
env:
FLYWAY_CLEAN_DISABLED: false
- task: PowerShell@2
inputs:
targetType: 'inline'
script: |
Invoke-Sqlcmd -ServerInstance "REDGATE-DEMO\SQLEXPRESS" -Database "Westwind_Build" -Query "ALTER DATABASE Westwind_Build SET TRUSTWORTHY ON" # SQL CMD to add priveleges for SQL tests.
- script: '$(FLYWAY) migrate info -url="$(target_database_JDBC)" -placeholders.environment=build' # IMPORTANT! This labels your database as a build, whithout your tSQLt Migration script will be ignored.
failOnStderr: true # Validates Migration scripts, including tSQLt script as this environment is placeholdered as a Build.
displayName: 'Validate Migrate Scripts'
- task: PowerShell@2
inputs:
targetType: 'inline' # Powershell script to run all tSQLt Tests inside DB, as well as creating XML file for outputting results.
script: |
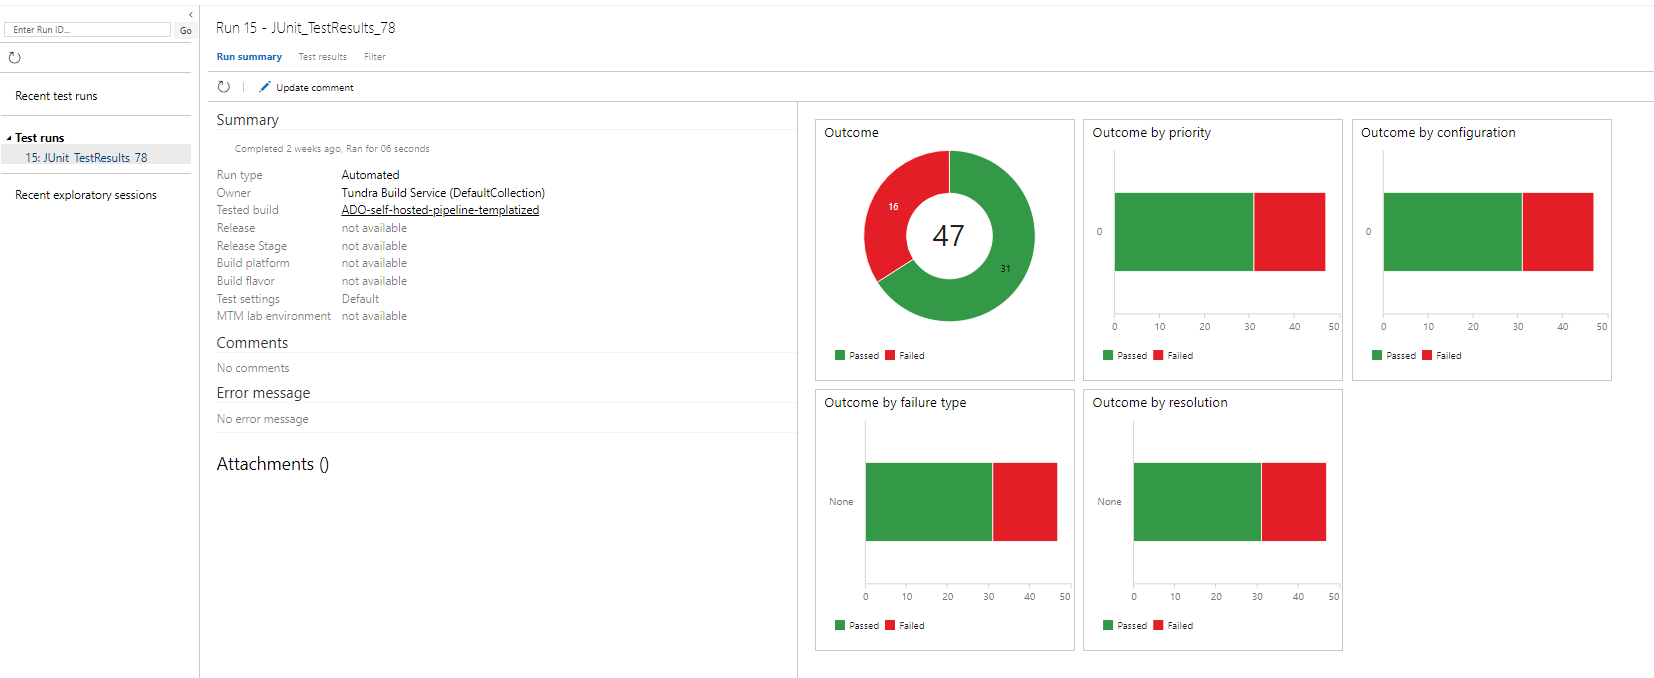
Invoke-Sqlcmd -ServerInstance "REDGATE-DEMO\SQLEXPRESS" -Database "Westwind_Build" -Query "BEGIN TRY EXEC tSQLt.RunAll END TRY BEGIN CATCH END CATCH; EXEC tSQLt.XmlResultFormatter" -MaxCharLength 1000000 | %{ $out = $out + $_[0]}; $out > "C:\agent\_work\5\s\TestResults\DatabaseTestResults.junit.xml"
#Invoke-Sqlcmd -ServerInstance "REDGATE-DEMO\SQLEXPRESS" -Database "Westwind_Test" -Query "BEGIN TRY EXEC tSQLt.RunAll END TRY BEGIN CATCH END CATCH; EXEC tSQLt.XmlResultFormatter" | Out-File -FilePath "C:\agent\_work\5\s\TestResults\DatabaseTestResults.junit.xml"
Write-Host "##vso[results.publish type=JUnit;resultFiles="C:\agent\_work\5\s\TestResults\DatabaseTestResults.junit.xml";]"
### End of Automatic Migration Script Creation ###
displayName: 'Run tSQLt Tests'
- script: '$(FLYWAY) undo info -url="$(target_database_JDBC)" -target="$(FIRST_UNDO_SCRIPT)"?'
continueOnError: true
displayName: 'Validate Undo Scripts' # Validate Undo Scripts
Alongside this file, we will also create a separate 'csv-vars.yml' to pass each template's needed variables. Create this file in the same location as the file above, using the following code, changes are not needed but can be customised:
csv-vars.yml
variables:
  # This is the relative path to the migrations folder in your project, such as:
  # $(System.DefaultWorkingDirectory)\project
  # The default is to have the migrations folder in the same directory as the yml file
  WORKING_DIRECTORY: $(System.DefaultWorkingDirectory)

  FLYWAY: 'flyway -baselineOnMigrate=true -errorOverrides=S0001:0:I- -baselineVersion=$(BASELINE_VERSION) -licenseKey=$(FLYWAY_LICENSE_KEY) -configFiles="$(WORKING_DIRECTORY)\flyway.conf" -locations="filesystem:$(WORKING_DIRECTORY)\migrations"'
  BUILD_NAME: 'Repository-Snapshot'
  RELEASE_PREVIEW: 'Release-Preview.sql'
  DRIFT_AND_CHANGE_REPORT: 'Drift-And-Change-Report.html'
  DRIFT_AND_CHANGE_REPORT_DISPLAY_NAME: 'Drift And Change Report'
It is important to note that while this code can be copied directly into the new "Build.yml" file, a variable group as seen below will need to be created so it has access to the needed variable.
Option 1 - Add Build Stage to existing ADO Pipeline:
If we want to add the Build stage, with the unit tests, to a pre-existing CI/CD pipeline then the following YAML should be added to the Pipelines YAML:
Reference the 'templates' repository if the script is stored in a separate repository:
Where is Build.yml
resources:
  repositories:
    - repository: templates
      type: git
      name: templates
Reference the new 'csv-vars.yml' inside of your pipeline's yml file. This needs to be above your 'stages' section, inside a 'variables' section if not already declared as seen below.
csv-vars.yml
variables:	# only needed if you have not declared a variables section.
- template: csv-vars.yml@template                       # templates/vars.yml if kept in same repository
Add the code to reference the 'build.yml' file and add the build stage to the pipeline, add this to the pipelines yml file, inside the stages section:
Adding the Build stage
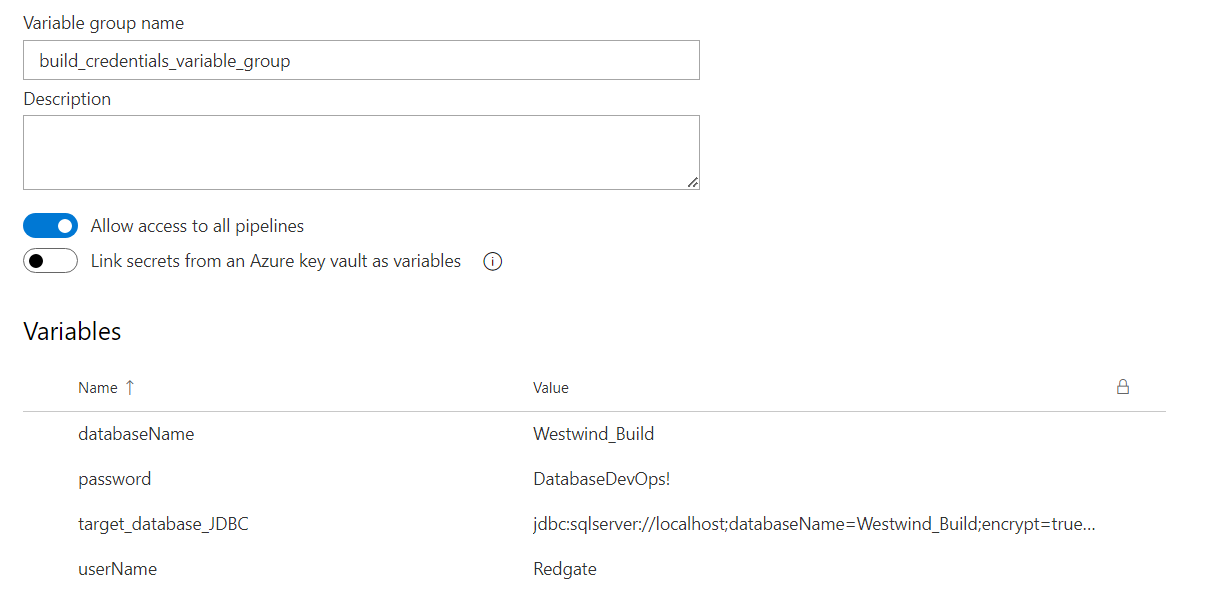
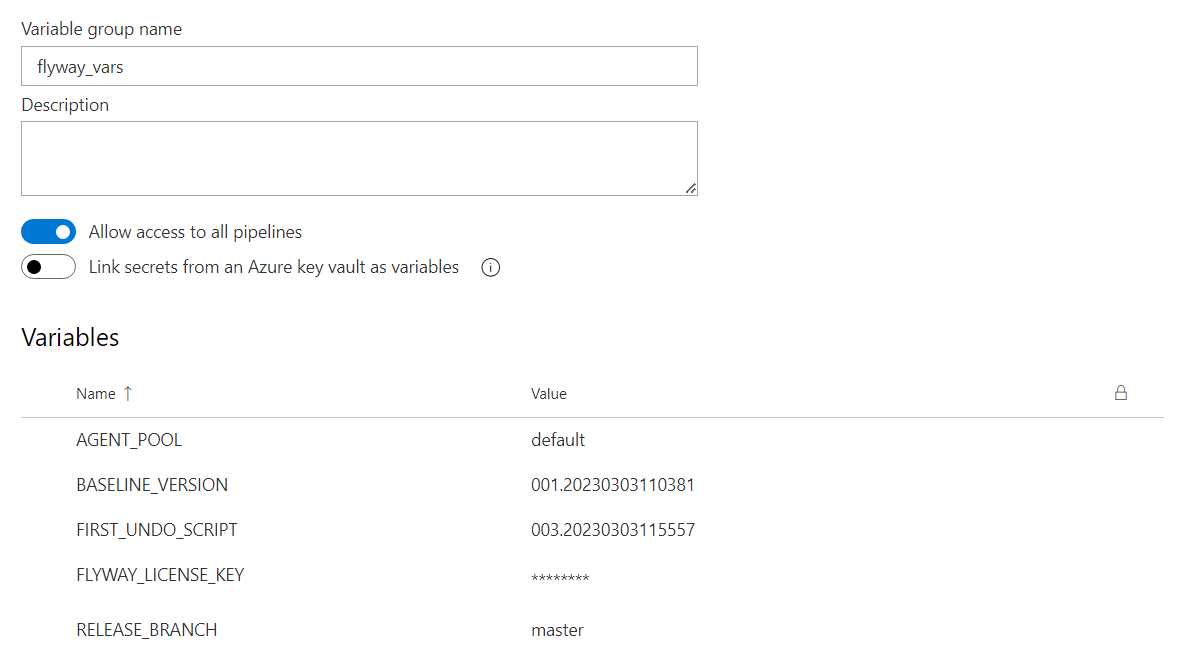
stages: # Do not include this line if you already have a 'stages:' section declared.

- template: build.yml@template                     # templates/build.yml if kept in same repository
  parameters:
    stage: Build
    displayName: Deploy Build
    executeBuild: true
    targetCredentials: build_credentials_variable_group
    pipelineParameters: flyway_vars
It is very important that the location inside '-template' is correct otherwise it will have no code to reference.
Option 2 - Add Build Stage to new ADO Pipeline:
These are the following steps to creating a new Build Pipeline in Azure DevOps:
- Create a new Azure DevOps pipeline, this should be located in the main projects Azure Repos Git, and chose to create a new YAML file.
Add the following YAML to create the file:
Pipeline YAML
name: ADO-self-hosted-pipeline-templatized

# trigger: none
trigger: none

# Move the templates to their own repository for greater control and lack of repitition across projects (DRY)
# They can be included in the same repository if preferred: templates/vars.yml would work for the file below
resources:
  repositories:
    - repository: templates
      type: git
      name: templates

variables:
- template: csv-vars.yml@template                       # templates/vars.yml if kept in same repository stages:

- template: build.yml@template                     # templates/build.yml if kept in same repository
  parameters:
    stage: Build
    displayName: Deploy Build
    executeBuild: true
    targetCredentials: build_credentials_variable_group
    pipelineParameters: flyway_vars
It is very important that the location inside '-template' is correct otherwise it will have no code to reference.
This should now add a Build stage to an Azure DevOps Pipeline. As seen below: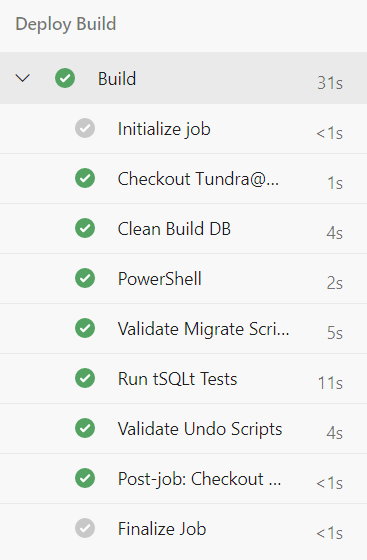
Running tSQLt as part of a continuous integration process
- In CI, migrate the main database project and then migrate the tSQLt project
- When migrating the tSQLt project, the flyway command used may need to include additional parameters to avoid issues. See below for an example:
- flyway -user="MyUsername" -password="MyPassword" -ignoreMigrationPatterns="*:*" -locations="filesystem:$(System.DefaultWorkingDirectory)\MyProjectName_tSQLt\migrations" migrate info -url="$(target_database_JDBC)
- By adding in this additional parameter, the migrate command will ignore any missing versioned scripts from the initial project.
- flyway -user="MyUsername" -password="MyPassword" -ignoreMigrationPatterns="*:*" -locations="filesystem:$(System.DefaultWorkingDirectory)\MyProjectName_tSQLt\migrations" migrate info -url="$(target_database_JDBC)
- When migrating the tSQLt project, the flyway command used may need to include additional parameters to avoid issues. See below for an example:
- Add an afterMigrate__tSQLtRunAll.sql file in your project folder that calls the tsqlt runAll command to run all your tests. Learn more about callbacks
- Example Callback scripts (Ensure these are placed into the migrations folder of the Unit Test project, created in step 1b)
afterMigrate (This example will check to see if the tSQLt schema exists, before running the tSQLt run all command)
If EXISTS (SELECT * FROM sys.schemas WHERE name = 'tSQLt')
BEGIN
EXEC tSQLt.RunAll
END
Make sure the beforeClean callback is setup as described above.
- Example Callback scripts (Ensure these are placed into the migrations folder of the Unit Test project, created in step 1b)
Running tSQLt tests in your pipeline
One way to do this is by adding a PowerShell step after your database build to execute the tests.
This example uses integrated security and a PowerShell step in Azure DevOps (work in progress).
$SQLServer = "<SERVER_NAME>"
$Database = "<DATABASE_NAME>"

Invoke-Sqlcmd -ServerInstance "$SQLServer" -Database "$Database" -Query "BEGIN TRY EXEC tSQLt.RunAll END TRY BEGIN CATCH END CATCH; EXEC tSQLt.XmlResultFormatter" | Out-File -FilePath "$(System.DefaultWorkingDirectory)\TestResults\DatabaseTestResults.xml"
Learn more:
- Learn more about Redgate SQL Test for writing tSQLt tests in SSMS
- PowerShell Invoke-Sqlcmd
- tSQLt runAll or run specific tests
This documentation contains proprietary information and is protected by copyright law.
Copyright © 2026 Red Gate Software Limited. All rights reserved


