Getting a new team member setup
Published 01 July 2022
New team members can watch training videos about Flyway on Redgate University to help them get started. There is a 3.5 minute video showing how to get another developer setup.
Prerequisites: Your new team member will need the right access setup for the Git repositories and the databases. They should also have Flyway Desktop and Git installed on their machine.
Opening a Flyway Project from a Git repository
- Launch Flyway Desktop and sign in with their Redgate ID.
- A license will need to be assigned to their Redgate ID or they can start a free trial.
- A license will need to be assigned to their Redgate ID or they can start a free trial.
- In Flyway Desktop, select the drop down to open a project from version control.
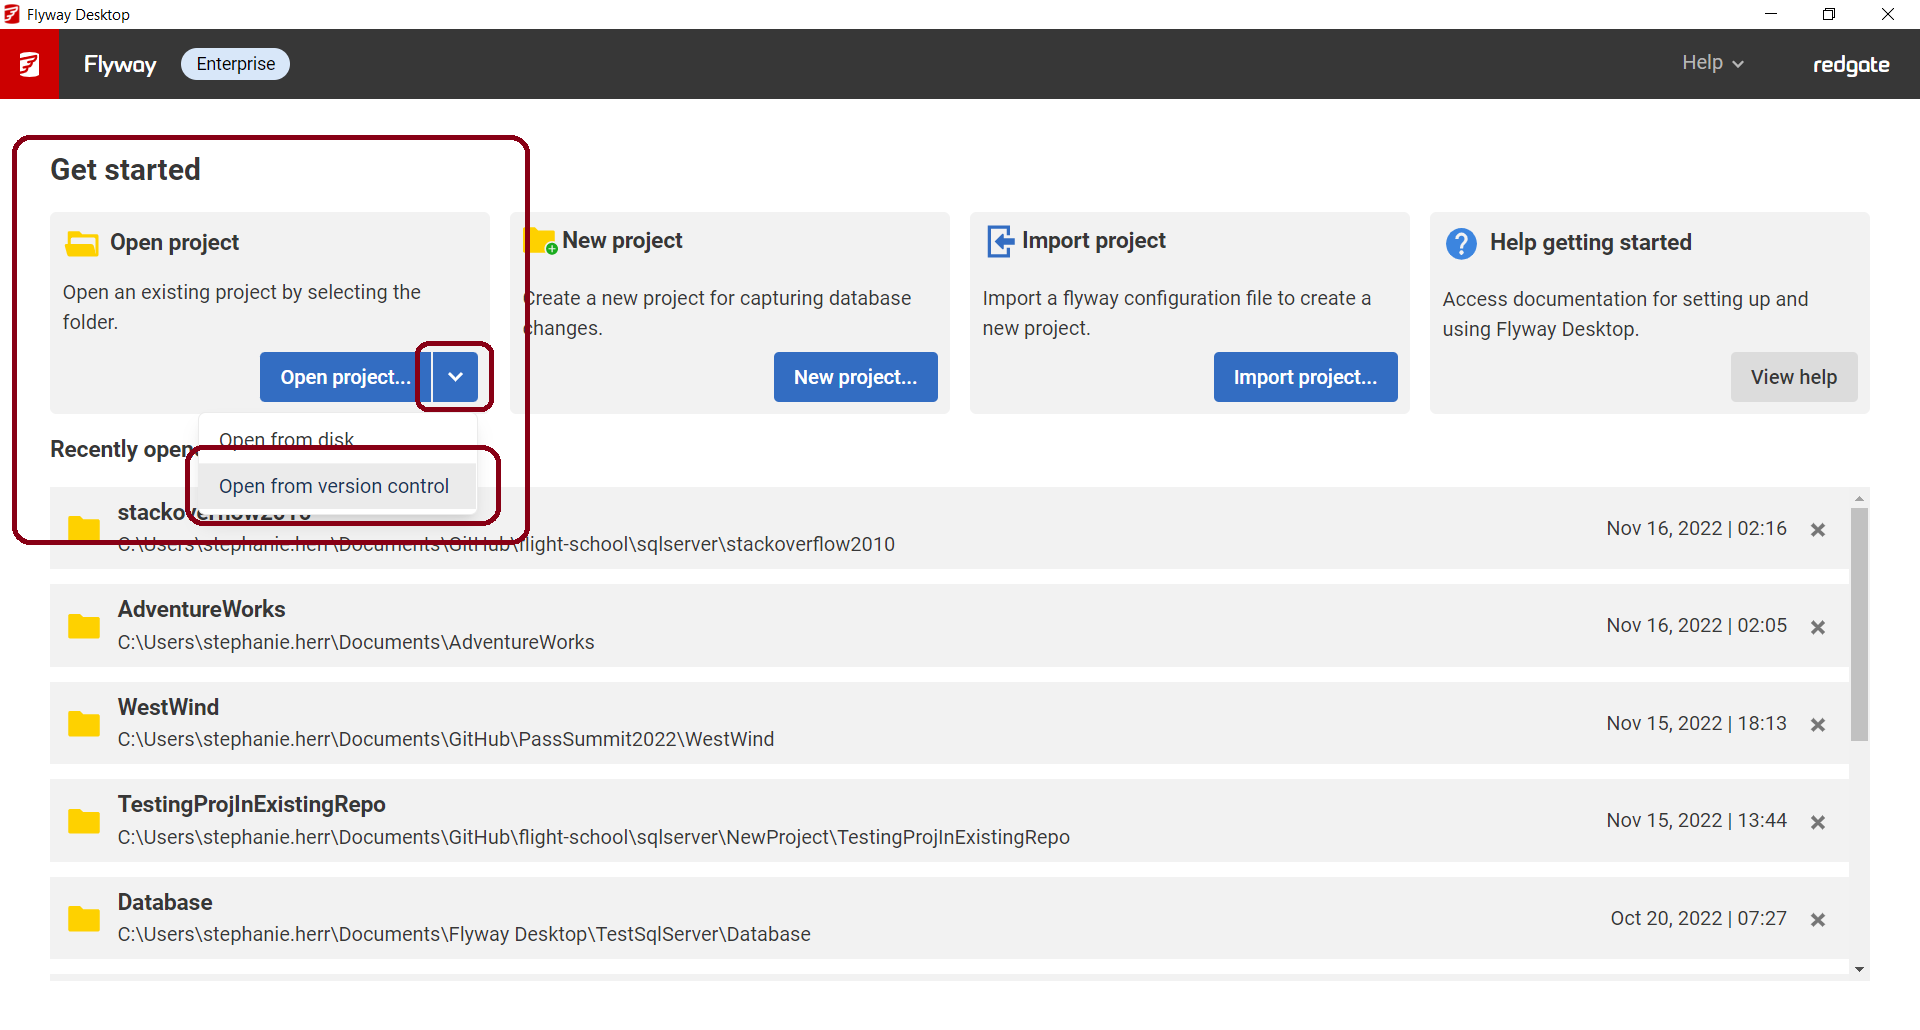
- Enter the URL for your Git repository and browse to a local directory for where the remote repository will be cloned to. This folder will be your local Git repo. See below for examples on how to find your Git repo.

- Next, they may be prompted to setup their development database (unless the project has been created for shared setup).
- If they are using their own dedicated development database, have them go to the the Schema model tab, toggle to Apply to database, and click the Apply to database button. This is very important to make sure their dedicated development database is up to date with all the changes from their team in the repository. (For future development, go to the Version control tab to pull the latest changes and apply them to stay up to date.)
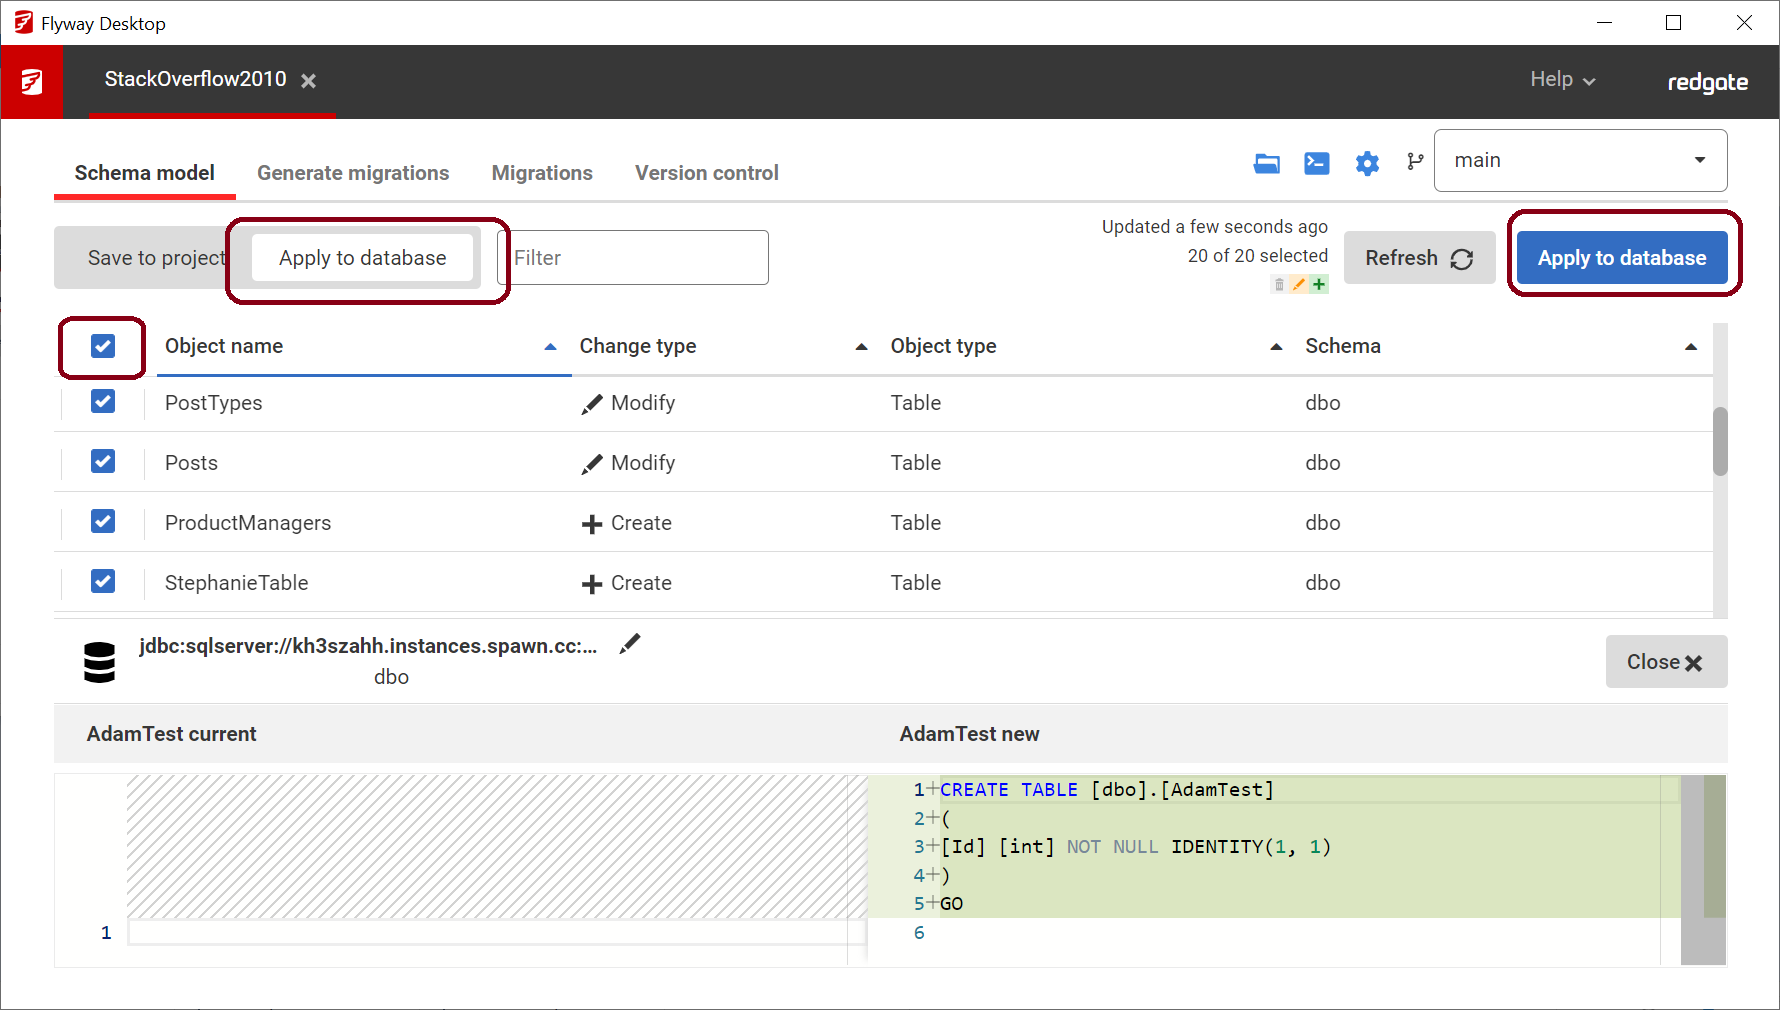
- Click the Continue confirmation button if they are happy to make apply these changes to their development database.
- If they are using their own dedicated development database, have them go to the the Schema model tab, toggle to Apply to database, and click the Apply to database button. This is very important to make sure their dedicated development database is up to date with all the changes from their team in the repository. (For future development, go to the Version control tab to pull the latest changes and apply them to stay up to date.)
- Optionally, if they will be generating migration scripts, then they should visit the Generate migrations tab to setup their shadow database.
Now, your new team member can start making changes to their development database. Once they are happy with their changes, they should go to Flyway Desktop's Schema model tab to save the changes to disk. From there, they can commit their changes or generate migrations for deployment.
Opening a project if you already have the repository cloned locally
- Launch Flyway Desktop and sign in with their Redgate ID.
- A license will need to be assigned to their Redgate ID or they can start a free trial.
- A license will need to be assigned to their Redgate ID or they can start a free trial.
- In Flyway Desktop, select "Open project..."
- Navigate to your local repository on disk and choose the root database folder that contains the migrations and schema model folders.
- Next, they may be prompted to setup their development database (unless the project has been created for shared setup).
- If they are using their own dedicated development database, have them go to the the Schema model tab, toggle to Apply to database, and click the Apply to database button. This is very important to make sure their dedicated development database is up to date with all the changes from their team in the repository. (For future development, go to the Version control tab to Pull the latest changes and apply them to stay up to date.)
- Click the Continue confirmation button if they are happy to make apply these changes to their development database.
- If they are using their own dedicated development database, have them go to the the Schema model tab, toggle to Apply to database, and click the Apply to database button. This is very important to make sure their dedicated development database is up to date with all the changes from their team in the repository. (For future development, go to the Version control tab to Pull the latest changes and apply them to stay up to date.)
- Optionally, if they will be generating migration scripts, then they should visit the Generate migrations tab to setup their shadow database.
Now, your new team member can start making changes to their development database. Once they are happy with their changes, they should go to Flyway Desktop's Schema model tab to save the changes to disk. From there, they can commit their changes or generate migrations for deployment.
Examples for how to find the URL for your remote Git repositories
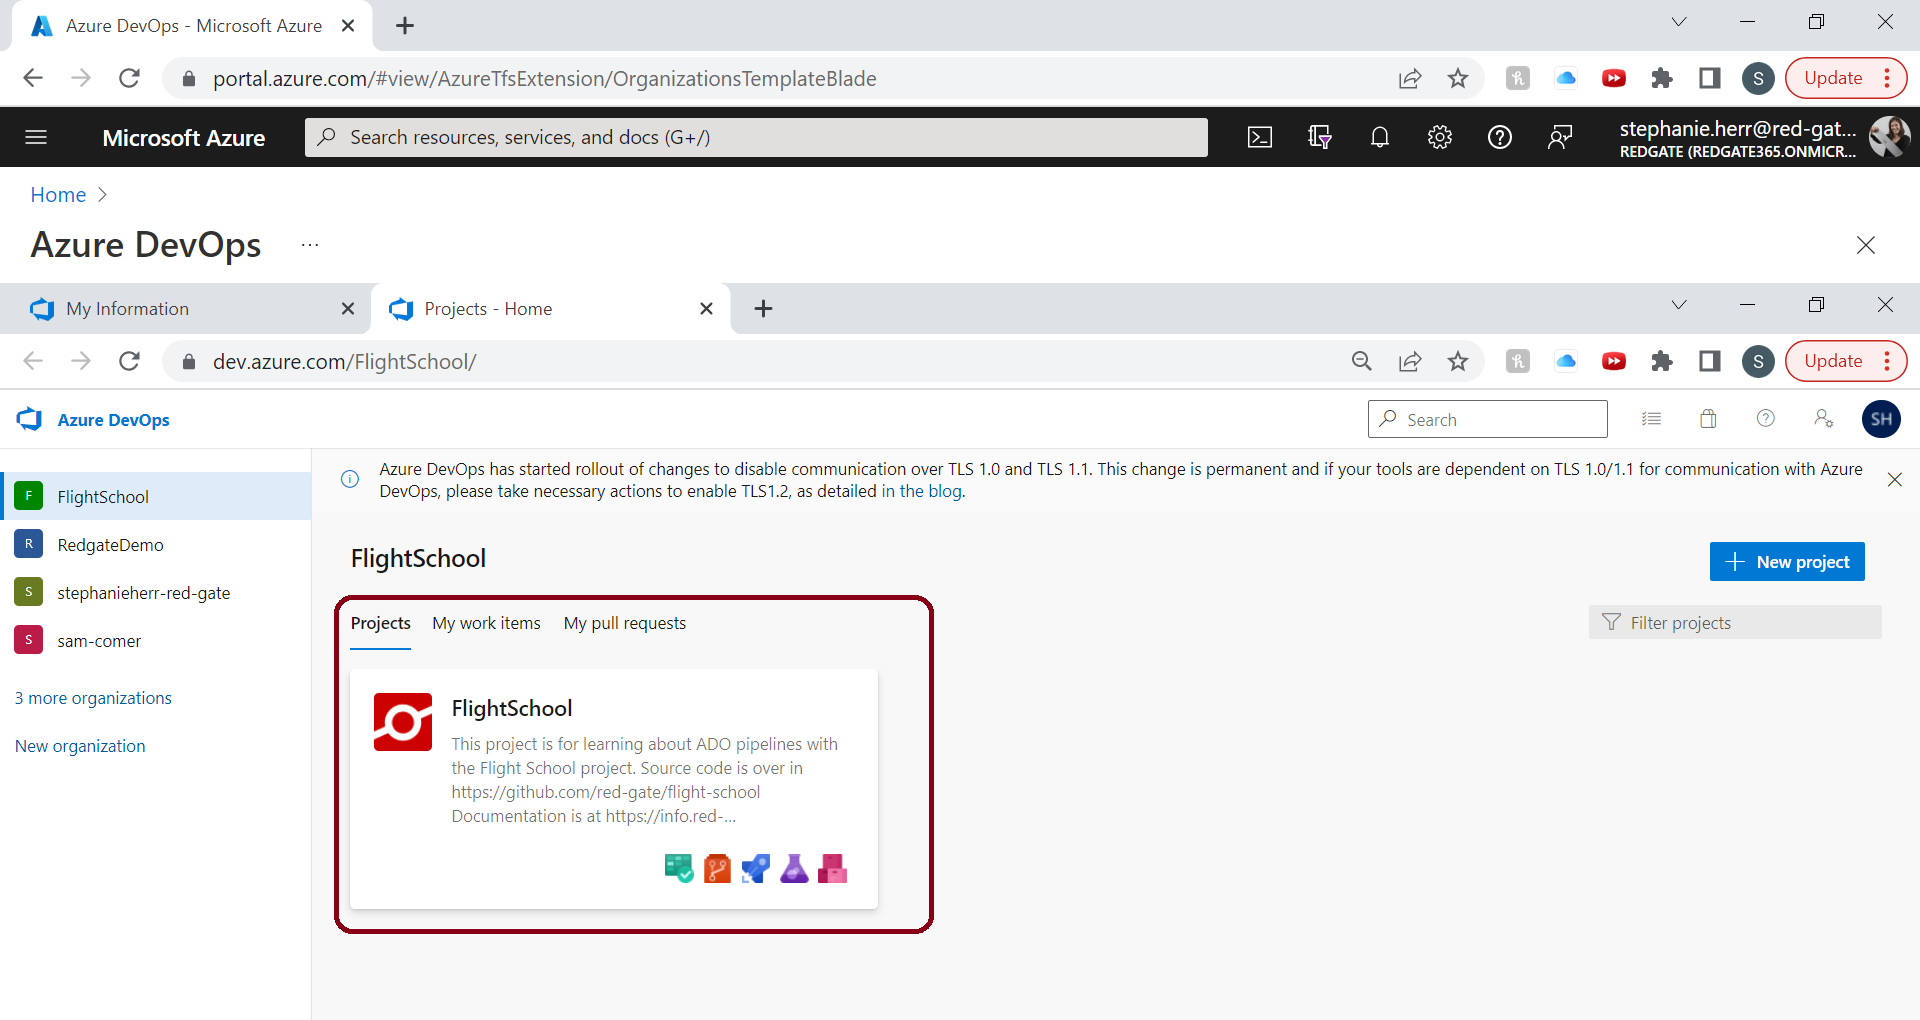
- If you are using Azure DevOps (hosted):
- Access your Azure DevOps organizations through the My Azure DevOps Organizations link on the Azure Portal.

- Select the Organization that your team member created the project in by clicking on it.
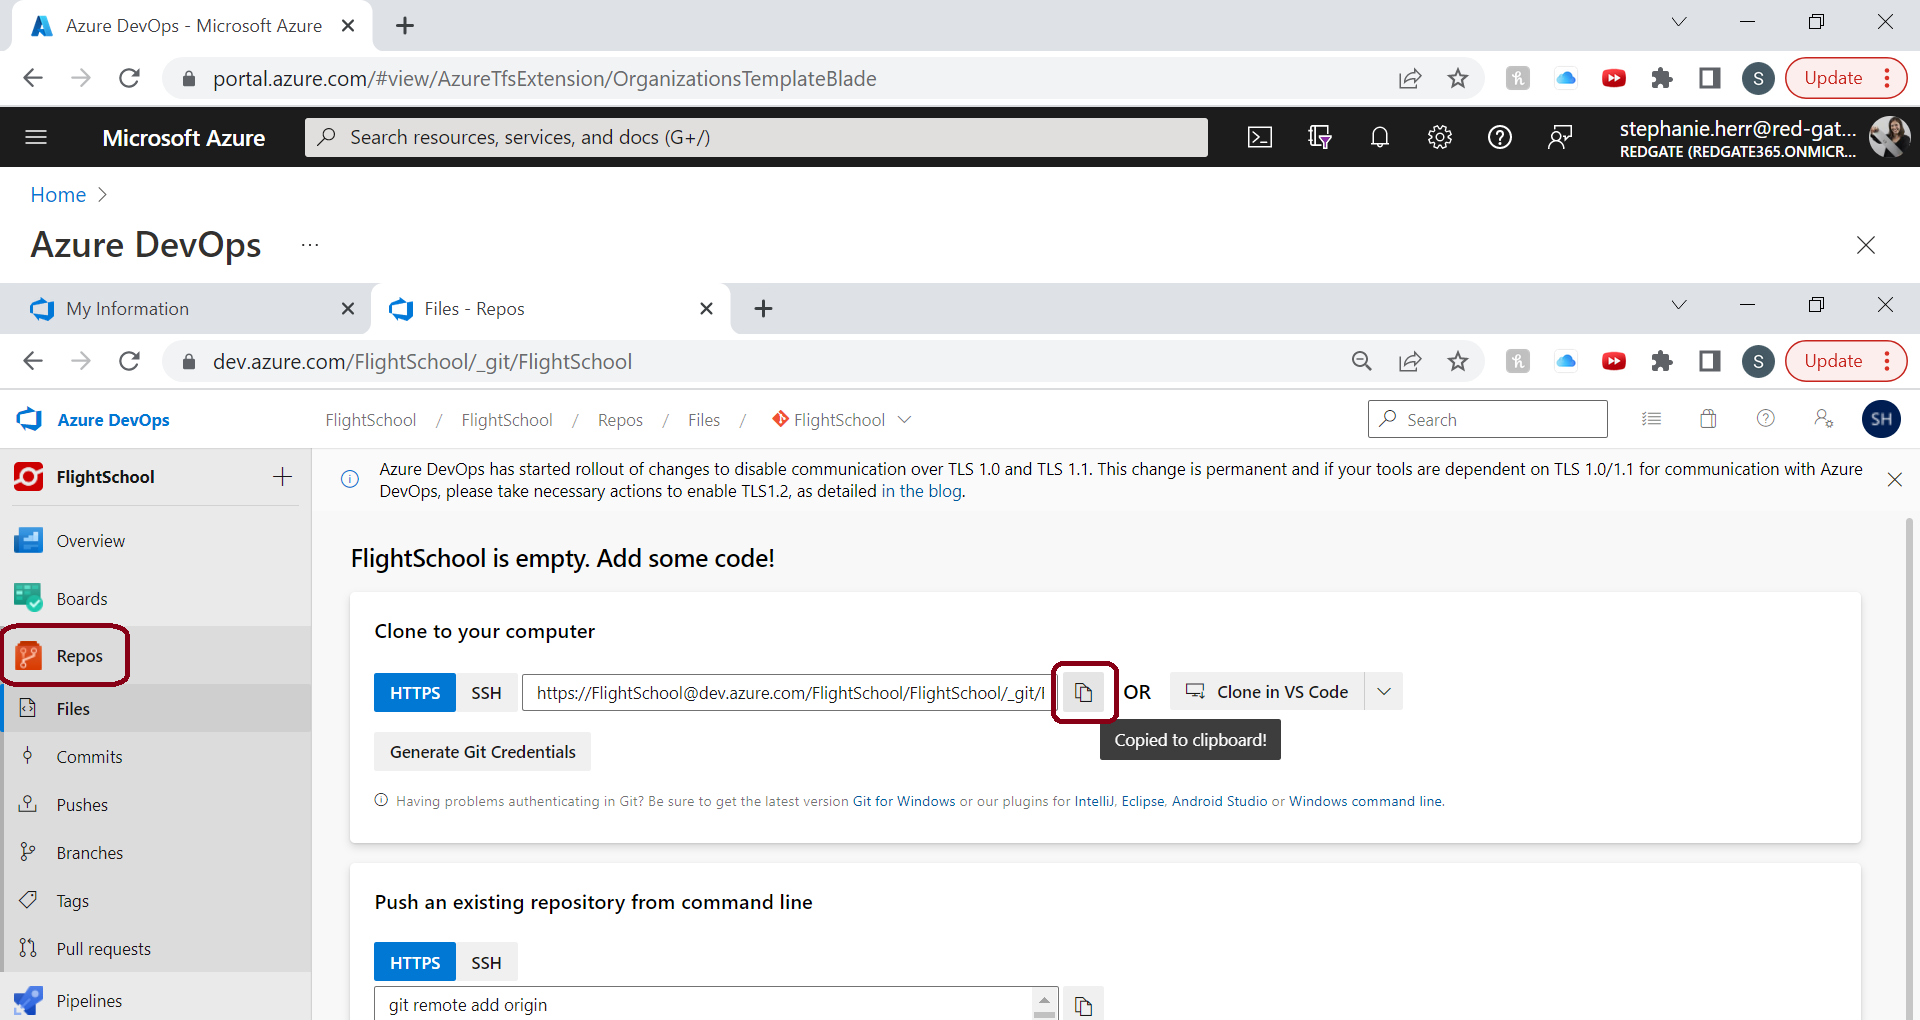
- Click Repos on the left and then copy the repositories URL. (There are many other ways to clone a repo using other VCS clients or the Clone in VS Code button if you have that installed.)
- Access your Azure DevOps organizations through the My Azure DevOps Organizations link on the Azure Portal.
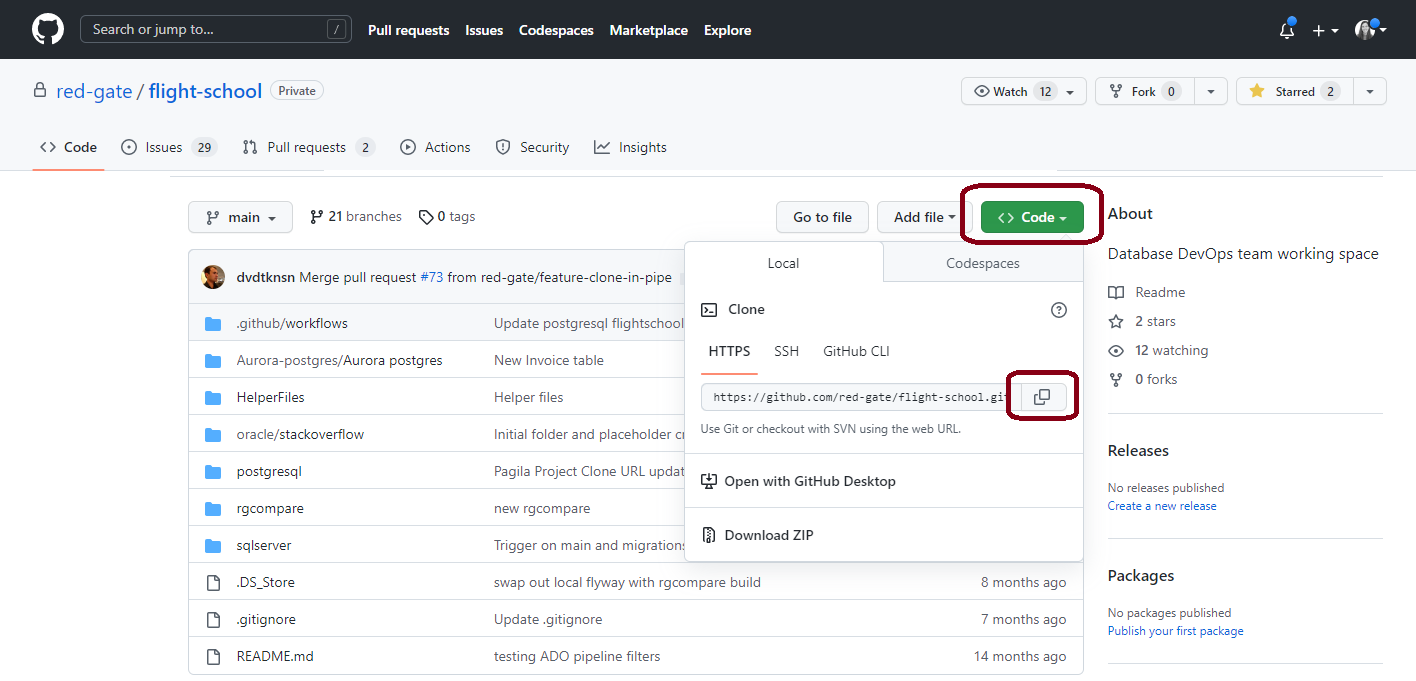
- If you are using GitHub:
- Navigate to your GitHub repository and click the green Code button to copy the repository URL.
- Navigate to your GitHub repository and click the green Code button to copy the repository URL.


