Using Azure Interactive Authentication
Published 29 July 2021
In v5, Redgate Change Control has been renamed to Flyway Desktop. Check out the latest documentation at https://documentation.red-gate.com/fd
Requirements
- To use Azure Active Directory with an Azure SQL Database server, the server needs to be assigned to an Azure Active Directory admin.
- To register an app with Azure Active Directory, you need to be either an Azure AD admin or a user assigned the Azure AD Application Developer role.
Registering Redgate Change Control and setting permissions
To use interactive authentication to connect to Azure, Redgate Change Control needs to register as an Azure Active Directory app. Registering Redgate Change Control will generate an application (client) ID that Redgate Change Control will need to know to connect.
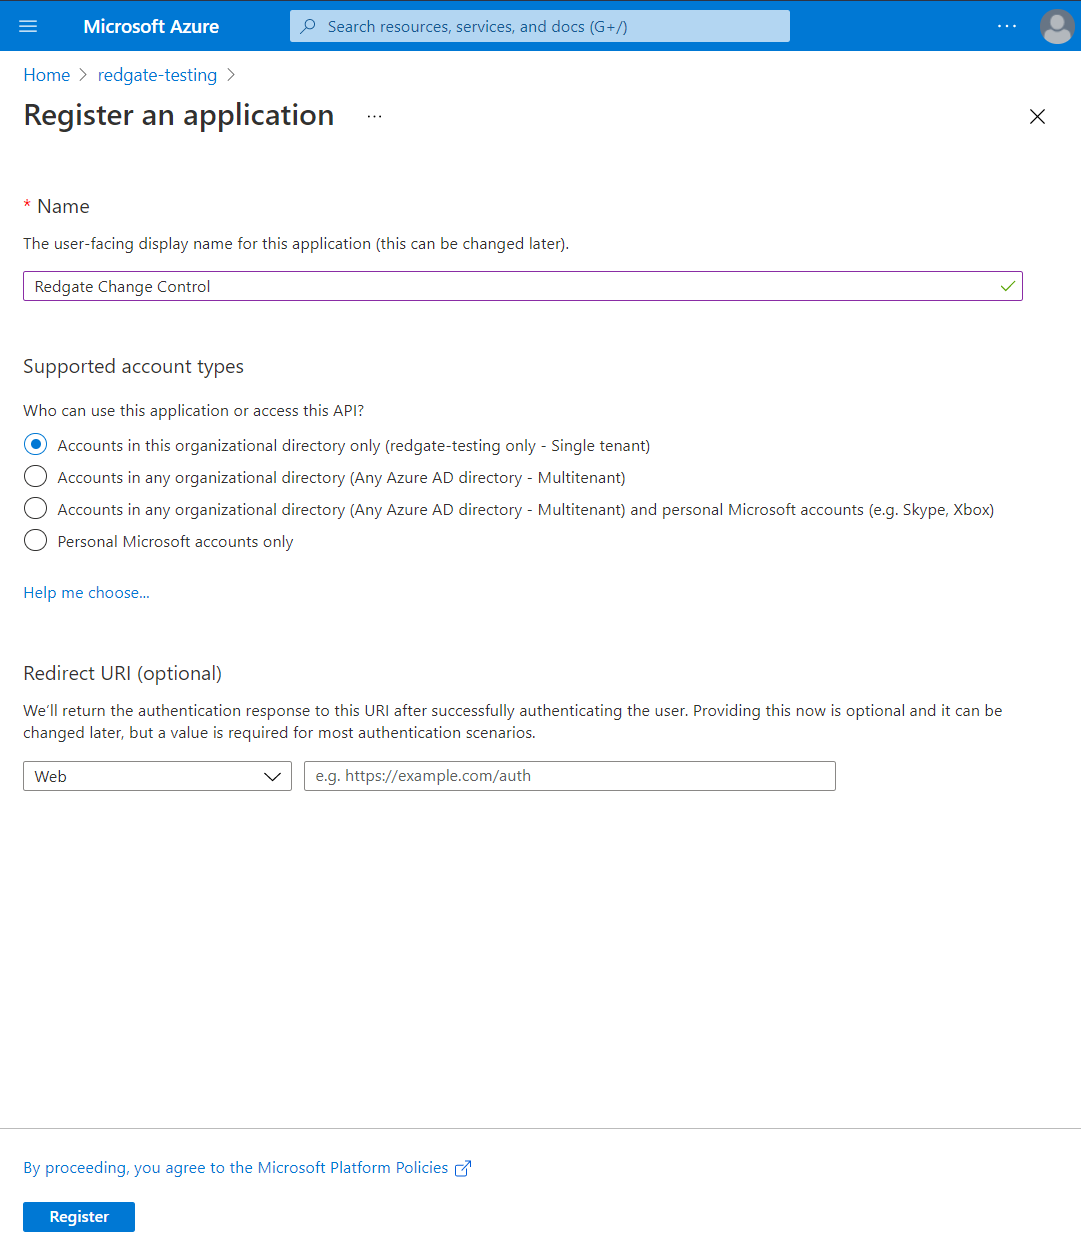
In the Azure portal, select Azure Active Directory > App registrations > New registration. Enter Redgate Change Control (or some other recognizable name) for the application name and then click on the Register button.
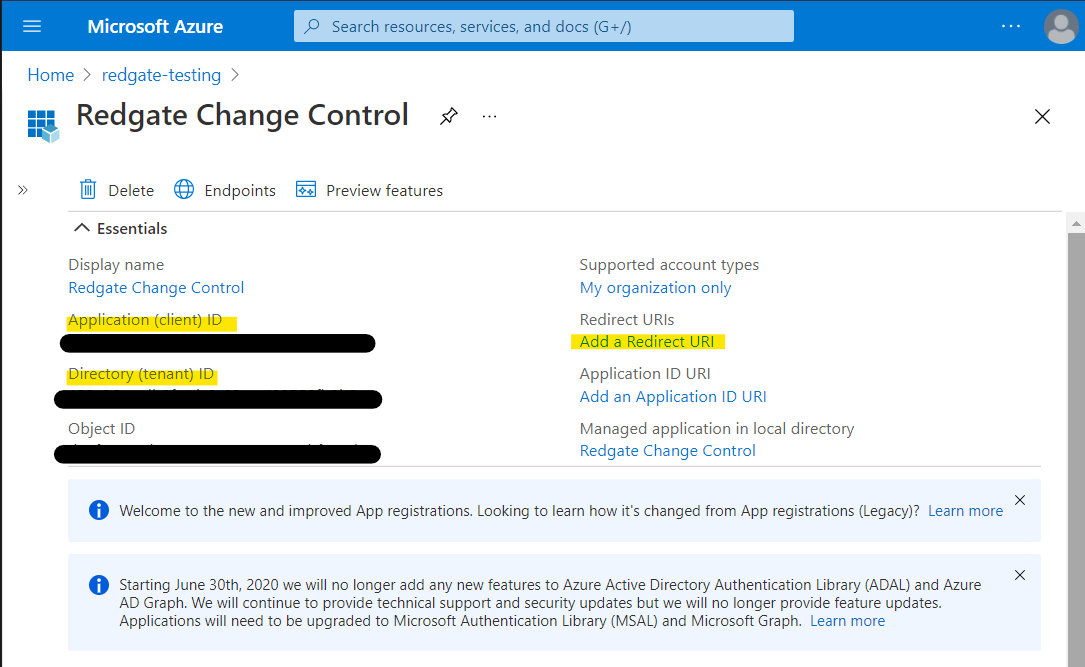
Make a note of the Application (client) ID, and the Directory (tenant) ID as these will be required later. Then click on Add a Redirect URI.
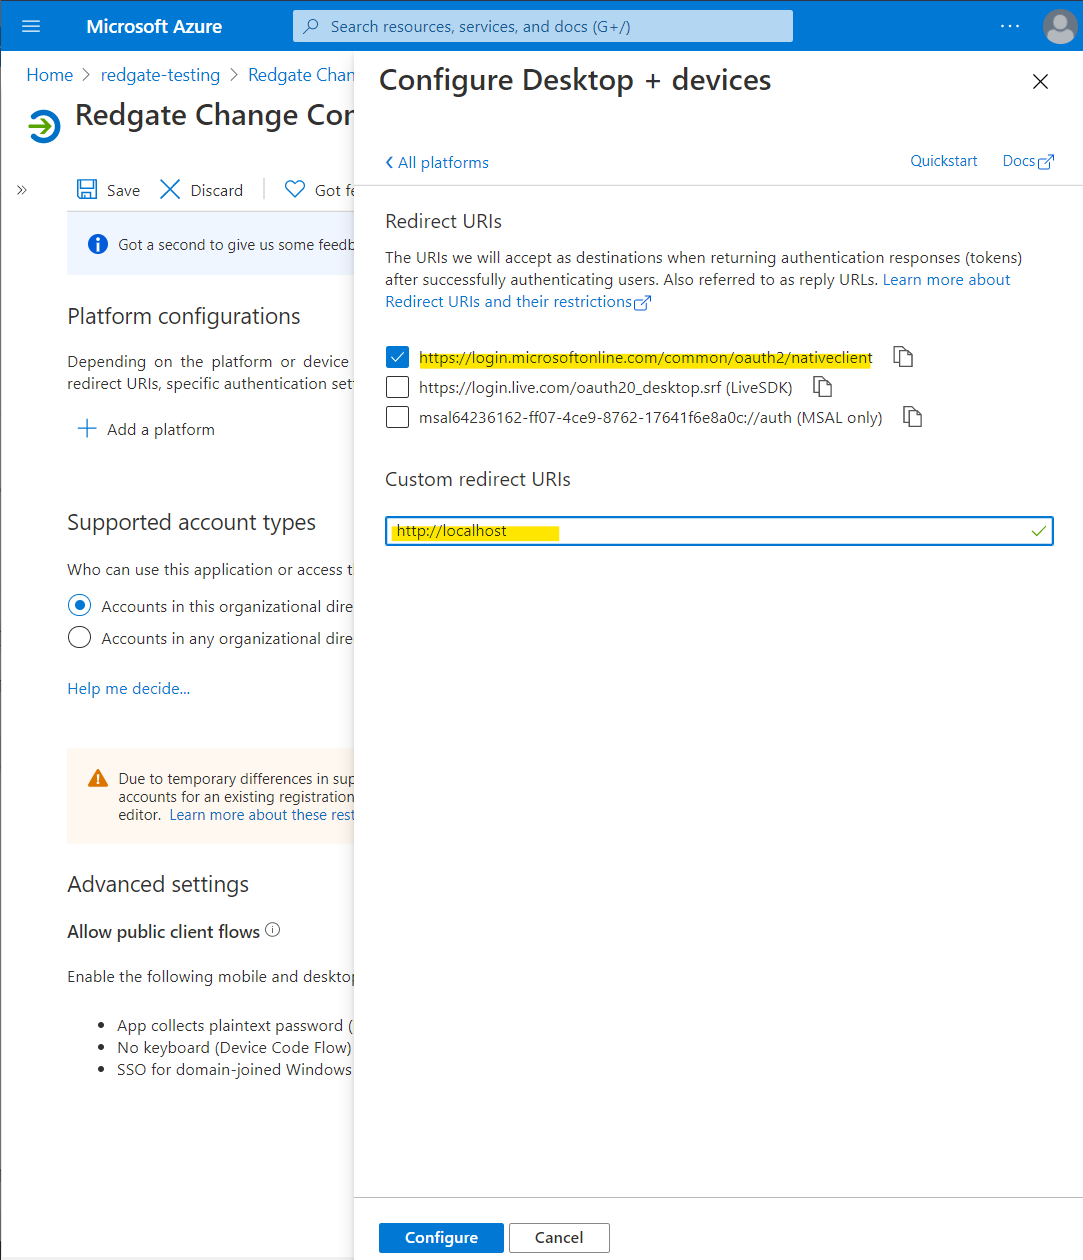
Go to Add a platform > Mobile and desktop applications and then ensure https://login.microsoftonline.com/common/oauth2/nativeclient is selected.
In addition, add a Custom redirect URIs of http://localhost. See here for information about redirect URI and why it is safe to use the http scheme for localhost.
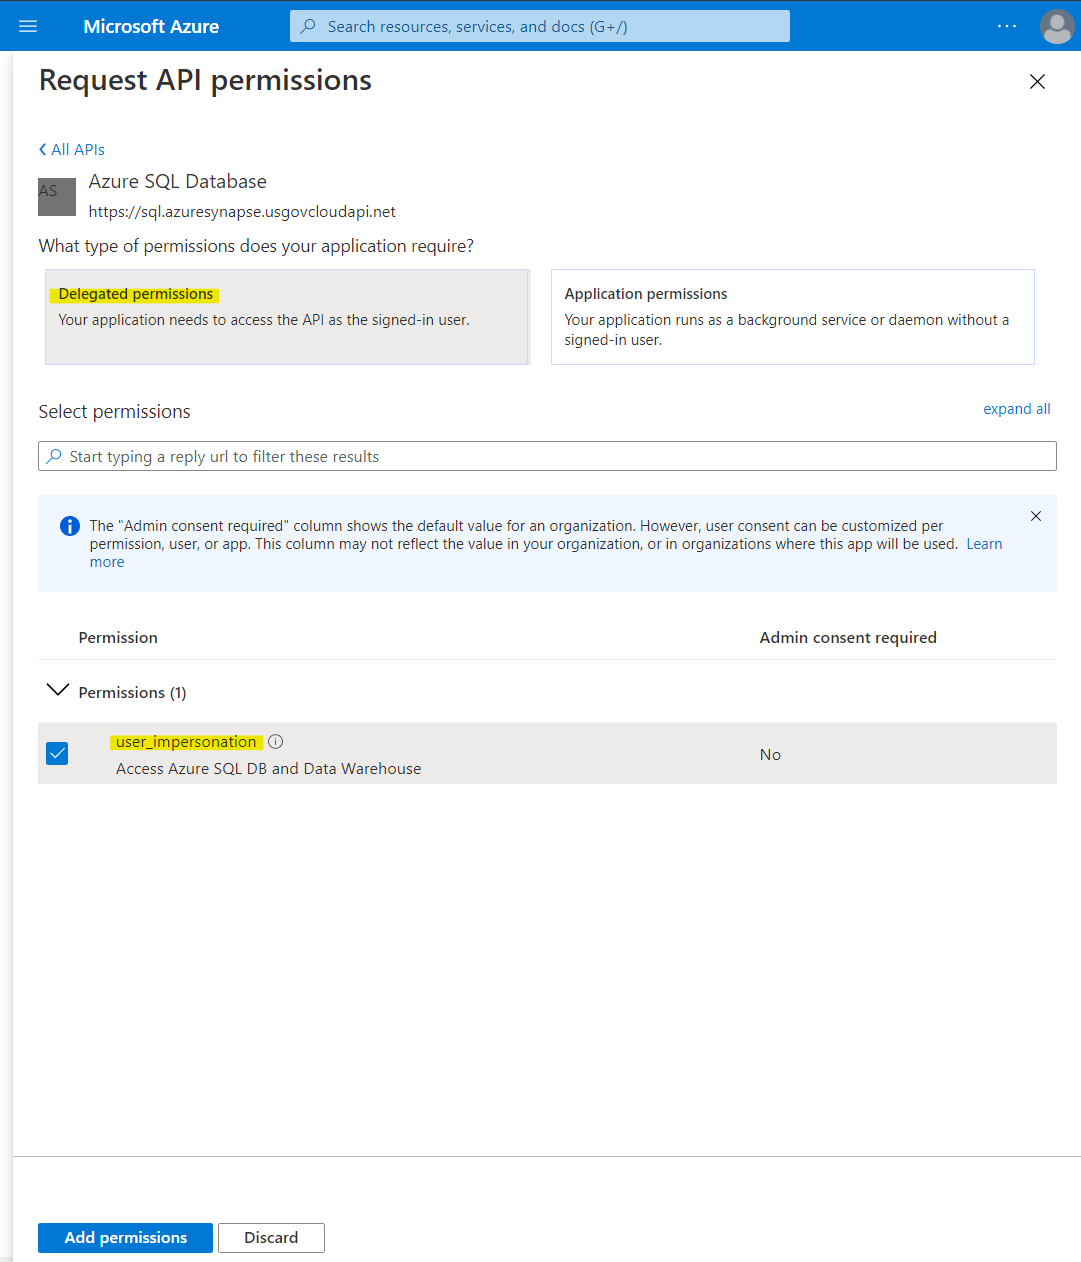
Select API permissions > Add a permission.
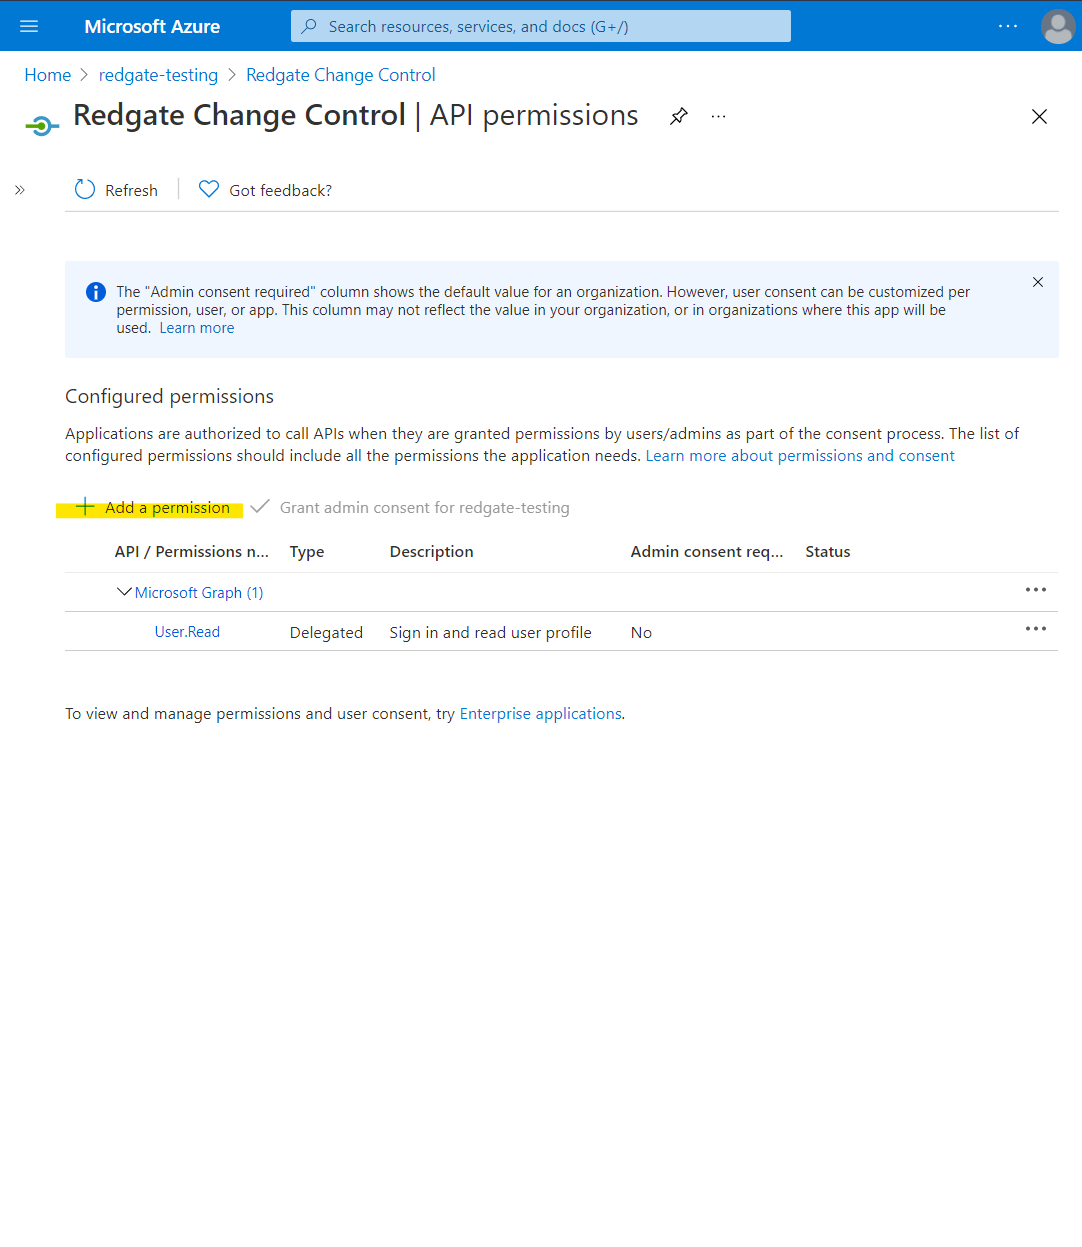
Select APIs my organization uses > type Azure SQL Database into the search and select Azure SQL Database.

Select Delegated permissions. Ensure Permissions > user_impersonation is selected, and then click Add permissions.
Using your app registration with Redgate Change Control
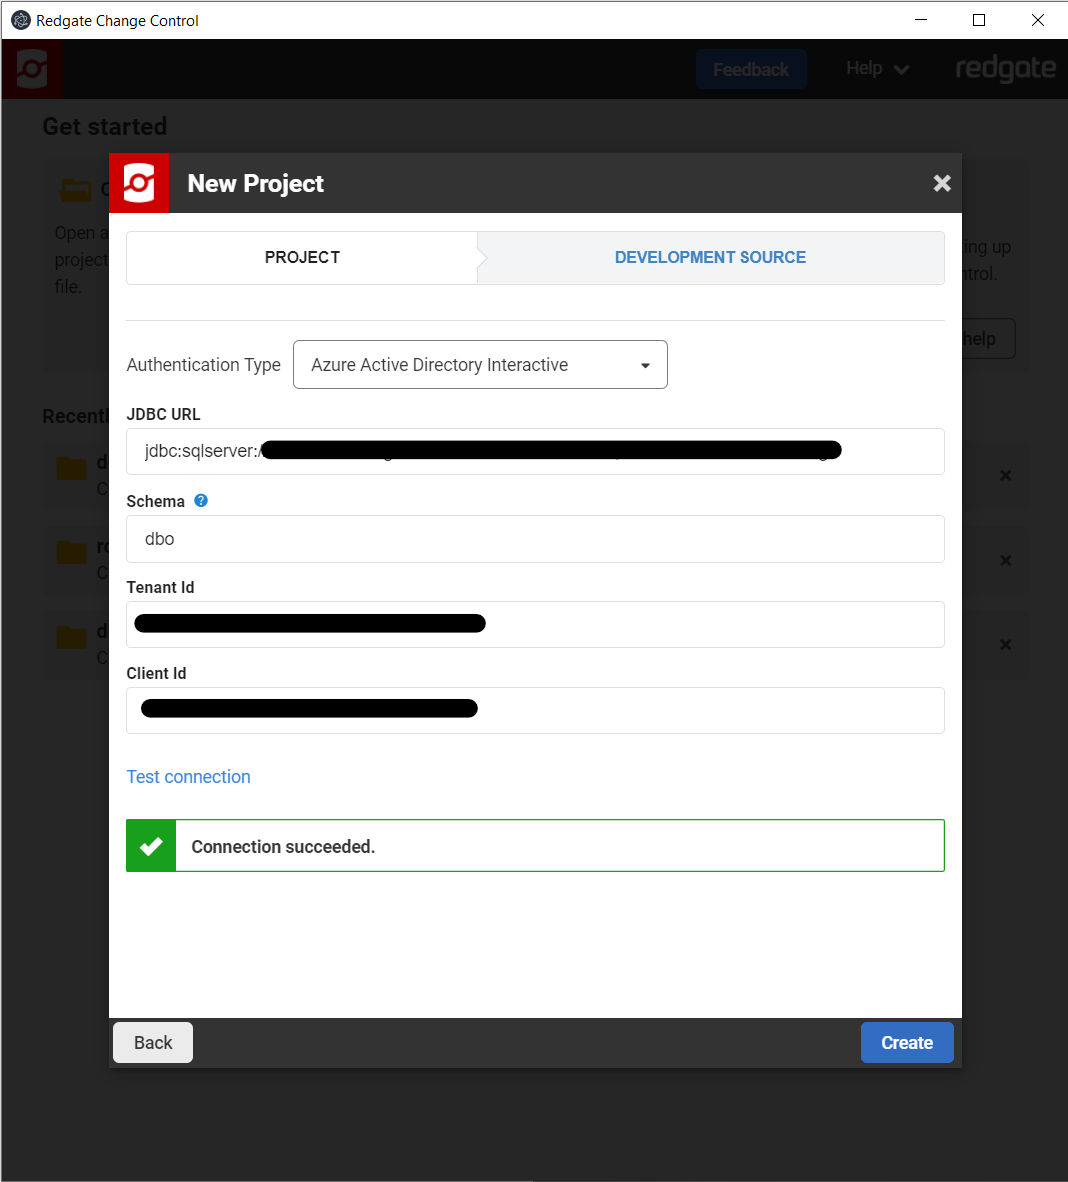
New project wizard
If creating a new project, select Azure Active Directory Interactive from the Authentication Type drop down. This only applies to new projects for SQL server databases.

Enter the JDBC URL for your SQL server database, the schemas you wish to target. Input the Tenant ID and Client ID that you recorded earlier.
Click Test connection. This will open a web page in your default browser in order for you to log onto your Azure AD account.
Proceed through the authentication flow to ensure the details you provided are correct and that the app is configured correctly.
Requirements
- To use Azure Active Directory with an Azure SQL Database server, the server needs to be assigned to an Azure Active Directory admin.
- To register an app with Azure Active Directory, you need to be either an Azure AD admin or a user assigned the Azure AD Application Developer role.
Registering Redgate Change Control and setting permissions
To use interactive authentication to connect to Azure, Redgate Change Control needs to register as an Azure Active Directory app. Registering Redgate Change Control will generate an application (client) ID that Redgate Change Control will need to know to connect.
In the Azure portal, select Azure Active Directory > App registrations > New registration. Enter Redgate Change Control (or some other recognizable name) for the application name and then click on the Register button.
Make a note of the Application (client) ID, and the Directory (tenant) ID as these will be required later. Then click on Add a Redirect URI.
Go to Add a platform > Mobile and desktop applications and then ensure https://login.microsoftonline.com/common/oauth2/nativeclient is selected.
In addition, add a Custom redirect URIs of http://localhost. See here for information about redirect URI and why it is safe to use the http scheme for localhost.
Select API permissions > Add a permission.
Select APIs my organization uses > type Azure SQL Database into the search and select Azure SQL Database.
Select Delegated permissions. Ensure Permissions > user_impersonation is selected, and then click Add permissions.
Using your app registration with Redgate Change Control
New project wizard
If creating a new project, select Azure Active Directory Interactive from the Authentication Type drop down. This only applies to new projects for SQL server databases.
Enter the JDBC URL for your SQL server database, the schemas you wish to target. Input the Tenant ID and Client ID that you recorded earlier.
Click Test connection. This will open a web page in your default browser in order for you to log onto your Azure AD account.
Proceed through the authentication flow to ensure the details you provided are correct and that the app is configured correctly.
This documentation contains proprietary information and is protected by copyright law.
Copyright © 2026 Red Gate Software Limited. All rights reserved


