Installing SQL Monitor on IIS
Published 21 October 2021
Prerequisites for systems without IIS
Install IIS on Windows Server
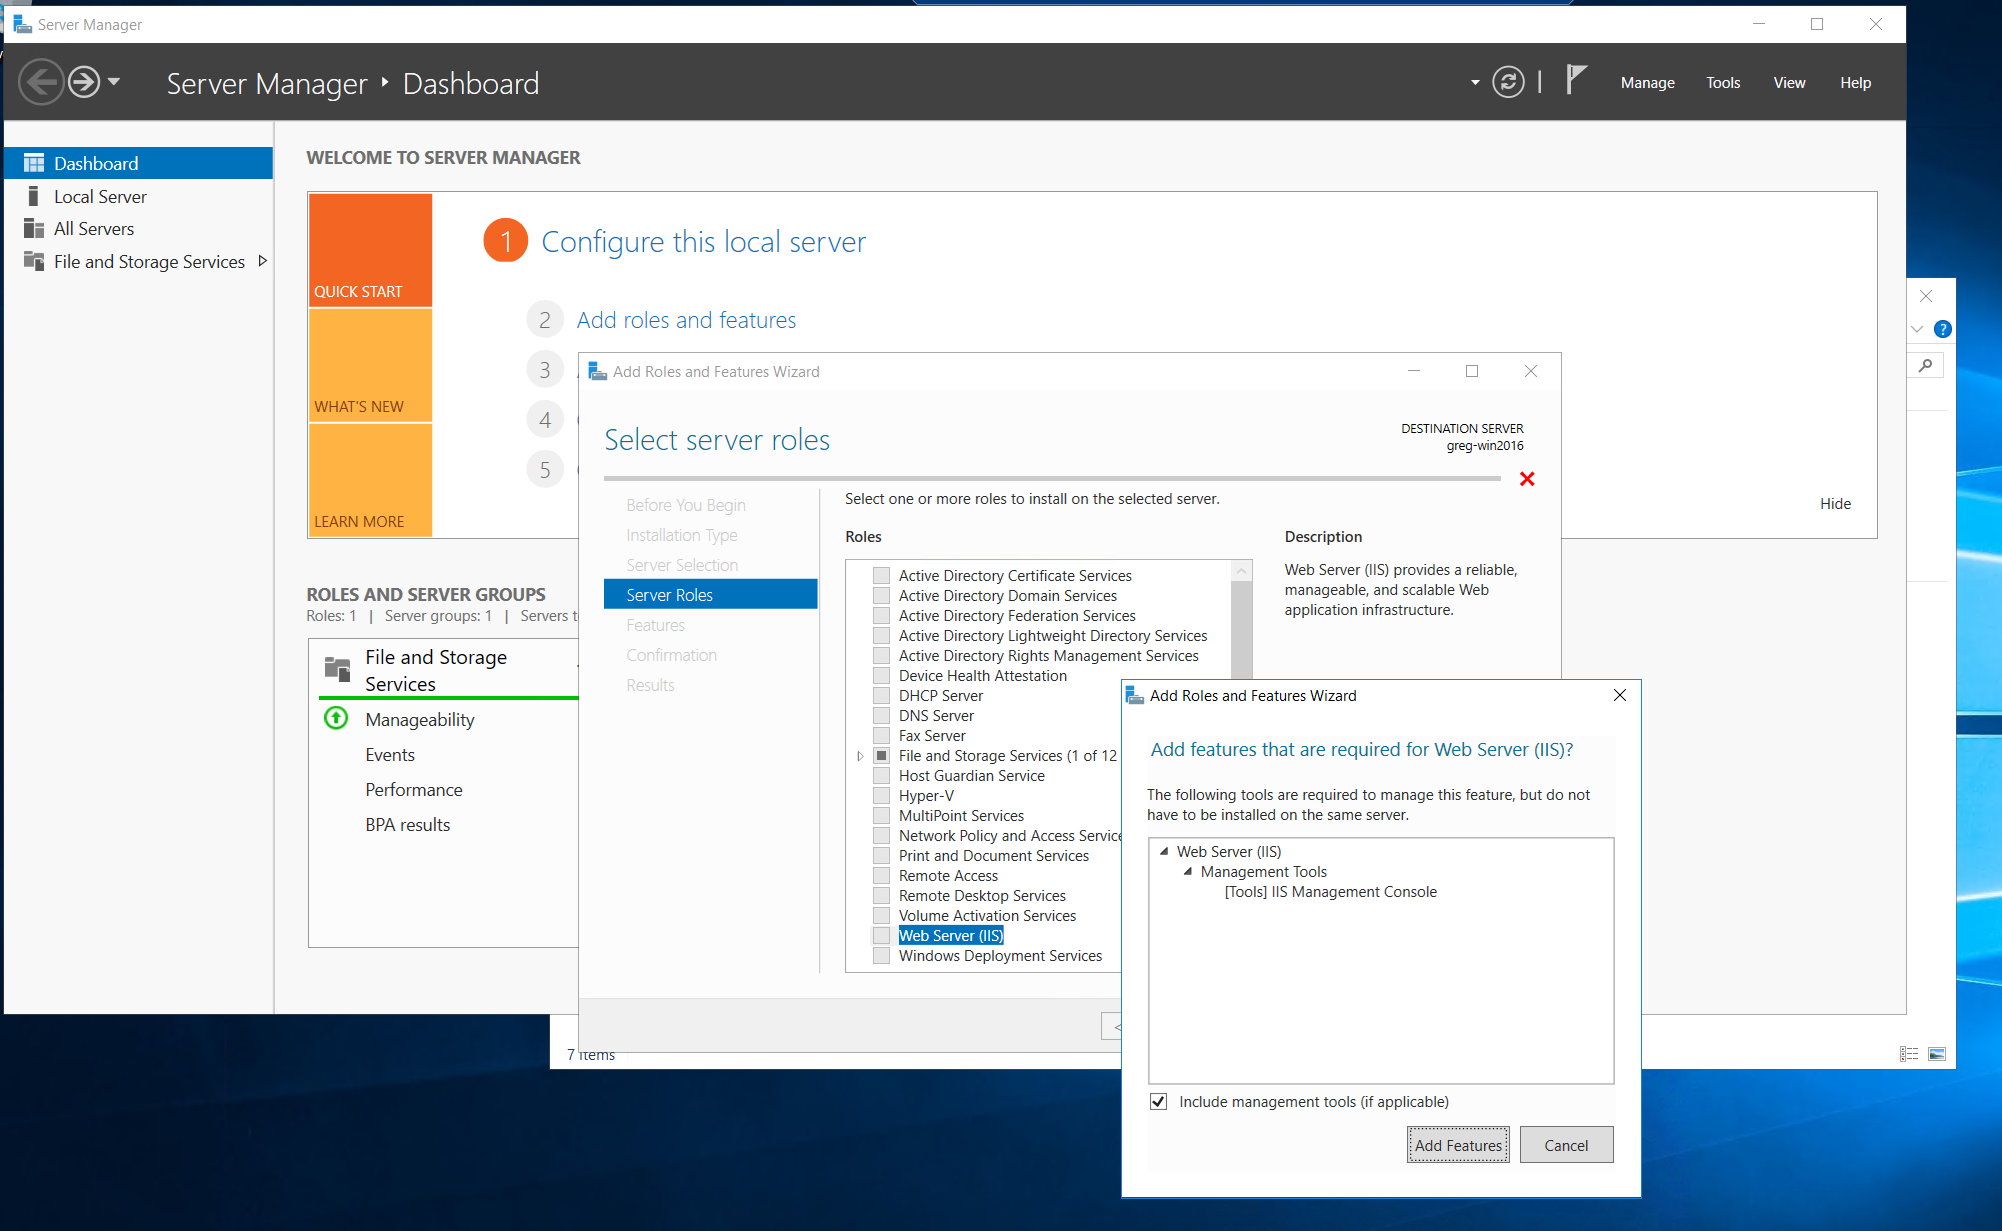
- Open Server Manager
- Open Add roles and features
- Go forward to the Select server roles screen, select Web Server (IIS), then Add Features
- Accept the changes, wait for the installation to finish,
- Install the ASP.NET Core Module for IIS, restart IIS.
SQL Monitor installation details
Install SQL Monitor, choose the Use IIS web server option and follow the steps,
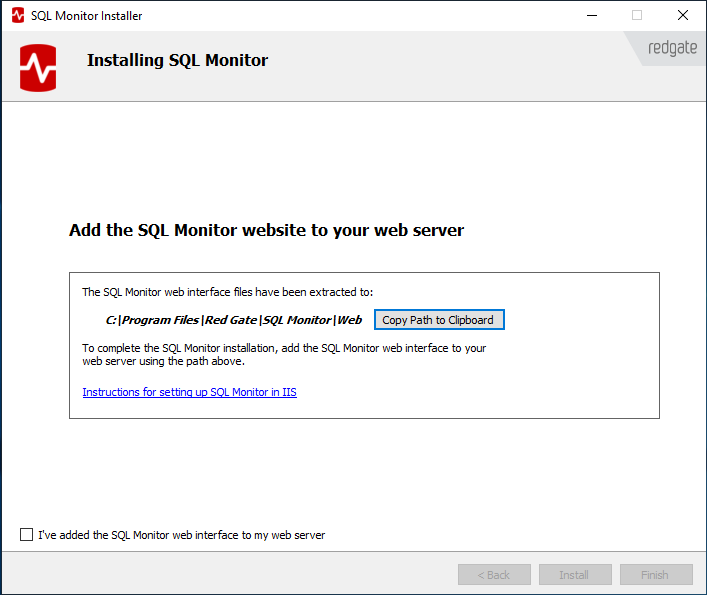
Once you've set the installation running, you will reach the step :
At that point, you'll need to Configure the SQL Monitor website in IIS – see the next section, IIS Configuration
Only having done that, check I've added the SQL Monitor web interface to my web server and click Finish.
IIS configuration
First, make sure that you have ASP.NET Core Module for IIS installed and have restarted IIS afterwards.
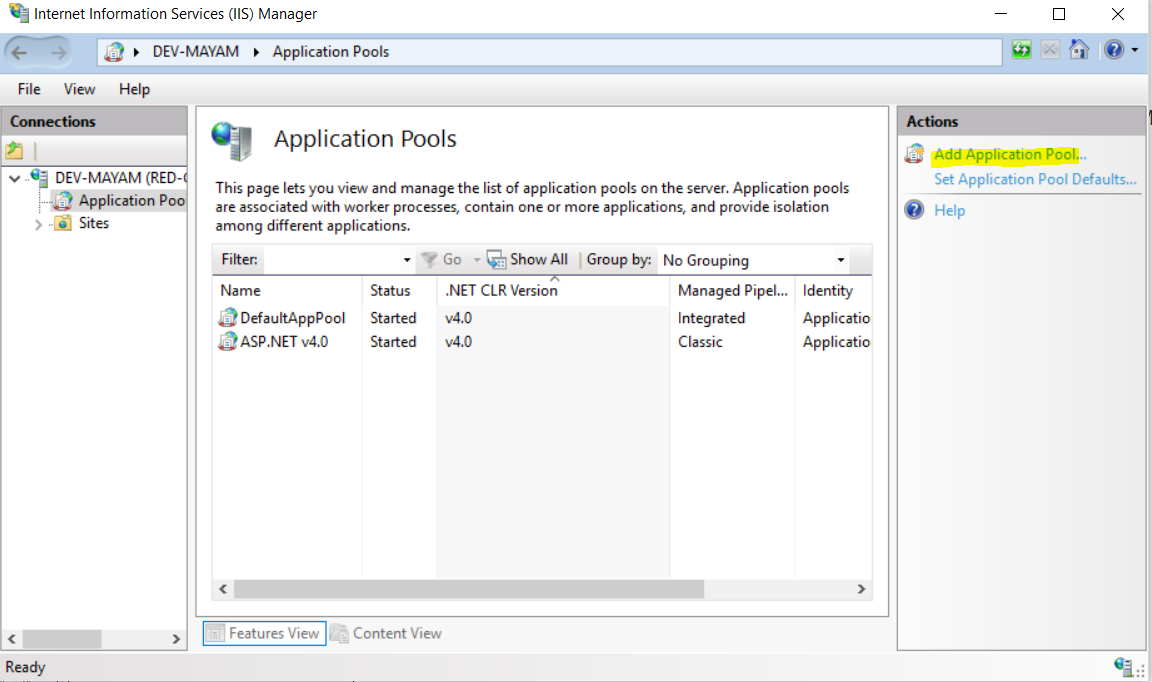
Configure an application pool
Either use an existing application pool, or go to IIS Manager > Application Pools to create an application pool with the following properties:
- .NET CLR version: .NET CLR Version v4.0.xxxxx.
- Managed pipeline mode: Integrated.
- In the Advanced Settings for the Application Pool, set Enable 32-Bit Application to False
Add the SQL Monitor website
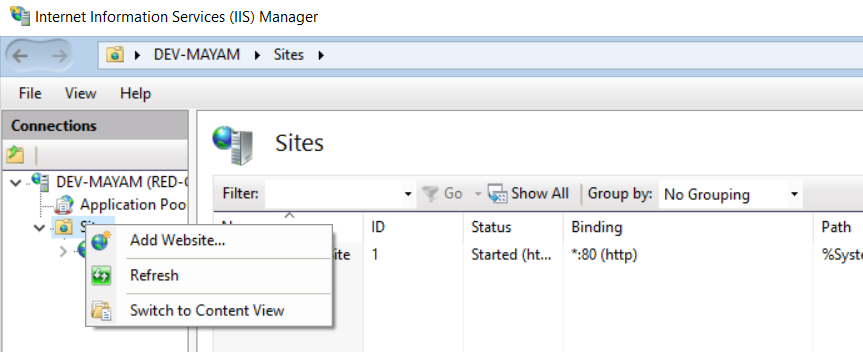
Adding the Website
Please note that SQL Monitor must be added as a Website, not as a Web Application.
From IIS Manager > Connections add a website with the following properties:
- Website name – can be anything, e.g. "SQL Monitor".
- Application pool – select the application pool you have created for SQL Monitor.
- Physical path – the path to the location of the SQL Monitor website files. By default, this is C:\Program Files\Red Gate\SQL Monitor\Web\
- Binding
- For HTTPS (recommended)
Type: https
Port: Specify an available port number or leave the default port 443.
SSL certificate: Select a self-signed certificate (recommended for evaluation purposes only. For production we recommend a proper SSL certificate).
Note: You can create one using IIS Manager > Server Certificates > Create Self-Signed Certificate.
For more information on how to set up IIS with SSL see How to Set Up SSL on IIS 7 using IIS Manager. - For HTTP
Type: http
Port: Specify an available port number or leave the default port 80.
Note: If you use port 80 you may need to disable/delete the Default Website to reassign it.
- For HTTPS (recommended)
Enable application initialization in IIS
If you wish to make use of the scheduled reporting feature to receive regular reports, then it will be necessary to enable the Application Initialization feature for IIS.
This module enables the website to be always running, even if the application pool is recycled or the IIS service is restarted.
You can find information about how to do this on: Enabling Application Initialization in IIS.
Test the configuration
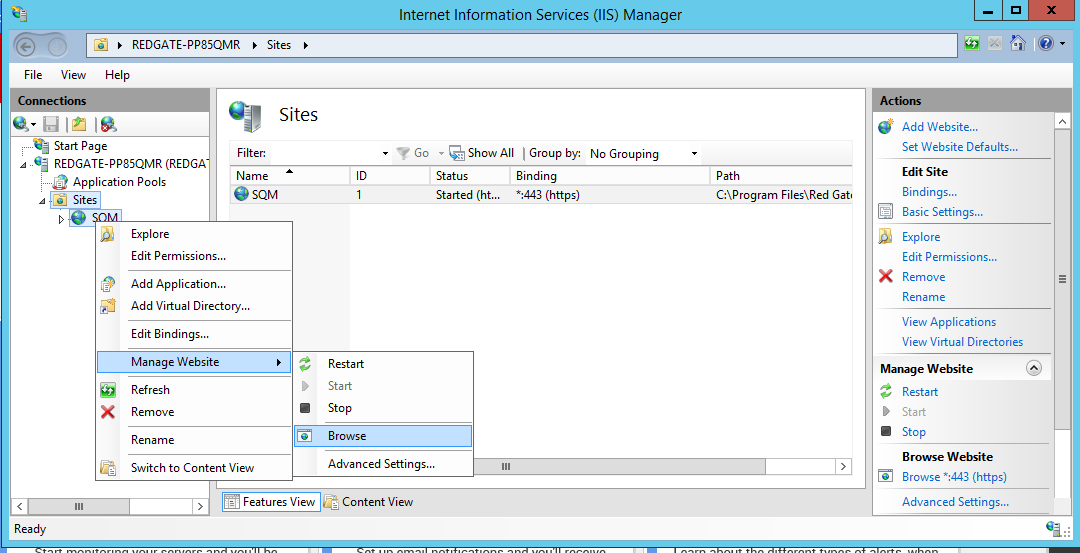
In IIS Manager use Manage Website > Browse from the SQL Monitor context menu to verify that the monitor website opens in your default browser:
Security
For enhanced security, we recommend disabling the Server header, for detailed information follow Microsoft documentation.
For IIS 10.0+ this can be done by configuring web.config:
<system.webServer>
    <security>
        <requestFiltering removeServerHeader="true" />
    </security>
</system.webServer>
For more information
- See the Microsoft documentation: Create a Website
- Problems with IIS and ASP.NET.
