Configuring Redgate Monitor database using SQL Server
Published 31 March 2025
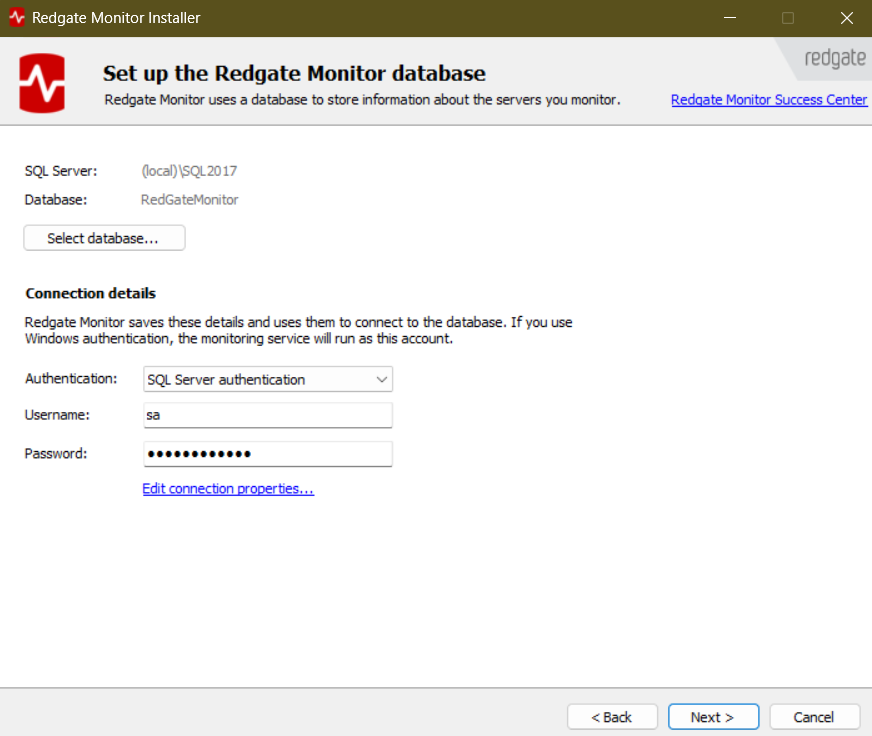
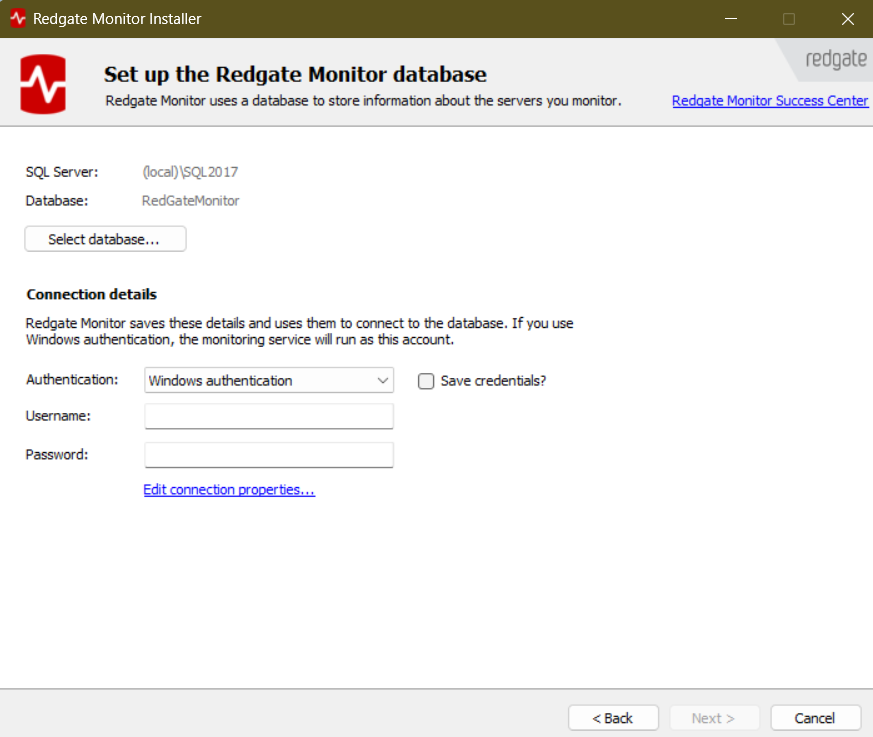
On this screen, you are setting up the Redgate Monitor monitoring service (also called the Base Monitor). It is a Windows service that collects data about your SQL Servers and must be able to connect to the Redgate Monitor database and to the SQL Servers you want to monitor. See: How Redgate Monitor works.
Therefore, on this screen you will:
- Configure the Redgate Monitor database (a.k.a. data repository).
- Specify connection details – the credentials that the Base Monitor service will use to connect to the Redgate Monitor database. If you supply Windows/AD credentials, this account will also run the Base Monitor service and can also be used, if required, to connect the SQL Servers you want to monitor.
Configure the Redgate Monitor database for SQL Server
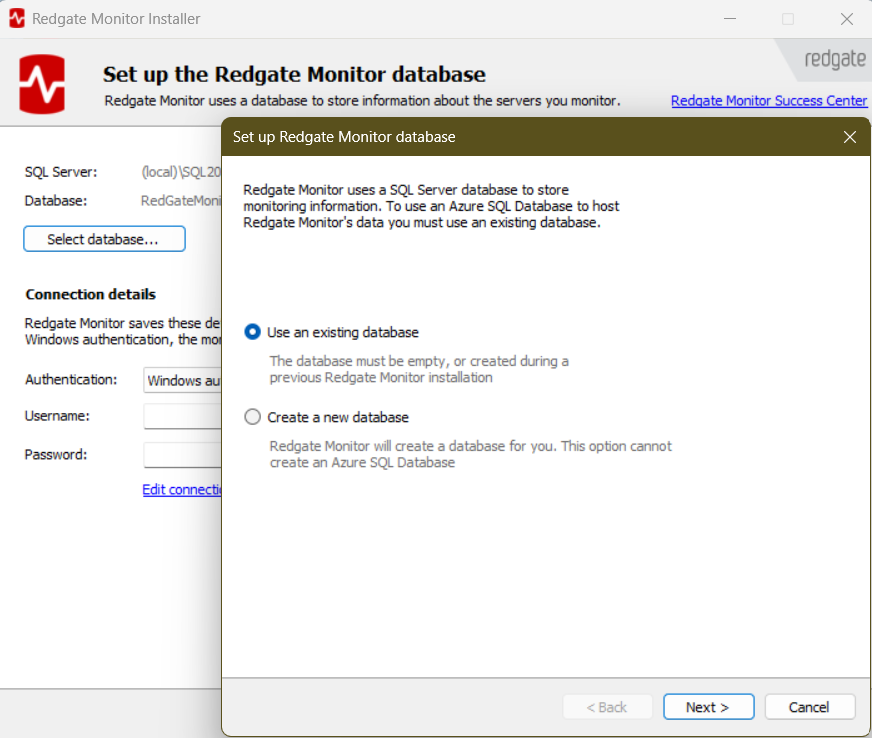
For the Redgate Monitor database, you can either:
- Use an existing empty database
or - Create a new database using the Redgate Monitor installer (which will be called RedGateMonitor by default).
The Redgate Monitor database must be hosted on SQL Server 2012+. See: Supported platforms for supported SQL Server versions and and editions, and advice on using Azure SQL Database or a database running on a virtual machine. Note that if you host the Redgate Monitor database on an Azure SQL Database you will need to use the "Use existing database" option and currently only SQL Server authentication is supported.
If your repository is hosted by a cloud provider, connection attempts may occasionally fail due to timeouts. You may need to increase the connection timeout setting depending on the reliability and speed of your network connection.
Using an empty SQL Server database
Click Select database. Leave the default option of Use an existing database selected and click Next:
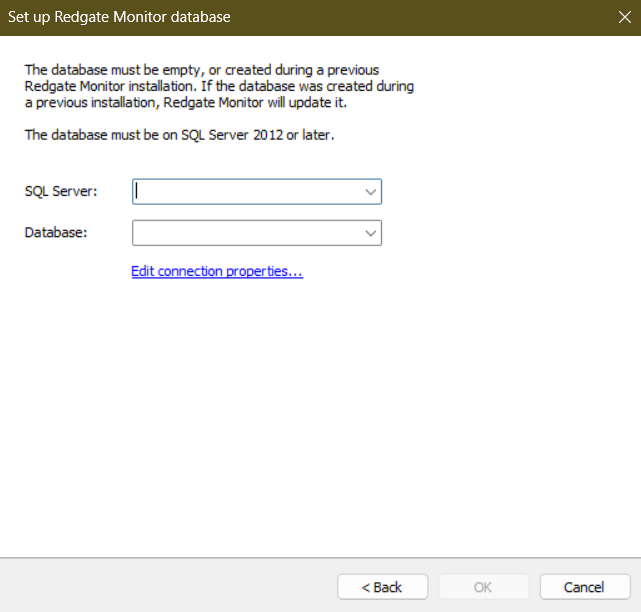
Note that you need to choose either an empty database or a database that was created during a previous Redgate Monitor installation. Click OK.
Create a new database using the Redgate Monitor installer
1. Click Select database and choose Create a new database. Then click Next:
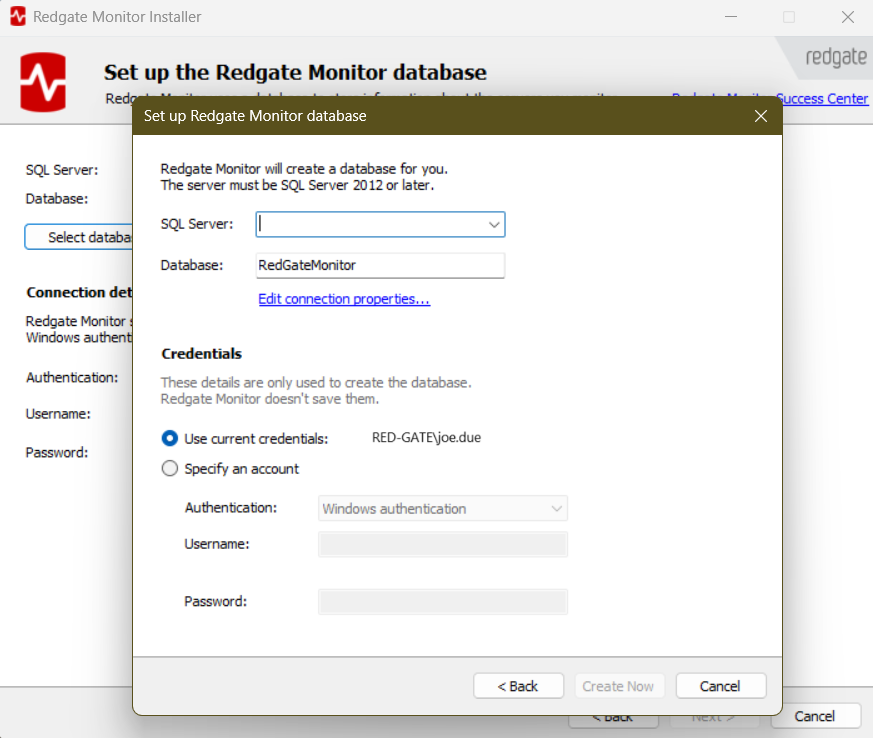
2. Identify SQL Server instance and name of database.
You can select a SQL Server from the drop-down menu, or type the instance name or IP address directly into the server box.
3. Specify the credentials used to create the database .
To create the Redgate Monitor database, you need an account with Create Database permissions on the specified server. This account is only used to create this database; Redgate Monitor doesn't save the credentials.
- If you don't have a login for the SQL Server with the right permissions, use the
sp_addsrvrolememberstored procedure to assign a login to the dbcreator role. For more information about this stored procedure, see the MSDN documentation. - If you see error messages, see: Error messages: creating a data repository database . If the error is about permissions, make sure you have Create Database permissions on the specified SQL Server.
You can either:
- Select Use current credentials to use the Windows account that you're currently logged into.
Or
- Select Specify an account, choose either Windows or SQL Server authentication, and provide the account details.
- If you select Windows authentication, Redgate Monitor assumes the account is in the current domain. To use a different domain account, enter credentials in the format username@domain-name or domain-name\username .
- If you specify a different Windows account, and this account fails, Redgate Monitor will automatically attempt to create the database using your current credentials.
4. Click Create now.
Specify connection details
The connection details you supply here are used by the Base Monitor service to store and retrieve the monitoring and alert data, and Redgate Monitor configuration data, for all machines that are registered to that Base Monitor.
You can connect using Windows authentication or SQL Server authentication. If you specify Windows authentication they will be used to run the Base Monitor service.
Windows authentication
If you choose Windows authentication:
- The specified Windows / Active Directory domain account will also be used to run the Base Monitor service and will require permissions to run the service, as well as to manage the Redgate Monitor database.
- Redgate Monitor assumes the account is in the current domain. To use a different domain account, enter credentials in the format username@domain-name or domain-name\username.
- Redgate Monitor supports the use of a gMSA for the Base Monitor service. If you use a gMSA account to run the Base Monitor, the gMSA can be used to give Redgate Monitor access to monitor servers. To specify a group Managed Service Account, simply enter as the Username the gMSA name with a dollar-mark ($): e.g. gmsasqqm$.
- The account you provide here can also be used, if required, to grant access to monitored servers. This can simplify the management of passwords when adding servers.
- If so, ideally the Base Monitor service account will be a member of the Windows Administrators group on any monitored machine, and of the sysadmin fixed server role on monitored SQL Server instances, but it's not required. See: ~Permissions required for monitoring servers.
- Alternatively, you can specify different accounts to connect to monitored servers, once you start adding them, post-installation. See: ~Adding servers for monitoring.
SQL Server authentication
If you choose to use SQL Server user authentication:
This account will be used by the Base Monitor service only to manage the Redgate Monitor database.
- The account you specify details for must be a member of the db_owner database role on the Redgate Monitor database. This membership will be granted automatically if you create the Redgate Monitor database as part of the installation process.
The monitoring service will run under the Local Service account. For more information, see the MSDN documentation. Redgate Monitor will grant it all the permissions it needs to run the Base Monitor service, during installation.
Post-installation, you should configure the Base Monitor service to use a different account. See Permissions required for the Redgate Monitor Service accounts.
Next steps
When you click Next, Redgate Monitor will summarize the install, and you can click Install to start it.
- If you're installing the Base Monitor and Web Server on one machine, then this will complete the installation.
- If you're installing the Base Monitor on a separate server, then:
This documentation contains proprietary information and is protected by copyright law.
Copyright © 2026 Red Gate Software Limited. All rights reserved


