Add storage disks
Published 09 March 2022
This page explains what needs to be done to scale out (horizontal upscale) the data storage used by Redgate Clone. Please be sure to check the current limitations and recommendations in this document.
Contents
Prerequisites
Before proceeding we highly recommend reviewing the FAQ on scaling types to ensure if horizontal scaling is the best option for you, and what limitations are there when considering horizontal or vertical scaling overall.
A few manual steps are required at present to add a new block device disk. This basically involves telling our internal storage system that it needs to be reconfigured to use the new storage for future data images and data containers.
NOTE: This requires the installation of the yq dependency in the control plane node (1st node) or in a machine with kubectl cluster access, a tool which manipulates YAML and JSON.
- Attach a new volume storage empty disk to the Kubernetes cluster as a new block device volume.
- Disk size: The disk size should be no less than 500-750GB, even if other disks are already attached.
- NOTE: Empty means a raw device without a filesystem but that can have raw partitions (although this is not recommended as they will be wiped out automatically).
- Double check the volume mapping that was assigned to the new disk by following all the steps in the Volume Storage disk requirements section of the disk prerequisites to confirm that your new volume storage disk is correctly assigned and fulfils the requirements for Redgate Clone.
- Confirm in the Admin Console that the Storage Settings (Embedded) configuration matches the volume mount mapping (e.g.
sda/sdb/sdc/...for name patterns orlun0/lun1/...if you are using lun-based disks such as Azure ones), which you verified for the disk in the previous step. Here's an example for a cluster accepting diskssdb-sdz(but excludingsdaas the system disk):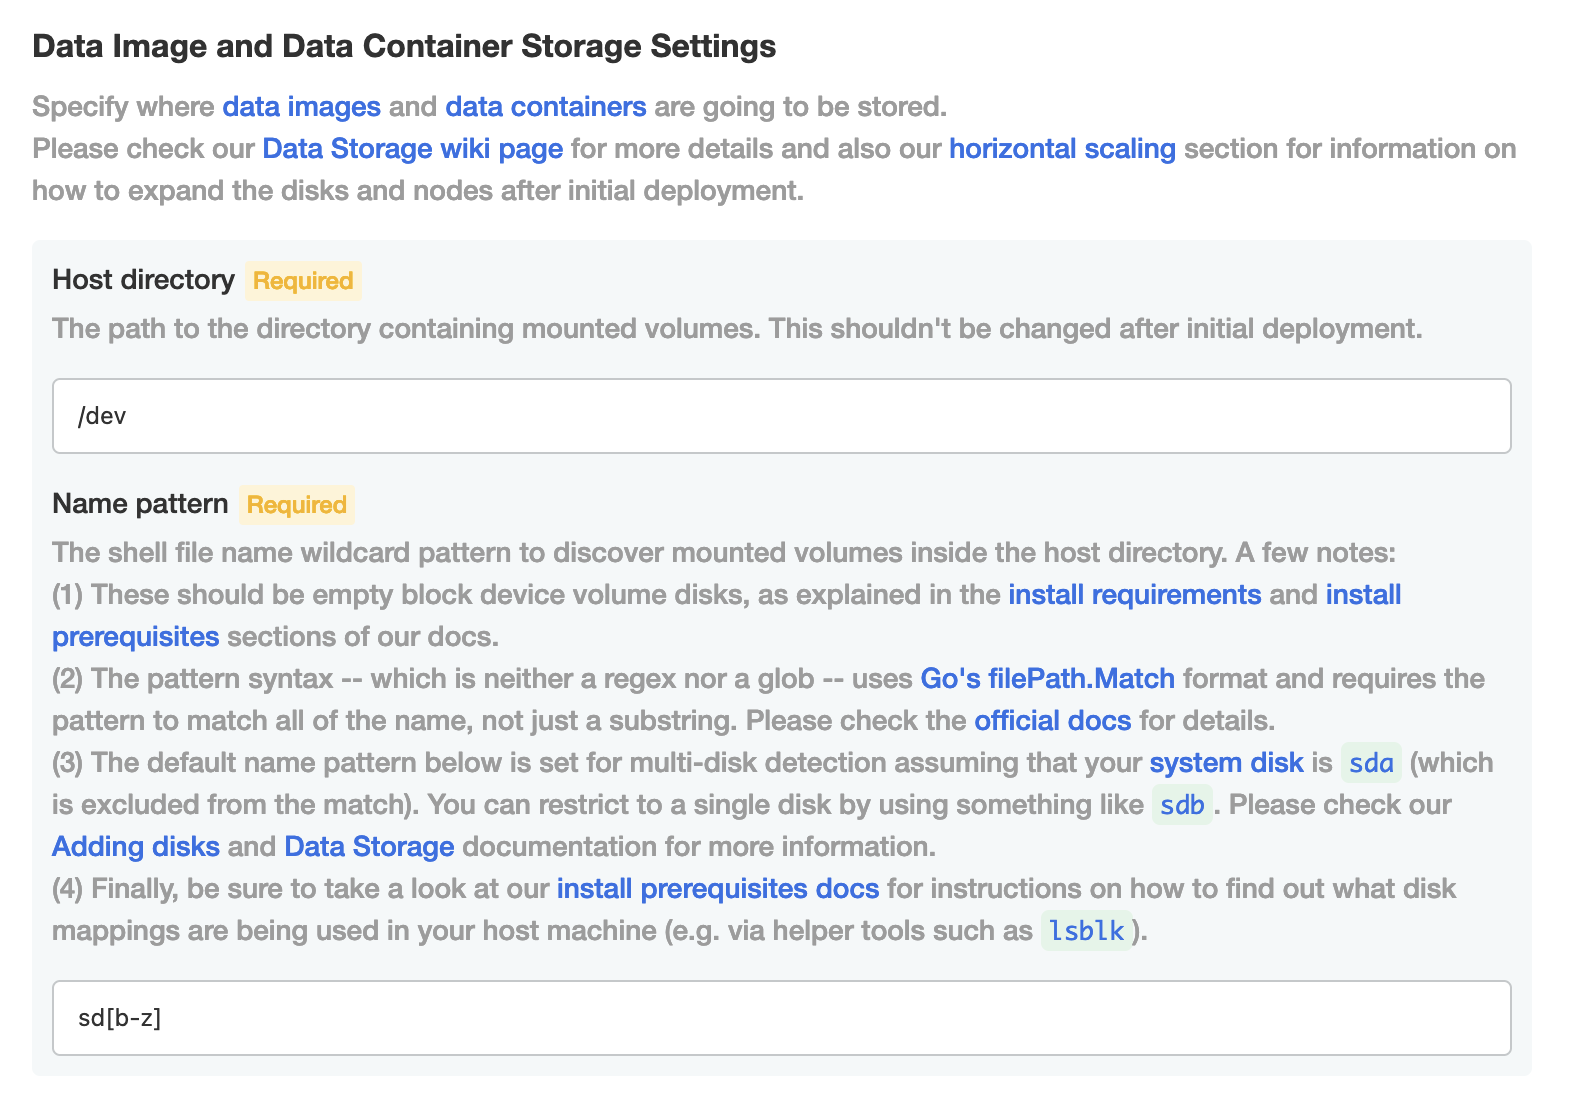
- NOTE: More recent versions of Redgate Clone enable multi-disk name patterns by default, but you can restrict this as you see fit (e.g. to a single disk with
sdb).
- IF CHANGES REQUIRED If you need to modify the volume mount's name pattern, please apply the new configuration and wait for the application to become
Readyin Admin Console. - In a machine with cluster access via
kubectl:Install yq if not already present. Confirm it's correctly installed by running:
yq --version
Run the following command to scale out (horizontal upscale) the storage by one so our system can pick up the new disk:
kubectl get CephCluster ceph-cluster -n redgate-clone-app -o json \
  | yq '.spec.storage.storageClassDeviceSets[0].count += 1' \
  | kubectl apply -f -
NOTE: The above command simply increments the existing storage by one, but if you are adding multiple disks in one go, you can set an explicit value that matches the exact number of attached volume storage disks and that is higher than the current one (see Limitations below for why this is so). For example, imagining you have 4 disks attached, you can run:
kubectl get CephCluster ceph-cluster -n redgate-clone-app -o json \
  | yq '.spec.storage.storageClassDeviceSets[0].count = 4' \
  | kubectl apply -f -
Wait for the application to become
Readyin Admin Console- Check in the Cluster Storage State dashboard (see Grafana: Dashboards) that the Total OSDs number matches the new number of volume storage disks.
Limitations
- No scaling in (horizontal downscale) - At present it's only possible to add new disks and not remove them as data integrity and migration cannot be guaranteed yet. This also means that once a cloning node has associated storage being used by data images and data containers, it won't be possible to remove the disk safely from the cluster.
- Single shared name pattern - We currently only have a single name pattern for all disk volume mounts, configurable in Admin Console. Also keep in mind that the pattern is not a glob nor a regex (see instructions in the Admin Console
Configpage for more details)
This documentation contains proprietary information and is protected by copyright law.
Copyright © 2026 Red Gate Software Limited. All rights reserved


