Configuring reporting on multiple computers
Published 02 January 2013
Setting the reports database
To use Automated Error Reporting or Feature Usage Reporting on more than one computer, the error reports must be saved on a central database. To do this:
- In the menu bar, click Options.
- Scroll to Reports Database Options:
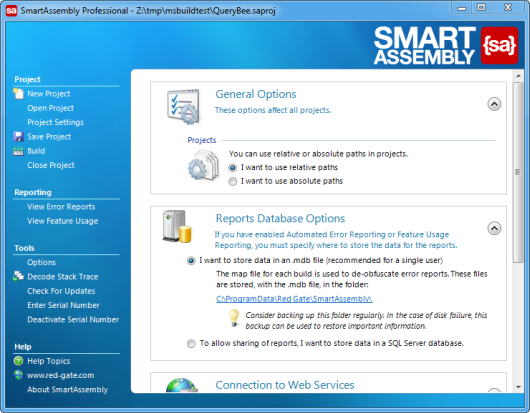
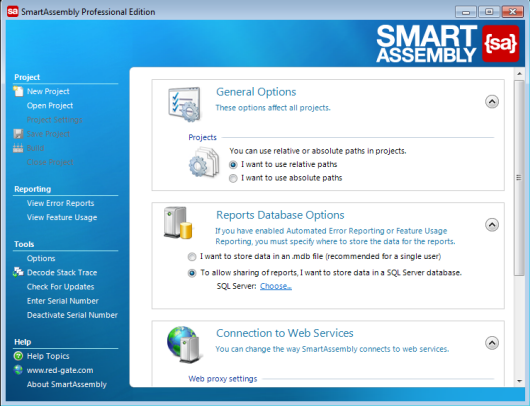
- Select To allow sharing of reports, I want to store data in a SQL Server database
- Click Choose...
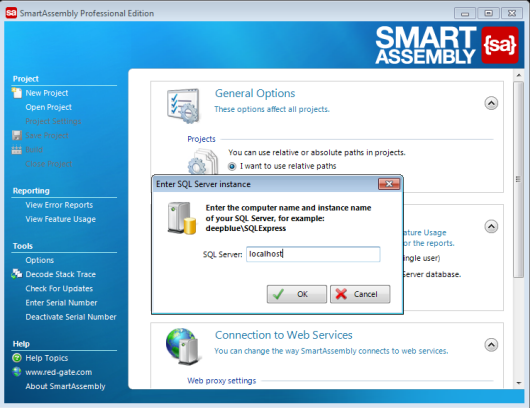
- Enter the name of your SQL Server.
If you have multiple instances of SQL Server running on the same computer, append the SQL Server instance name to the computer name, in the format computername\instancename.
All computers which will be used for downloading error reports must be able to access the computer hosting the SQL Server instance.
- Click OK.
Setting the map file path
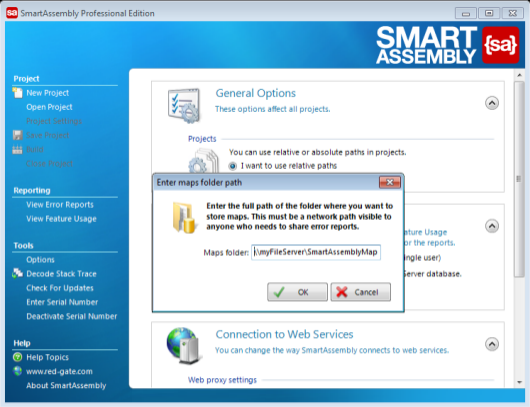
If your application is obfuscated, you must also be able to access the map file, which SmartAssembly uses to de-obfuscate error reports, from all of the computers.
To set the maps folder:
- If the chosen SQL Server instance has not been used by SmartAssembly before, you are asked to supply a network path where SmartAssembly can store map files.
Note: SmartAssembly must have read and write access to this network path from all of the computers that you will use to download the error reports.
- If the chosen SQL Server instance has already been entered on another computer, the network path will be set automatically. To ensure that all computers share the same map file, it cannot be changed from within SmartAssembly. (To change the setting, see the instructions in About map files.)
You must set a map files location even if you only want to use feature reporting, not error reports.
Using SQL authentication
By default, SmartAssembly uses Windows authentication when connecting to the SQL server. To use SQL authentication instead, follow these steps:
- Using an XML editor, open SmartAssembly.settings. By default, this file is located in %ProgramData%\Red Gate\SmartAssembly\ in Windows Vista and later, or %ProgramFiles%\Red Gate\SmartAssembly 6\ in older versions of Windows.
- Find the
<Database>node. - Check that the
DatabaseEngineattribute is set to '1' (this means that SQL server will be used for error reports, rather than a .mdb file). - Set the value of the
Serverattribute to the computer name and SQL server instance in the formatMyServer\SQLExpress. - Set the value of the
MasterConnectionStringattribute as follows. This will be used to create the error reports database.
Data Source=MyServer\SQLExpress; Initial Catalog=master; UserId=[YourUserName]; Password=[YourPassword] - Set the value of the
ConnectionStringattribute as follows. This will be used for subsequent connections to the database.
Data Source=MyServer\SQLExpress; Initial Catalog=smartassembly; UserId=[YourUserName]; Password=[YourPassword]
The resulting file should look like this:
<SmartAssembly.Settings>
...
  <Options>
    <Database DatabaseEngine="1" Server="MyServer\SQLExpress" ConnectionString="Data Source=MyServer\SQLExpress; Initial Catalog=smartassembly; User Id=[YourUserName]; Password=[YourPassword]" MasterConnectionString="Data Source=MyServer\SQLExpress; Initial Catalog=master; User Id=[YourUserName]; Password=[YourPassword]"/>
  </Options>
...
</SmartAssembly.Settings>
This documentation contains proprietary information and is protected by copyright law.
Copyright © 2026 Red Gate Software Limited. All rights reserved


