Worked example - comparing and deploying two databases
Published 21 August 2019
This worked example demonstrates a basic comparison and deployment of two SQL Server databases.
In the example, the Magic Widget Company has a SQL Server database running on a live web server. This database contains a number of tables, views, stored procedures, and other database objects. The Magic Widget Company's development team has been working on an upgrade to their website. As part of this upgrade, they have made a number of changes to the structure of the database. They have already deployed the changes from the development server to a staging server.
They now need to deploy the changes to the production server.
This example has four steps:
- Set up the databases
Create the example databases on your SQL Server. - Set up the comparison
Specify the data sources you want to compare. - Select objects to deploy
Review the results and select the objects you want to deploy. - Deploy the databases
Create and run a deployment script.
1. Set up the databases
The worked example uses the following databases:
- WidgetStaging is the staging database
- WidgetProduction is the production database
To create these two databases on your SQL Server:
- If they already exist, delete the databases WidgetStaging and WidgetProduction.
- Click here to download the SQL creation script for the databases.
- Copy the script, paste it in your SQL editor application, and run it.
The databases and their schema are created.
2. Set up the comparison
- Start SQL Compare if it is not already running. The Project Configuration dialog is displayed:
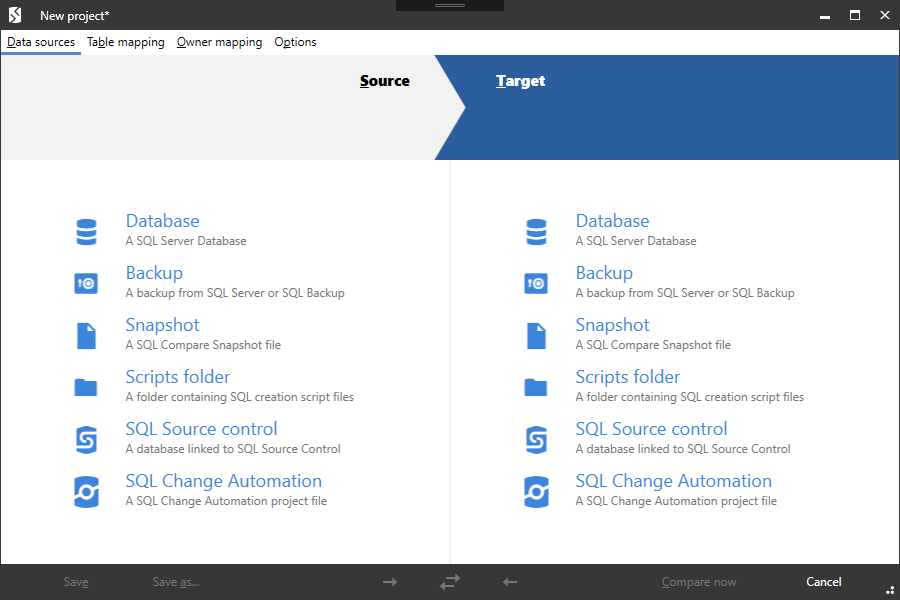
You can edit the current project, or create a new project.
If you want to create a new project, click Cancel to close the dialog box, and on the toolbar click (New Project)
 - On both sides of the dialog, select Database.
In this example, we will compare databases. You can also compare backups, SQL Compare snapshots, and scripts folders. - For each data source, in Server, type or select the name of the server on which you set up the databases.
- For the source, in Database, type or select WidgetStaging. Type or select WidgetProduction for the target.
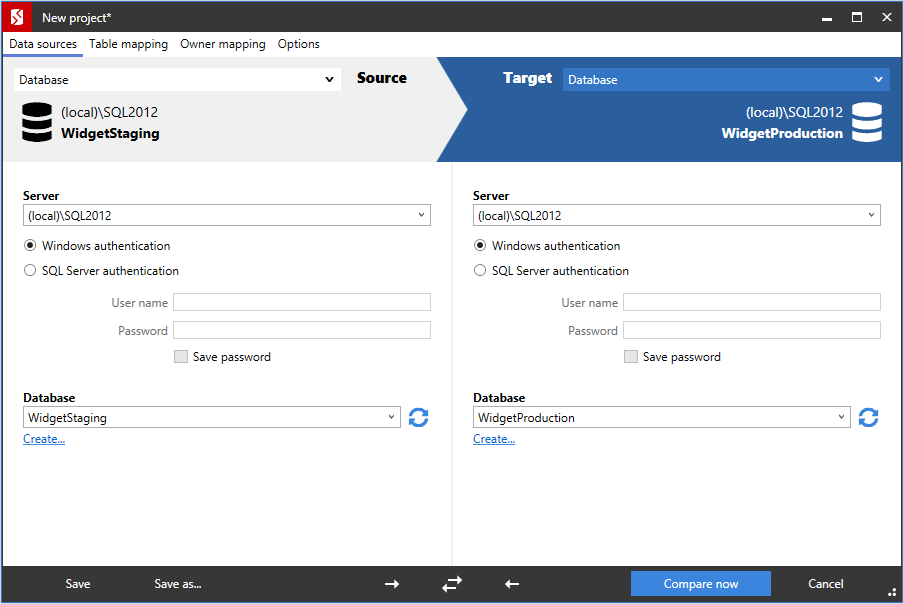
If the databases are not displayed in the Database lists, click Refresh.
 - Click Compare Now.
SQL Compare displays a message dialog box that shows the progress of the comparison.
When the comparison is complete, click OK to close the message box.
3. Select objects to deploy
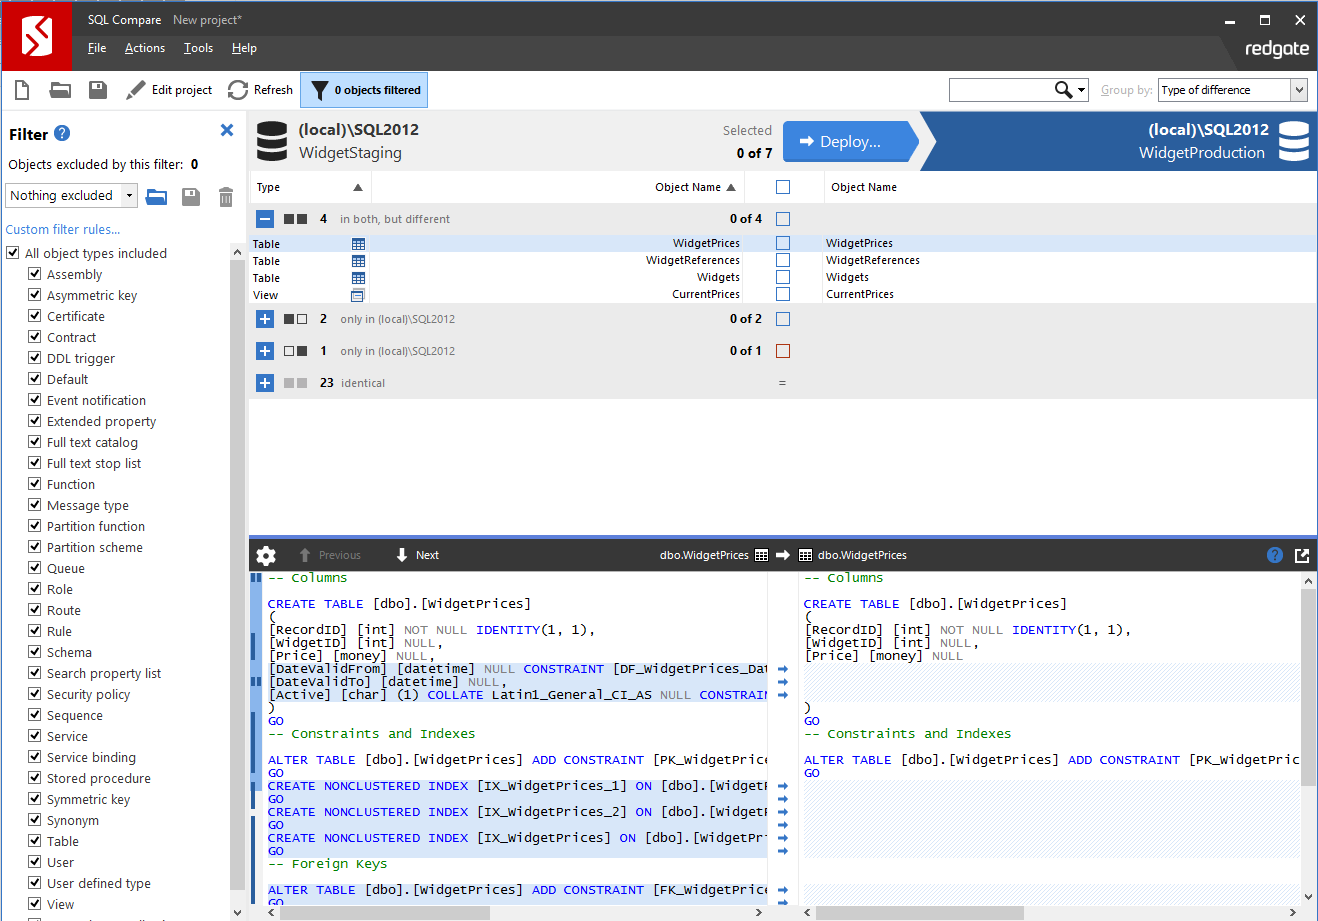
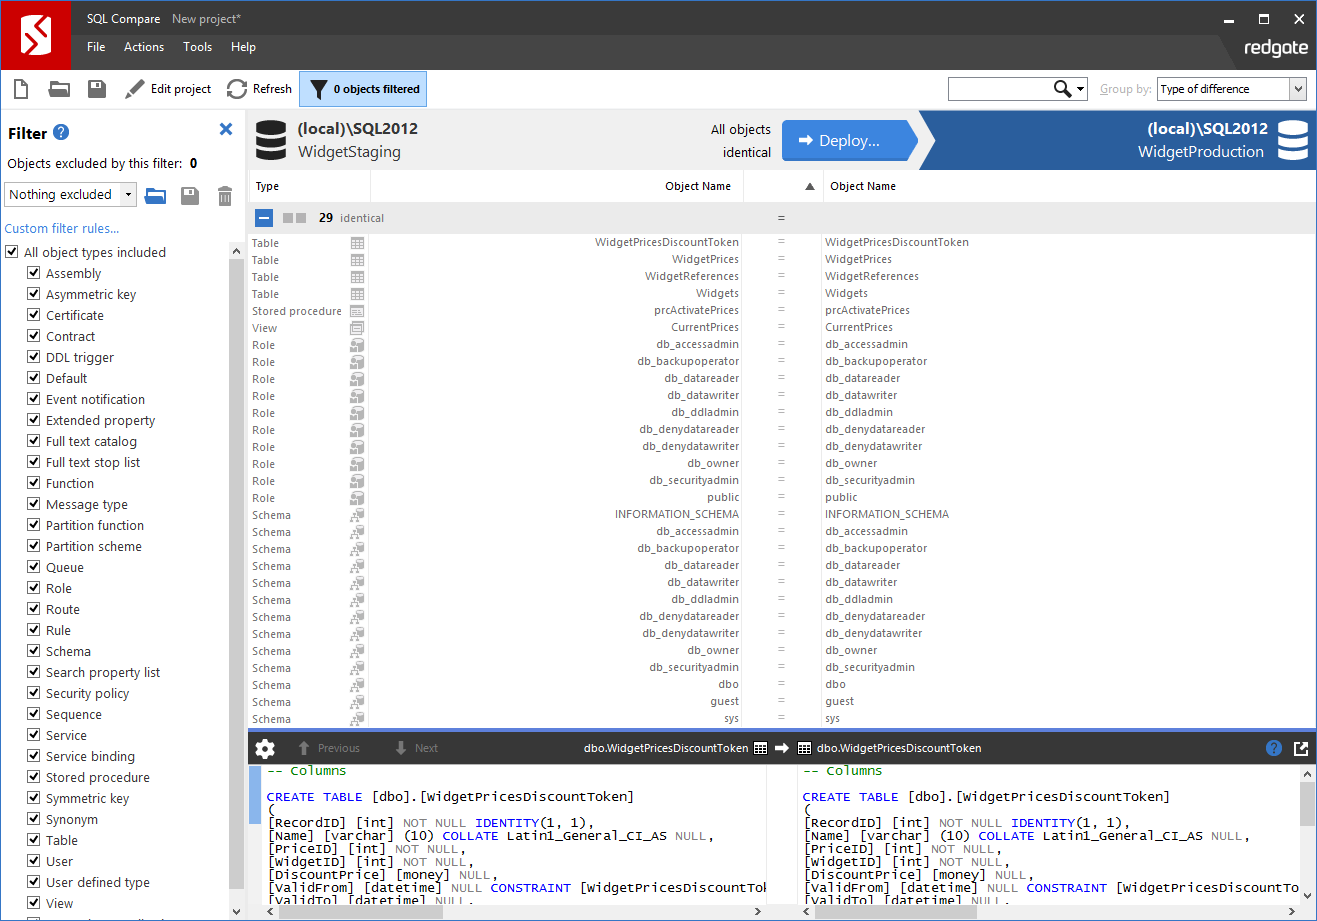
The results of the comparison are displayed in the results pane:
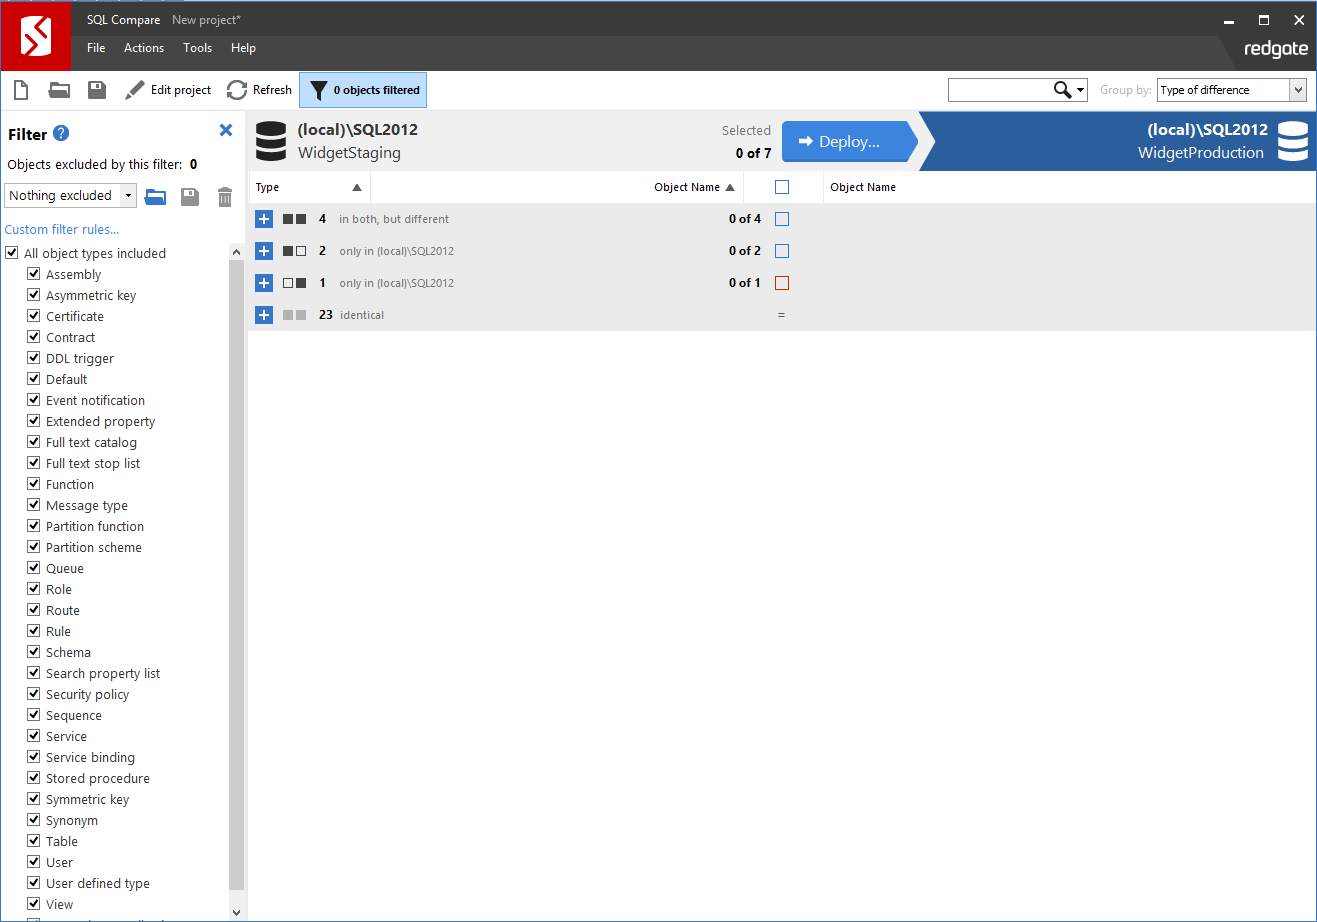
The results are grouped by:
| objects that exist in both databases but are different |
|---|---|
| objects that exist in WidgetStaging but do not exist in WidgetProduction |
| objects that exist in both databases and are identical |


To view the objects in a group, click  :
:
When you click an object, the lower (SQL Differences) pane shows a side-by-side, color-coded listing of the differences in the object creation scripts.
This example shows the WidgetPrices table:
For more information, see:
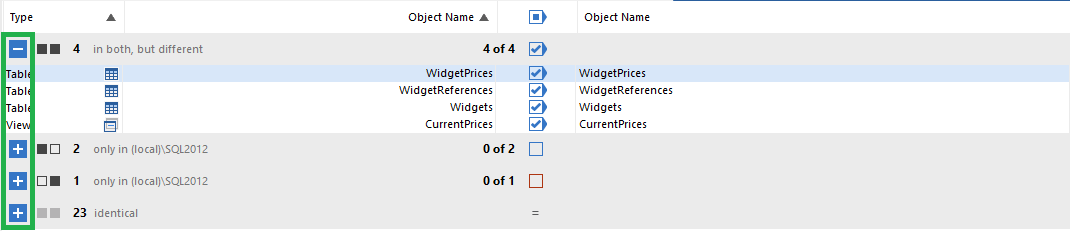
Use the check boxes in the middle of the upper (Results) pane to select objects for deployment.
In this example, we will deploy all objects that are different:
- On the Filter pane, ensure the default filter All object types included is selected.
The current filter defines which objects are displayed. When you use the filter to exclude an object, it is removed from the Results pane and can't be selected for deployment.
For more information, see: Using filters. - In the central column of the Results pane, select the top level check box to include all objects in the deployment:
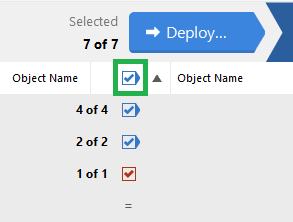
All objects are selected.
- Click the Deploy button to open the deployment dialog.

4. Deploy the databases
On the first page of the deployment wizard you can choose to create and save a deployment script, or perform the deployment using SQL Compare.
Choose deployment method
In this example, we will deploy using SQL Compare.
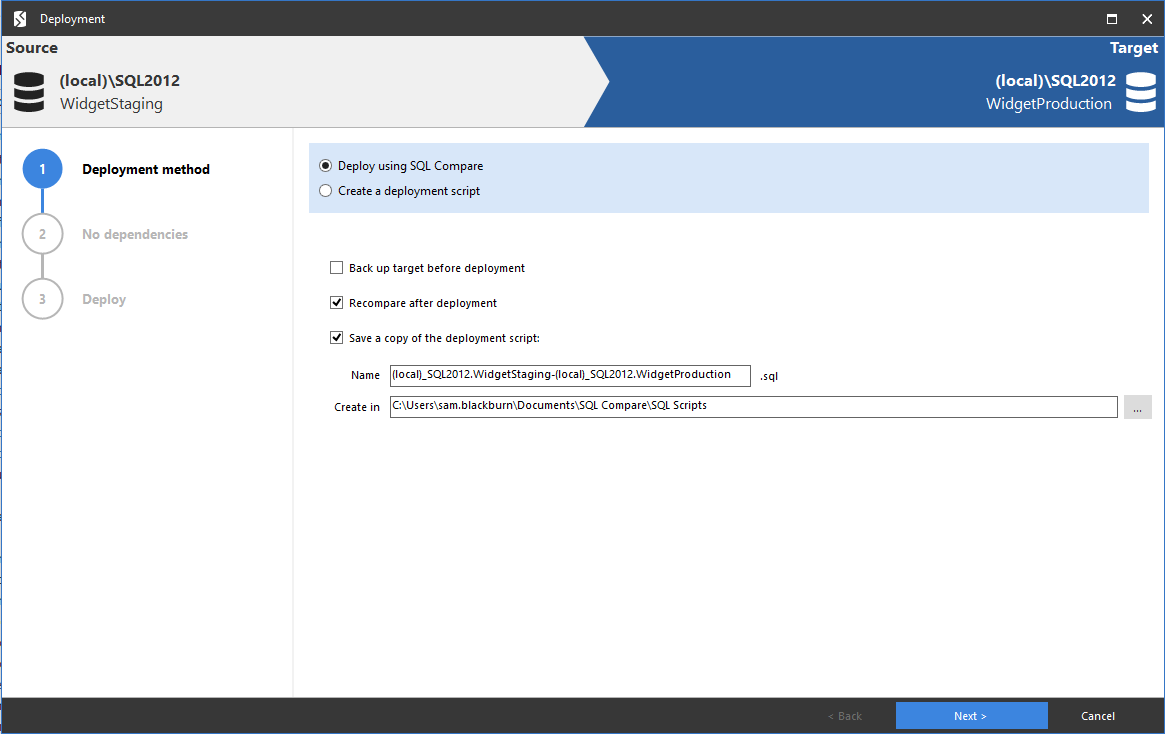
- Ensure that Deploy using SQL Compare is selected.
- Clear the Back up target before deployment check box if it is selected.
In this example, we will not back up before deployment.
For more information, see: Backing up before deployment. - Ensure the Recompare after deployment check box and the Save a copy of the deployment script check box are selected.
In this example, we will run the script from SQL Compare, and compare the databases afterwards to check the results. We will also save a copy of the deployment script. - Click Next.
Review script
The final page of the wizard displays information about the deployment:
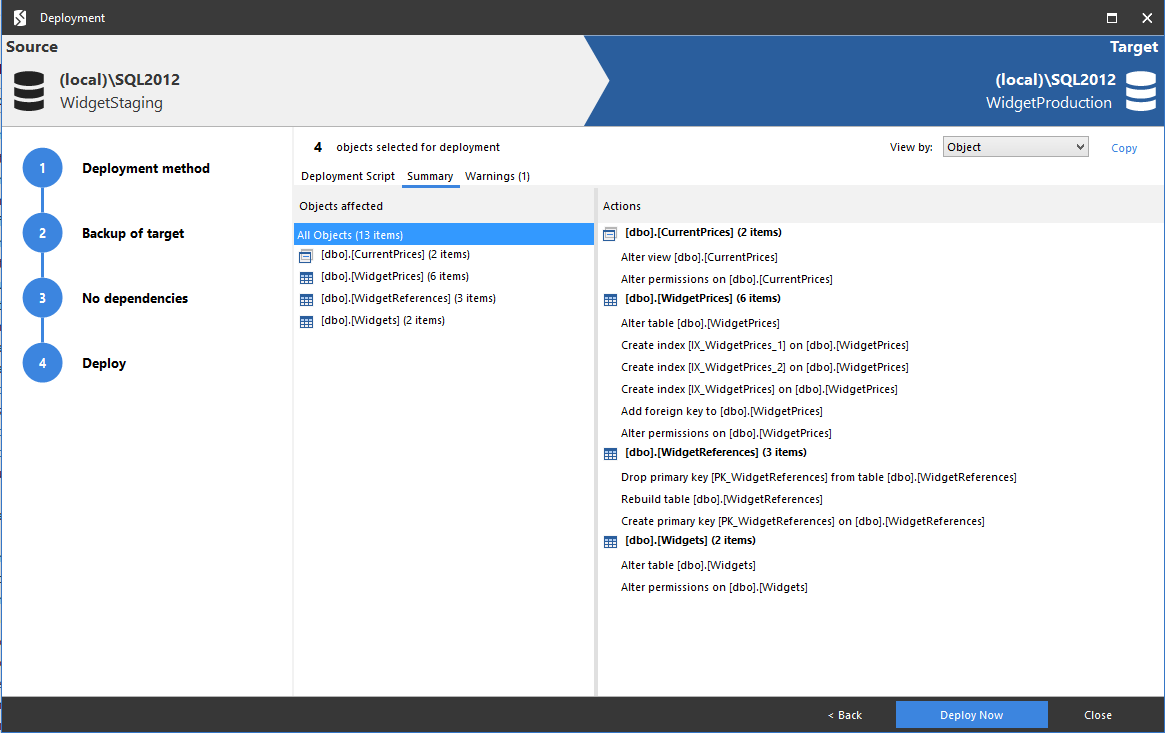
There are three tabs on the Review page:
- Deployment script shows the script to deploy the data sources.
You can search the script, save it, or copy it to the clipboard. - Summary shows a synopsis of the actions in the deployment script.
You can view the summary grouped by the objects affected, by the type of modification, or by the order in which the script modifies the target. - Warnings shows a list of any warnings about unexpected behavior that may occur when you deploy the databases.
For more information, see: Deployment warnings.
In this example, SQL Compare displays a warning to inform you that it can't use the ALTER TABLE command to change the IDENTITY column, so the deployment script will rebuild the WidgetReferences table.
Warnings are displayed whenever tables require rebuilding as these may be slow operations. Data in tables is preserved when tables are rebuilt.
Performing the deployment
When you have reviewed the script, deploy the databases:
- Click Deploy Now to perform the deployment.
- A confirmation dialog box is displayed. Click Deploy Now to continue.
- SQL Compare displays a message dialog box that shows the progress of the deployment.
When the deployment is complete, click OK to close the message box.
SQL Compare then re-compares the databases. The results are shown in the main window. In this example, all objects are shown to be identical, confirming that the deployment has been a success:
This documentation contains proprietary information and is protected by copyright law.
Copyright © 2026 Red Gate Software Limited. All rights reserved


