Applying changes to a database in Visual Studio
Published 19 August 2019
Apply changes to database allows you to keep your development database up-to-date by running any migration scripts in the SQL Change Automation Project that haven’t yet been applied to the database.
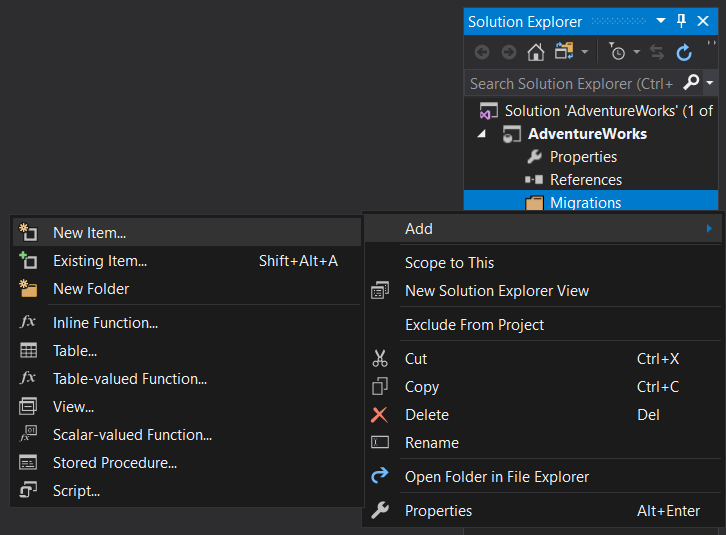
1. Navigate to the Migrations folder in the Solution Explorer
You can view your scripts by expanding any of the folders.
2. Create a new script
In the Solution Explorer right-click the folder you want to add the script to, and select Add, then New Item....
3. Edit the script
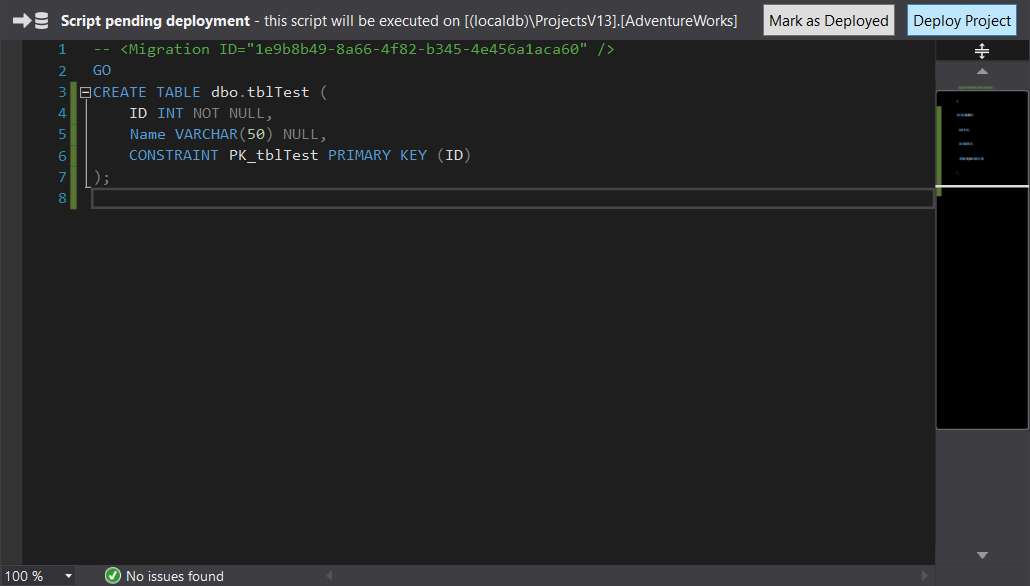
The script will be opened when it is created, with a unique Migration ID. Copy the following code into the script editor. Make sure you do not remove the Migration ID header.
CREATE TABLE dbo.tblTest (
    ID INT NOT NULL,
	Name VARCHAR(50) NULL,
    CONSTRAINT PK_tblTest PRIMARY KEY (ID)
);
Once you have edited the script, save it. This saves the file to the project, but no changes have been made to the database yet.
4. Deploy the script
Click the Deploy Project button in the top-right corner of the script editor. This will run the pending scripts on your development database. Alternatively, you can click Refresh and then Deploy when prompted in the SQL Change Automation window.
5. Verify the script
Once the migration has been generated, click Refresh. This will verify that your development database and SQL Change Automation Project are now in sync.
Next steps
- Commit your new file to version control.
- When you want to deploy your new change to production, you can use the PowerShell cmdlets. See automated deployments.
This documentation contains proprietary information and is protected by copyright law.
Copyright © 2026 Red Gate Software Limited. All rights reserved


